Tag Archives: natural hair

DIY Coconut Conditioning Cream

Hello Maicurlies,

It is yet again time for a Do It Yourself (DIY) because I of course do not share enough of these normally ;).

DIY Coconut Conditioning Cream

So as the name indicates today I have got a DIY Conditioning Cream recipe and surprise surprise the mix contains…….coconut cream!!! Jokes aside, apart from the Coconut Cream it also contains Flax Seeds, Fenugreek Seeds and two different types of infused carrier oils (coffee bean infused almond oil and coffee bean infused coconut oil) along with some Essential Oil at the end. Another additional ingredient is a moisturizing conditioner with can be added to the mix otherwise should be used after rinsing the mix from your hair (more details about this below). For now, let’s break down the ingredients and their benefits.

Flax Seeds:

  • Helps with hair growth due to the rich source of vitamin E.
  • Due to the Vitamin E oil it is said to help slow down premature grey hairs.
  • Contains Omega-3 fatty acids which helps provide the hair with strength and elasticity.
  • Helps fight hair loss (excessive shedding).
  • Can help ease scalp irritations such as dryness and dandruff.
  • Nourishes the hair roots, shaft, and the scalp.

Fenugreek Seeds (aka Methi):

(Tip: Fenugreek is a popular ingredient in Asian dishes (mainly India) so in case you can’t find the seeds in your local supermarket/grocery store – (the “ethnic” isle) check your local Indian markets you will be able to find them there).

  • Aids in hair growth thanks to the proteins and nicotinic acid
  • Provides strength to the hair thanks to lecithin
  • Provides moisture to the hair
  • Helps fight dandruff
  • Soothes an irritated scalp
  • Conditions the hair

Coconut Cream*:

  • Helps to sooth scalp irritations
  • Penetrates the hair strands
  • Provides the hair with luster & shine 
  • Provides strength to the hair
  • Enforces hair growth 
  • Reduces hair shedding
  • Reduces hair breakage
  • Makes the hair soft
  • Said to help slow down premature grey hairs

*NOTE: Due to the presence of protein in coconut cream some of you might find that it makes your hair feel hard. It is recommended that if you do not use a moisturizing conditioner as part of the mix that you rinse your hair with a moisturizing conditioner after you rinse your hair.

Oils:

I use coffee based oils since it has a whole number of benefits e.g stimulates blood flow therefore growth in the hair, helps keep the scalp clean, provides luster to the hair, provides shine, helps to subtly darken the hair and so much more. I have a lot of details about coffee infused oil here but you can use any oil of choice. 

Products/Tools Used:

DIY Coconut Conditioning Cream

  • 2 oz Flaxseeds
  • 2 oz Fenugreek Seeds
  • 8 oz water (used the night before to soak the seeds)
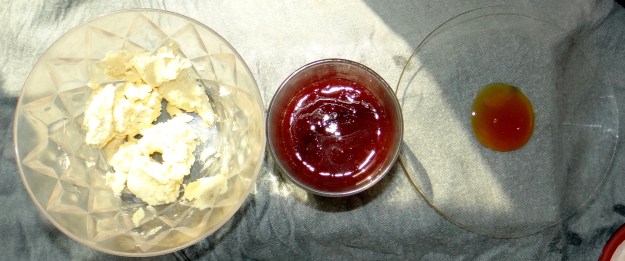
  • 7 oz coconut cream
  • 0.2 oz Coffee Bean Infused Almond Oil
  • 0.5 oz Coffee Bean Infused Coconut Oil
  • 7 oz water (to boil the seeds)
    – Optional – Essential Oil (after the mix cools)
    – Optional – 2 – 3 tablespoons Rinse out conditioner
  • Pot
  • Sieve
  • Bowl/container
  • Spoon
  • Gloves (optional to keep things sanitized) 
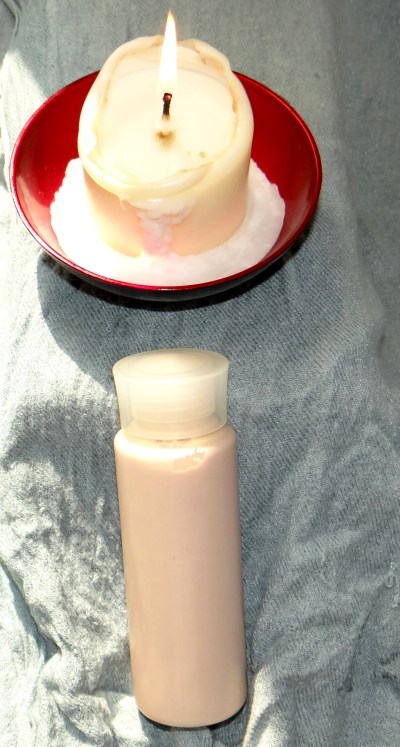
  • Squeeze bottle (clean and disinfected) 
  • Funnel (to pour the mix into your squeeze bottle) 

Method:

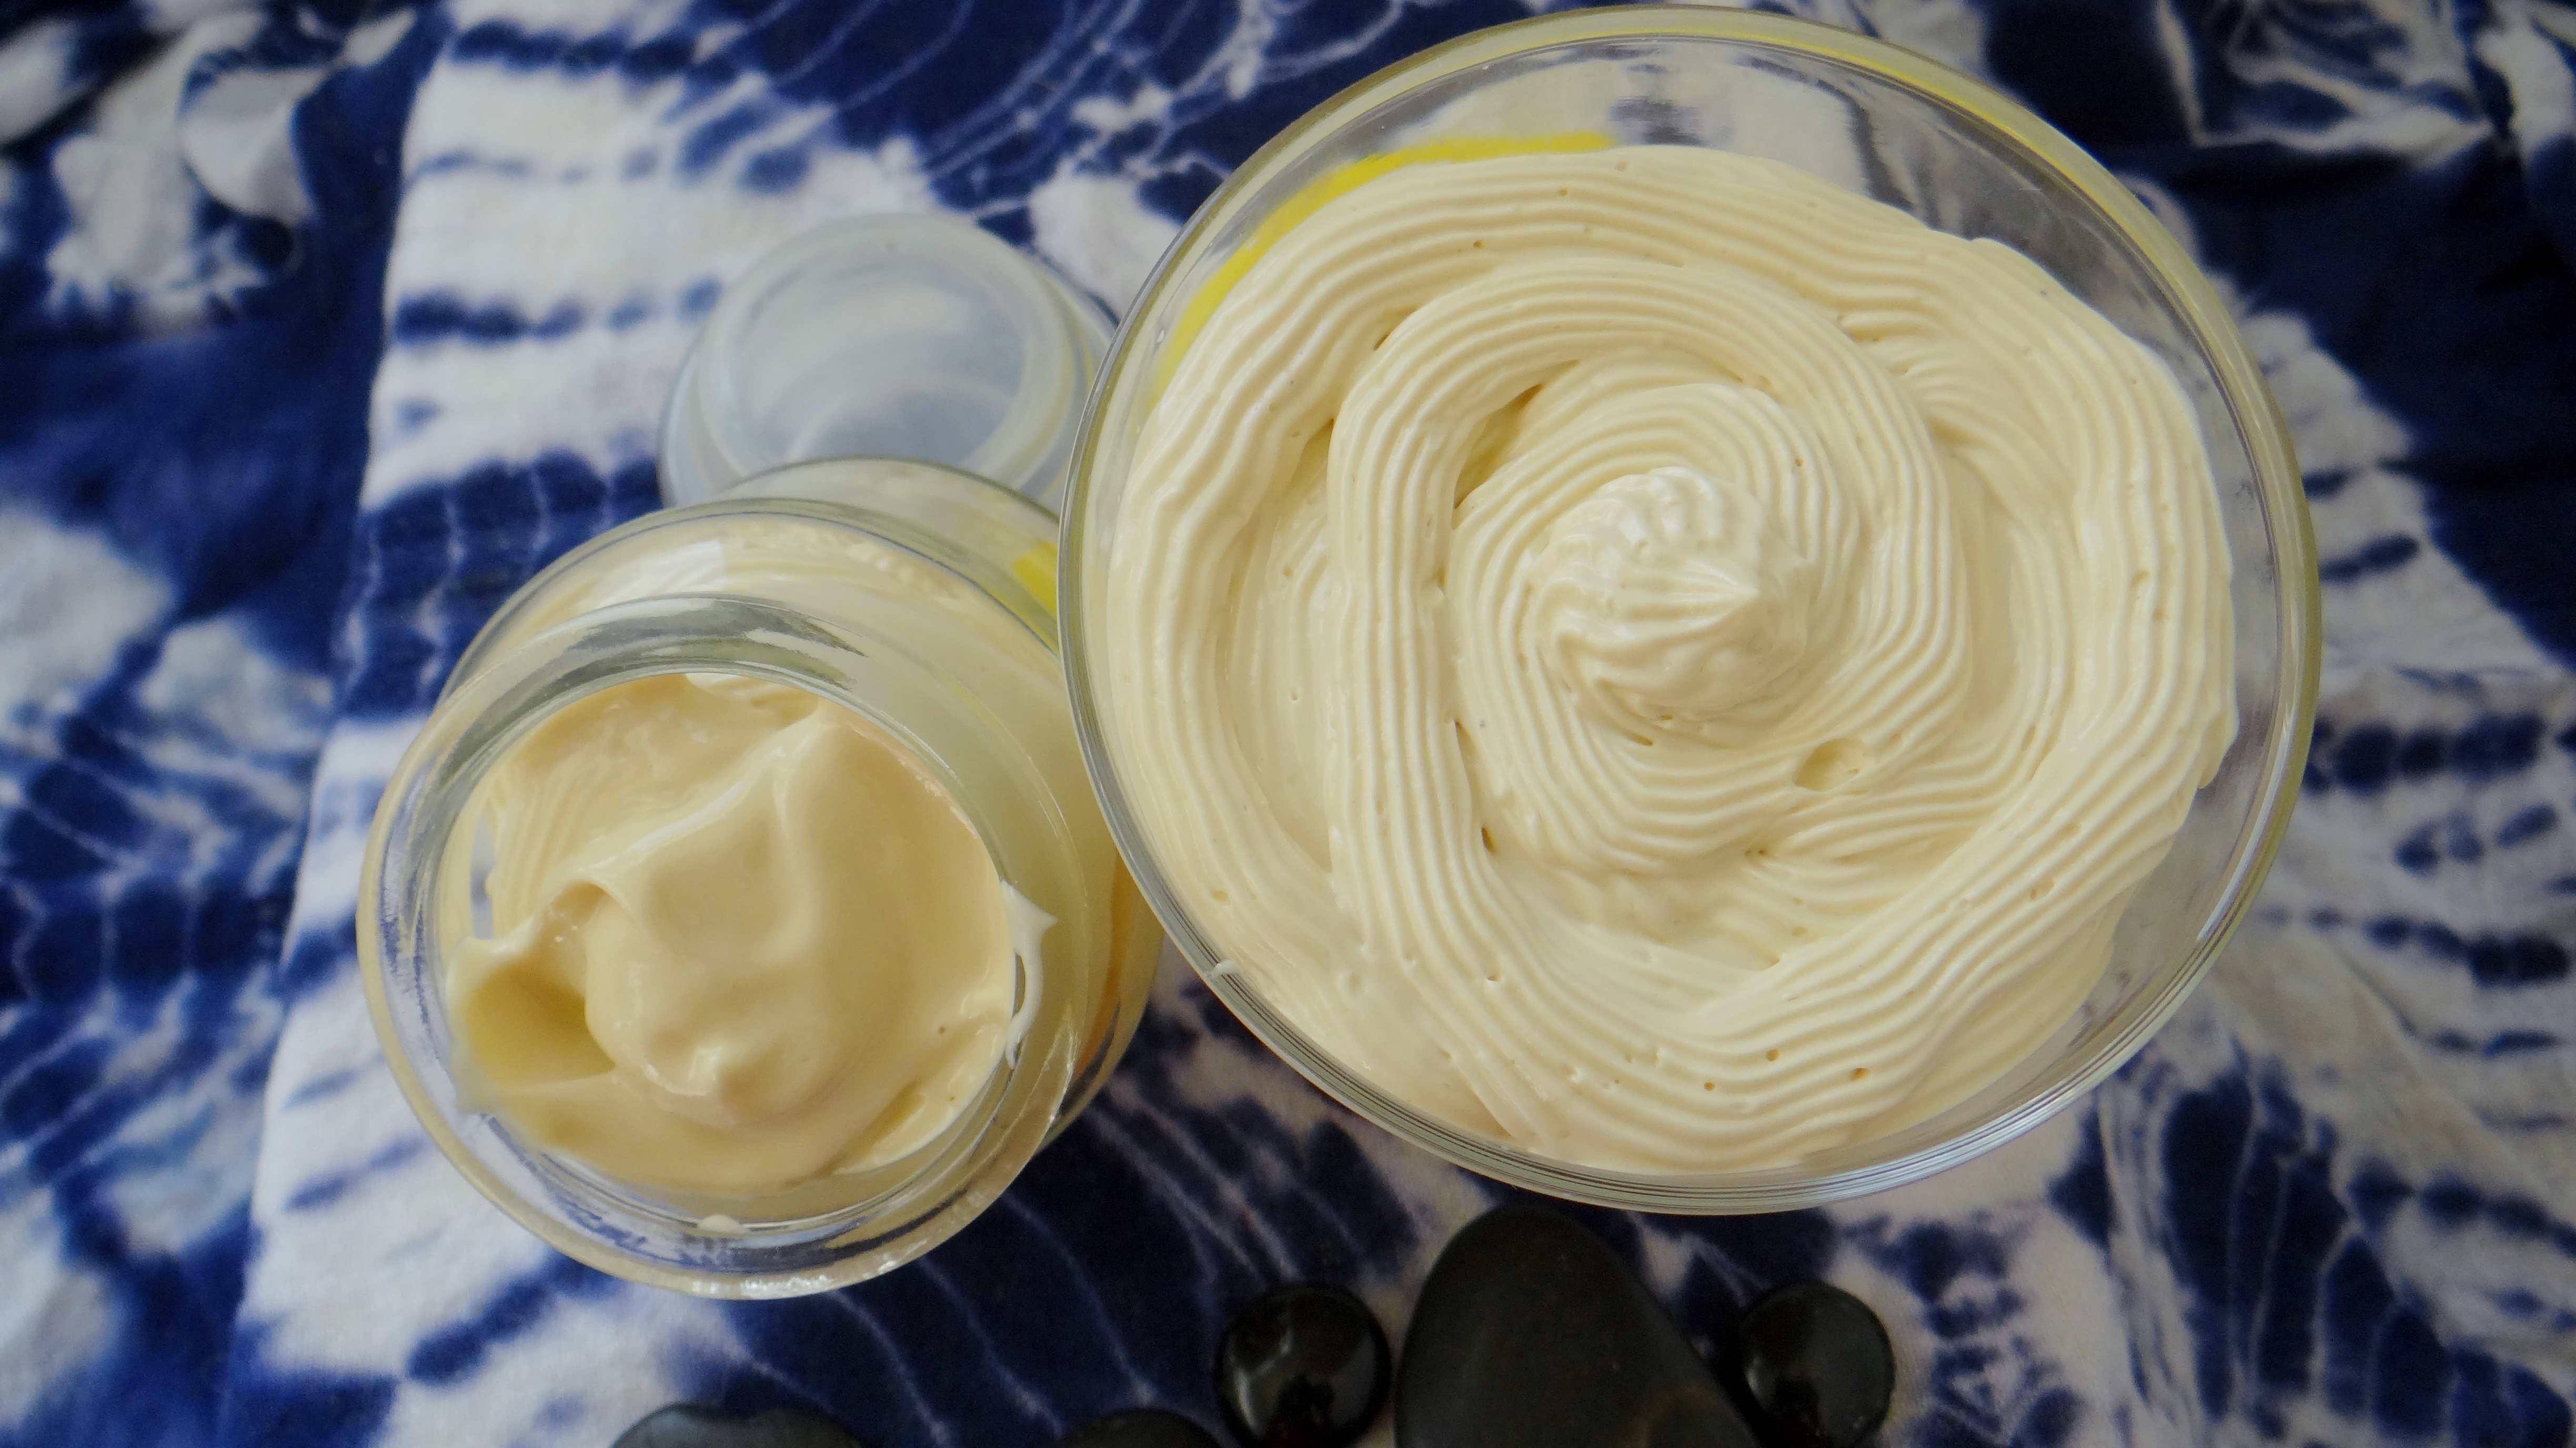
Before I begin the recipe I first soak the seeds in 8oz of plain water overnight (you can choose to soak them for less time or skip this all together). Boil the seeds in 7oz of plain water on low heat just until it starts a rolling boil (string the whole time). Pour the liquid through a strainer and reserve the seeds (they can be stored and reused later if kept in the freezer). Rinse out the pot and warm up the coconut cream just till it starts to thicken (no more than 3 – 5 minutes). Add the warm coconut cream to the liquid and stir thoroughly. (If you choose to add conditioner to the mix directly, do so now) then add the oils, stir and pour into the container. Once the mix cools you can add Essential oil (optional). 

Instead of adding the conditioner to the mix I like to use it after I have rinsed my hair and the water runs clear. I do this because I am not the biggest fan of the scent of Fenugreek seeds. Some have said that they get a “maple syrup” scent when they use Fenugreek seeds, I get no such smell! To me the seeds have a spice scent that I am not a fan of but that is way I add essential oil (usually peppermint) once the mix cools and then do a final rinse with conditioner.If you use conditioner in the recipe this will give your mix additional slip and that will help detangle the hair even further. 

Application/Rinse:

Apply the mix to freshly washed, clean and detangled hair going from the ends to your roots. Use your fingers to gently “finger comb” and distribute the mix, cover with a shower cap and let it sit for 10 – 15 minutes and rinse your hair using warm water. If you feel like you need to follow up with a moisturizing conditioner do so after the water runs clear. 

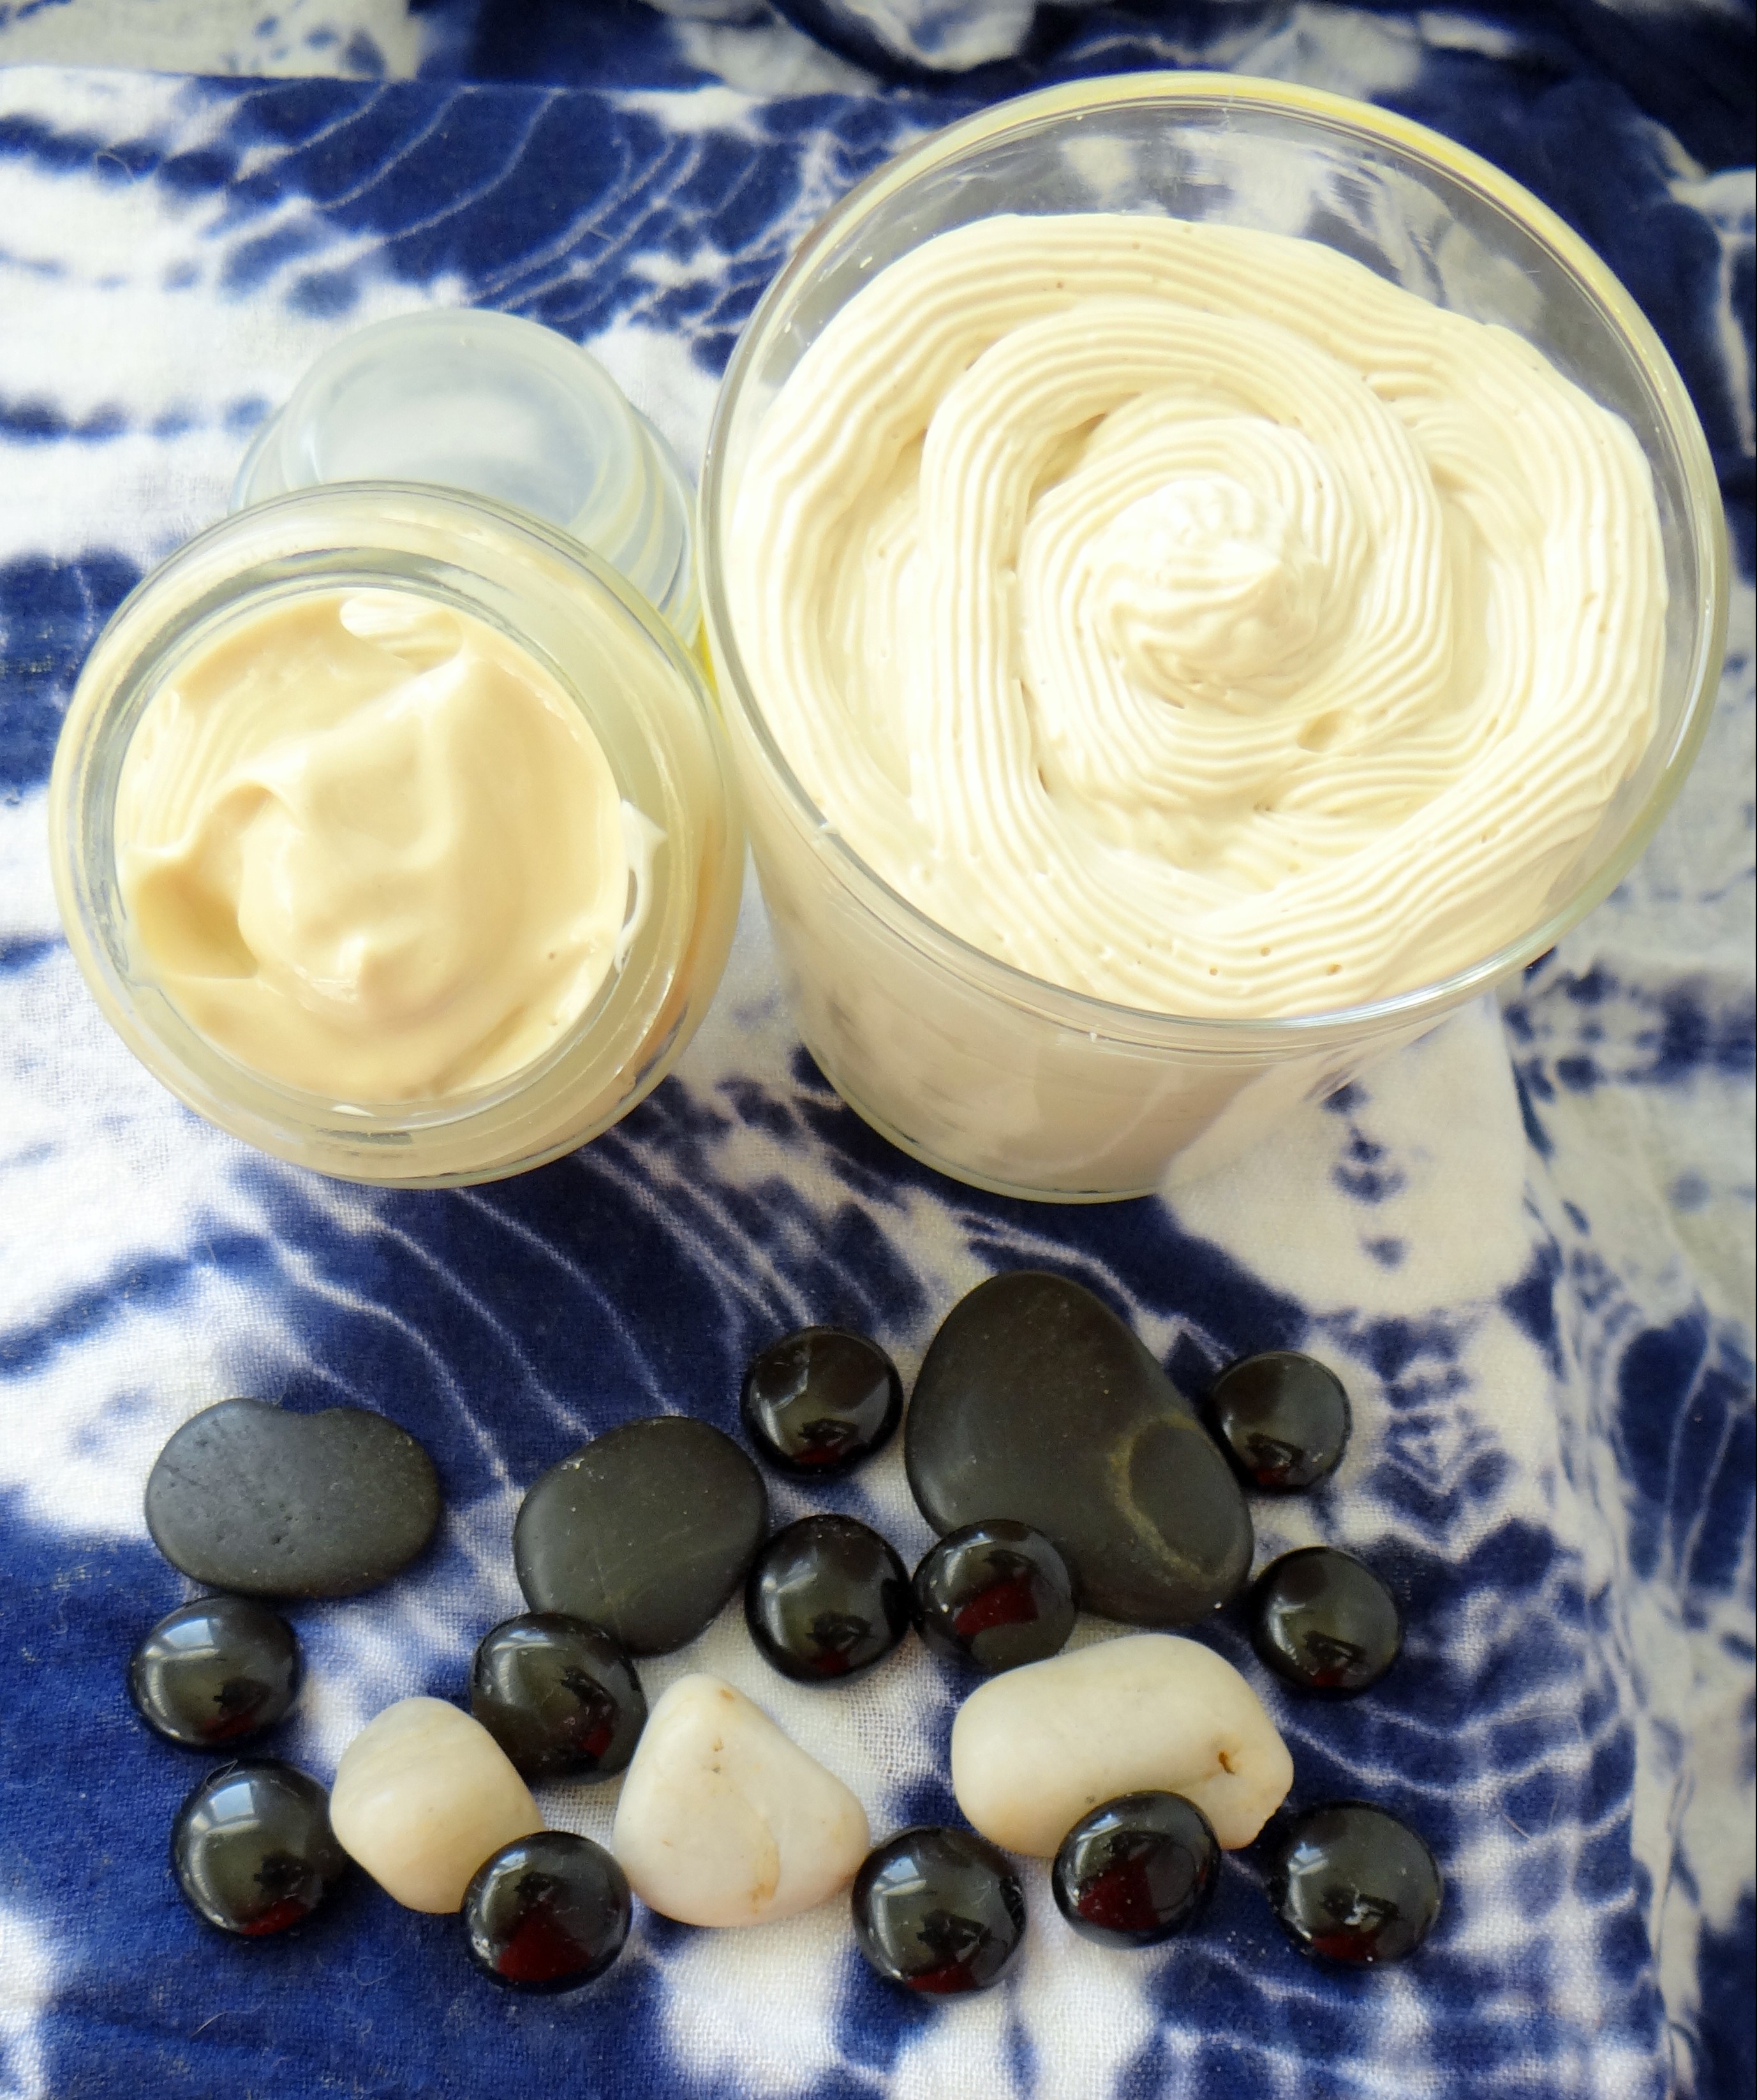
You should be left with hair the feels stronger but not dry, shiny but not sticky, basically your hair should be feeling happy! 

NOTE: If you have any leftover conditioning cream you can store it in your freezer for future use (I always have some left over). You also can freeze your coconut cream in case you don’t use the rest for cooking – it is delicious in curries btw ;).

I would love to hear if you have ever used Fenugreek seeds before. If you have, please let me know if you get that “maple syrup” scent from your seeds. 

Thanks

Maicurls

Maicurls

My contribution work on Global Couture

Hey Maicurlies,

I have been a little off about posting the different articles I have contributed to Global Couture. If you haven’t already visited the site then you really should! It is a wonderful source of information and inspiration! 

I just wanted to share some of the previous articles along with the links to them. 

I would love to hear what you think if you read any of them.

Thanks

Maicurls

Maicurls

How to: Heatless Wave Curls on Fine Natural Hair – Jumbo Perm Rods

Hey Maicurlies,

First off I want to wish you all a very Happy New Year! I hope that 2015 ended well and that 2016 will be a bright year full of love, good health, great company, prosperity and happiness for you and your family 🙂 

I wanted to start my blog post this year with a styling tutorial. I actually (hopefully) will be a little more “adventurous” with my styling options in 2016. So to kick things off here is my Heatless Wave Curls.

DSC03485

This is my “quick fix” styling option that I love! There are a few things I like about this style: 1. it sets in four hours so no sleeping with rollers in my hair (I have found a method that is not too uncomfortable but still prefer not to). 2. it is a great last minute styling option if I haven’t planned anything but need my hair done for an night out and 3. it gives my fine and thin hair volume! 

Products/Tools Used:

Method:

After spritzing my hair with a tiny bit of water I added a little spray leave-in conditioner to help moisturize my hair (just to lightly moisten but not to make it soaking wet). I lightly detangle my hair to make sure there are no knots and then I spay a tiny bit of my Spray FSG to help give really light hold. My rolling method is to first try and make sure my hair is smooth, I then roll the perm rod up my hair (for one rotation) and then twirl my hair once, roll up again and twirl the perm rod towards the root before closing the perm rods. I literally let it set (without heat) for 4 hours and then take the rods down, separate and I am done! 

It is a little easier to understand the “how to” in the video: 

As I mentioned this is a “quick fix” styling option that I like to do whenever I haven’t had time the day before to plan for a hairstyle. The hold is really light and does not last for days and days therefore I will usually install the perm rods again after a day or two either during the day or at night (e.g. during the week when I have work and can’t sit in my office with perm rods on my head LOL). 

I would love to hear what you think. Have you tried day time jumbo perm rod sets or any other perm rod sets done during the day? I would love to hear from you! 

Thanks

Maicurls

Maicurls

Hard Protein/Moisture Balance Treatment

Hello Maicurlies, 

Today I wanted to share something that has become a “hair saver” (for me). My Hard Protein/Moisture Balancing Treatment.

Hard Protein Treatment

This recipe has become part of my routine however, it is not something I do every week or even every month because as the name suggests it is a HARD protein treatment. Before I delve into the details of what I use, how I mix, how I apply etc. it is important to point out a few things.

  1. This is an extremely hard protein treatment that should only be done once every 2 – 3 months (some might only want to do this 2 times a year).
  2. I have been told that this feels/acts like the 2 step ApHogee Protein Treatment therefore if you have tired that before, keep in mind how often you have used it/how you hair felt afterwards. Do not do both this and ApHogee treatments since they work similarly and you might end up with protein overload!
  3. It is vital to do a Moisturizing Deep Condition (DC) after. VITAL! Your hair will feel hard, brittle and almost straw-like (this is normal) however, it should not feel like that after you have done the Moisturizing DC. Without the moisturizing DC you will not have a protein/moisture balance and that will just result in breakage (not good)!
  4. If your hair does still feel hard after your Moisturizing DC, do another DC again!
  5. Ensure you have fully and properly detangled your hair before you apply the protein mix. Protein makes the hair hard (and this one does so extremely well) and if you haven’t detangled your hair beforehand you will only end up breaking hair in the spots where you have knots as you try to distribute the mix.
  6. Work with freshly washed, clean and damp hair to remove any product buildup which will allow the protein to latch on and penetrate the hair strands (this is when you would detangled your hair).
  7. Once the mix is on your hair DO NOT TOUCH YOUR HAIR!
  8. Leave the mix on for no more than 15 minutes!
  9. Some people like to use a drier/hooded drier after applying the protein to help dry the hair however, since I do not use any form on heat I do not suggest this step in my demonstration. (If you do decide to use heat, please ensure it is not set to high because you can cause damage).
  10. Once the time is up use your shower head/faucet (warm water) to rinse your hair going in a downwards motion. After you let water run over your hair slowly use your finger tips to help ensure all of the protein has been rinsed out (gently). You can use conditioner after you rinse to make sure the protein is out.
  11. ALWAYS DO A MOISTURIZING DC!!!!! (Sorry but I have to stress this part).

Ingredients/Tools Used:

Hard Protein Treatment Ingredients

  • 7 oz Hot Water (I used bottled water)
  • 0.24 oz Gelatine 
  • 0.5 oz Pure Apple Cider Vinegar (ACV)
  • Applicator bottle
  • Bowl/container (to mix)
  • Spoon
  • Essential Oil (optional if you can’t stand the smell of ACV but the ACV smell will go away anyways after you rinse and DC your hair). 

Mixing:

Sprinkle the gelatine over the water (while it is still hot) and stir to dissolve the gelatine. Add the ACV, stir again and pour into your applicator bottle. Allow the mix to completely cool down (if you plan to add EO add it after the mix has cooled down). 

Application

While you are letting the mix cool wash and detangle your hair so it is free from products, this will allow the protein to attach and absorb into the hair strands easier. Section your hair into parts to make it easier to work with and pour the mix from root to tip, paying particualr attention to the ends since this is where breakge occurs most frequently. Distribute the mix by finger combing/wide tooth comb but be VERY CAREFUL since the protein will make your hair feel hard and can cause breakage if you are rough. (This is why it is important to make sure you have fully detangled your hair prior to application)! After you are done with one section LEAVE THAT PART ALONE, do not touch it anymore and move onto the next. Once you are done allow the mix to sit for no more than 15 minutes. Typically people like to use a drier/hooded drier while waiting for the 15 minutes however, I do not use heat and therefore do not take this step. If you do, please make sure that you do not bake your hair, you will see damage if you do!

After the 15 minutes using your shower head/facet let warm water run over your hair going in a downwards motion (do not use your fingers to manipulate) unitl you feel your have rinsed out the protein. Once you have rinsed with water alone then you can gently use your fingers to run over your hair to make sure it is protein free,  you can use a little conditioner to help ensure all the protein is out.  Follow up with a Moisturizing DC for no less than 1.5 hours and proceed with your styling. If you feel your hair still feels rough, dry, brittle you need to do another moisturizing DC to restore the protein/moisture balance! 

This is my demonstration video:

If you try this mix I would love to hear what you think and if you have used ApHogee before I would love to hear if you think these two work similarly or not. 

Thanks

Maicurls

Maicurls

DIY Hair Setting Lotion

Hey Maicurlies,

Today I have yet another DIY to share! 😀

DIY Hair Setting Lotion

DIY Hair Setting Lotion

This baby is my DIY Hair Setting Lotion and before I begin I want to point out that while I consider this a “lotion” the name comes from the fact that it has a lotion-ish consistency. It does not contain the main ingredients included in most normal hair lotions/creams you can buy from the store. What this recipe does contain is Flax Seed Gel (FSG) and Whipped Butter, along with a little natural honey. It is an all natural (no parabens, no chemicals, no alcohol) product that helps enhance your curls, provides you with light hold while at the same time provides moisture and seals in that moisture.

As I have always mentioned in all of my DIY recipes, you do not have to follow my recipe step by step (it is good to experiment for yourself) but just so you have an idea of what I do, I include my: DIY Protein Hibiscus Flax Seed Gel and my DIY Double Coffee Whipped butter. (I will provide you with ingredient alternatives below).

I have used this product in a number of different ways and loved the results of each for example to set a rake & shake (similar to a wash and go), perm rod curls, twist-outs. I like to apply this as a final product after I have moisturized my hair with a leave-in conditioner. I do not follow up with a butter/oil/gel since this basically has it all! 

Ingredients/Tools Used:

Ingredients used

Mixing Method:

Hair Setting Lotion

Hair Setting Lotion

1. I put my (super fluffy and delicious smelling) double coffee whipped butter in a tall container and pour in the FSG. 2. Using an emulsifier (you can use a blender) I pulse the butter and gel together until it starts to combine, add the honey and continue to pulse till it starts to turn into a lotion-ish consistency (usually no more than 3 – 4 minutes). That is it! Simple 😀 

Storage:

You MUST I repeat you MUST store this in the fridge. FSG has a short shelf life on its own and while the honey does help to extend the shelf life, you are combining butter together with a liquid; therefore in order to avoid bacteria from growing too quickly it has to be stored in the fridge. You also only want to make small amounts so that you can use it up quickly and then just remake some more. Again, this will reduce the chances of your product growing mold before it is used up (avoid wasting it). 

Ingredient alternatives:

Instead of the Protein FSG I use you can of course use regular FSG. The whipped butter used is completely up to you, whipped Shea butter, mango butter, a combination of butters will work just as well. Honey is an optional ingredient that can either be skipped all together or replaced with glycerin or agave nectar. The addition of this helps to provide the mix with a little extra moisture and again helps to extend the shelf life of the product (just a little nothing major). You could also opt to try and use a store bought gel (however the consistency of the end product will probably be much thicker and more like a DIY hair custard which is great too)! 

Benefits:

  • Provides light hold (none crunchy hold)
  • Helps enhance curl defintion
  • Proivdes moisture
  • Provides shine
  • Helps seal in moisture 

This product has the ability to provide your hair with hold and curl definition while at the same time it provides moisture due to the Flax Seed Benefits such as the Omega fatty acids present in the seeds. Depending on your FSG recipe you might have extra moisturizing elements e.g. I use rose water, and plain water which is great for the hair and scalp. The addition of carrier oils in the gel also helps with providing the hair with sheen and the ability to seal in moisture. The same applies for the whipped butter which helps to soften the hair, smooth the hairs cuticles, provides shine and seals in moisture. If you added Essential oil in the process of your gel/butter making this again helps with the overall health of your hair and scalp. Overall this is one goody in a squeeze bottle! 

Here is my “how to” video:

I would love to hear what you think if you try this recipe and if you attempt this with a store bought gel I really would love to hear how it turned out!

Thanks

Maicurls

Maicurls

Protein Hibiscus Flaxseed Gel

Hey Maicurlies,

Today I wanted to share another updated recipe: my Protein Hibiscus Flaxseed Gel (FSG).

Protein Hibiscus Flax Seed Gel (FSG)

                                                                 Protein Hibiscus Flax Seed Gel (FSG)

This is an updated mix from my previous recipes (here) and (here). There are a few similarities but the major difference is the addition of Gelatine (the protein) and Hibiscus Petals.

Those that have protein sensitive hair might think you need to skip this recipe however, it can be modified since the protein is an optional ingredient. I have been using this recipe for a while now since I have fine hair strands and protein gives the hair strength and elasticity and that is what I need. A lot of the times we are very diligent on making sure we moisturize our hair, use moisturizing based products, deep condition etc but sometimes forget that we still do require some protein in our routine. So if you feel that your hair is weak, if you are going through some chemical or heat damage or if you have fine and fragile hair strands and are only using moisturizing products then you might want to switch to a protein gel from time to time when it comes to styling your hair. Make sure to switch between the protein gel and non protein gel so you do not get a protein overload and whenever you are using a protein gel, ensure that you are using a moisturizing leave-in conditioner.

Now another point I want to make is that I like to use hibiscus since my hair loves ayurvedic herbs but please keep in mind: not to wear your favorite light top while setting your hair with the gel since hibiscus does give the gel a red/purple tone which could potentially stain your top while you hair is wet and touching it. Once you hair dries the colour will not rub off it is just while setting/as your hair dries. Since it does give a red/purple tint to the gel it could potentially do the same to the hair of those that have blond/light/bleached hair. If this is something you want to avoid then please avoiding adding hibiscus, those with dark hair will not really notice a major colour difference.

Ingredients/tools used:

Protein Hibiscus Flax Seed Gel (FSG)

                                           Protein Hibiscus Flax Seed Gel (FSG)

  • 12 oz Water (bottled water)
  • 2 oz Rose water (Optional – not really required, can be replaced with plain water but a good addition)
  • 2.5 oz Flax Seeds (this makes a thick gel – use less for a thinner gel)
  • Roughly 0.2 oz hibiscus petals (optional)
  • 0.2 oz Gelatine (protein optional – those with protein sensitive hair will want to skip it)
  • 0.2 oz DIY Coffee Bean infused Almond Oil (you can use any carrier oil)
  • 0.2 oz Glycerin (optional)
  • 5 drop Grapefruit Essential Oil (you can use any Essential Oil or none at all)*
  • 3 Capsules vitamin E oil – roughly 0.15 oz
  • Non Stick Pot
  • Spoon/spatula
  • Sieve
  • Disinfected container (squeeze/pump bottle is best)

*If you are pregnant do not use any essential oil.

Alternatives:

Rose Water can be replaced with regular water if you do not have any however, rose water does have its own nourishing properties (read here). If you do not want to use Hibiscus it can be skipped all together otherwise you could also use dried rose petals. Glycerine is a humectant that does not always play nice with peoples hair therefore, it can be skipped all together otherwise you can replace it with honey or agave nectar which also are humectants. (Humectants provide the hair with moisture from the air (humidity) however, it always depends on the weather conditions in the area where you live). If you have too much humidity it can cause frizz and if you do not have enough humidity in the air the results can be the opposite; drawing moisture from the hair outwards to the air which causes driness. Aloe Vera Juice can also be added to the mix if you have any on hand for its moisturizing properties. If you prefer your gel to be thinner either add more water e.g. 13 – 14 oz or reduce the amount of flax seeds use e.g. 1 – 1.5 oz.

Mixing Method:

1. I first warm up the water and rose water together in a pot, once it starts to lightly warm up I throw in the flax seeds and begin to stir. 2. After about 5 – 7 minutes of the liquids and flax seeds have started to boil I throw in the hibiscus petals and let that boil for a further 5 – 7 minutes while continuing to stir (you must stay by the pot the whole time and continue to stir). As the hibiscus boils you will notice the colour of the gel starts to change and as it boils the liquid starts to become thicker. 3. Depending on how thick you want your gel, remove it from the stove (the longer on the stove the thicker the gel) and immediately pour it through a sieve. (As soon as the seeds are out of the pot be sure to cover the pot with water to help with the clean up). 4. I squeeze out any excess gel from the seeds with a spoon/spatula and then transfer the seeds into a container. Let the seeds cool down before covering with an airtight lid and storing it in the freezer to be reused next time. 5. Let the gel cool down a little (it should still be warm) before adding the gelatine (skip if not making a protein gel). 6. I sprinkle half the gelatine evenly over the top of the gel and begin to stir then add the remaining and repeat. 7. I use an electric whisk to help breakup any lumps and clumps and also to help loosen the gel a little (otherwise it can become really thick and “jello- like” once it cools). 8. Let the gel completely cool down before adding the oils otherwise the heat will destroy their properties. I add the Coffee Infused Oil, Essential Oil, Vitamin E Oil and the Glycerine (optional) and stir before pouring it into a clean & disinfected pump container.

Storage:

FSG has a short shelf life so it is essential to store it in the fridge whenever it is not being used! It generally will be go for 2 weeks 3 weeks  maximum however, you can save some of your gel if you know it won’t be used up before it goes bad by pouring some into ice-cube trays in the freezer. Put the gel ice-blocks in a sandwich bag and remove some cubes whenever you need some gel.

Benefits:

Protein Hibiscus Flax Seed Gel (FSG)

                             Protein Hibiscus Flax Seed Gel (FSG)

So while I have previously written about all the nourishing benefits of FSG (yes this gel actually has more than the ability of giving your hair some hold) I will quickly jot down some of the benefits of FSG in general along with the benefits of a protein FSG:

  • Its rich source of vitamin E holds the power to help with hair growth.
  • Provides the hair with shine.
  • It contains moisturizing elements (along with the additional moisturizing ingredients added) helps keep the hair moisturized.
  • Provides nourishment to the hair roots, shaft, and the scalp.
  • Gives the hair a light hold that is not crunchy or flakely
  • Helps smooth the hairs  cuticle
  • Said to help prevent early hair discolouration thanks to the Vitamin E in the flax seeds.
  • Contains Omega-3 fatty acid that helps nourish the hair follicles.
  • Provides additional elasticity thanks to the Omega-3 fatty acid.
  • The addition of protein provides the hair with strength especially for those with fine/chemically damage/heat damaged hair.
  • The addition of protein also helps reestablish the elasticity of the hair (when you use a moisturizing leave-in and follow up with a protein gel).

This is the “how to” video:

I would love to hear what you think of this recipe. If you try the protein version (or skip it) I would really like to hear how it worked for you.

Thanks

Maicurls

Maicurls

Easy Milkmaid Twists

Hey Maicurlies,

So today I have a styling tutorial of my Milkmaid Twists. 

Milkmaid Twists

Milkmaid Twists

Now I will point out that I am not all that crazy about how this particular style looks on me (I love the style on others) the main reason why I don’t like it on myself that much is because my forehead and ears become quite obvious because all my hair is pulled back and away from my face LOL. I do like the fact that it is a protective/ low manipulation style since your hair is tucked away and can be left alone for days even. 

The style of  course is a breeze to do and doesn’t require too many products either. Please note: I actually recorded this video working on old, frizzy hair (that had seen better days) but even with the frizz and mess the final look still ends up looking polished and neat. The video was recorded a few months back but since I was not that big of a fan I put it away without editing it, until I was kindly requested to share the video so I did 🙂

Tools/Products used:

Method:

The first step is to split my hair in the middle in order to make two side ponytails (please note again apart from the frizz I also don’t make neat partings – I have issues). After parting, I use some FSG to help smooth out my hair and “tame” the frizz a little. I also follow up with a little of my Hair Pomade on my edges to help provide a little extra shine and thanks to the ingredients in the pomade it also helps protect and aid in the health of my edges. I use the soft bristle brush to bring my hair together and distribute the products applied. The soft bristle brush along with the gel and pomade really helps to give that “smooth” look. I pull my hair together into two side ponytails and then two strand twist each side. I then cross each twist over the top and bobby pin them on the opposite side (under the base of the twist) and tuck away the ends under the base of each twist and that is it. 

Additional:

I tend to add a wide ribbon to help accessorize the look, I like to think it makes the style look a little more “fancy” while at the same time helps me feel that I have caused some distraction away from my forehead and ears (yes I am not a fan of them!) 

Whenever I do this style I actually just take down the bobby pins, cover my hair with a scarf for the night and the next morning I touch up my edges if there is need to and then re-pin them down so I get to protect my hair for a few days. 

I have a video of course:

Would love to hear if you do Milkmaid Twists, if your method is different or if you have any suggestions for me.

Thanks

Maicurls

Maicurls

DIY Whipped Double Coffee Butter

Hello Maicurlies,

The DIY freak is back and this shall be my last whipped butter as part of this “series” for now.

Whipped Double Coffee Butter

                                                              Whipped Double Coffee Butter

Fret not (I can hear you screaming whaaaat), I shall have 2 more tutorials that will be released within the next 2 months that will be strength based thanks to an inspiration from a YouTube viewer (thank you)! I am just taking a break to actually have time to use up the whips I already have. 

Anyways back to this whipped butter, I can honestly say that this Double Coffee Butter is my favorite (I have probably said this a few times but I truly love this) 😀

From all the mixes/recipes/concoctions I have made, this one has the highest concentration of coffee… coffee is my friend is my love. My curls seem to thrive on products that include coffee/caffeine so why would I not use use different types of coffee butter along with some coffee infused oil right?

I can go on and on about the benefits of coffee for the hair and skin and I of course already have, you can read all about it here where I introduce my DIY Coffee Bean Infused Butter and here my DIY Coffee Bean Infused Almond Oil

Ingredients/Tools: (makes 10.3 oz whipped butter) 

  • 5.5 oz Coffee Bean Infused Butter (Cocoa/Shea Combination)
  • 3 oz Coffee Butter (I bought mine from SheaButter Cottage
  • 1.1 oz Coffee Bean Infused Almond Oil
  • 0.5 oz Vanilla Bean Infused Almond Oil
  • 0.15 oz Glycerin (optional)
  • 3 capsules Vitamin E Oil (roughly 0.15 oz)
  • Heatproof Bowl 
  • Whisk
  • Gloves
  • Airtight Container
  • Spatula
  • Piping Bag (optional) – a sandwich bag can do the trick or a spoon/spatula to transfer the whip to your container) 

Note: I want to remind you that I live in the desert so normally during the summer I prefer my mix to be a little more firm therefore I use more butter than oil. If you live in colder climates and especially during autumn & winter I suggest that you add more oil that I do (see below).

Ratio Alternatives/Ingredient Alternatives:

In my opinion the infused coffee bean and the coffee butter are what makes this a double coffee butter however, should you not have any infused coffee bean butter (recipe) you can replace it with either Shea Butter or a Shea & Cocoa Butter combination (40% Cocoa 60% Shea butter). For a less firm whip particularly in autumn/winter I would suggest  using 2 oz – 3 oz carrier oils. Technically you can use any carrier oil you prefer, they do not have to be coffee bean or vanilla bean infused oils however again, to make this a coffee focused butter I would suggest using more coffee bean infused oil (recipe) such as 70% coffee oil 30% vanilla bean oil. Other oil alternatives could be: Extra Virgin Coconut Oil, Pure Almond Oil, Grapeseed Oil, Avocado Oil, Extra Virgin Olive Oil etc. Glycerin is an optional ingredient that does not need to be added especially if your hair does not like it. It can either be omitted or even replaced with raw honey. 

Method:

Once the coffee bean infused butter has been double broiled I add the coffee butter. The warmth from the melted butter will help melt down the coffee butter without the need of additional broiling. I then add 0.8 oz of the Coffee Bean Infused Almond Oil  and 0.5 oz Vanilla Bean Infused Almond Oil and stir.

I then place it in my freezer for 10 – 15 minutes till it begins to thicken. Once this happens, I scrape the mix together and then begin to whisk. I whisk for a good 3 – 5 minutes and then add the remaining 0.3 oz of Coffee Bean Infused Almond Oil, 0.15 oz Glycerin (optional) and 3 capsules Vitamin E  Oil. I continue to whisk for at least 3 – 5 minutes.

Depending on the consistency you prefer you can stop here and transfer it to an airtight container but I prefer mine to have a fluffy texture so I place it in my fridge, this time for 10 minutes till it becomes a little hard on the top. I then take it out and whisk for the last 5 – 7 minutes and I am happy with the texture. Using a spatula I scoop the whip into a piping bag (because I like being “extra”) and transfer to my container. (The piping bag really isn’t necessary but it makes the butter look extra pretty and is a nice touch if you are giving it away as a gift). 

Uses:

It is not just the inclusion of coffee and coffee butter that makes this an excellent choice for your hair and skin care but also the inclusion of  cocoa butter, Shea butter, almond oil, vitamin E oil and glycerin (read about the benefits of these ingredients for the Hair and Skin). I like to use this butter on damp/slightly damp hair  after I have moisturized to help seal in moisture for styles likes twists, twist outs, braid outs, Bantu knots, Straw Sets, Perm rod sets, Pin curls, Flexi rod sets… basically everything! Whenever I use Flax Seed Gel(FSG) which is full of nourishing benefits and is all natural, I actually like to seal in the FSG too by applying the butter as my last product. If however you are using a store bought commercial gel, you might find it more beneficial to apply the whip before you apply your gel. When it comes to the skin,  I like to apply this after a shower to slightly damp skin to help seal in the moisture. It makes my skin super soft, smooth and lush looking and also helps with faint marks!

I of course had to record my tutorial as well: 

I would love to hear from you if you try this delicious whipped butter! 

Thanks

Maicurls

Maicurls


1st Attempt with Super Large Perm Rods

Hello Beautiful Maicurlies,

So today I wanted to do a quick post on my first attempt with one of my newest hair tools – Super Large Perm rods!

Large Perm Rod Curls

I actually purchased two different perm rods sizes from Amazon (I will provide links to both the sets at the end of this post) but for this particular style I used the black Jumbo Perm Rods.

DSC00439

I bought:

  • 36 x Diane Cold Wave Head Band ( 1-1/4 inch diameters) – Each pack contained 6 perm rods so I got 6 packs.

81aM3N3LWlL._SL1500_

  • 36 x Perm Rods Jumbo Tangerine (3/4 inch diameter) – Each pack contained 12 perm rods so I went for the option of 3 packs (it worked out cheaper that way)

61d49FoqRYL._SL1050_

I will say that the rods arrived as promised actually even earlier than anticipated! Payment and delivery went smoothly and like I said the perm rods turned up as anticipated so I do recommend buying from these sellers (based on my own experience). Please note: I was not asked or paid to mention the rods, the buyer experience or the point of purchase and I bought the rods with my own money. 

My Process:

I was working with super stretched hair (heat free) which started of as a twist out, then was stretched when I used a hair donought to make a bun and finally I had two flattwists. I used a little of my DIY Spray Leave-In Conditioner to very very lightly mist my hair (it was barely damp) just so my hair would take on the curl shape of the rods and I also use a tiny bit of gel right before twirling my hair around the rods.Using a hair net and satin scarf I let my hair set overnight (sleeping wasn’t as bad as I’d imagine it would be). The next morning using a little DIY Coffee Bean Infused Almond Oil on my fingers I took my hair down and separated the curls and that was it.

I really do love the results! 

I need to practice a little on how I roll my hair because since the rods are so large it took a little getting use to (you know I am styling challenged lol). I will try different ways of rolling my hair to see if I get different curl results but for a first attempt I was happy.  😀

These are photos from day 3 of the same perm rod curls. Of course I was even happier with the results on day 3 because my hair was fluffier and bigger! Give me volume…give it to me!!!! 😀 

Have you tried Jumbo perm rods? Do you have a particular rolling method? I would love to hear from you! 

Diane Cold Wave Head Band, DCW125, 1-1/4 Inch: http://amzn.to/1OOfP6s

Perm Rods Jumbo Tangerine Lot of 3 Dozen: http://amzn.to/1PBBfV7

Thanks

Maicurls

Maicurls

7 Reasons to Start Making DIY Hair Care Products and How – Global Couture

Hey Lovely Maicurlies,

I wanted to quickly share my contribution article on Global Couture.

So, the article might be ever so slightly bias (seeing as I am obsessed with Do It Yourself mixes) but I did want to share my passion for DIY’s and perhaps encourage someone else to give it a whirl. I have come across a few people that have stated reasons why they “dislike” DIY’s (I am trying not to give the side-eye while thinking someone could actually dislike them LOL) so to counter-claim I wrote about: 7 Reasons to start making DIY Hair Care Products & How“.

I hope you enjoy the article! 

Thanks

Maicurls

Maicurls