I have been busy trying to record videos back to back because I will be out of the country in 2 weeks (on holidayaaayyyy) so please forgive my delays.
Today I am going to be sharing a new Skin DIY! And yes, the title of the post gives it away, it will be a face mask that helps to detoxify the skin.
DIY Detox Mask
Benefits
Brightens the skin (NOT LIGHTENS but brightens).
Leaves you with a youthful glowy finish.
Helps reduce redness.
Soothes the skin.
Helps to remove toxins in the skin.
Helps to remove dead skin cells.
Closes the pores.
Leaves your face smooth and soft.
Ingredients/Tools used
0.8oz Amla Powder
1.4oz Water (I use plain bottled water)
0.5oz Rose Water
0.4oz Natural/Raw Honey
Squeeze of Fresh Lemon Juice
3 Capsules Vitamin E Oil (roughly 0.15oz)
(Optional) Essential Oil
Clean and disinfected Bowl
Clean and disinfected spoon
Gloves (optional to keep things sanitized)
Mixing
I add both the water and rose water a little at a time to the amla powder while continuously stirring. I then add the honey, lemon juice and Vitamin E Oil (Essential Oil if using).
Ingredient/Ratio Alternatives
Should you not have access to rose water, you can just replace it with plain water.
Natural/Raw Honey can be replaced with Agave Nectar or even Molasses.
Application
I like to apply the mask onto makeup free skin that is slightly damp. I use my fingers to apply the mask AVOIDING THE EYE & EYEBROW AREA! Let the mask dry for 15 – 25 minutes, splash lukewarm water on my face and slowly wipe away the mask using a damp face cloth. I follow up with my toner & moisturizer. NOTE: as the mask dries it will start to tighten the skin, this is normal.
If you use this mask please let me know what you think!
Today I am back with an alternative recipe version of a mix I already shared a few weeks ago! I have a post & video about moisturizing dry & brittle ends with a humectant based recipe here and was then requested to do a humectnt free version and here it is!
I have mentioned this a few times in my blog, not everyone’s hair appreciates humectants, it all boils down to hair preference and weather conditions in the area where you live. This recipe works in a similar way to my humectant based mix, just without the addition of ingredients that draw moisture in the air (humidity) to the area applied (the hair).
Ingredients/tools:
1.7oz Plain Full Fat Yogurt
1oz Cocoa Butter
0.5oz Rose Water
0.5oz Plain Water
0.5oz Virgin Coconut Oil
3 capsules Vitamin E Oil (roughly 0.15oz)
3-5 drops Peppermint Essential Oil (Optional) – use any*
Clean and disinfected heatproof container
Pot
Clean and disinfected spoon
Gloves (optional to keep mix sanitized)
*If you are pregnant do not use Essential Oil and always consult your personal physician whenever using something new!
Ingredient alternatives:
You can replace the 0.5oz Rose Water with more 0.5oz Plain Water if you do not have access to Rose Water. Virgin Coconut Oil can be replaced with any other carrier oil e.g. Almond Oil, Grape Seed Oil, Jojoba Oil etc Cocoa Butter can be replaced with any other butter e.g. Shea or Mango Butter. Depending on your preference you can either use any Essential Oil of choice or opt not to use any.
Mixing:
1.Melt down the cocoa butter by double broiling for 5 – 7 minutes. 2. add the yogurt and stir really well. (If you haven’t fully melted down the butter it will become a bit lumpy with the addition of the yogurt so place the container back in the pot with hot water for a few minutes till it is fully melted. 3. add the water and rose water a little at a time while continuously stirring. 4. add the virgin coconut oil and stir well. 5 add the Vitamin E oil and finally 6. add the essential oil (if using) and stir. I like to place the mix in my fridge in a squeeze container for a few minutes as this allows it to thicken up but this is optional.
Application:
I like to apply this to slightly damp hair that has been detangled. I mainly focus the mix on my ends – at the most going to the mid-length of my hair since the ingredients are a little on the heavy side and can weigh down my curls if I apply it on my length of my hair. However, this can be used on the entire length of your hair (it depends from person to person).
Storage:
I keep it for no longer than 10 days in the fridge, IT MUST BE STORED IN THE FRIDGE. If you know you won’t be able to use it all up then I suggest storing in the freezer if you want it to last for more than 10 days.
Ingredient Benefits:
Plain Full Fat Yogurt – helps provide strength to the hair thanks to the traces of protein. Leaves hair feeling soft and eases detangling. Provides shine while smoothing the hair stands and fighting frizz.
Cocoa Butter – reduces hair loss and breakage. Since it is a fat, it can be used to replenish lost oils. Strengthens the hair, tames frizz and flyaway hair.
Plain Water – the optional moisturizing element for the hair!
Rose Water – revitalizes the quality of the hair due to Its natural moisturizing and nourishing properties. It helps stabilize the natural p.H level of the hair which helps to heal the porosity of the cuticle providing shine and it smells divine!
Virgin Coconut Oil – provides shine and strength, penetrates into the hair shaft strengthening from within. Helps seal in moisture from the other ingredients used in the mix e.g. water & rose water. Helps to fight against frizzy and brittle hair.
Vitamin E Oil – helps to extend the products shelf life (extends not preserves). Rejuvenates the hair strands, fights against frizz, provides shine and helps to slow down premature greying.
Would love to hear what you think, especially if you use this recipe!
I brought my DIY (you know what) back on the blog to share…drum roll please…a DIY Recipe for the hair! (And the crowd goes wild!)
This particular recipe is one that I like to mainly focus on my ends since it does include a few “heavy” ingredients (heavy for my hair) that can potentially weigh my fine hair strands down. If however, you happen to have thick/coarse hair you probably can get away with applying this throughout the length of your hair without it stopping your curls/kinks/coils from being big and fierce!
Ingredients/Tools
Mixing Bowl (dry, clean and disinfected)
1.5 oz Plain Full Fat Yogurt
0.2 oz Raw/Natural Honey or Agave Nectar
0.2 oz (optional) Glycerine or Fresh Aloe Vera Juice
0.5 oz Rose Water
0.2 oz Virgin Olive Oil*
3 capsules Vitamin E Oil (roughly 0.15 oz)
**3-5 drops any Essential Oil (I used Citronella)
Spoon (dry, clean and disinfected)
Gloves (to be “extra” but not absolutely necessary)
**Note: Please do not use Essential Oils if you are pregnant of breastfeeding. Always consult with your doctor/dermatologist or a professional. Always make sure not to use too much Essential Oil since this can make the mix extremely “potent” and harsh, potentially causing you skin irritations.
Mixing Instructions:
All you need to do is combine all the ingredients together and mix really well once the Virgin Olive Oil has been added and that is it!
Application:
I prefer applying this on lightly damp detangled hair (the ends) as it makes it easier to distribute versus working on dry hair. I usually put my hair up in a bun and cover with a shower cap for 15-30 minutes then rinse it off with conditioner and cold water. The cold water helps to close the hair’s cuticles which allows for moisture to stay in my hair and since the cuticles are laying flat (closed) it also provides extra shine!
Ingredient Alternatives:
This is a humectant based recipe and some of you might find that humectants and your hair are not friends, it really depends on what your hair likes and the weather in your area. Humectants draws humidity in the air (moisture) to the area applied, if you have the right amount of humidity (neither too much nor too little) this creates additional moisture for dry curls/kinks/coils. If your hair does not like humectants you can limit the amount used e.g. Instead of using both Honey/Agave Nectar AND Glycerine/Aloe Vera Juice you can go for either Honey/Agave Nectar or Glycerine/Aloe Vera Juice.
Extra Virgin Olive Oil – can be replaced with any carrier oil of choice however I would suggest using one that is known to penetrate the hair strands e.g Virgin Coconut Oil.
Essential Oil – you can use any Essential Oil of choice or skip this all together (I am not the biggest fan of the smell of yogurt so the Rose water and Essential Oil helps to mask that).
If you have coarse/thick hair and would like to use this on the entire length of your hair then simply double the amounts apart from the Rose Water and Essential Oil. Instead use 0.7 oz Rose Water (so it does not become too runny) and keep the Essential oil at no more than 5-7 drops.
Storage:
I always use what I have made and then place the remaining in my freezer. I simply let it defrost on its own (no heat) during the following application.
P.S. in case some of you would like a humectant free recipe please do let me know I would be happy to create something along those lines.
Today I wanted to share another updated recipe: my Protein Hibiscus Flaxseed Gel (FSG).
Protein Hibiscus Flax Seed Gel (FSG)
This is an updated mix from my previous recipes (here) and (here). There are a few similarities but the major difference is the addition of Gelatine (the protein) and Hibiscus Petals.
Those that have protein sensitive hair might think you need to skip this recipe however, it can be modified since the protein is an optional ingredient. I have been using this recipe for a while now since I have fine hair strands and protein gives the hair strength and elasticity and that is what I need. A lot of the times we are very diligent on making sure we moisturize our hair, use moisturizing based products, deep condition etc but sometimes forget that we still do require some protein in our routine. So if you feel that your hair is weak, if you are going through some chemical or heat damage or if you have fine and fragile hair strands and are only using moisturizing products then you might want to switch to a protein gel from time to time when it comes to styling your hair. Make sure to switch between the protein gel and non protein gel so you do not get a protein overload and whenever you are using a protein gel, ensure that you are using a moisturizing leave-in conditioner.
Now another point I want to make is that I like to use hibiscus since my hair loves ayurvedic herbs but please keep in mind: not to wear your favorite light top while setting your hair with the gel since hibiscus does give the gel a red/purple tone which could potentially stain your top while you hair is wet and touching it. Once you hair dries the colour will not rub off it is just while setting/as your hair dries. Since it does give a red/purple tint to the gel it could potentially do the same to the hair of those that have blond/light/bleached hair. If this is something you want to avoid then please avoiding adding hibiscus, those with dark hair will not really notice a major colour difference.
Ingredients/tools used:
Protein Hibiscus Flax Seed Gel (FSG)
12 oz Water (bottled water)
2 oz Rose water (Optional – not really required, can be replaced with plain water but a good addition)
2.5 oz Flax Seeds (this makes a thick gel – use less for a thinner gel)
Roughly 0.2 oz hibiscus petals (optional)
0.2 oz Gelatine (protein optional – those with protein sensitive hair will want to skip it)
5 drop Grapefruit Essential Oil (you can use any Essential Oil or none at all)*
3 Capsules vitamin E oil – roughly 0.15 oz
Non Stick Pot
Spoon/spatula
Sieve
Disinfected container (squeeze/pump bottle is best)
*If you are pregnant do not use any essential oil.
Alternatives:
Rose Water can be replaced with regular water if you do not have any however, rose water does have its own nourishing properties (read here). If you do not want to use Hibiscus it can be skipped all together otherwise you could also use dried rose petals. Glycerine is a humectant that does not always play nice with peoples hair therefore, it can be skipped all together otherwise you can replace it with honey or agave nectar which also are humectants. (Humectants provide the hair with moisture from the air (humidity) however, it always depends on the weather conditions in the area where you live). If you have too much humidity it can cause frizz and if you do not have enough humidity in the air the results can be the opposite; drawing moisture from the hair outwards to the air which causes driness. Aloe Vera Juice can also be added to the mix if you have any on hand for its moisturizing properties. If you prefer your gel to be thinner either add more water e.g. 13 – 14 oz or reduce the amount of flax seeds use e.g. 1 – 1.5 oz.
Mixing Method:
1. I first warm up the water and rose water together in a pot, once it starts to lightly warm up I throw in the flax seeds and begin to stir. 2. After about 5 – 7 minutes of the liquids and flax seeds have started to boil I throw in the hibiscus petals and let that boil for a further 5 – 7 minutes while continuing to stir (you must stay by the pot the whole time and continue to stir). As the hibiscus boils you will notice the colour of the gel starts to change and as it boils the liquid starts to become thicker. 3. Depending on how thick you want your gel, remove it from the stove (the longer on the stove the thicker the gel) and immediately pour it through a sieve. (As soon as the seeds are out of the pot be sure to cover the pot with water to help with the clean up). 4. I squeeze out any excess gel from the seeds with a spoon/spatula and then transfer the seeds into a container. Let the seeds cool down before covering with an airtight lid and storing it in the freezer to be reused next time. 5. Let the gel cool down a little (it should still be warm) before adding the gelatine (skip if not making a protein gel). 6. I sprinkle half the gelatine evenly over the top of the gel and begin to stir then add the remaining and repeat. 7. I use an electric whisk to help breakup any lumps and clumps and also to help loosen the gel a little (otherwise it can become really thick and “jello- like” once it cools). 8. Let the gel completely cool down before adding the oils otherwise the heat will destroy their properties. I add the Coffee Infused Oil, Essential Oil, Vitamin E Oil and the Glycerine (optional) and stir before pouring it into a clean & disinfected pump container.
Storage:
FSG has a short shelf life so it is essential to store it in the fridge whenever it is not being used! It generally will be go for 2 weeks 3 weeks maximum however, you can save some of your gel if you know it won’t be used up before it goes bad by pouring some into ice-cube trays in the freezer. Put the gel ice-blocks in a sandwich bag and remove some cubes whenever you need some gel.
Benefits:
Protein Hibiscus Flax Seed Gel (FSG)
So while I have previously written about all the nourishing benefits of FSG (yes this gel actually has more than the ability of giving your hair some hold) I will quickly jot down some of the benefits of FSG in general along with the benefits of a protein FSG:
Its rich source of vitamin E holds the power to help with hair growth.
Provides the hair with shine.
It contains moisturizing elements (along with the additional moisturizing ingredients added) helps keep the hair moisturized.
Provides nourishment to the hair roots, shaft, and the scalp.
Gives the hair a light hold that is not crunchy or flakely
Helps smooth the hairs cuticle
Said to help prevent early hair discolouration thanks to the Vitamin E in the flax seeds.
Contains Omega-3 fatty acid that helps nourish the hair follicles.
Provides additional elasticity thanks to the Omega-3 fatty acid.
The addition of protein provides the hair with strength especially for those with fine/chemically damage/heat damaged hair.
The addition of protein also helps reestablish the elasticity of the hair (when you use a moisturizing leave-in and follow up with a protein gel).
This is the “how to” video:
I would love to hear what you think of this recipe. If you try the protein version (or skip it) I would really like to hear how it worked for you.
Today I want to share a DIY Hair Mask (Masque) with you. I actually started using this as a alternative to a Clay Mask (Masque) since I can’t seem to get the Clay here locally so I will probably buy some at some point to try experiment with and write about.
But for now this is my baby!
DIY Ayurvedic Hair Mask (Amla Shikakai Rose)
I LOVE using this mix on my hair for several reasons:
Its strengthening property
Conditioning ability
The sheen provided by the mask
Light cleansing property
Detoxifying ability (due to its cleansing property)
Darkening ability (I like my hair in a brown/red tone thanks to henna and amla)
Curl popping power (my curls come back to life after this mask)
Now what is in this wonder mask I hear you asking right? Well the recipe is simple and as always is built around ingredients I use regularly on my hair. You should be able to find most of these in your grocery store (perhaps the “ethnic” section), your local Indian store or if all else fails you can find them all Online. Butters-n-Bars is a good place to check, as is Sheabutter Cottage and if you find a good reliable source Amazon is another alternative. I am able to find all the ingredients used locally.
(NOTE: I was not paid, compensated or requested to mention any company names these are just suggestions of places where you can purchase some of the ingredients. I bought my products locally and paid for them with my own money).
Ingredients:
3.5 oz Amla powder (I use the Hesh Brand)
0.5 oz Shikakai (I use the Hesh Brand)
0.2 oz Amla Infused Coconut Oil (can be replaced with regular coconut oil or any other carrier oil)
0.1 oz Glycerine (Optional)
2.5 oz Rose Water
5.5 oz Plain Water (I use bottled Water)
Additional Ingredients/Replacements
Honey/Agave Nectar – In place of the Glycerine
Essential Oils (EO’s) – you can use any Essential Oil you like. I am currently always in the mood of Rose water so I am not adding any EO’s to mine.
Cassia – in place of the Amla you can replace it with Cassia which will not darken your hair. It has conditioning properties just like Amla as well as strengthening abilities.
Other Ayurvedic Herbs – you can actually replace the Shikakai with any other herb such as Aritha, Brahmi, Neem just to mention a few.
Mixing Instructions:
I first combine the Ayurvedic Herbs together in a bowl and mix. Stir it carefully because they powders are really light and will fly around everywhere. Next I add the Oil, Glycerine and Rose water and stir again. The final step is adding the water. I like to add the water a little at a time and mix. You might want to add more/less water depending on how thick/thin you want the mask, I like mine to be a little thicker than pancake batter.
Application
1. I first dampen my hair with a spray bottle, I like my hair to be damp but not sopping wet. 2. I apply the mask liberally all over my hair starting at the ends and make my way to my roots. (Do not comb or manipulate your hair once it is applied because otherwise you are asking for breakage!) 3. I wrap my hair around my head and cover with a shower cap and usually some material too to keep my head warm and leave it on for 30 – 60 minutes. 4. I rinse out the mask and *co-wash my hair.
* For some the Amla might be a little acidic and therefore can leave your hair feeling a little rough and therefore a simple co-wash might not sufficient. If that is the case do a moisturising Deep Condition afterwards.
Application process
1. I first spritz my hair with water
2. Liberally apply the mask
3. I wrap my hair down and then will cover with cling-film and then material
4. I rinse out the mask, co-wash and then style (I really don’t like my hair wet…so mousey!)
4. I rinse out the mask, co-wash and then style (I really don’t like my hair wet…so mousey!)
5. After my hair airdries I get them popping curls! (Wash and Go)
5. After my hair airdries I get them popping curls! (Wash and Go)
Storage
I make a lot of this mask and use it all up because I like to coat my hair with it and my hair is a little long. You might need more/less depending on your hair length/density however if you have any leftovers you can cover and store it in the freezer just make sure to put a date on it to remember when it was made.
I would love to hear what you think if you try this mask/masque. I would also love to hear about your Clay Hair Masks so I can have a recipe list to follow when I try it 😀
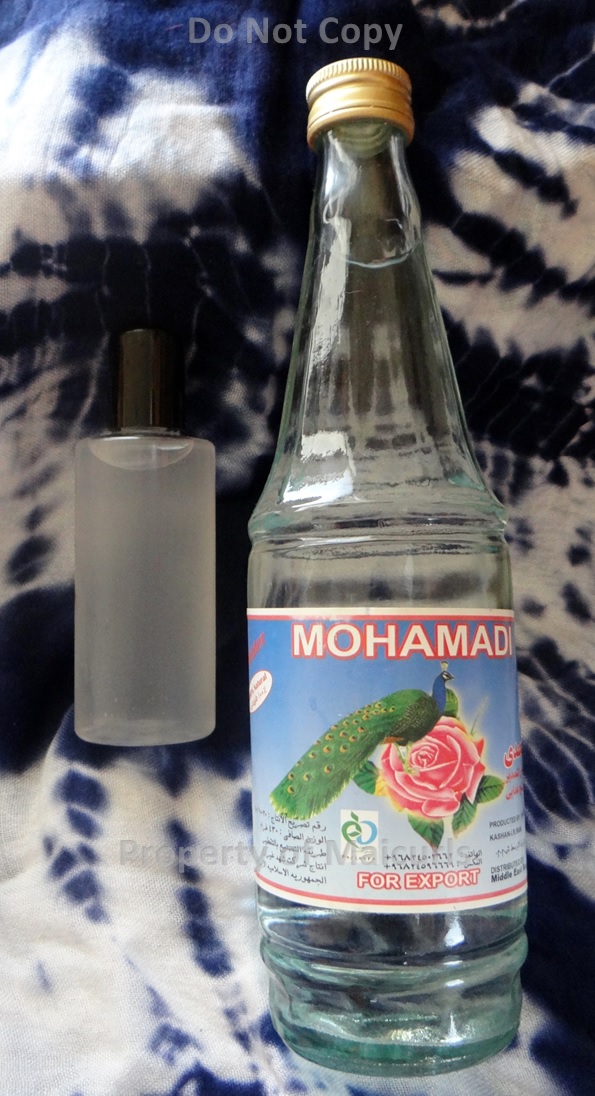
Today is another “ingredient feature” day! And the subject is going to be Rosewater! I honestly do not know where this absolutely beautiful product has been all my life but I am so happy to have met it! (Just by writing about it puts a smile on my face and reminds me of that beautiful intoxicating smell!)
Right lets get down to business shall we.
In Asia, Africa and the Middle East, Rosewater has been a popular natural ingredient that has been used in cuisine and for health. It should come as no surprise then that companies around the world have started to incorporate Rosewater into different beauty supplies and hair products are no exception (with good reason!)
Below are some of the reasons why I use Rosewater (and why you might want to try it out!):
It is known to help revitalize the quality of your hair due to Its natural moisturizing and nourishing properties.
Rosewater is effective in treating hair loss due to the fact that it helps to simulate the scalp.
There are no artificial additives or chemicals (if you purchase pure Rosewater) making it a ‘non-toxic’ product! (Just make sure you are not allergic to Roses.)
Should you suffer from mild scalp irritations or dandruff Rosewater can be used to help sooth irritations.
It leaves your scalp feeling ‘fresh’ and your hair smelling great!
How to use Rosewater:
You can add it to any of your DIY products e.g. Leave-In conditioner, Flax Seed Gel, Deep Conditioners etc. Remember to use a preservative and store the product in a fridge if you are going to mix Rosewater with Oils (in large quantities and want to keep it for a few weeks) otherwise stick to making smaller quantities frequently.
If your Shampoo tends to dry out your hair you can add a little Rosewater with the shampoo – it will moisturize your hair by reducing the “dryness”, soften, give your hair shine and your hair will smell great throughout the day!
You can mix equal quantities of Rosewater and Glycerin together to help moisturize your scalp by using it as a “massage oil”. (Rinse it off after 30 minutes – 1 hour.)
If Glycerin is not your friend, then you can use any carrier oil e.g. grapeseed, jojoba, almond oil etc with Rosewater and use it as a “massage oil” for your scalp. (Rinse it off after 30 minutes – 1 hour.)
I would love to know if you incorporate Rosewater into your routine!


")
")