Category Archives: moisturizing hair

3 Simple DIY Moisturizing Sprays

Hello Maicurlies,

Today I have 3 DIY’s! 

dsc00499

All of the three differ in ingredients but provide the same end result: moisturized curls/kinks/coils! 

So I decided to throw together three recipes in one post/video because I frequently get questions about using different ingredients and writing a post/making a video of a mix with alternative ingredients so this way I hope there is something for everyone. 

The main focus of change in the mixes is the use of humectants since they can be a hit or miss for many of us. For those that are unfamiliar with humectants, (putting it simple) they are ingredients and or chemicals that help to attract moisture in the air (e.g. humidity) to the hair. While this sounds awesome, it is important to note that the weather can play a huge role in whether our hair likes the use of them or not. You need to find a balance of “optimal” humidity because if you live in an area with high humidity this can cause the hair strands to swell up since they become over moisturized. This can cause frizz, can make the cuticle of the hair raise which can cause friction and thus cause tangles. On the other hand if you live in an area with low humidity, this can cause the opposite effect. The use of humectants would draw moisturize in the hair outwards and can cause dryness!

If you are unsure of whether or not your hair appreciates humectant based products check the back of your staple products to see if they include any humectants towards the top of the list. Here are examples of different humectants:

Honey, Agave nectar, Aloe Vera Juice, Vegetable Glycerin, Propylene glycol, Sorbitol, Hydrolyzed silk protein, Fructose, Sodium PCA, Panthenol.
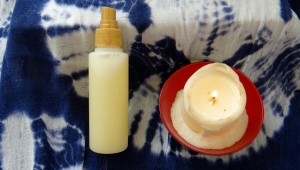
Ingredients/Tools:

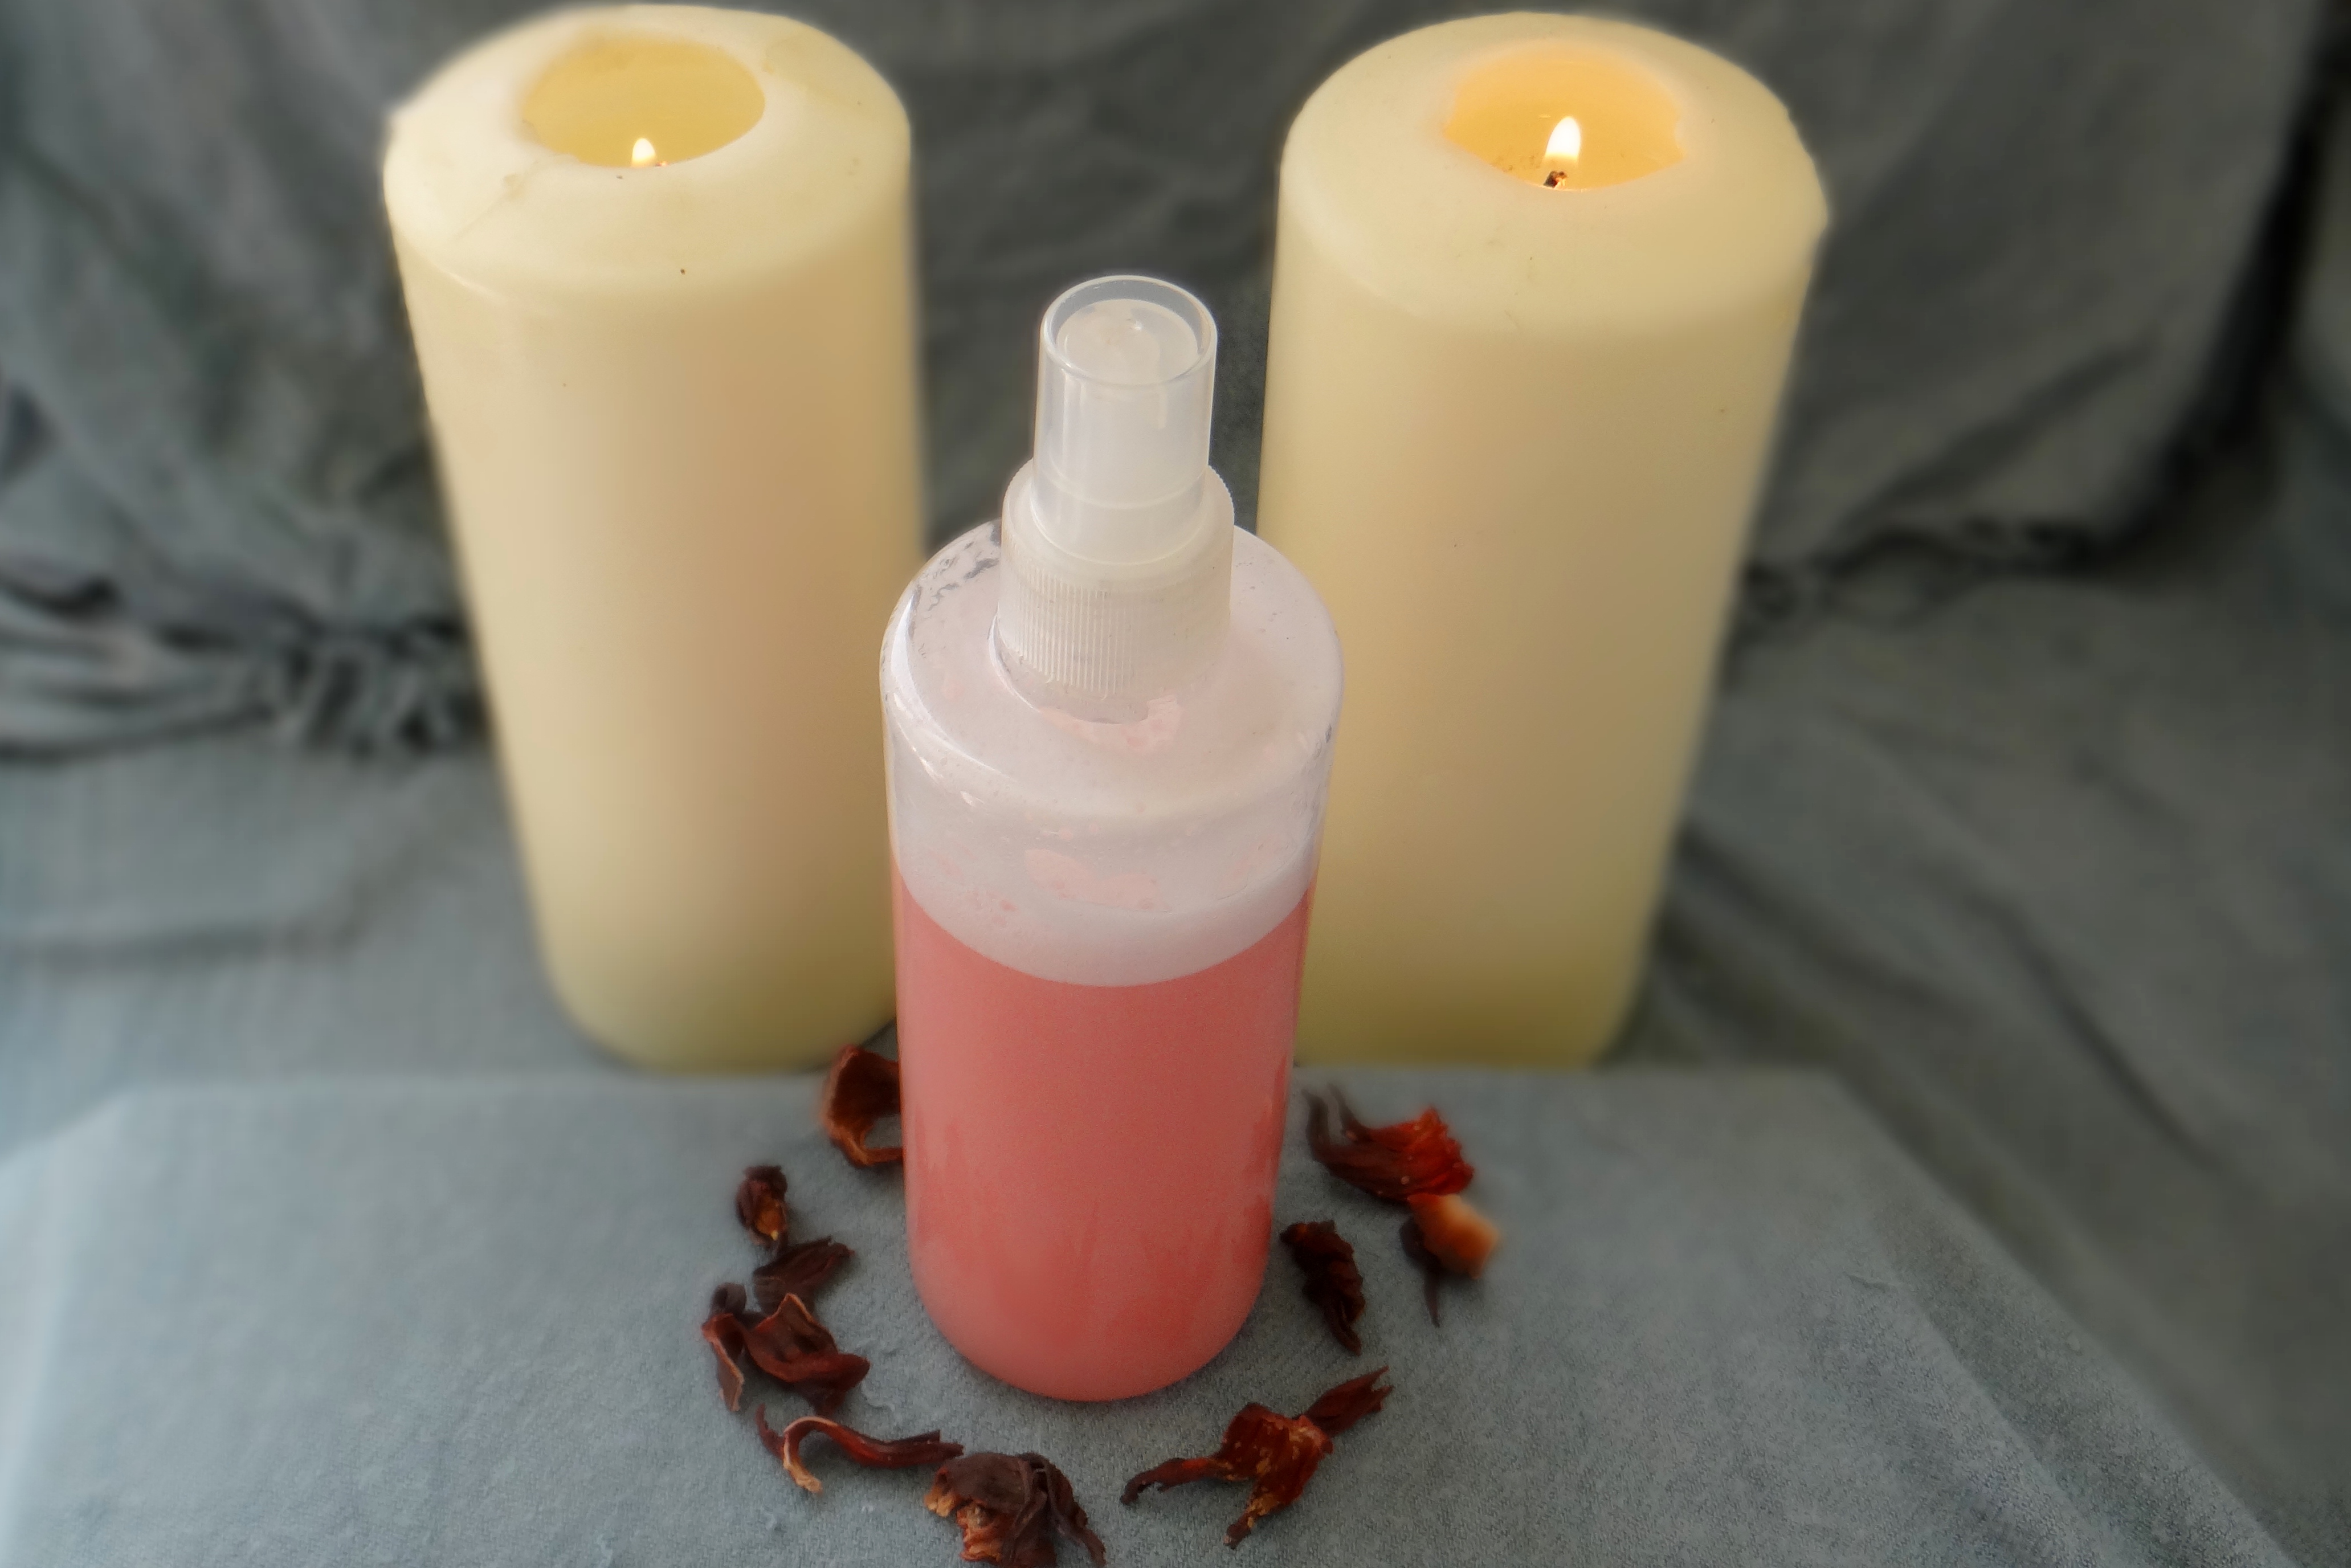
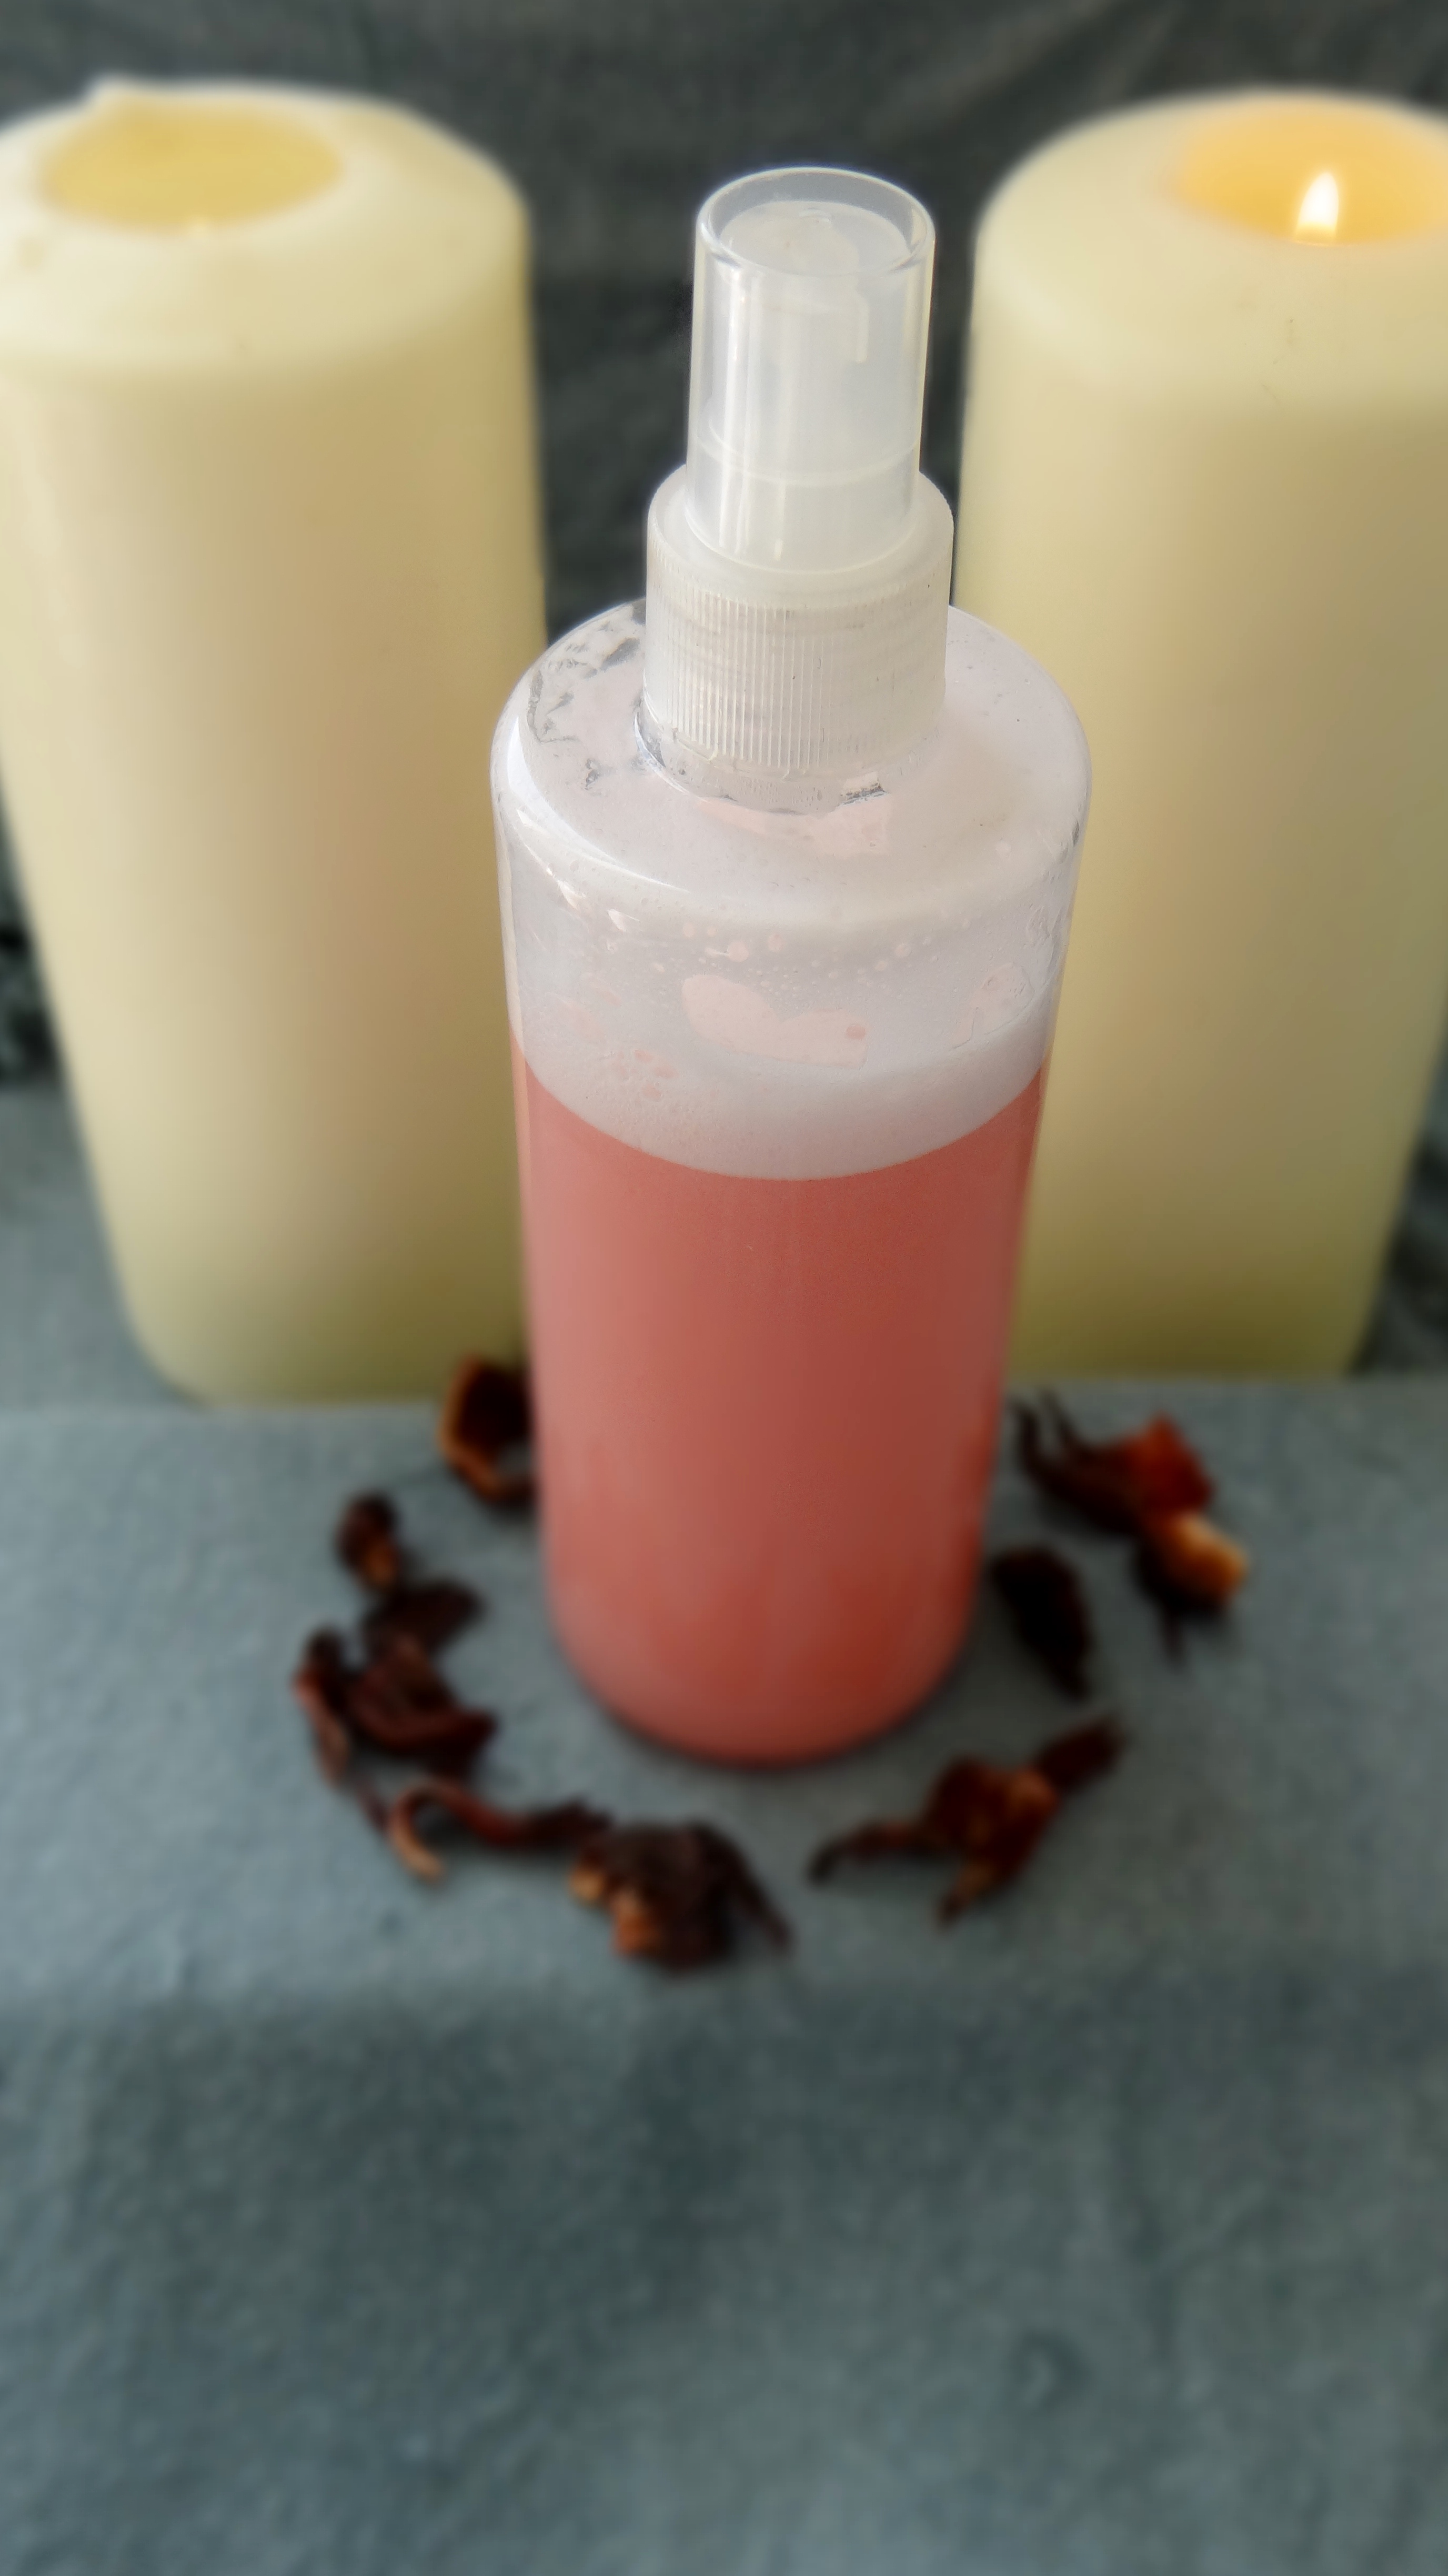
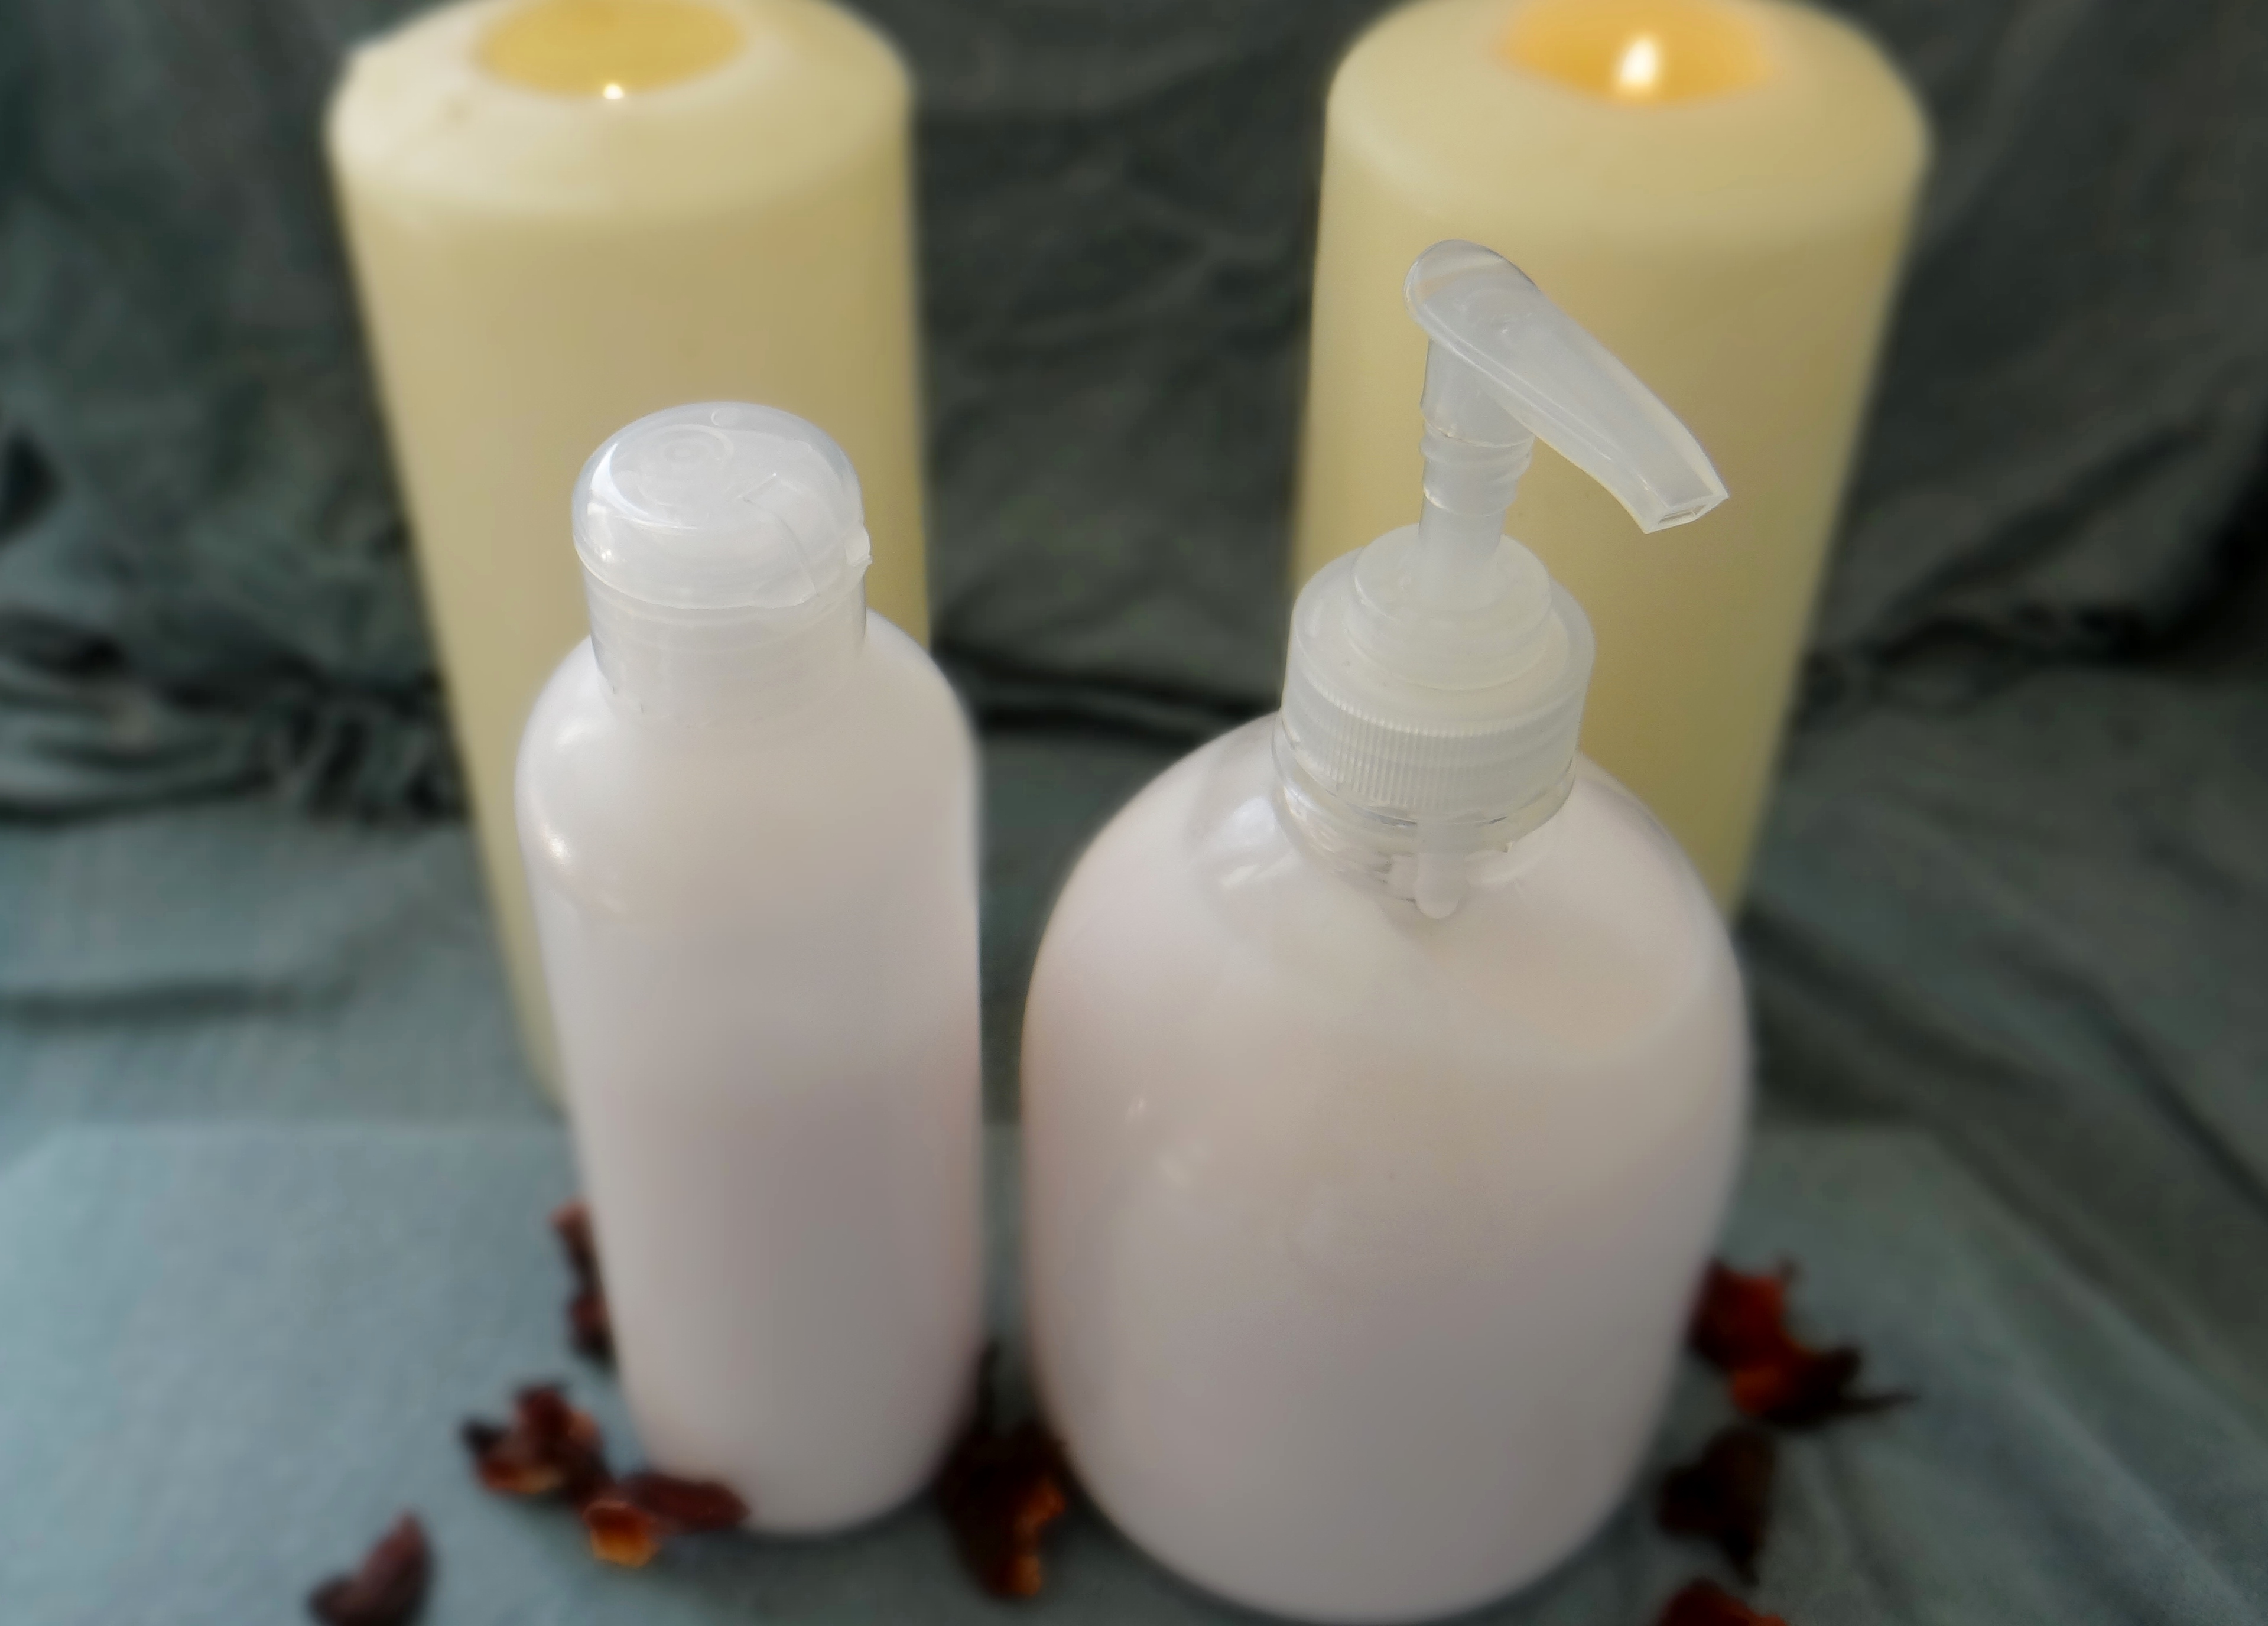
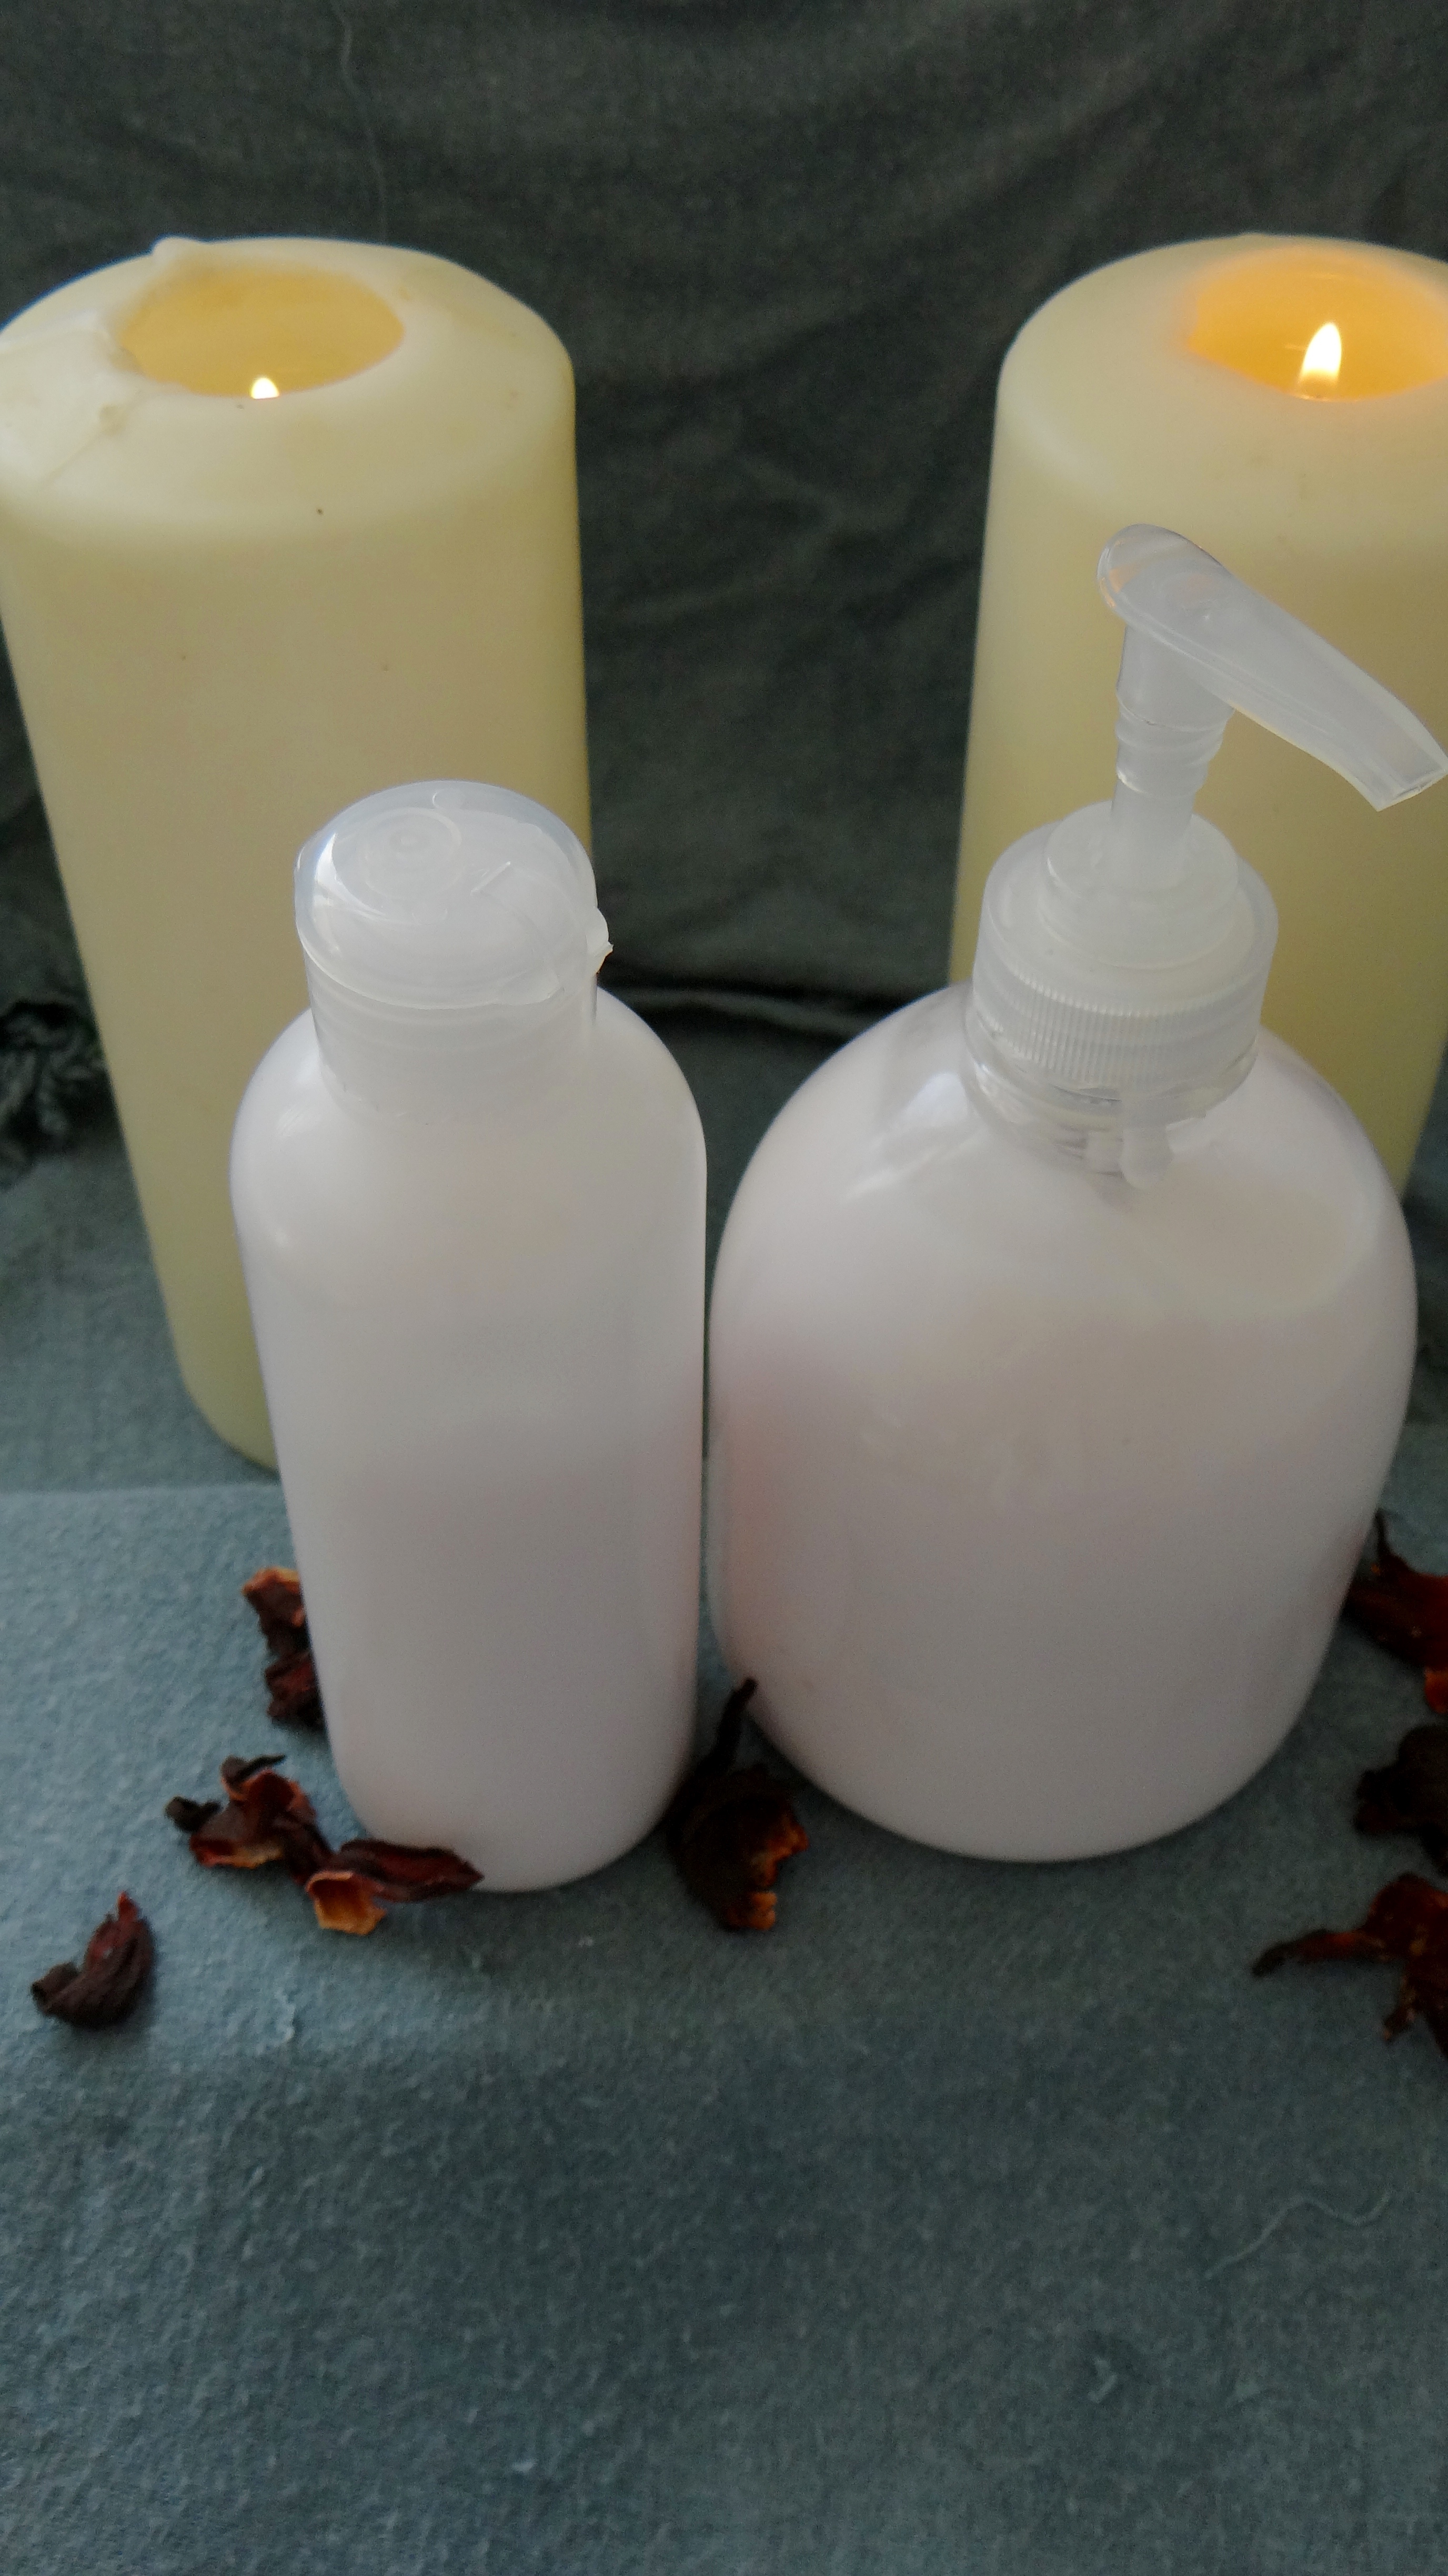
  • Clean & disinfected spray bottle
  • Spoon
  • Container
  • Gloves (optional)

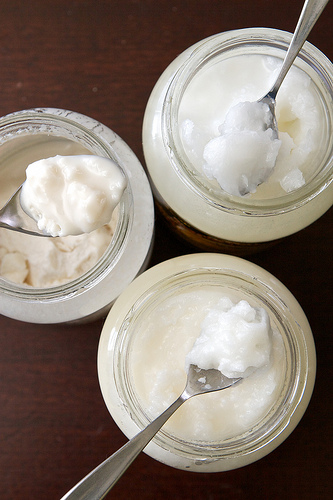
Recipe 1 – Humectant Free
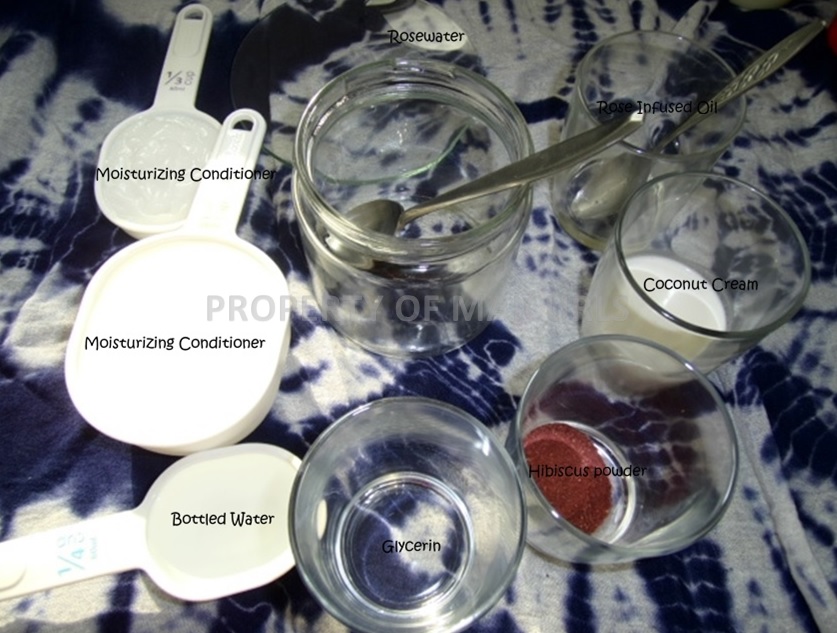
Humectant Free

  • 2 oz Plain Water
  • 1 oz Rose Water
  • 0.5 oz Leave In Conditioner
  • 0.5 oz Extra Virgin Coconut Oil (any Oil)
  • (Optional) 2 Drops Lavender Essential Oil (any oil)
  • 3 Capsules Vitamin E Oil (roughly 0.15 oz)

Recipe 2 – 1 Humectant

1 Humectant Recipe

  • 2 oz Plain Water
  • 0.5 oz Raw/Organic Honey
  • 0.5 oz Extra Virgin Coconut Oil (any oil)
  • 3 Capsules Vitamin E Oil (roughly 0.15 oz)
  • (Optional) 2 drops Peppermint Essential Oil (any oil)

Recipe 3 – 2 Humectants

2 Humectants Recipe

  • 2 oz Plain Water
  • 1 oz Fresh Aloe Vera Juice
  • 0.7 oz Extra Virgin Coconut Oil (use any)
  • 0.5 oz Glycerin
  • 3 Capsules Vitamin E Oil (roughly 0.15 oz)
  • (Optional) 2 drops Peppermint Essential Oil (any oil)

Mixing Instructions:

You basically just have to add all the ingredient together in a bowl and stir really well (using a whisk can help) and then pour into your spray bottle.
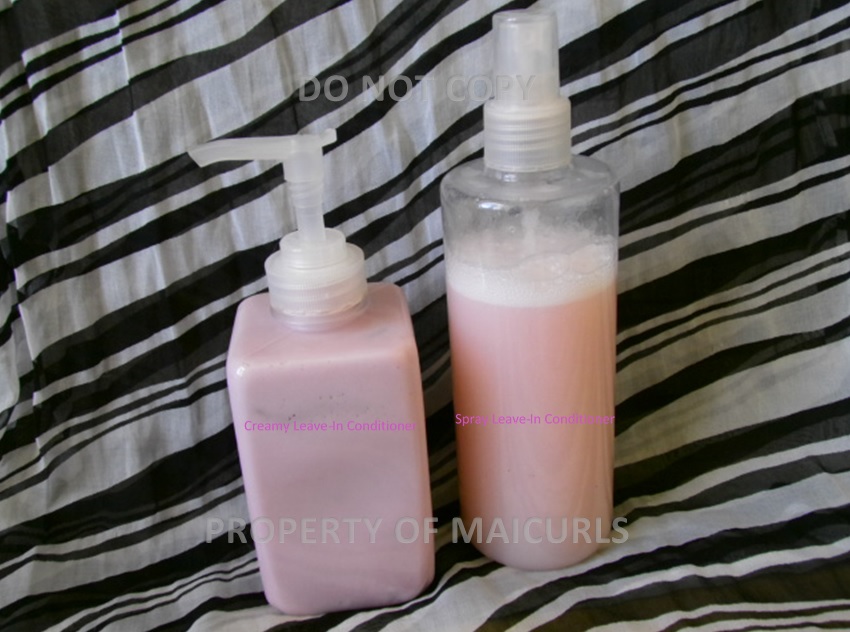
Application/Use:

I like to use the spray to remoisturize my hair at night when I want to “reset” a style. E.g. if my hair was in a braid out for a few days and feels a little dry with the curls loosing shape and gaining frizz, I spray my hair with the spray and re-braid for the night. The next morning i take down my hair and voila, a new looking braid out! I choose not to use a styling product again because I feel like the spray helps to “reactivate” the styling/holding product (but this is a personal choice). Make sure to shake the bottle each time really well to ensure all the ingredients are stirred together. 

Storage:

You MUST store the mixes in the fridge, regardless of which recipe you choose you have to store it in the fridge (maximum 2 weeks). I suggest making small amounts and remixing since each individual recipe is easy to make, this way you are not wasting anything with the mix going off before being used up. 

NOTE: In the examples I used Virgin Coconut Oil; Coconut Oil solidifies in cold temperatures therefore if you use Coconut Oil and notice white lumpy blocks of solidified oil this is normal. My suggestion is to either take the mix out of the fridge beforehand so that the coconut oil melts (if your house is warm enough) otherwise hold the mix (while in the spray bottle) in a cup of warm water for a few minutes so the oils melts. 

I have a compilation of benefits of each of the ingredients used in the recipes here

Thanks!

Maicurls

Maicurls

DIY – Moisturizing Dry Brittle Ends (Humectant Free)

Hello Maicurlies,

Today I am back with an alternative recipe version of a mix I already shared a few weeks ago! I have a post & video about moisturizing dry & brittle ends with a humectant based recipe here and was then requested to do a humectnt free version and here it is!

DIY: Moisturizing Dry Brittle End (Humectant Free)

I have mentioned this a few times in my blog, not everyone’s hair appreciates humectants, it all boils down to hair preference and weather conditions in the area where you live. This recipe works in a similar way to my humectant based mix, just without the addition of ingredients that draw moisture in the air (humidity) to the area applied (the hair).

Ingredients/tools:

Ingredients

  • 1.7oz Plain Full Fat Yogurt
  • 1oz Cocoa Butter
  • 0.5oz Rose Water
  • 0.5oz Plain Water
  • 0.5oz Virgin Coconut Oil
  • 3 capsules Vitamin E Oil (roughly 0.15oz)
  • 3-5 drops Peppermint Essential Oil (Optional) – use any*
  • Clean and disinfected heatproof container
  • Pot 
  • Clean and disinfected spoon
  • Gloves (optional to keep mix sanitized)

*If you are pregnant do not use Essential Oil and always consult your personal physician whenever using something new!

Ingredient alternatives:

You can replace the 0.5oz Rose Water with more 0.5oz Plain Water if you do not have access to Rose Water. Virgin Coconut Oil can be replaced with any other carrier oil e.g. Almond Oil, Grape Seed Oil, Jojoba Oil etc Cocoa Butter can be replaced with any other butter e.g. Shea or Mango Butter. Depending on your preference you can either use any Essential Oil of choice or opt not to use any.

Mixing:

1.Melt down the cocoa butter by double broiling for 5 – 7 minutes. 2. add the yogurt and stir really well. (If you haven’t fully melted down the butter it will become a bit lumpy with the addition of the yogurt so place the container back in the pot with hot water for a few minutes till it is fully melted. 3. add the water and rose water a little at a time while continuously stirring. 4. add the virgin coconut oil and stir well. 5 add the Vitamin E oil and finally 6. add the essential oil (if using) and stir. I like to place the mix in my fridge in a squeeze container for a few minutes as this allows it to thicken up but this is optional.

Application:

I like to apply this to slightly damp hair that has been detangled. I mainly focus the mix on my ends – at the most going to the mid-length of my hair since the ingredients are a little on the heavy side and can weigh down my curls if I apply it on my length of my hair. However, this can be used on the entire length of your hair (it depends from person to person).

Storage:

DIY: Moisturizing Dry Brittle Ends (Humectant Free)

I keep it for no longer than 10 days in the fridge, IT MUST BE STORED IN THE FRIDGE. If you know you won’t be able to use it all up then I suggest storing in the freezer if you want it to last for more than 10 days.

Ingredient Benefits:

Plain Full Fat Yogurt – helps provide strength to the hair thanks to the traces of protein. Leaves hair feeling soft and eases detangling. Provides shine while smoothing the hair stands and fighting frizz.

Cocoa Butter – reduces hair loss and breakage. Since it is a fat, it can be used to replenish lost oils. Strengthens the hair, tames frizz and flyaway hair.

Plain Water – the optional moisturizing element for the hair!

Rose Water – revitalizes the quality of the hair due to Its natural moisturizing and nourishing properties. It helps stabilize the natural p.H level of the hair which helps to heal the porosity of the cuticle providing shine and it smells divine!

Virgin Coconut Oil – provides shine and strength, penetrates into the hair shaft strengthening from within. Helps seal in moisture from the other ingredients used in the mix e.g. water & rose water. Helps to fight against frizzy and brittle hair.

Vitamin E Oil – helps to extend the products shelf life (extends not preserves). Rejuvenates the hair strands, fights against frizz, provides shine and helps to slow down premature greying. 

Would love to hear what you think, especially if you use this recipe!

Thanks

Maicurls

Maicurls

DIY: (Recipe) Moisturizing Dry & Brittle Ends

Hello Maicurlies,

I brought my DIY (you know what) back on the blog to share…drum roll please…a DIY Recipe for the hair! (And the crowd goes wild!)  

Moisturizing Dry & Brittle Ends

This particular recipe is one that I like to mainly focus on my ends since it does include a few “heavy” ingredients (heavy for my hair) that can potentially weigh my fine hair strands down. If however, you happen to have thick/coarse hair you probably can get away with applying this throughout the length of your hair without it stopping your curls/kinks/coils from being big and fierce! 

Ingredients/Tools

  • Mixing Bowl (dry, clean and disinfected)
  • 1.5 oz Plain Full Fat Yogurt
  • 0.2 oz Raw/Natural Honey or Agave Nectar
  • 0.2 oz (optional) Glycerine or Fresh Aloe Vera Juice
  • 0.5 oz Rose Water
  • 0.2 oz Virgin Olive Oil*
  • 3 capsules Vitamin E Oil (roughly 0.15 oz)
  • **3-5 drops any Essential Oil (I used Citronella) 
  • Spoon (dry, clean and disinfected)
  • Gloves (to be “extra” but not absolutely necessary)

**Note: Please do not use Essential Oils if you are pregnant of breastfeeding. Always consult with your doctor/dermatologist or a professional. Always make sure not to use too much Essential Oil since this can make the mix extremely “potent” and harsh, potentially causing you skin irritations. 

Mixing Instructions:

All you need to do is combine all the ingredients together and mix really well once the Virgin Olive Oil has been added and that is it!

Application:

I prefer applying this on lightly damp detangled hair (the ends) as it makes it easier to distribute versus working on dry hair. I usually put my hair up in a bun and cover with a shower cap for 15-30 minutes then rinse it off with conditioner and cold water. The cold water helps to close the hair’s cuticles which allows for moisture to stay in my hair and since the cuticles are laying flat (closed) it also provides extra shine! 

Ingredient Alternatives:

This is a humectant based recipe and some of you might find that humectants and your hair are not friends, it really depends on what your hair likes and the weather in your area. Humectants draws humidity in the air (moisture) to the area applied, if you have the right amount of humidity (neither too much nor too little) this creates additional moisture for dry curls/kinks/coils. If your hair does not like humectants you can limit the amount used e.g. Instead of using both Honey/Agave Nectar AND Glycerine/Aloe Vera Juice you can go for either Honey/Agave Nectar or Glycerine/Aloe Vera Juice. 

Extra Virgin Olive Oil – can be replaced with any carrier oil of choice however I would suggest using one that is known to penetrate the hair strands e.g Virgin Coconut Oil.

Essential Oil – you can use any Essential Oil of choice or skip this all together (I am not the biggest fan of the smell of yogurt so the Rose water and Essential Oil helps to mask that).

If you have coarse/thick hair and would like to use this on the entire length of your hair then simply double the amounts apart from the Rose Water and Essential Oil. Instead use 0.7 oz Rose Water (so it does not become too runny) and keep the Essential oil at no more than 5-7 drops.

Storage:

I always use what I have made and then place the remaining in my freezer. I simply let it defrost on its own (no heat) during the following application. 

P.S. in case some of you would like a humectant free recipe please do let me know I would be happy to create something along those lines. 

Thanks

Maicurls

Maicurls

DIY Boosted Leave-In Conditioner (Spray)

Hey Maicurlies,

I am back with another DIY Update! This time it is my Spray Leave-In Conditioner.

Spray Leave-In Conditioner

This goodness is a modified version of my previous Spray Leave-In Conditioner which you can read about here. Similar to my updated Creamy Leave-In Conditioner I changed the recipe a little due to the fact that I no longer use the conditioner I use to use and the old mix was no longer as effective in moisturizing my hair as it use to be.

This recipe is quite simple, does not include too many steps and like I mentioned is a slight modification from the old one.

Ingredients

  • 6 oz plain water (I use bottled water)
  • Hibiscus petals (optional) I use about 10 – 12 petals
  • 0.8 oz leave-in conditioner (use any leave-in your hair likes)
  • 2 oz Rose Water
  • 0.1 oz Almond Oil (use any carrier oil your hair likes)
  • 0.1 oz Glycerine (optional)
  • 3 capsules vitamin E oil = roughly 0.15 oz

(Additional ingredients I sometimes use)

I sometimes add 0.8 oz fresh Aloe Vera Juice (from my garden) I didn’t this time.

Essential Oil (any oil of choice) – I like the rose scent so I skip the essential oil.

Mixing Instructions

I first add the hibiscus petals to the water and let it sit while I add the other ingredients. In the mean time I pour the leave-in conditioner, rose water, almond oil, glycerine and vitamin E oil in my container. I then pour the hibiscus water through a sieve to catch the petals and then whisk. I pour the mix into a spray bottle and shake it before every use.

Spray Leave-In Conditioner

Substitute Ingredients

  • Honey or agave nectar –  instead of the glycerine (or skip this all together)
  • Any carrier oil of choice – instead of the almond oil
  • Arrowroot – can be added to the mix to give a little extra slip

Side Note:

This mix might be a little too light for those with coarser or thicker hair due to the fact that the ingredients I use are quite light weight. In case you do have thicker or coarser hair than I, you can either increase the amount of leave-in used, add a heavier carrier oil such as castor oil and/or double the amount of oil used in the mix.

When I use it/How I store it:

I like to use this mix when I want to lightly re-moisturize my hair or when I want to dampen my hair without getting it soaking wet before styling/restyling. The Leave-In is left out with the rest of my products (without needing to store it in the fridge). I have never had an issue with the mix going off or going rancid before I use it up, however, you can store it in the fridge just in case.

Do you use a spray leave-in? Do you make your own or use a store bought one? I would love to hear from you. 

Thanks

Maicurls

Maicurls

DIY Boosted Leave-In Conditioner (Creamy)

Hey Maicurlies,

(Side Note: I have been having issues with my WordPress…trying to figure out how to fix it but hopefully you will see this new post without any issues!)

So back to the topic, my DIY Boosted Leave-In Conditioner.

DIY Boosted Leave-In Conditioner (Creamy)

DIY Boosted Leave-In Conditioner (Creamy)

Some of you who might have been following me for a while will know that I have a DIY Leave-In Conditioner mix already and might be wondering why another recipe Mai? Well, two reasons: 1. In the old mix I used a conditioner as the base of the recipe but I no longer use that conditioner and 2. my hair wasn’t responding as well as to the old mix as it use to. When that happens my hair is telling me “change the product mix Mai!” Since I do not use too many store brought products I do not have a stash of different leave-ins I can rotate I listen to my hair and rework the recipes instead.:D

I will put a link at the bottom of the post directing you to my old recipe, just so you can see what all I have changed. There are some subtle changes in the new recipe and a few ingredients that I add or omit depending on my mood at the time of mixing.

DIY Boosted Leave-In Conditioner (Creamy)

DIY Boosted Leave-In Conditioner (Creamy)

Ingredients

2.6 oz plain water (I use bottled water)
A couple petals of dried hibiscus (completely optional) – I use about 7
8 oz leave-in conditioner (use any moisturizing leave-in your hair likes)
2 oz Rose Water
0.1 oz Virgin Coconut Oil
0.2 oz Coffee Infused Almond Oil (use any carrier oil)
3 capsules Vitamin E Oil = roughly 0.15 oz
0.1 oz Glycerine

(Additional ingredients I sometimes use)

  • 0.5 oz fresh home made Aloe Vera Juice to the water I use. When I add AVJ I increase the amount of leave-in my 2 oz.
  • Glycerine – I add glycerine if the leave-in being used doesn’t contain it already but mine did.
  • Essential Oil (any oil of choice) – I like the rose scent so I skip the essential oil.

Mixing Instructions

I first add the hibiscus petals to the water and let it sit while I add the other ingredients. First I add the leave-in conditioner with the rose water, virgin coconut oil, coffee infused almond oil and vitamin E oil. I then pour the hibiscus water through a sieve to catch the petals and then whisk. When I use glycerine I add it along with the leave-in and other ingredients. After whisking I transfer the mix into my containers.

Ingredient Alternatives

In case some of the ingredients I use do not play well with your hair they can be replaced by basically anything e.g. castor oil, grapeseed oil, jojoba oil, olive oil or any other carrier oil in place of/along with the coffee infused almond oil I use. If glycerine is not your favourite you can use honey or agave nectar as a humectant. (The leave-in I was using in the video had Glycerine in it so there was no need to add any more.) 

My next update will be a Spray Leave-In 😀 

I would love to hear if you add any particular ingredients to a store bought leave-in to “boost” its properties! 

(Previous Creamy Leave-In Conditioner Mix)

Thanks

Maicurls

Maicurls

Methods of Moisturizing and Retaining Moisture

Hey Maicurlies!

What does it means to moisturize your hair and how should you moisturize your hair? Why is it important to keep your hair moisturized? How do you keep your hair moisturized? 

It can be a little tricky and to confuse matters a little further, depending on the season you might have to switch up how you moisturize .

The first thing is understanding the moisturizing process (the products you need to use) and then comes the order in which you apply the products. The order of application will depend mainly on the structure of your hair (porosity), your hair width (how thick your hair strands are) and what your hair likes.

Moisturizing Methods

There is no one rule fits all but the general rule of thumb is that moisturizing your hair should consist of:

L = Liquid (water/water-based leave-in used to moisturize)

Leave-in Conditioners

O = Oil (carrier oil)

oilsC = Cream (hair cream/butter)

Whipped butter

What are the combination of applications you can use?

  • L.C.O.
  • L.O.C.O.
  • L.O.C.

But there are some who do a shortened version as well:

  • L.O
  • L.C

Liquids: can be anything from water, water and aloe Vera juice or a water based leave-in conditioners. The important aspect is using a product that is water based (water should be listed within the top 3 ingredients if not the first). Personally for me, water alone is not enough. I like to use water and my DIY Creamy Leave-in conditioner or my  DIY Spray Leave-in Conditioner -which is water in a spray bottle with other ingredients added to it.

Oil: this should be a carrier oil of choice that works as a sealant to “trap” in the moisture applied before (the liquid). Depending on several characteristics of your hair: virgin coconut oil, grapeseed oil, almond oil, jojoba oil, avocado oil, castor oil (to name a few) or even a mix of oils. Those with fine hair will prefer lighter oils and those with coarse hair can get away with using heavier oils.

Cream: this can either be a hair cream, a whipped butter or a whipped butter mix. Depending on your hair structure a butter or cream can actually also be sufficient to help set styles. However if not, then you will want to apply a setting product for additional hold such as a gel (the styling product is not part of the moisturizing step).

How, why, when?

You want to layer on the products. I heard somewhere on a YouTube channel that moisturizing should be considered as painting your nails. You have a base coat, the color and then a top coat. The same applies for moisturizing our hair. 

Why is it important to moisturize our hair? Well, basically if you do not, you are asking for damage, breakage, thirsty and dull hair. Our hair is naturally dry due to its structure, the curls, kinks and coils makes it a little more difficult for the natural oils produced by the scalp (sebum) to travel down the entire length of the hair strand. We need to help the process along and the way to do that is to moisturize and seal.

How often do you need to moisturize? For some, moisturizing and sealing after washing your hair might be enough for the week however, for a lot of us we need to re-moisturize our hair at some point during the week. The frequency will really depend on weather conditions, how “thirsty” your hair gets, how much manipulation you do to your hair and how your hair is styled (e.g protective vs. free flowing). I for example will re-moisturize anywhere from 1-3 times during the week. Keep in mind – While moisturizing is important it is also important to remember that you shouldn’t over do it. Product buildup can occur if you laden on the products. If your hair is coated it actually makes it is harder to attain and retain moisture because the moisture is not able to reach the core of your hair and thus just sits on top of the previously applied products (ineffective!) 

So which method is right for you? The only way to find out is to start with one method and then build from there, once you have determined your hair structure of course. If the L.O.C method doesn’t work for you then try L.C.O. and so on. Start off light with the products and try to determine how much/little you need and build from there. 

My Method:

Up until I started using butters my method was the L.O. which for some sounds crazy (I didn’t have access to butters). Now I like to do the L.O.C method (both in summer and winter) after I have washed my hair. If I want super definition I will add Flax Seed Gel before applying the Cream. When I re-moisturize I will either do the L.O. or L.C. method and if I am restyling midweek then I might add my Flax Seed  Spray Gel for hold.

What is your moisturizing process? Does your routine differ in the summer and winter? I would love to hear from you!

Maicurls

Maicurls


DIY Moisturizing & Fortifying DC (Pink CoCream Hibiscus – update)

Hey Maicurlies,

Yup, I’ve got an updated Deep Conditioner I would like to share with you!

DIY Moisturizing & Fortifying DC

I’ve actually updated most of my DIY products (I do this whenever I feel like my hair is no longer responding as well as it use to). Sometimes our hair can be accustomed to a product/treatment and needs a change. I’ve posted my previous DIY Moisturizing DC that I used routinely on a weekly basis in case you want to compare the ingredients of both concoctions. 

A lot of the ingredients I use now are also part of my “old” mix with one new ingredient and a twist to my old oil. What I LOVE about the DC is that it’s packed with moisturizing properties and also has a kick of strength to help fortify the hair at the same time. My hair feels absolutely fabulous after I rinse it off (as we speak I just rinsed mine out after using henna…it feels sooo good!) Aside from all that, it is so pretty isn’t it?! 😀 And it smells AWESOME (Yup i took a ton of pictures just to prove my point). 

I make A LOT of the DC and freeze part of it in silicon molds and then put the DC “bars” into a sandwich bag that’s stored in my freezer for future use. The freezer helps “preserve” the DC and also means I don’t have to remix every single week. When I want to use them all I do is take out the amount I need (3 – 4 bars to cover the length of my hair completely) and place them in a heat proof bowl to gently warm it up in a double broiler (the DC is cold if it is not warmed up and my hair likes slightly warm DC and so does my fingers and scalp lol). I am NOT cooking or boiling the DC just letting it melt and lightly warm up. I then apply as usual, starting from ends to root. I cover my hair with cling film or a shower cap, a plastic bag and then layer on a scarf too. I also warm up a facecloth by dunking it in warm water, wringing  out the excess water and placing it over the cling film/shower cap for a few minutes. The point is to keep my scalp and the DC warm since this helps to open up the cuticle of the hair and allows the moisturizing and fortifying properties of the to DC penetrate the hair strands.

So without further ado here are the ingredients:

Ingredients

Ingredients

  • 11 oz. Moisturizing Conditioner – provides the base for the moisturizing DC (use your favorite moisturizing conditioner – you can use less if you don’t want to make extra DC) 
  • 1.8 oz. Plain bottled water provides additional moisture for the hair…H2o a naturals bestie!
  • 0.2 oz. Hibiscus powder* – provides strength, shine, luster and conditions the hair
  • 2 oz. Organic Coconut Cream – provides strength 
  • 0.8 oz Rosewater – provides moisture, shine, soothes the scalp & re-balances the pH of the hair (smells AMAZING)
  • 0.2 oz. Rose Infused Oil (I use rose infused almond oil but you can use any carrier oil of choice) – a light oil that helps to seal in the properties of the DC, provides shine, softens the hair, provides luster and smells AWESOME
  • 0.1 oz. Glycerina humectant the draws water in the air to the hair (if you hair doesn’t like glycerin you can omit it or replace it with Honey/Agave Nectar/Aloe Vera Juice)

*try to use finely sieved hibiscus powder. I make my own hibiscus powder but didn’t sieve it a lot on the day but once I rinsed out the DC I had absolutely no “bits” in my hair (I only rinsed my hair once). Note: Hibiscus gives off a red/purple tint to the hair and is most obvious on blond/bleached/light hair therefore if red undertones are not something you want do not add hibiscus. 

Mixing Instructions

Mix everything together in a large container in any order. After you have combined everything I suggest whisking the DC to ensure everything is well combined. (Split the mix in 2 containers to avoid your kitchen and yourself from getting splashed)!

Video explanation


I am not a doctor, dermatologist nor a medical professional. The information provided here are for informational purposes only and should not be used as medical advice. Please consult with your personal doctor/dermatologist/medical professional before using any new ingredients/products. 

Do you store any of your DIY Deep Conditioner mixes in your freezer? I would love to hear what you think as always Maicurlies! 

Maicurls

Maicurls

Long Fluffy Puff

Hey Maicurlies!

I’ve got a new styling video up of how I do my long fluffy puff!

I sometimes wish my hair were a little shorter because I would be able to call it my fluffy Afro puff but gravity likes to pull my hair downwards (not that I am complaining about my hair.) 

Products/Tools used:

Styling Tutorial 

I did this style on day 3 of a Wash-N-Go and my hair was a little frizzy and dry so I needed to first remoisturize it by applying water, leave-in conditioner and to seal a little oil. 

After moisturizing I separate a section of hair at the front with a hair bubble because I will style that section last. 

Separate front

I then apply a little gel to the edges of my sides and brush them back gently. 

I collect and pin my hair down in the middle of my head till I have pinned all the hair on one side. (I use two bobby pins crisscrossing them over each other until I reach the back where I only use one bobby pin.)

Use bobby pins to hold hair

I repeat the gel, brush, and pin routine on the other side.

repeat on second side

I then style the front by first spritzing a little water, adding a little gel, brushing the edges. 

I like to give myself a little “pompadou” or bump at the front and then pin the hair down.

create pompadou

I like to fluff my hair out to make it bigger and then fix areas that need fixing.

And voila!

What do you think? How do you make your fluffy puff or Afro puff? Would love to hear from you!

Maicurls

Maicurls

Simple DIY Deep Conditioners

Hello Maicurlies

As you well know, I am a DIY freak! I love the whole research and mixing process (some trails are a fail but that is part of the fun right?!) Anyways, I came across a post in Natura Magazine by TyLisa which covers the topic of DIY Deep Conditioners. 

photo credit: Chiot's Run via photopin cc

               photo credit: Chiot’s Run via photopin cc

I of course have my own concoctions that I mix up for Moisture, Protein and Strengthening

It is important to have a balance of moisture and protein so that your hair is neither dry nor “mushy” or “stretchy” when it is over moisturized. Having a balanced routine means that your hair is receiving the right amount of nourishment to be healthy, thrive and grow.

There are three really simple yet effective DIY Deep Conditioners in the article “The World of Homemade Deep Conditioners“. If you are not the biggest fan of mixing a bunch of ingredients together these recipes are so simple and you probably already have the ingredients at home that you have to give it a try. Trust me once you get the DIY bug in you, you won’t want to stop!

Maicurls

Maicurls


Wash and Go with Flax Seed Gel

Hi Maicurlies!

wash-n-go FSG

I decided to make a video of how I do my Wash and Go using my Rosewater infused Flax Seed Gel (FSG). Only then did I notice that I never made a write up of my “Simple Wash and Go”. I need to update my Wash-n-Go Page because it only includes how I maintain a Wash and Go over a week. So I have a little bit of writing to do over the next few days. (I am on it)! 

You can find my Simple Wash and Go method on YouTube as well as my Wash and Go with Flax Seed Gel. I also attached it to my Video page on the blog. These are the products I used (I linked all the recipes as well):

I apply the products in that order and have no issues to “trap” in the FSG with my mixed sealing oil because apart from being a great styling product with hold, FSG is moisturizing and nourishing for the hair and scalp! I also occasionally mix my FSG with my “Creamy” Leave-In Conditioner in a separate container and then apply it in one go. 

I will have a detailed write up of the process … I promise! 

Thanks

Maicurls

Maicurls