Tag Archives: DIY Creamy Leave-In Conditioner

My Curly Hair Morning & Night Time Routine

Helloooo Maicurlies, 

Morning & Night Routine

Yes she is finally back with an actual tutorial & video! I know I have been terrible and a little Missing In Action on both my Blog and YouTube (if you don’t already follow me on Instagram please do because I tend to post a lot on there) but I have been away, getting back into “regular routine” and working on a few projects so I do apologize. 

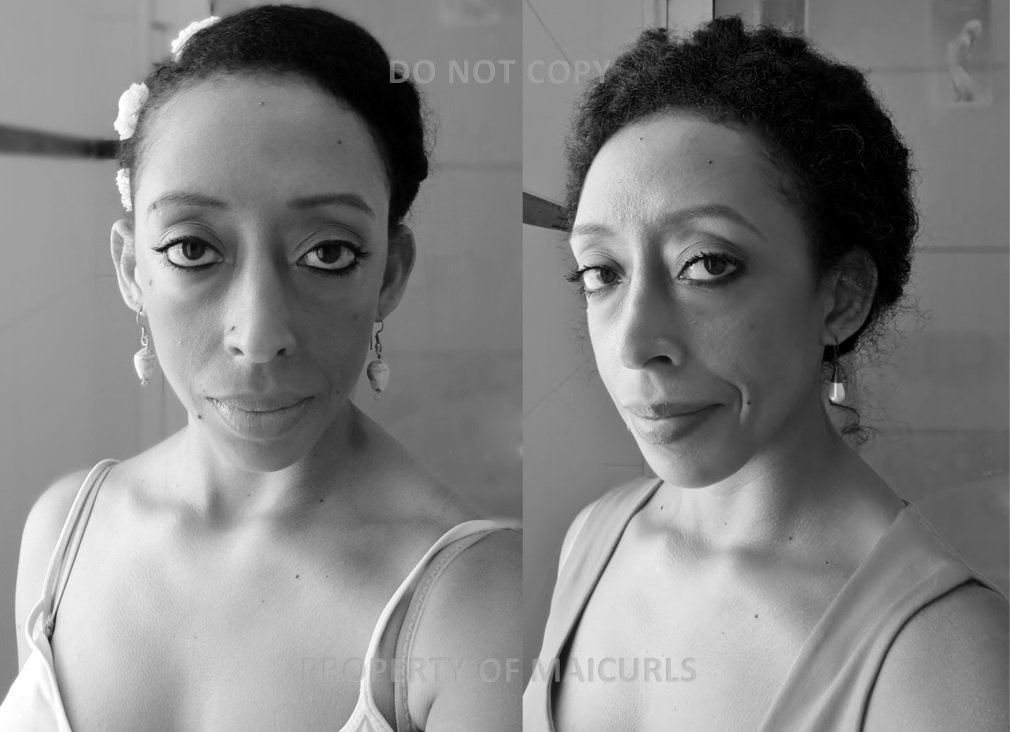
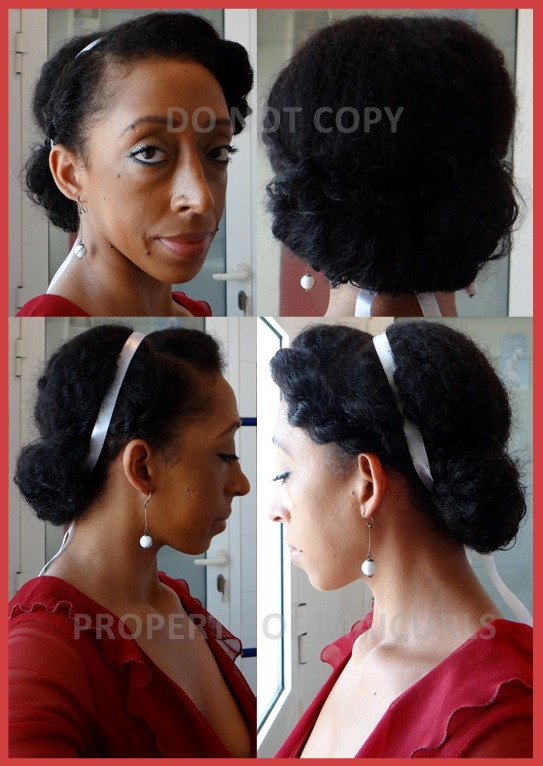
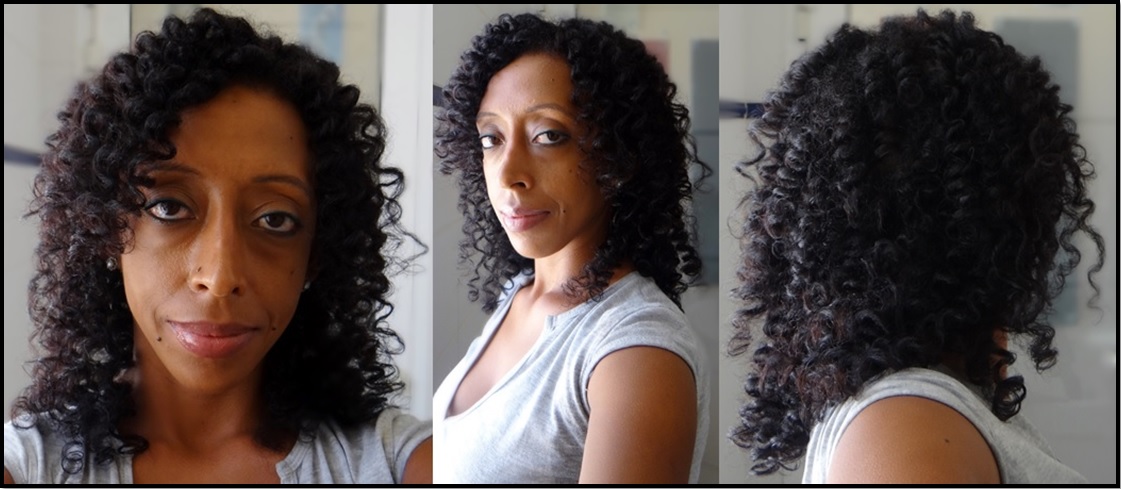
Today’s post is based on a request; I was asked to share my morning and night routine so share I shall. Now before I get into the post and demonstrate (in the video below) I will point out that my night routine tends to be the same pretty much all the time apart from if I re-braid/re-twist/re-bantu knot my hair. So, for the most part if my hair is down then this is what I do every night and yes the same applies for my mornings too. 

Morning & Night Routine

Morning Routine Products/Tools

Method:

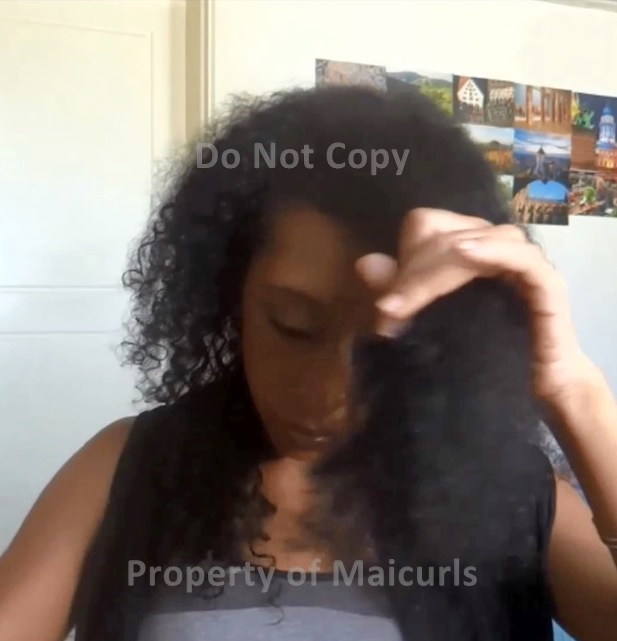
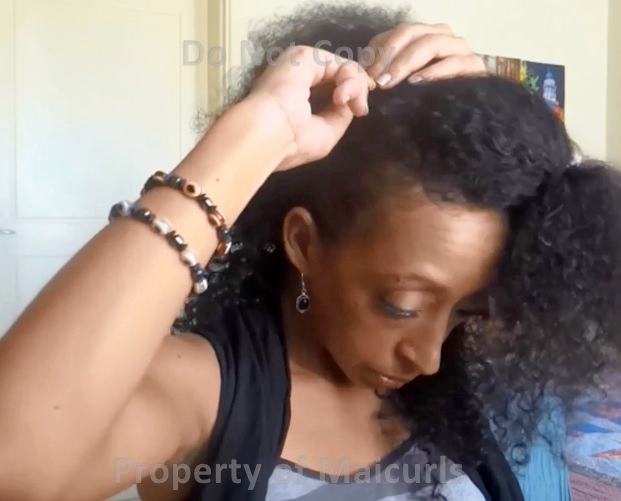
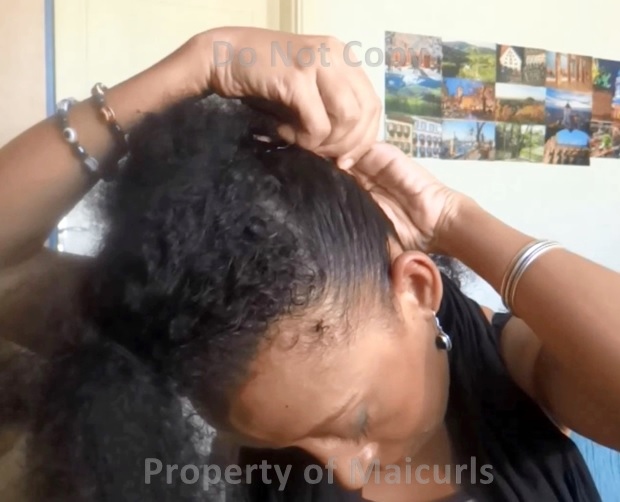
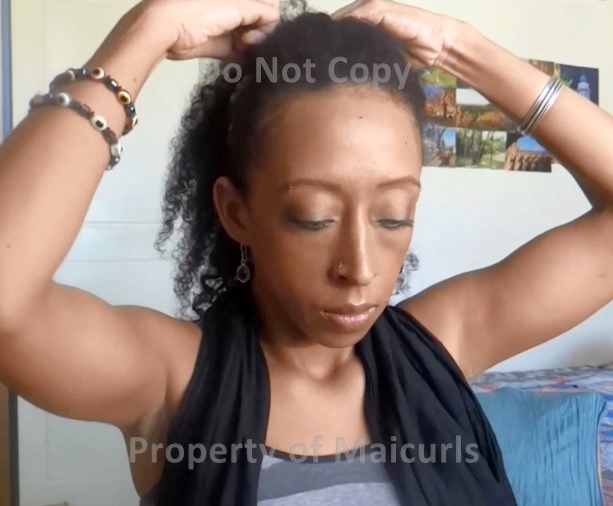
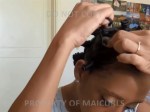
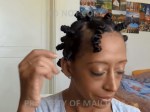
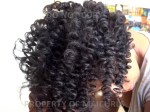
I take my hair down from my modified Pineapple (explained below) and first try and arrange, separate and gently manipulate my hair to arrange it. I then move onto my beloved scalp massage (read about it here). Then depending on how dry my hair is feeling I either use water, Spray Leave-In Conditioner or my Creamy Leave-In Conditioner to re-moisturize my hair. Again depending on my hair I will follow up with any carrier oil within reach to seal in the moisture. The final step is to use my Afro Pick to lift my roots and I am done!

Night Routine Products/Tools:

  • Satin/Silk Scarf 

Method:

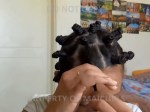
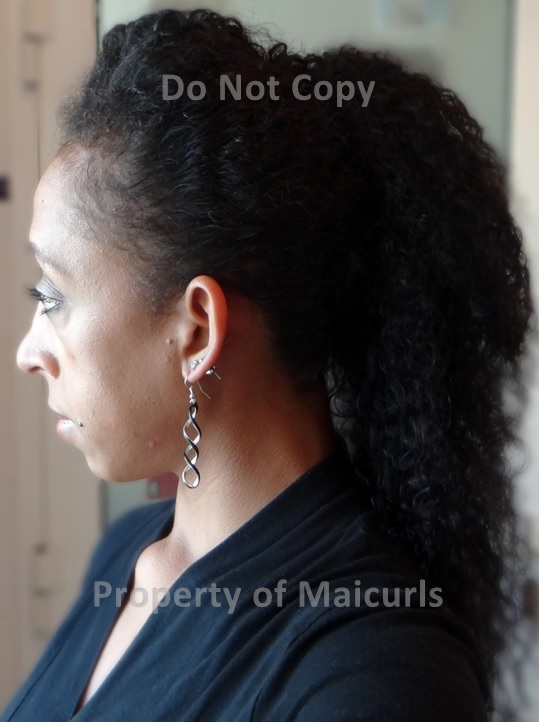
Instead of doing the traditional pineapple (a very loose and high ponytail using a hair bubble) I do the modified version where I skip the hair bubble. I lean forward to get my hair gathered together and cover with my scarf. I feel whenever I use a hair bubble it over stretches my hair (I do not need help on that front, the less the stretch the better for me). That is my night routine! 

What is your Day and Night routine would love for you to share! 

Thanks

Maicurls

Maicurls

Protective Style & Castor Oil Week 6 Update

Hey Maicurlies,

Week 6 cover

                                                         Week 6

So I have come to the end of my Protective Style and Castor Oil Challenge and have to admit I am a little sad. Figured B&W pictures would show “sadness” but to be honest I just love the look of B&W photos! 

Anyways, I will have a separate overview of the challenge as a whole, along with a video shortly but I just wanted to share how my last week went in this post.

For a recap of my previous weeks check below:

How did my last week go?

Not to sound like a broken record but it went well. I did two protective styles over six days and of course also massaged my Castor Oil Mix on my scalp, hairline and ends four times in the week. My two styles were as always super simple. For the first three days I did a really quick & loose pinned back up-do using only bobby pins. On the last three days I did a roll and tuck with 3 two-strand twists & accessorized the style with my DIY Floral hairband.

What Did I do?

I did my wash day routine on Sunday, moisturized and sealed before twisting my hair at night.

  • Day 1 – After taking down the twists in the morning I massaged my Castor Oil Mix on my scalp, hairline, ends and did one of the simplest styles since starting the challenge for the next 3 days.

Literally all I did was very loosely take my hair back fold it over and pin it down. The style was so loose that you could see a little frizz I call this being “carefree” ( it doesn’t bother me but I could be done the style with a little of my DIY Flaxseed gel for a “neater” look.)

  • Day 3 – I reapplied the Castor Oil mix to my scalp, hairline and ends at night.
  • Day 4 – In the morning I moisturized my hair with my DIY Creamy Leave-In Conditioner and sealed  with my whipped butter mix then put my hair into a rolled back up-do accessorized with a DIY floral headband. (I had my DIY shell earrings on that day and it get a beach feeling when I wear them) 😀

I left two sections on the sides and one at the front to make two-strand twists. The rest of my hair was pulled back and rolled up. I pinned my hair at the top instead of under (by my neck). I took the twists to the back to give my hair a little texture and pinned the twist at the top as well.

  • Day 5 – At night I took my hair down, massaged my scalp, hairline and ends with the Castor Oil Mix and pineappled to sleep.
  • Day 6 – Redid the style and at night I repeated the night method of day 5.
  • Day 7 – Was supposed to wash my hair but got caught up with house work :/

Castor Oil Challenge:

As mentioned, I used the castor blend 4 times during the week. My hair felt a little limp by day 7 because I might have used a little too much whipped butter after re-moisturizing but I was still left with smooth, moisturized, shiny and soft hair.

So that was my first attempt at 6 weeks of protective styling and castor oil massages. Like I mentioned I will have a recap post of my final results along with a video explaining my experiences and plans but I can tell you now I enjoyed the whole challenge and it shall be repeated!

Thanks

Maicurls

Maicurls

Protective Style & Castor Oil Week 5 Update

Hey Maicurlies,

First I want to apologize for being late with this post I once again got caught up with work and personal stuff but I am here with an update!

Protective Style Challenge Week 5

                                 Protective Style Challenge Week 5

There is just one week left of my Protective Style and Castor Oil challenge and I can proudly say that I am glad I did it and look forward to incorporating more protective styles into my routine from now on.

For a recap of my previous weeks click below:

How did my fifth week go?

Similar to the previous weeks, everything followed together really well. I had my hair tucked away for 6 days of the week, used my Castor Oil Mix 4 times and then washed my hair. I noticed that I tend to do a really quick style at the start of the week and then try to do a little more for the second part (probably because I subconsciously want a little more “oomph” on the weekend). I will admit that when I took my twists down on the first day I really really wanted to rock a twist-out…the definition was AMAZING but I was strong.

The first style I did was a SUPER quick and simple tuck and pin and then finished with a big puff bun with a deep side-bang (I really liked this one)!

What Did I do?

  • I did my wash day routine on Sunday which included a new and improved Protein Deep Condition (DC) followed by my Moisturizing DC. (The Protein DC involved egg yolks, hibiscus tea, gelatin, coffee infused oil and a little conditioner. I will eventually have a write-up and how to video). I moisturized my hair with my creamy leave-in conditioner, lightly sealed with a tiny bit of oil and then added some of my whipped butter before putting my hair into 12 twists.
  • Day 1 – After taking the twists down I massaged my Castor Oil Mix on my scalp, hairline, ends and randomly pinned my hair back. There was no real strategy to the method I lightly rolled my hair at the front, tucked it and used bobby pins to hold it in place. For the hair at the back I loosely rolled my hair under and then pinned it (repeating this every morning gave me slight variations in the look).
  • Day 3 – I reapplied my Castor Oil mix to my scalp, hairline and ends.
  • Day 4 – I moisturized my hair with my DIY Creamy Leave-In Conditioner and sealed with Almond Oil. I then put my hair into a big puff bun with a side-bang.
  • Day 5 – I took down my hair at night, massaged my scalp, hairline and ends with my Castor Oil Mix then pineappled for the night.
  • Day 6 – I repeated what I did the night before.
  • Day 7 – Wash day routine and then got my hair ready for the final week.

Castor Oil Challenge:

I still am amazed at the fact that although I have fine hair, I can still get away with using a thick oil like castor without ending up with greasy limp hair. Since I thoroughly enjoyed incorporating my whipped butter into my routine last week I used it again and yes this addition is a winner! I ended the week with hair that wasn’t thirsty, dull or knotty. I will say that I started the week with hair that felt different…stronger, I think my hair was in need of a really strong Protein DC. I will just end this with: I was working with hair that retained moisture, had less tangles and less frizz = happy Mai.

So digging this challenge experience and experiment!

On the last home stretch! 

Maicurls

Maicurls


Protective Style & Castor Oil Week 4 Update

Another week done Maicurlies!

Protective Style Challenge Week 4

Protective Style Challenge Week 4

I am on the last 2 weeks of my Protective Style and Castor Oil challenge and haven’t given up yet! 😀

For a recap of my previous weeks click below:

How did my fourth week go?

It went by well. I was able to protect my hair for 6 days and used my Castor Oil Mix 4 times in the week. I did a REALLY simple updo at the start of the week (I don’t want to call it “boring”)  – the “Gibson Tuck” and then finished with what I call the “Chameleon Twist” (I liked this one!)

What Did I do?

  • I did my wash day routine on Sunday, a Henna Gloss followed by a moisturizing Deep Condition, moisturized and sealed before twisting 9  chunky twists.
  • Day 1 – After taking down the twists I massaged my Castor Oil Mix on my scalp, hairline, ends and put my hair in the Gibson Tuck with 2 two-strand twists on the side and a chunky two strand twist at the front – pinned as a “side bang”.
Gibson Tuck with two two strand twists on the side and a chunky two strand twist as a side bang.

Gibson Tuck with two two strand twists on the side and a chunky two strand twist as a side bang.

Twisted Twist

                                                         Twisted Twist

– After making one big two strand twist from 7 medium twists held at then center of my head I tucked away the ends of my hair by wrapping it around the base.

Chameleon twist with pompadour

                                            Chameleon twist with pompadour

  • Day 5 – I took the Chameleon Twist down and massaged my scalp (as best I could), hairline and the ends of each of the 7 twists with my Castor Oil Mix then wrapped it back up.
  • Day 6 – At night took my hair down, massaged my scalp, hairline and ends with the Castor Oil Mix and pineappled to sleep.
  • Day 7 – Wash day routine and then got my hair ready to be set for week 5.

Castor Oil Challenge:

As mentioned, I used the blend 4 times during the week and my hair was suuuuuper smooth, moisturized, shiny and soft! I think my whipped butter sort of helped with that as well (particularly on my ends). I had been using my DIY Spray Leave-In Conditioner to remoisturize my hair mid week but decided to use the Creamy Leave-in and whipped butter for a change. My hair LOVED the combination of being moisturized and super sealed. I can’t say it enough, castor oil is the truth and when combined with other nourishing ingredients …bye bye dryness!

Looking forward to the last 2 weeks.

What do you think of the styles I did this week?

Maicurls

Maicurls

Long Fluffy Puff

Hey Maicurlies!

I’ve got a new styling video up of how I do my long fluffy puff!

I sometimes wish my hair were a little shorter because I would be able to call it my fluffy Afro puff but gravity likes to pull my hair downwards (not that I am complaining about my hair.) 

Products/Tools used:

Styling Tutorial 

I did this style on day 3 of a Wash-N-Go and my hair was a little frizzy and dry so I needed to first remoisturize it by applying water, leave-in conditioner and to seal a little oil. 

After moisturizing I separate a section of hair at the front with a hair bubble because I will style that section last. 

Separate front

I then apply a little gel to the edges of my sides and brush them back gently. 

I collect and pin my hair down in the middle of my head till I have pinned all the hair on one side. (I use two bobby pins crisscrossing them over each other until I reach the back where I only use one bobby pin.)

Use bobby pins to hold hair

I repeat the gel, brush, and pin routine on the other side.

repeat on second side

I then style the front by first spritzing a little water, adding a little gel, brushing the edges. 

I like to give myself a little “pompadou” or bump at the front and then pin the hair down.

create pompadou

I like to fluff my hair out to make it bigger and then fix areas that need fixing.

And voila!

What do you think? How do you make your fluffy puff or Afro puff? Would love to hear from you!

Maicurls

Maicurls

Twisted Bantu Knot-Out

Hello lovely Maicurlies!

I hope all is well 🙂

Lets get down to business shall we…and that business is my Twisted Bantu Knot-out.

Twisted Bantu Knot-Out

                                                                                   Twisted Bantu Knot-Out

Let me start off by saying I love the curl results I get from this style. I think they are really “girly” and fun… in my opinion. I did not manage to record how I actually put in the Bantu Knots because I decided to do them late at night but I did demonstrate on one piece before taking down my hair (see video below). I can do a proper demonstration of how I install my twisted Bantu Knots in a separate video & write up (if someone needs to see it) although my method is no different to the other lovely ladies on YouTube.

These particular Bantu Knots were not two strand twist, instead I just twisted single sections of my hair around like you would a rope and then put them into Bantu Knots. Because they were not put into two strand twists I separated each curl a little more than I would when they are in twists. With the two strand Bantu Knots, I already have 2 separate sections and then separate each half of the twist one or two times.

I have a few photos of what my Two Strand Bantu Knot-Outs look like here for you to compare to the images below.

Products/Tools Used

I did not neatly part my hair nor did I use rat-tail comb I just sectioned 5 parts; 2 on the left, 2 on the right and one in the middle of my head and then randomly took small/medium sections of hair and twirl my hair into a Bantu Knot.

Twisted Bantu Knots

                       Twisted Bantu Knots

Tutorial

I have explained how I achieve this style along with images and text below.

How I install the Bantu Knots

I worked on dry hair that was slightly stretched and finger detangled. I first lightly mist my hair with water, apply my leave-in conditioner and set/seal with my whipped butter.

The Take Down & Styling:

Twisted Bantu Knot-Out styled and accessorized

white ribbon

Loose hair Red ribbon

What do you think, don’t the curls look light, bouncy and girly? 😀

Thanks

Maicurls

Maicurls

Wash and Go with Flax Seed Gel

Hi Maicurlies!

wash-n-go FSG

I decided to make a video of how I do my Wash and Go using my Rosewater infused Flax Seed Gel (FSG). Only then did I notice that I never made a write up of my “Simple Wash and Go”. I need to update my Wash-n-Go Page because it only includes how I maintain a Wash and Go over a week. So I have a little bit of writing to do over the next few days. (I am on it)! 

You can find my Simple Wash and Go method on YouTube as well as my Wash and Go with Flax Seed Gel. I also attached it to my Video page on the blog. These are the products I used (I linked all the recipes as well):

I apply the products in that order and have no issues to “trap” in the FSG with my mixed sealing oil because apart from being a great styling product with hold, FSG is moisturizing and nourishing for the hair and scalp! I also occasionally mix my FSG with my “Creamy” Leave-In Conditioner in a separate container and then apply it in one go. 

I will have a detailed write up of the process … I promise! 

Thanks

Maicurls

Maicurls


The Faux-Hawk

Good Evening Maicurlies!

I hope all is well and you are enjoying the start of 2014!

I haven’t tried a “Faux Hawk” in a while, there is no real reason as to why I haven’t…I guess I just forgot. After my Wash Day Routine I put my hair in 5 braids, applied my DIY Creamy Leave-In conditioner (to wet hair) and then sealed in the moisture with my DIY Mixed Sealing Oil. I used bobby pins to pin the braids down and stretch them and then covered my hair with my scarf overnight. My intention was to actually wear my hair out and “flowy” so the next morning, I took the braids down (with a little sealing oil on my fingertips) and my hair decided it did not want to corporate. It wasn’t feeling the “flowly-ness” I wanted, so I gave in and tired something different and this is what I ended up with!

side

Now this is not your traditional “Faux Hawk” because gravity is basically pulling my hair down due to its length. I will be trying this again after a Wash-n-Go because I am sure if I do not stretch my hair (with braids) then the length will be a little shorter and I might get more of a “spunky” look. I do love this though because I find it elegant and I LOVE that just due to braiding my hair I get to take advantage of my length!

I have a write-up of my Long “Faux-Hawk” and photos to go with it here

Do you rock a Faux-hawk, Fro-hawk? If so let me know, I would love to hear from you!

Thanks

Maicurls

Maicurls