Category Archives: Accessories

How To: Turning an old Twist-out to Braid & Curl Low Manipulation Style

Hello Maicurlies,

Today I wanted to share one of the methods I use to remoisturize old hair & how I style my hair in a low manipulation style (when I went camping for 2 nights). 

wrap up braid-out

So I was off to a beach camping trip for 2 nights and my hair was a MESS! I had it in a twist out that turned into a messy bun. The curls were tangled, dry and just not in a good way! Since I was camping I knew I didn’t want to do anything “drastic” especially since I would be washing my hair once I got back. I also knew I wanted my hair tucked away since sand and my hair just don’t play nice at all so I figured I would remoisturize, bring back some texture but still keep my hair tucked away.

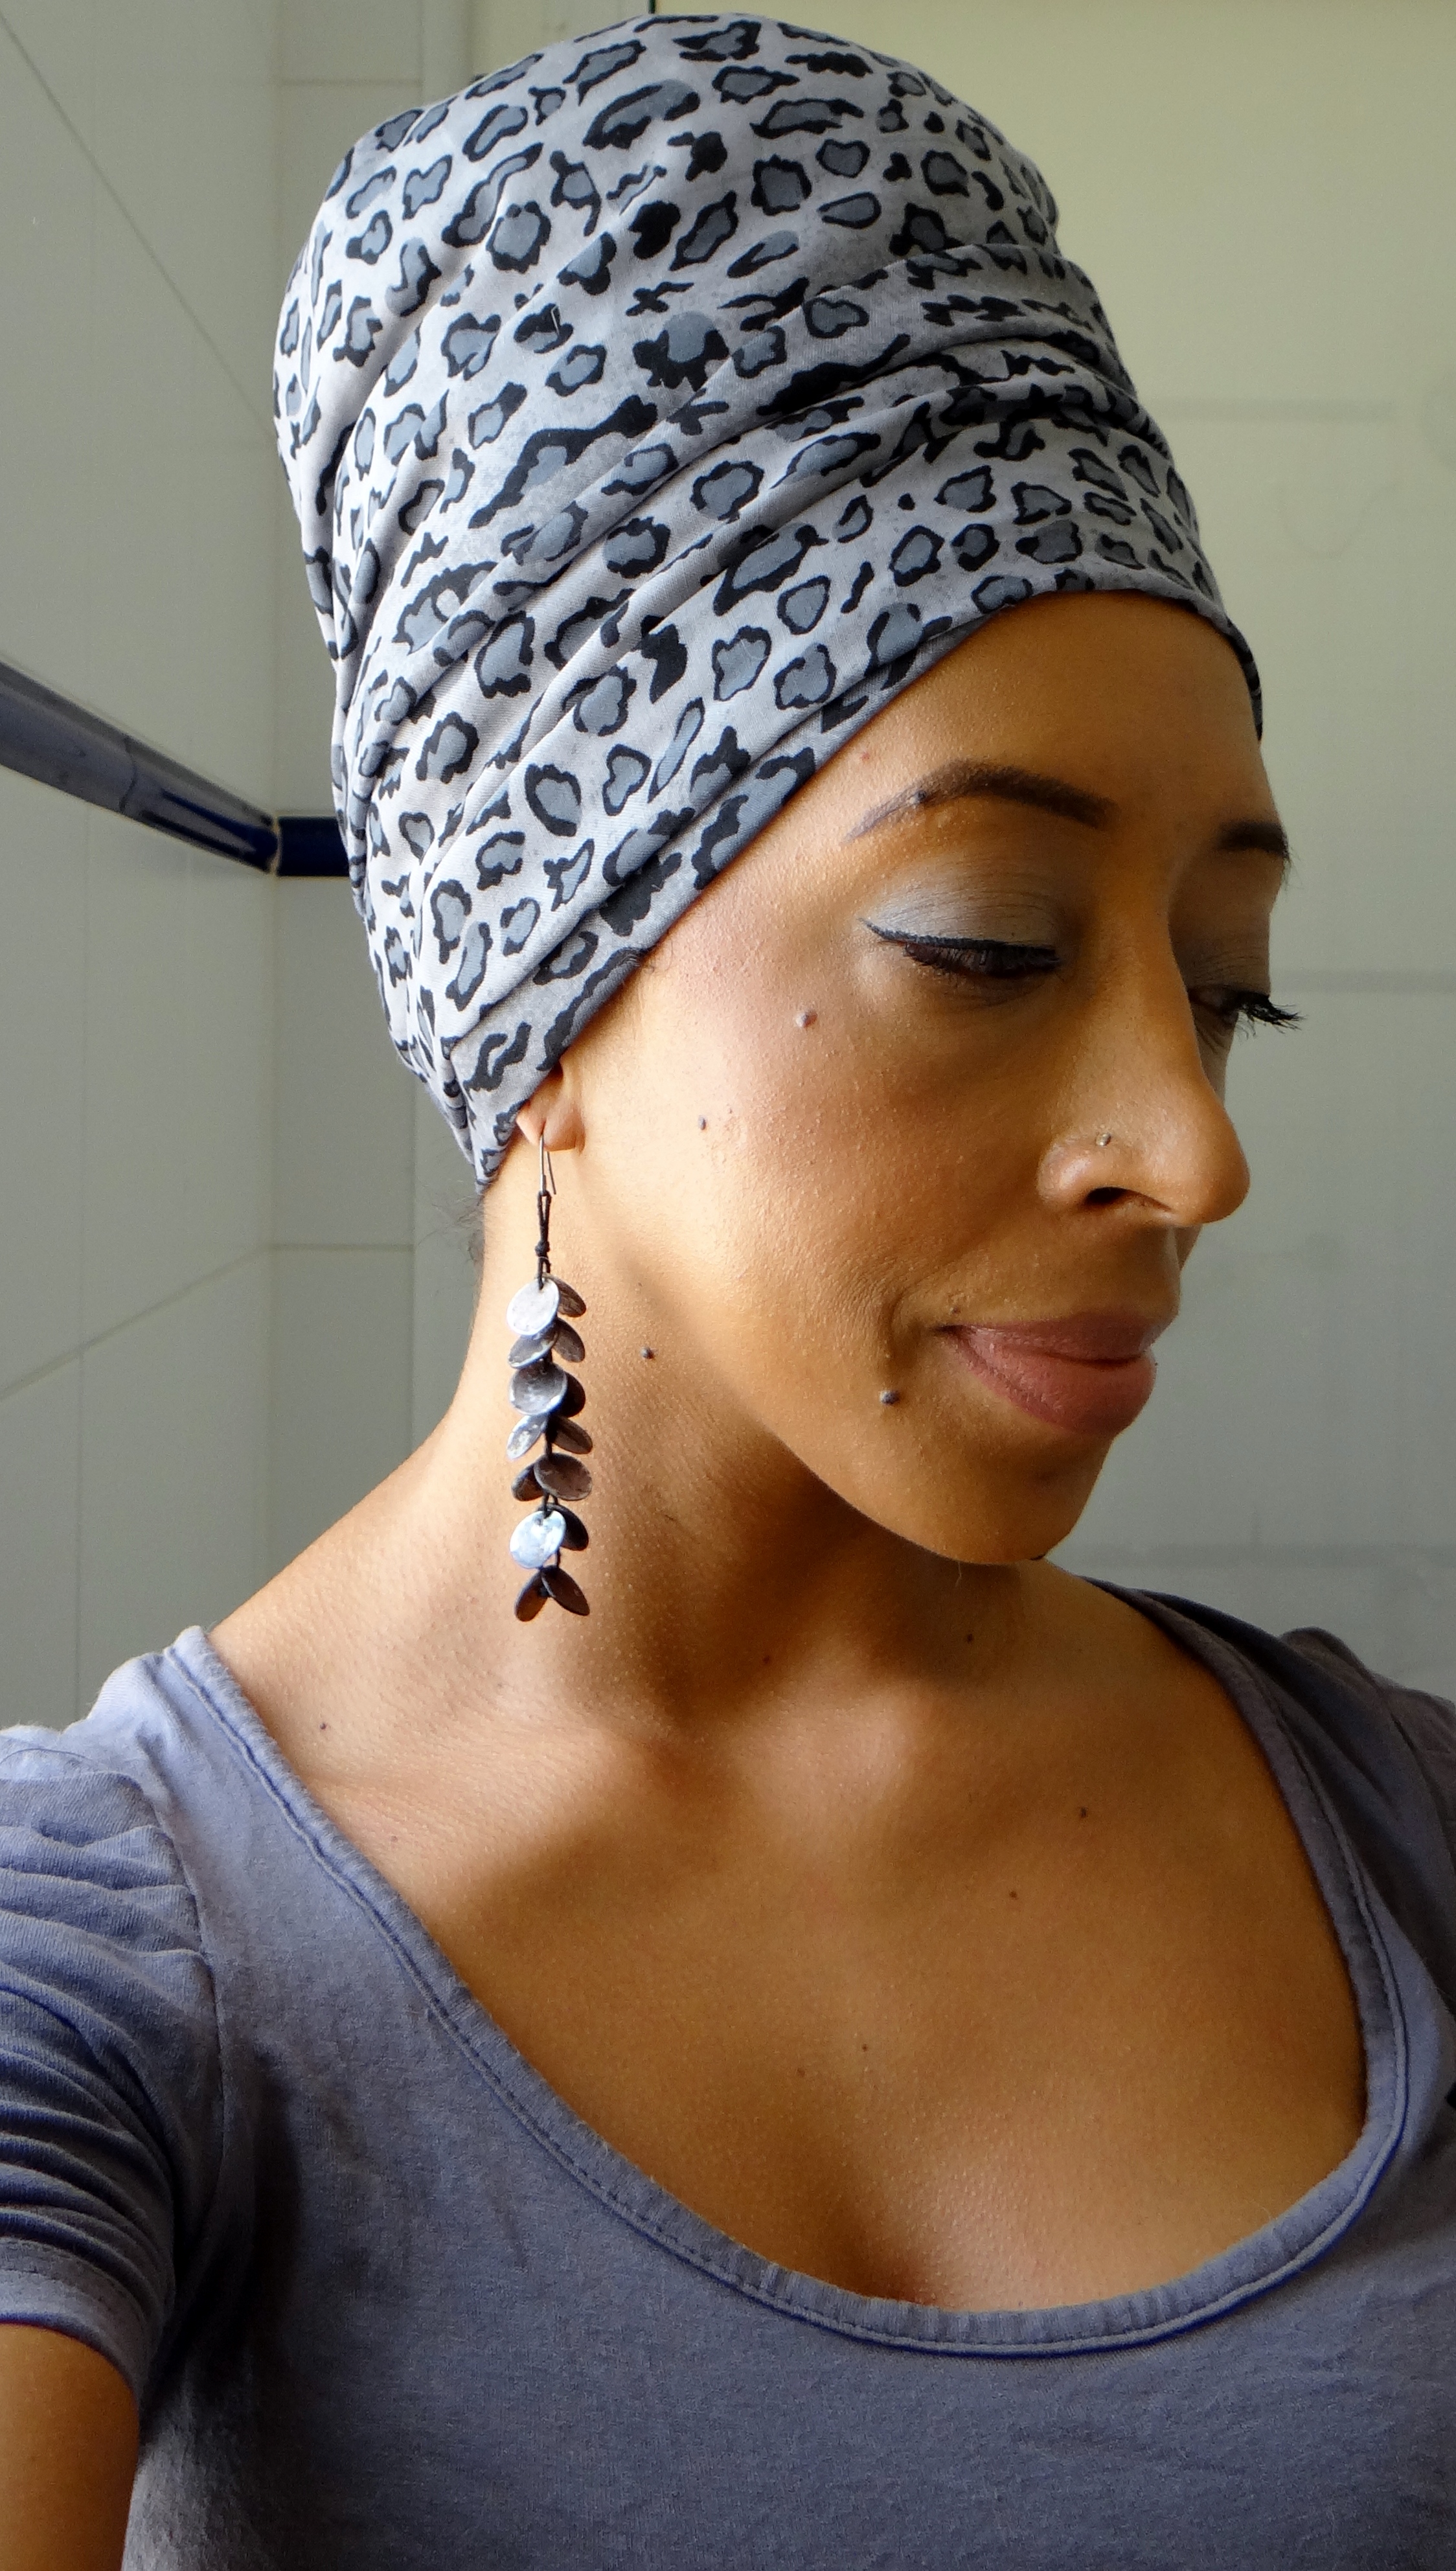
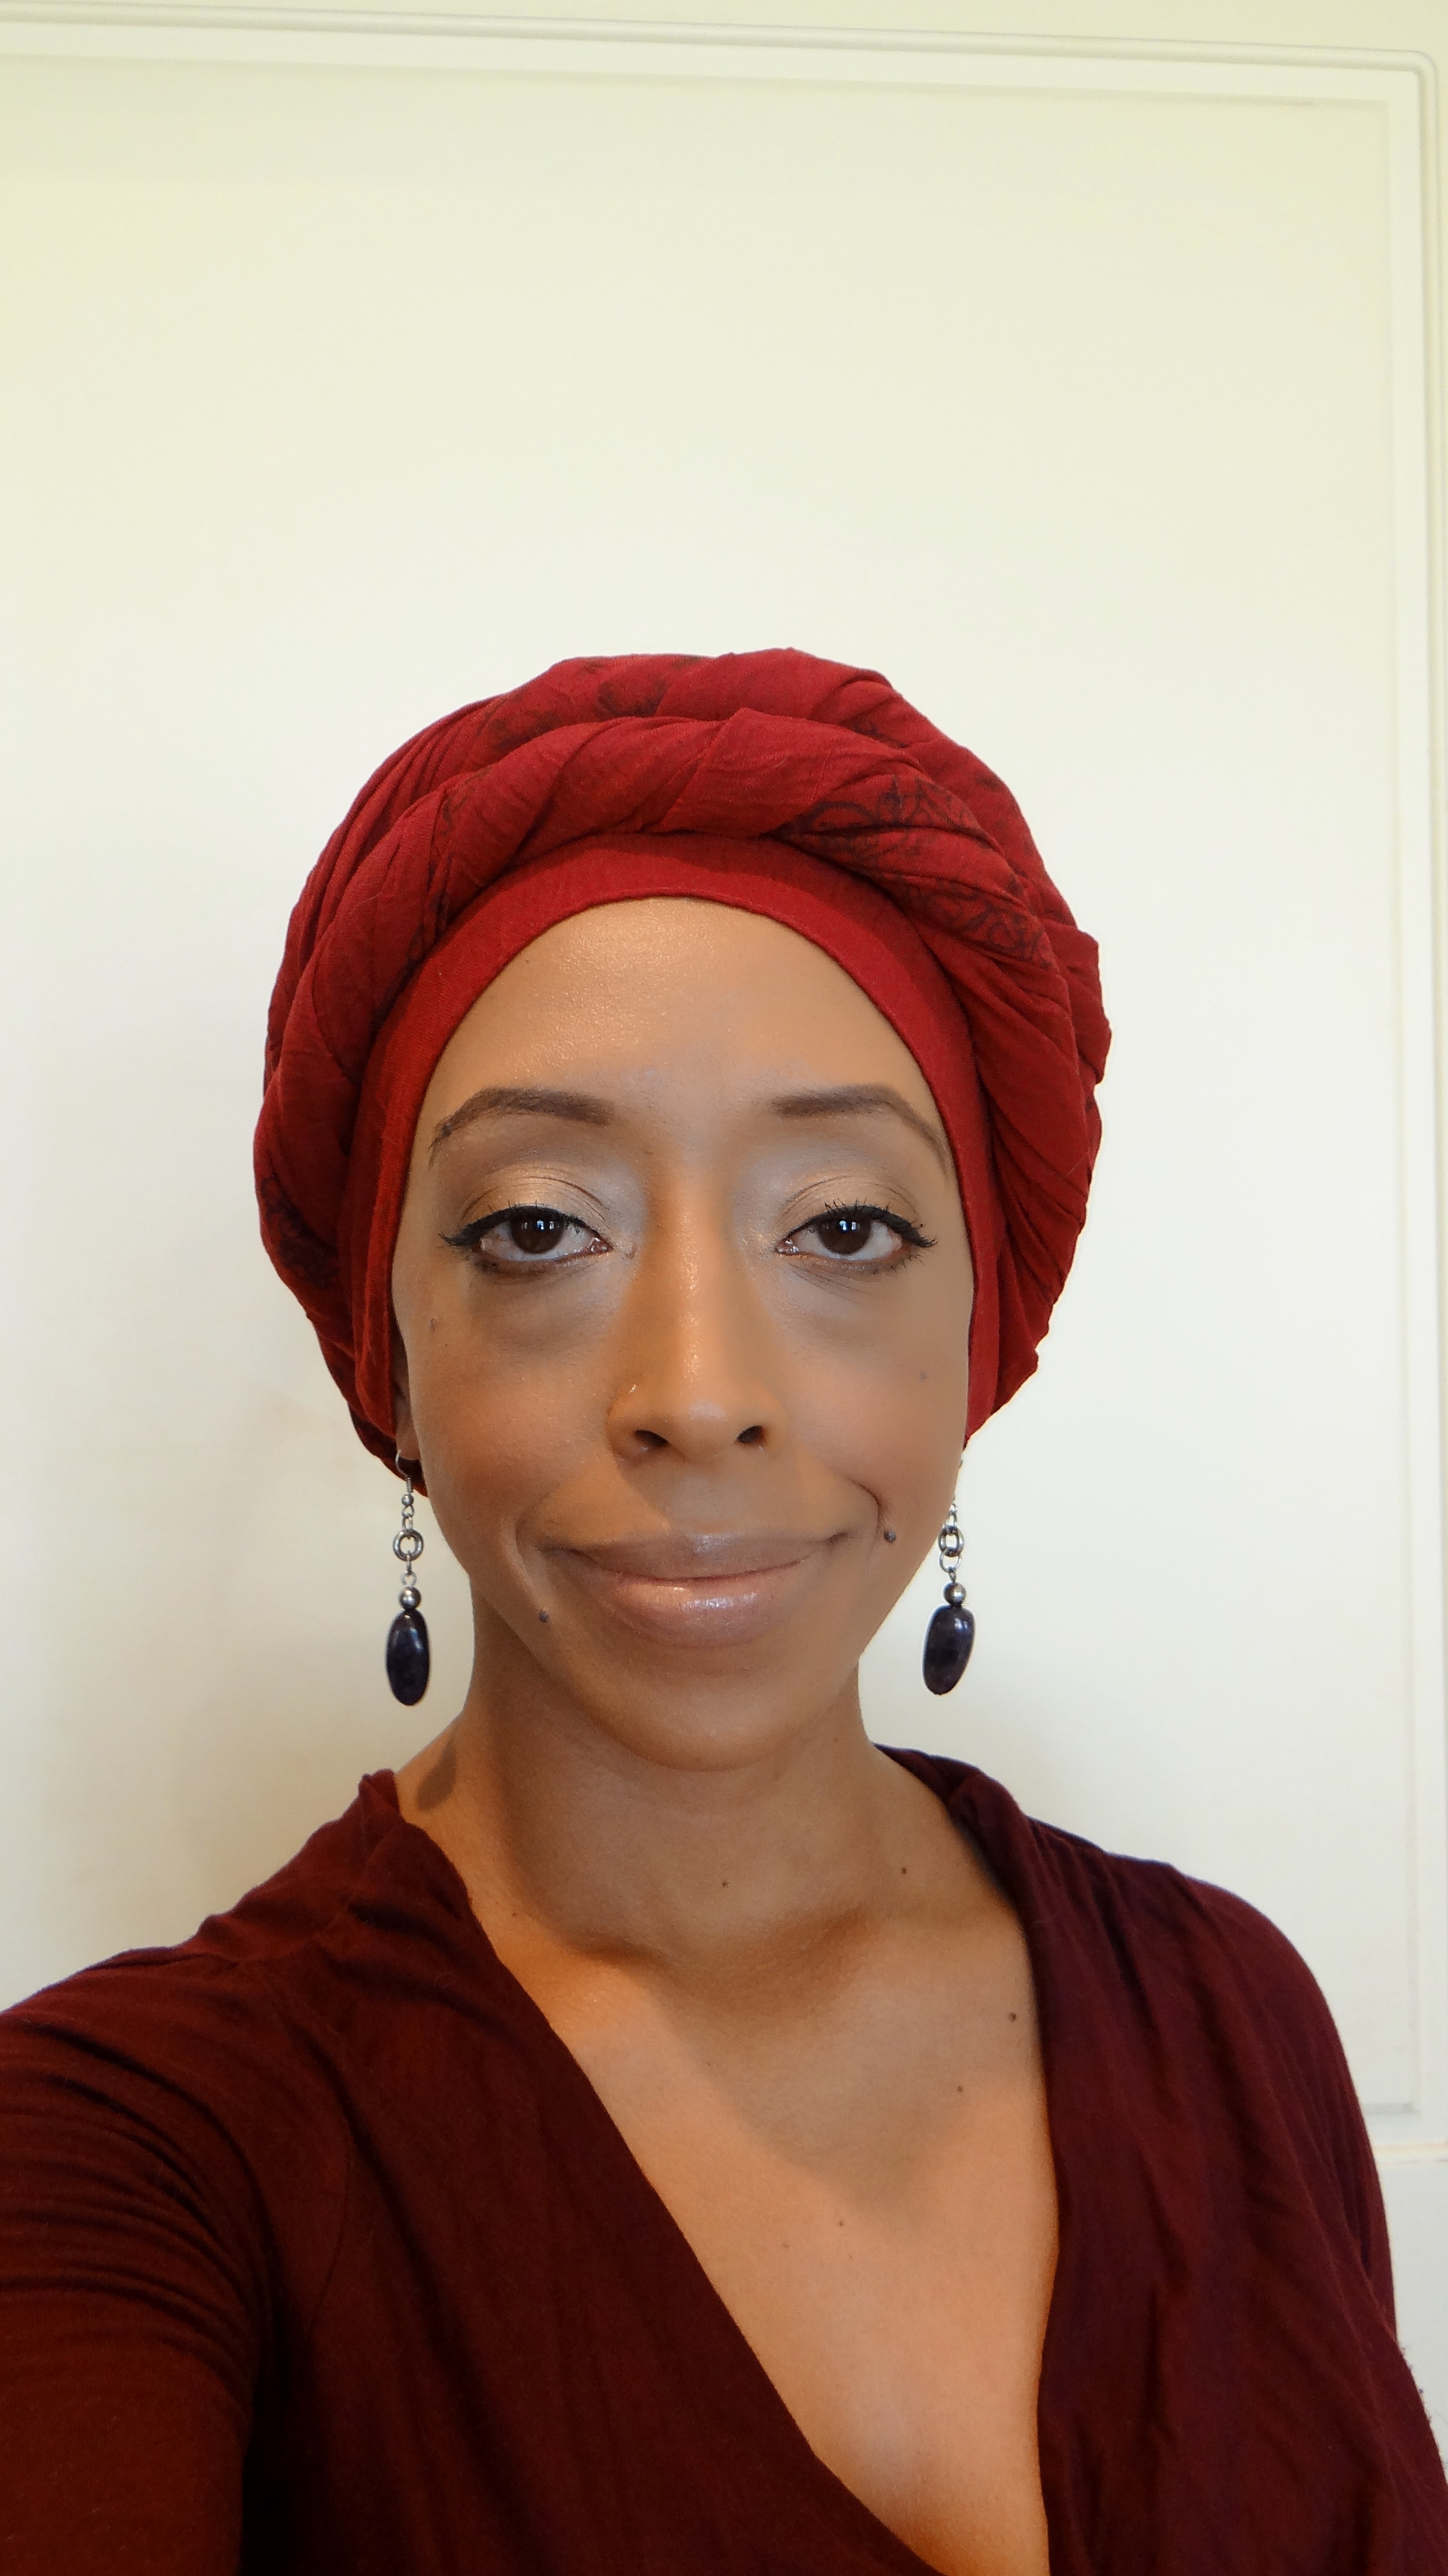
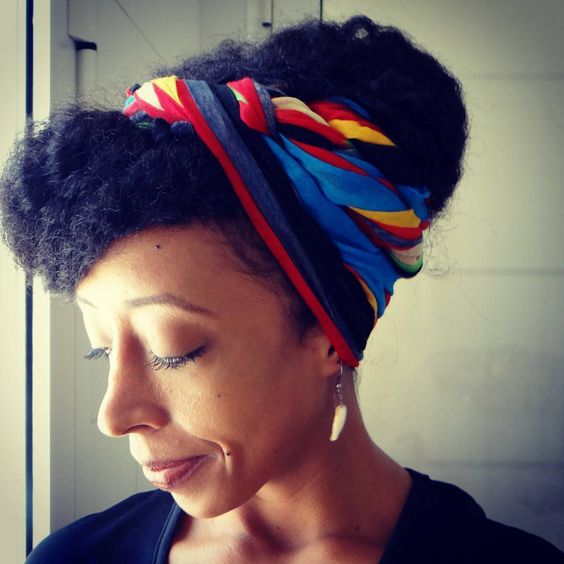
My remoisturizing method was simple, the L.O.C method (Leave-in/liquid, Oil, Cream/Whipped butter) I also used permrods and that was it. I did not use a comb to get through my hair since I wanted low manipulation and to protect my hair during the trip I used a scarf to keep my hair up and away from my shoulders and presto. 

Products/Tools Used:

Method:

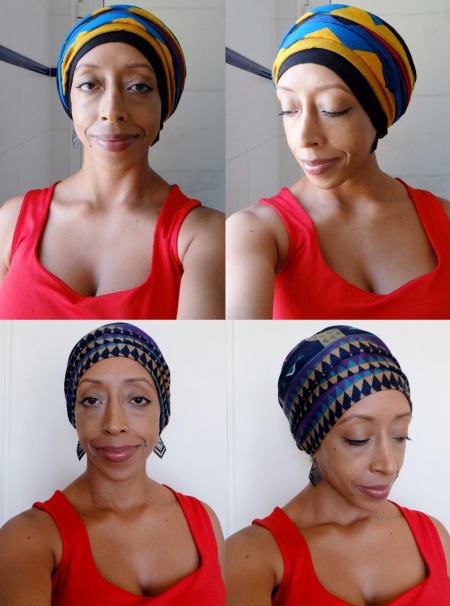
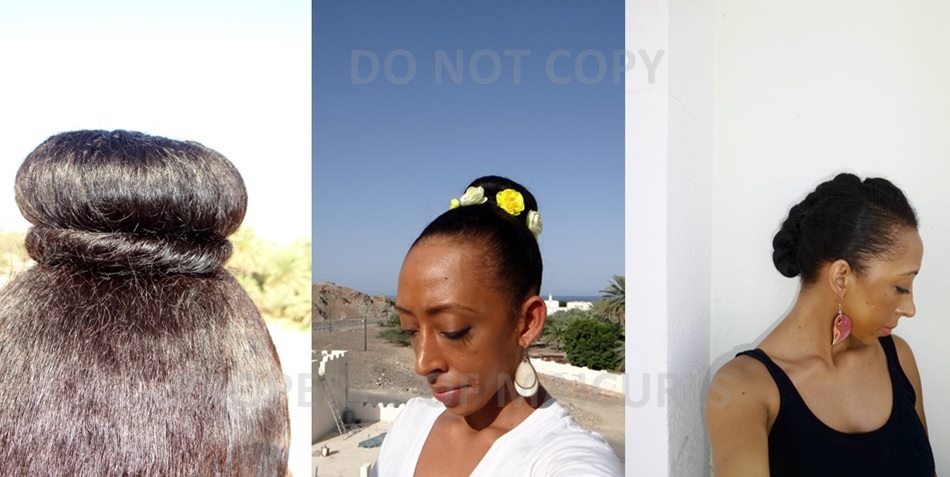
I parted my hair into sections (roughly 15 – 18 in total), spritzed my hair with my DIY Spray Leave-In Conditioner followed by my oil. I then gently, carefully and slowly detangled my hair and get rid of shed hair. I braided my hair but left my ends unbraided. I added a little extra spray leave-in on the ends, smoothed on some whipped butter before wrapping them around the perm rods and then rolling up to my roots.

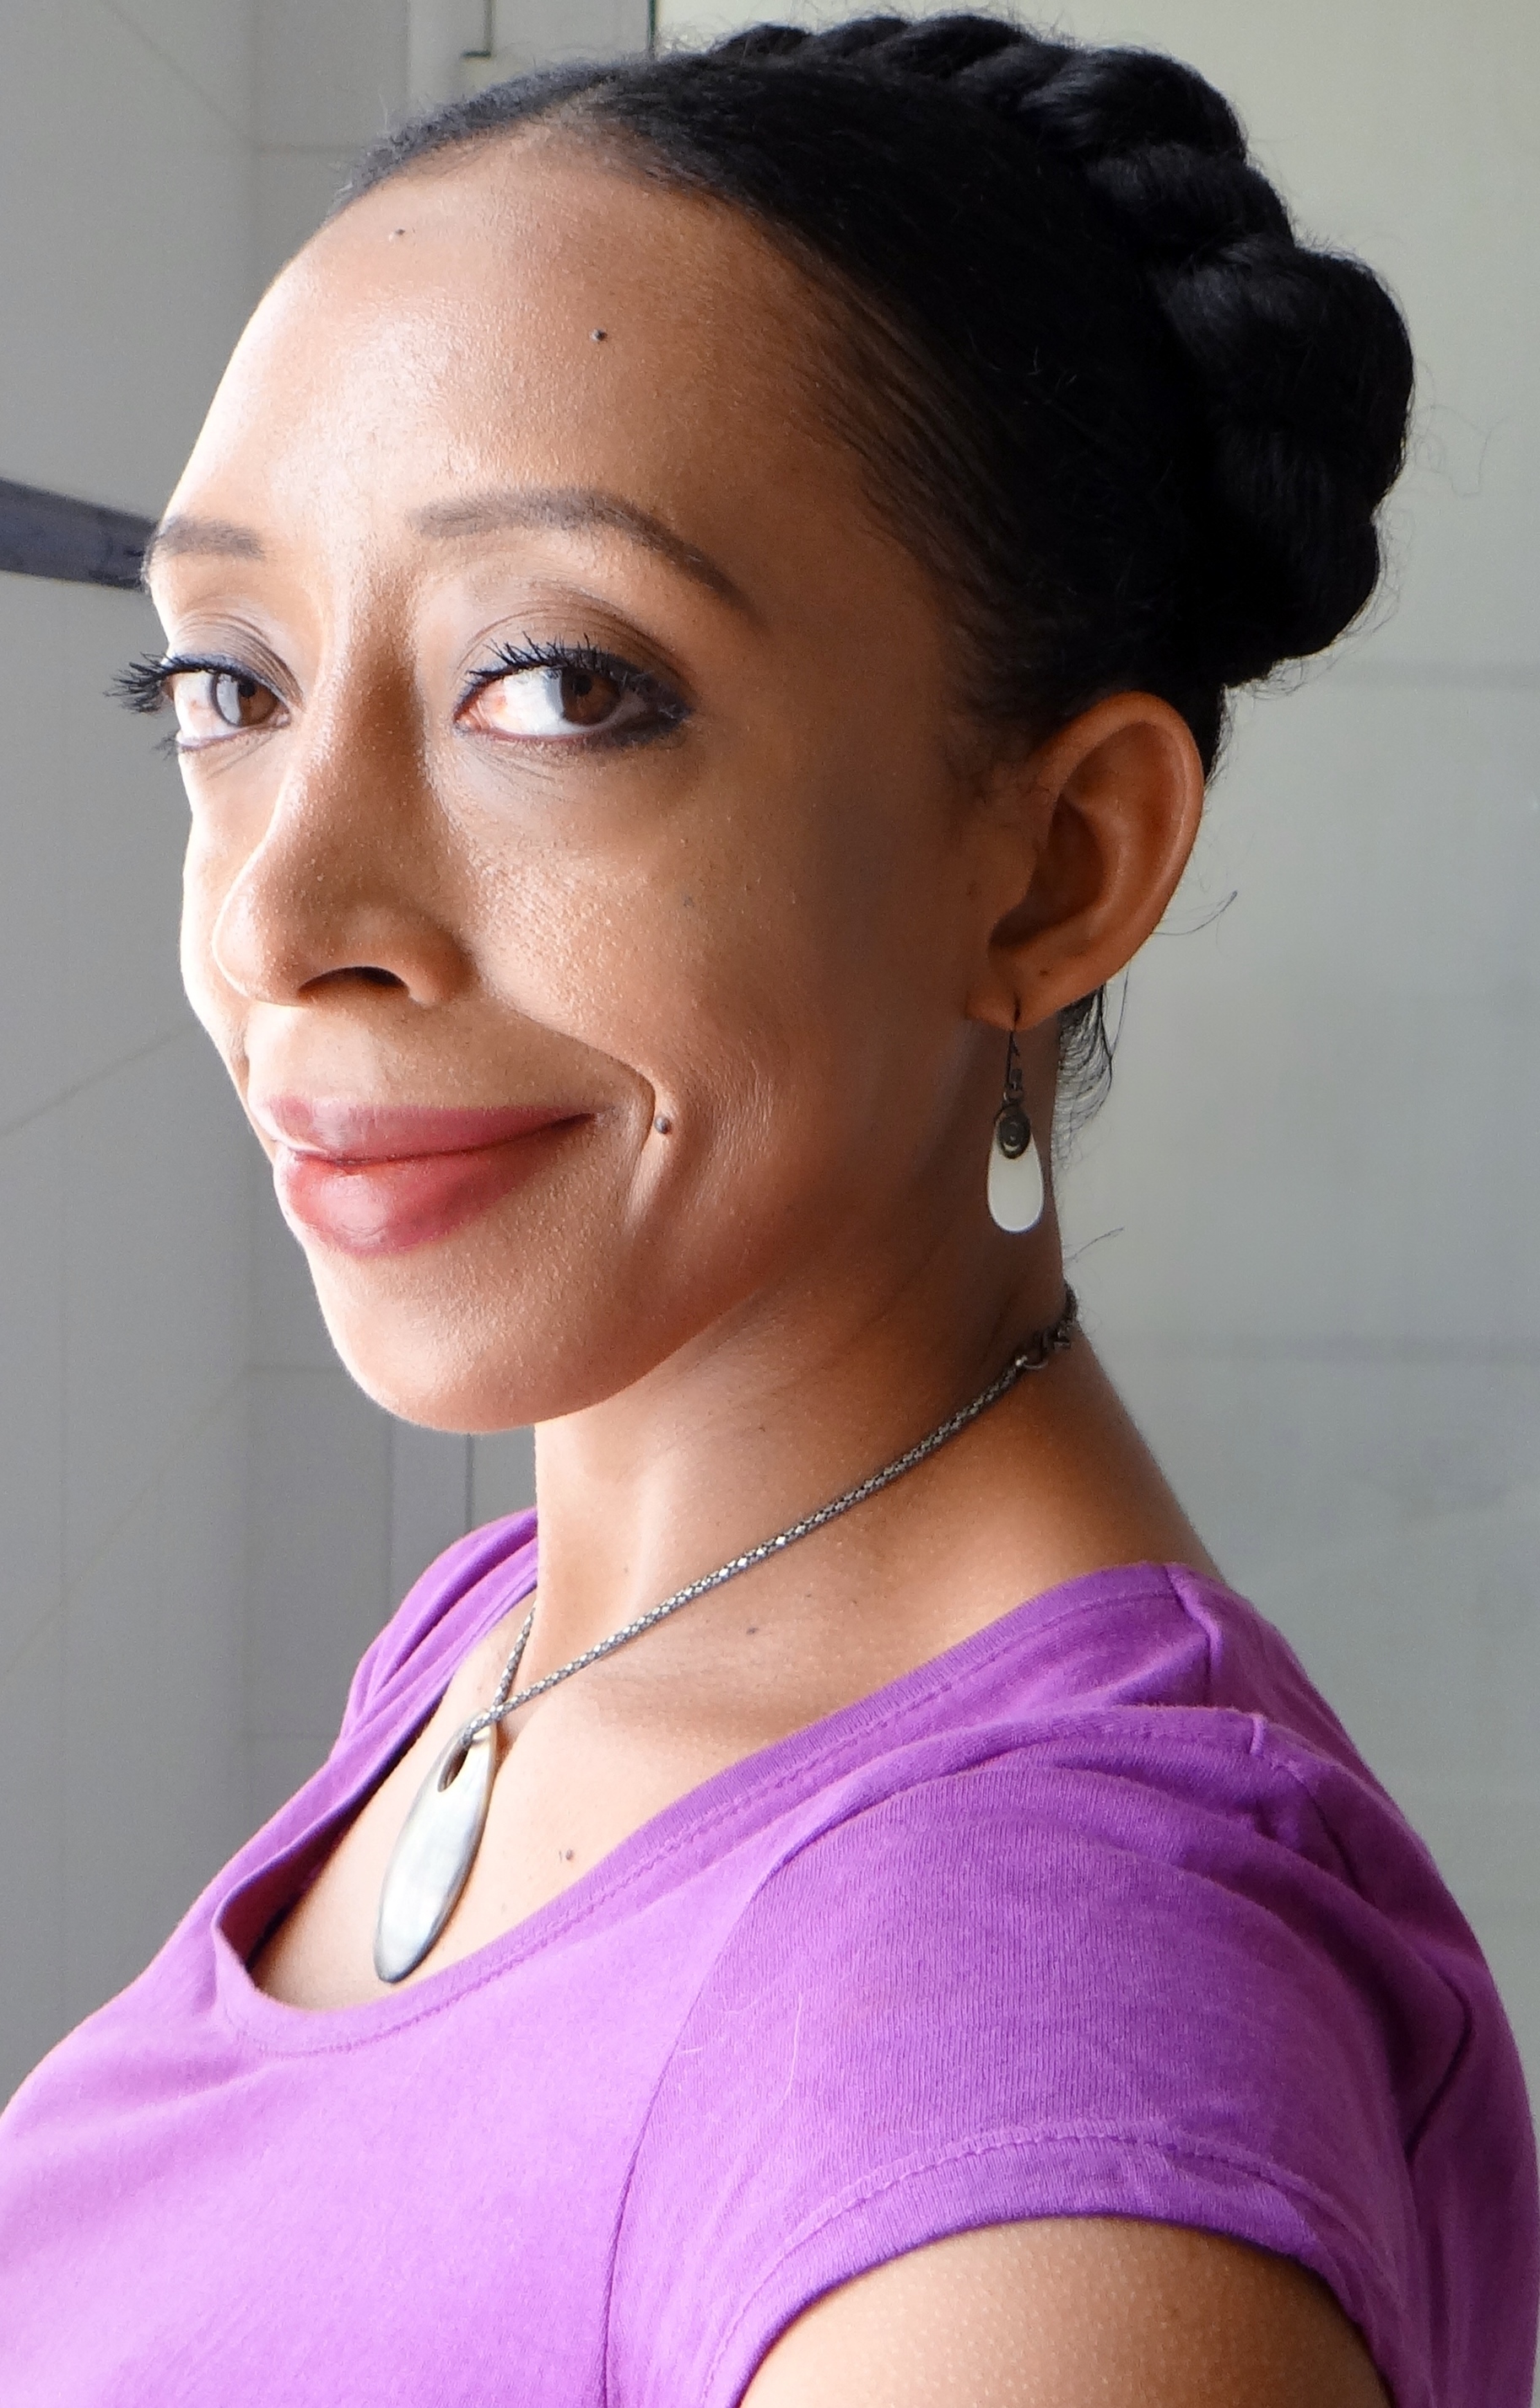
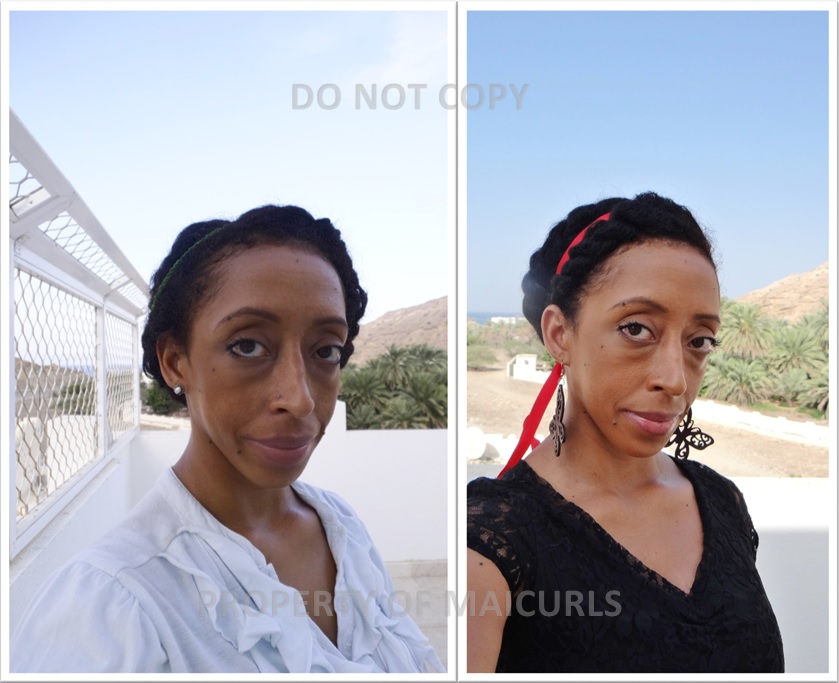
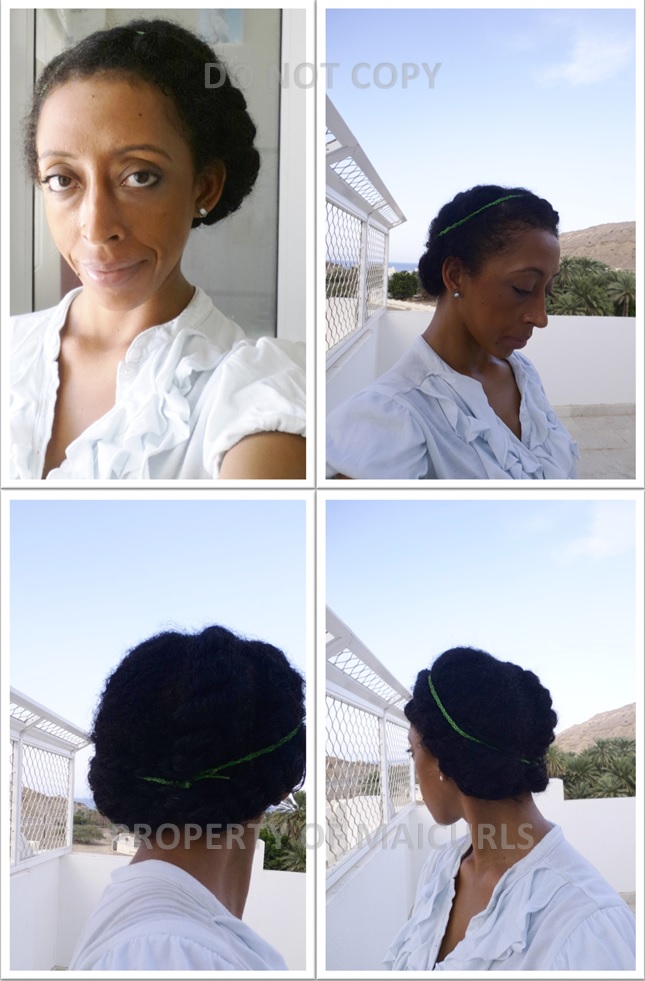
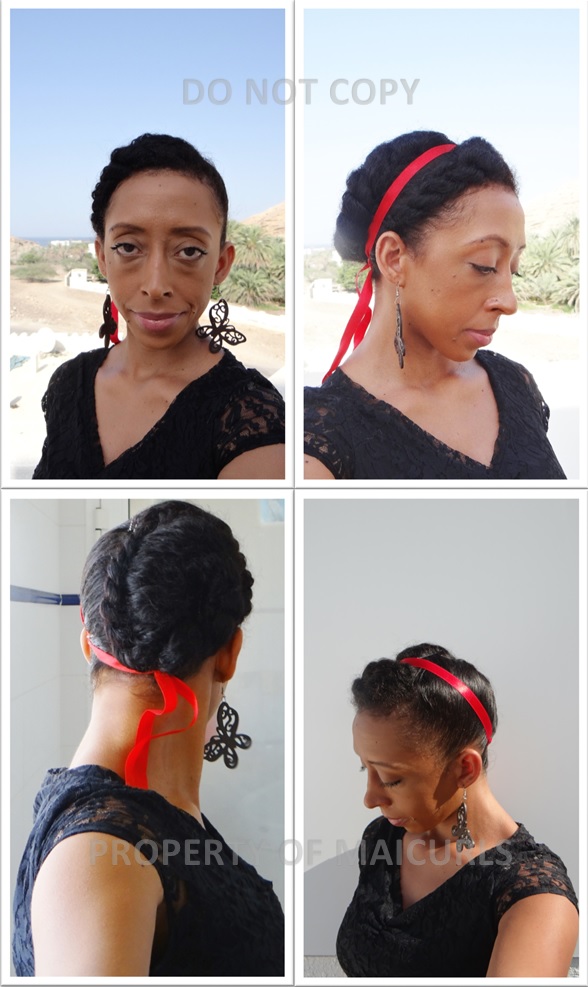
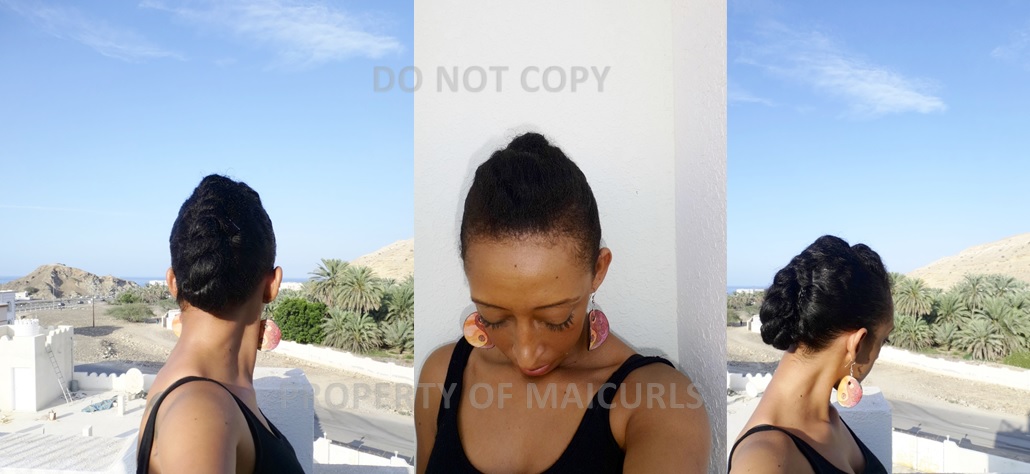
Once I was done I covered my hair at night (I kept it uncovered right until I went to bed). The following morning I took down the perm rods and using a little oil on my fingertips I undid the braids. Now if you want to have definition then take the braids down carefully to keep the integrity of the curl pattern (since I just wanted a little texture, a little volume and was going to cover my hair it didn’t really matter for me). After I took down the braids I separated my hair a tiny bit and covered my hair with the scarf, leaving a swooped bang at the front (the ends tucked away) and pinned the rest of my hair upwards. Presto: happy moisturized and protected hair ready for camping! 

I have a video of the whole process:

P.s. In case you were wondering, here is a peak at the spot where we camped. 

What is your go to method to remoisturize “old hair” mid-week/before washing your hair?

Thanks

Maicurls

Maicurls

2 Head Wrap Styles for Winter (Protective Styles)

Hey Lovely Maicurlies, 

So this post comes a little late (I am currently sitting in a hotel in Dubai waiting to check out). I wanted to yet again share some head wrap styles! I had posted a few photos on Instagram (yes I am addicted) and was kindly requested to do a demonstration of one of the styles so I figured I would do 2 styles in one video.

2 head wrap styles for winter

2 head wrap styles for winter

In the first example of my video I start of with a messy bun that is covered with a satin scarf first (since the outer scarf I use is neither Satin nor Silk) and then I used the outer scarf.

For the second style I start off with 2 really rough flat twists that I pin down and again use my satin scarf first followed by the outer scarf. 

It is easier to explain in video which I of course have:

I would love to hear if you use scarfs during winter to help protect your hair? 

Thanks

Maicurls

Maicurls

Easy Milkmaid Twists

Hey Maicurlies,

So today I have a styling tutorial of my Milkmaid Twists. 

Milkmaid Twists

Milkmaid Twists

Now I will point out that I am not all that crazy about how this particular style looks on me (I love the style on others) the main reason why I don’t like it on myself that much is because my forehead and ears become quite obvious because all my hair is pulled back and away from my face LOL. I do like the fact that it is a protective/ low manipulation style since your hair is tucked away and can be left alone for days even. 

The style of  course is a breeze to do and doesn’t require too many products either. Please note: I actually recorded this video working on old, frizzy hair (that had seen better days) but even with the frizz and mess the final look still ends up looking polished and neat. The video was recorded a few months back but since I was not that big of a fan I put it away without editing it, until I was kindly requested to share the video so I did 🙂

Tools/Products used:

Method:

The first step is to split my hair in the middle in order to make two side ponytails (please note again apart from the frizz I also don’t make neat partings – I have issues). After parting, I use some FSG to help smooth out my hair and “tame” the frizz a little. I also follow up with a little of my Hair Pomade on my edges to help provide a little extra shine and thanks to the ingredients in the pomade it also helps protect and aid in the health of my edges. I use the soft bristle brush to bring my hair together and distribute the products applied. The soft bristle brush along with the gel and pomade really helps to give that “smooth” look. I pull my hair together into two side ponytails and then two strand twist each side. I then cross each twist over the top and bobby pin them on the opposite side (under the base of the twist) and tuck away the ends under the base of each twist and that is it. 

Additional:

I tend to add a wide ribbon to help accessorize the look, I like to think it makes the style look a little more “fancy” while at the same time helps me feel that I have caused some distraction away from my forehead and ears (yes I am not a fan of them!) 

Whenever I do this style I actually just take down the bobby pins, cover my hair with a scarf for the night and the next morning I touch up my edges if there is need to and then re-pin them down so I get to protect my hair for a few days. 

I have a video of course:

Would love to hear if you do Milkmaid Twists, if your method is different or if you have any suggestions for me.

Thanks

Maicurls

Maicurls

Nefertiti Head Wrap

Hey Maicurlies,

It is another wrap day today! I like to call this my Nefertiti Head Wrap. 🙂

DSC05561

I put  these photos on my Instagram page a little while ago:

and was sweetly asked if I could do a tutorial which I was very happy to do. These are the things I use to do the style:

  • A hair bubble
  • Silk Satin Scarf
  • Scarf/wrap (external wrap)

I have a quick “how to” method in photos:

  1. I make a bun (mine was a messy bun)
  2. I use the silk satin scarf to cover the bun – I use this to help protect my hair from the external scarf/wrap since that is made of cotton and also because it helps to make the wrap appear bigger. 
  3. I first tuck one end of the external scarf against my scalp and then wrap upwards, tugging/pulling and adjusting as needed. I then tuck away the other end at the very top and continue to adjust till I am happy. Le fin! 

To make it easier I of course have a video tutorial of the whole process. I also did a little “demo” of the same style with different scarves. 

I hope my IG friend get’s to see this video 😀 and I would love to hear what you all think of this style! 

Thanks

Maicurls

Maicurls

Double Twist Head Wrap

Hey Maicurlies,

Yup, I am back with another head wrap (I am sorry but I am obsessed so you will probably see more of these types of tutorials for a while!) 😀 

Double Twist Head Wrap

It is yet again a really simple and quick wrap that can be done in 5 minutes, who doesn’t like a quick style that also happens to leave your hair protected??? 😀

All you really are doing it covering your hair once with the wrap and then twirling the remaining material to make a fake “twirled rope” stretching them across your head and tucking away the ends. The End 🙂 

I as always have a video tutorial for an easy explanation. 

I have a few other head wrap videos and tutorials: Double Knot Head Wrap & Turban Wrap. Would love to hear what you think!

Thanks

Maicurls

Maicurls

Christmas & New Years Eve Outfits

Hey Maicurlies,
 
So it is that time of year again and apart from spending time with family and friends, the other thing I enjoy is dressing up for the occasion. These are just a few ideas for a Christmas Eve dinner outfit (left) and a cute little number to ring in the New Year (right).
 
Wishing you, your family and loved ones a Merry Christmas and a Happy New Year in advance!

Christmas & New Years Eve Outfits - http://maicurlz.polyvore.com/

Christmas & New Years Eve Outfits – http://maicurlz.polyvore.com/

Maicurls

Maicurls


Shopping Day

Hey Maicurlies,

Over the weekend I ended up doing a little shopping (window shopping) to get inspired for Christmas gifts. I like keeping it simple while shopping so I don’t have to worry too much about whether everything is “in place” while walking around for hours and rushing whenever needed.

Walking around in this would be AWESOME! If I came across these pieces they would be bought (for myself) and quickly!

Have you started Christmas shopping? If so, what did you buy? I would love to hear from you, maybe get a little inspiration from Maicurlies!

I hope you are having a lovely day and will have a fantastic week ahead!

Thanks

Maicurls

Maicurls

Protective Style & Castor Oil Week 3 Update

Good day Maicurlies,

I’ve reached the halfway mark of my Protective Style and Castor Oil challenge and I am still digging it!

You can read about my previous weeks here:

How did my third week go?

I must admit I sort of hit a little bump on the road in terms of how to style my hair but I figured something out in the end.

Protective Style challenge week 3

                                       Protective Style challenge week 3

I did not plan properly, washed my hair late at night on Sunday and everything just got dragged out but I managed. Similar the my previous weeks I did 2 styles (kept the styles for 3 days each) and then washed my hair at the end of the week.

The styles I did were “flat twists” (I’ve mentioned before  – flat twists and I are still trying to build a relationship) but I figured I would get to practice some more…

What Did I do?

  • To start the week I had washed, Deep Conditioned, moisturized and sealed before twisting my hair into 5  chunky twists.
  • Day 1 – After taking down the twists I massaged my Castor Oil Mix on my scalp, hairline, ends and put my hair in my first hairstyle: 3 really loose flat twists (one on either side of my head and one in the middle). I accessorized with different ribbons over the 3 days…to distract people from my not to neat flat twists.
First style - 3 loose flat twists and accessories (this was the last day before I changed the style).

First style – 3 loose flat twists and accessories (this was the last day before I changed the style).

Second style - One big flat twist (on the right) pinned down and a two strand twist pinned back.

Second style – One big flat twist (on the right) pinned down and a two strand twist pinned back.

  • Day 6 – I took down the flat twist at night, massaged my scalp, hairline and ends with the Castor Oil mix and pineappled my hair to sleep.
  • Day 7 – Wash day routine and then got my hair ready to be set for week 4.

Castor Oil Challenge:

 I used the oil 4 times and think I might stick with just applying it 4 times. I do not think my hair will be happy with me if it is coated even though I have diluted the Castor Oil…I know my limits :D.  I have my recipe and a video of the mixing process here.

Again my hair felt great throughout the week: moisturized, soft, smooth, less tangles and shine galore! While I am not really looking to “grow out” my hair, I will admit that I am interested to see how much length I retained/gained at the end of the challenge.

Week 4 here I come!

Maicurls

Maicurls

Protective Style & Castor Oil Week 2 Update

Good evening Maicurlies!

Protective style challenge week 2

Protective style challenge week 2

It has been two weeks since I started my Protective Style & Castor Oil challenge and let me tell you, I am LOVING it!

Protective style update:

In all honesty I have always been a fan of wearing my hair out….”FREE” because it is so much easier for me to do a simple twist-out or braid-out, but I am appreciating this challenge. Is it a little difficult for me to come up with styles to wear? Yes. I have said this before and will continue to say this: I am NOT a styling guru and I am not “creative” in terms of unique styles however, I do what I know/can.

How did my second week go?

Similar to week 1, I enjoyed the fact that I didn’t have to “mess” with my hair too much, especially in the morning before work. I would lightly touch up my edges and be on my way. As always I slept with my scarf around my head at night and that sort of helped with the fly-aways. My hair felt really moisturized, soft and looked shiny (LOVE). I only moisturized and sealed my hair once during the week and felt that a light moisturizer (my DIY Spray Leave-In) was sufficient. I also noticed that I had less tangles than I normally would by the end of the week (winning!) I did two styles for the my Twist and Tuck Donut Bun (days 1 – 3) and my new Pinned up “Flat twist” AKA Seahorse (I shall explain below).

What Did I do?

  • To start the week I had washed, Deep Conditioned, moisturized and sealed before twisting my hair into 5  chunky twists.
  • Day 1 – After taking down the twists I massaged my Castor Oil Mix on my scalp, hairline and used a dab on my ends. I put my hair in my first hairstyle: Twist and Tuck Donut Bun.
  • Day 3 – I reapplied my Castor Oil mix to my scalp, hairline, ends and decided to accessorize the Bun with my DIY floral hairband.
Twist and tuck donut bun

Twist and Tuck Donut Bun (added accessory)

  • Day 4 – I moisturized my hair with my DIY Spray Leave-In Conditioner and sealed  with Almond Oil. I then put my hair into my second hair style the (Pinned up “Flat twist”) that I kept for the remainder of the week. I don’t know if people would call it a flat twist because to me it looked like a seahorse before pinning. Side note*: Flat twists and I do not get along at all! I suck at them but I did try and so far this is the best I have ever done!
Pinned up flat twist

Pinned up flat twist

This is the seahorse “flat twist” before I used one bobby pin to tuck away the ends

Flat twist aka Seahorse

“Flat Twist” aka Seahorse

  • Day 6 – I took down the flat twist, massaged my scalp, hairline and ends with the Castor Oil mix and redid the flat twist again.
  • Day 7 – Wash day routine and then got my hair ready to be set for week 3 (this week).

Castor Oil Challenge:

 I used the oil 3 times last week and actually want to increase it to 4 times. Eventually I might  even increase it (but we shall see I don’t want to push it). I was always worried that my hair would be greasy and my scalp/pores clogged up but the mixed blend of Castor with Rose Infused Grapeseed Oil seems to be working out great. I have my recipe and a video of the mixing process here.

My hair did not feel dry at any point during the week. I did re-moisturize my hair mid week just because that has been my habit but I only used my light leave-in so there was no worry of product build up, plus moisturizing is always a good idea. My roots felt so super soft, the ends were smooth and I think the Castor oil blend helped to avoid extra tangles. My individual strands basically glided across each other instead of wrapping, trapping and clinging onto one another. Overall I am loving this challenge!

Here’s to week 3!

What do you think of my Protective challenge styles? Do you like my Castor oil blend? I would love to hear how you use castor oil.

Thanks

Maicurls

Maicurls

Autumn is upon us!

Hi Maicurlies!

With September comes the start of Autumn/Fall (depending on your location 22nd September or 23rd September). The reason slowly starts to change and cardigans can come in handy. So this “collection” is all about cardigans paired with simple or chic tops, jeans or shorts (if the temperature/weather permits) and of course SHOES!

Hope you like them!


Autumn is upon us!

Thanks
Maicurls

Maicurls