Category Archives: protective updo

Valentine’s Day Date – Protective Hair Style

Hello Maicurlies,

So in the spirit of Valentine’s Day I decided to so a styling video for a “Date Look”. (I think I might potentially do a second styling option – depending on if I will have time to record and edit in time before V-day). 

dsc07090

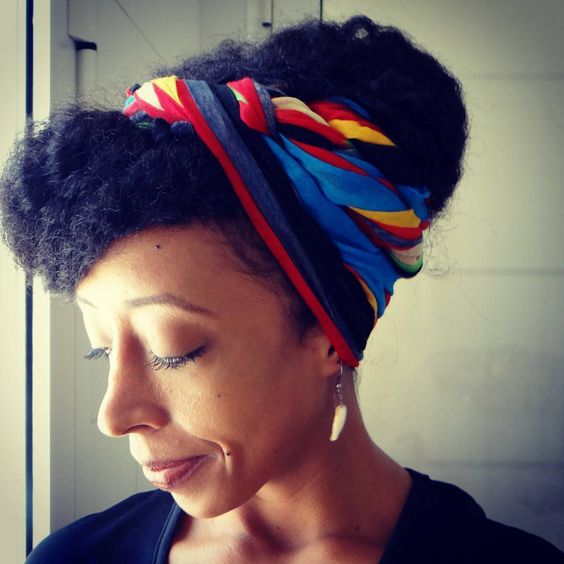
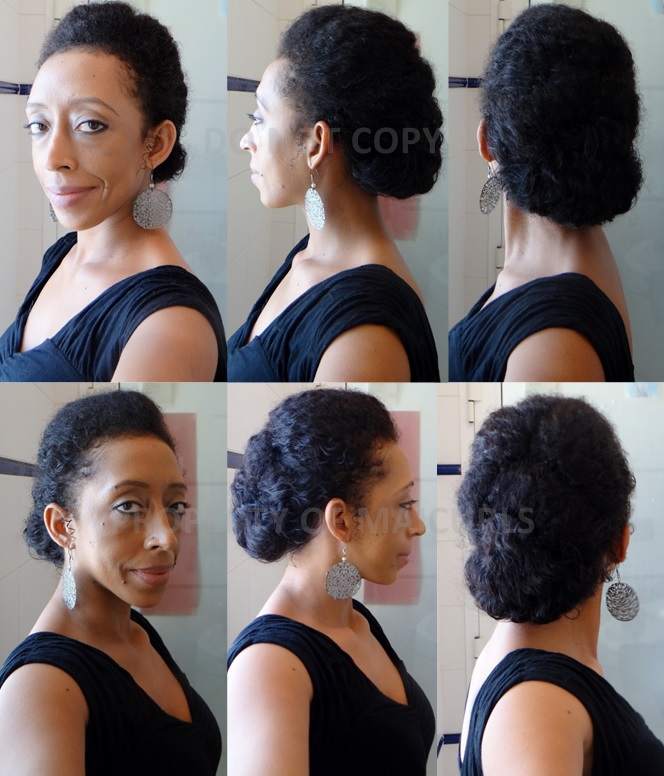
I am keeping it simple (as always) and quick. The style looks quite “chic” a little edgy and works as a protective style as well so overall I like it! I also kept my product use simple too (once again as always). 

img_3011

So without further-ado let’s go!

Products/Tools Used:

  • Wide Tooth Comb
  • Soft Bristle Brush
  • Bobby Pins
  • Hair Bubbles
  • Hair Elastics
  • Dye Brush (pointy part to section my hair)
  • DIY Spray Leave-In Conditioner
  • Argan Oil
  • Cantu Moisturizing Twist & Lock Gel

It is easier to watch a demonstration rather than read how I did the style:

Tip: for those with shorter hair, you can use braiding hair to do this style by adding it to the middle and bottom section, and twisting your hair together with it. I would recommend either doing a loose flat twist with the pompadour section go backwards or just making three sections,  add braiding hair to all three and then make  two – two strand twists within each sections. (You will need to watch the video so that this is clearer).  

dsc07069

Tip: In case you don’t want to redo the style in the morning my suggestion is to take down the bobby pins (it is never a comfortable night with them in and not necessarily a good idea). Use a scarf to cover your hair, paying attention to your edges and side; for a smooth look in the morning and then just re-pin the twists down. You might need to “touch up” your edges with a soft bristle brush but other than that, it should be fine! 

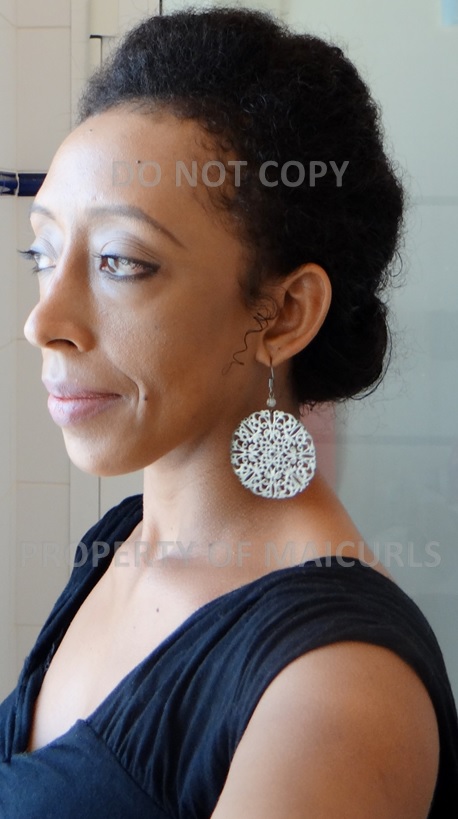
So here is my “final look”. Like I said, if I can I will do another styling option too and hopefully have it up before the 14th! 

dsc07092

Whether you have a Valentine or not, are celebrating or not, I hope you manage to have a lovely day Maicurlies! 

Thanks

Maicurls

Maicurls

How To: Turning an old Twist-out to Braid & Curl Low Manipulation Style

Hello Maicurlies,

Today I wanted to share one of the methods I use to remoisturize old hair & how I style my hair in a low manipulation style (when I went camping for 2 nights). 

wrap up braid-out

So I was off to a beach camping trip for 2 nights and my hair was a MESS! I had it in a twist out that turned into a messy bun. The curls were tangled, dry and just not in a good way! Since I was camping I knew I didn’t want to do anything “drastic” especially since I would be washing my hair once I got back. I also knew I wanted my hair tucked away since sand and my hair just don’t play nice at all so I figured I would remoisturize, bring back some texture but still keep my hair tucked away.

My remoisturizing method was simple, the L.O.C method (Leave-in/liquid, Oil, Cream/Whipped butter) I also used permrods and that was it. I did not use a comb to get through my hair since I wanted low manipulation and to protect my hair during the trip I used a scarf to keep my hair up and away from my shoulders and presto. 

Products/Tools Used:

Method:

I parted my hair into sections (roughly 15 – 18 in total), spritzed my hair with my DIY Spray Leave-In Conditioner followed by my oil. I then gently, carefully and slowly detangled my hair and get rid of shed hair. I braided my hair but left my ends unbraided. I added a little extra spray leave-in on the ends, smoothed on some whipped butter before wrapping them around the perm rods and then rolling up to my roots.

Once I was done I covered my hair at night (I kept it uncovered right until I went to bed). The following morning I took down the perm rods and using a little oil on my fingertips I undid the braids. Now if you want to have definition then take the braids down carefully to keep the integrity of the curl pattern (since I just wanted a little texture, a little volume and was going to cover my hair it didn’t really matter for me). After I took down the braids I separated my hair a tiny bit and covered my hair with the scarf, leaving a swooped bang at the front (the ends tucked away) and pinned the rest of my hair upwards. Presto: happy moisturized and protected hair ready for camping! 

I have a video of the whole process:

P.s. In case you were wondering, here is a peak at the spot where we camped. 

What is your go to method to remoisturize “old hair” mid-week/before washing your hair?

Thanks

Maicurls

Maicurls

2 Head Wrap Styles for Winter (Protective Styles)

Hey Lovely Maicurlies, 

So this post comes a little late (I am currently sitting in a hotel in Dubai waiting to check out). I wanted to yet again share some head wrap styles! I had posted a few photos on Instagram (yes I am addicted) and was kindly requested to do a demonstration of one of the styles so I figured I would do 2 styles in one video.

2 head wrap styles for winter

2 head wrap styles for winter

In the first example of my video I start of with a messy bun that is covered with a satin scarf first (since the outer scarf I use is neither Satin nor Silk) and then I used the outer scarf.

For the second style I start off with 2 really rough flat twists that I pin down and again use my satin scarf first followed by the outer scarf. 

It is easier to explain in video which I of course have:

I would love to hear if you use scarfs during winter to help protect your hair? 

Thanks

Maicurls

Maicurls

2 Quick Styles on an old Wash – N – Go

Hey Maicurlies,

So as always I am here with a super simple styling tutorial (yes in true form). I always mention that I like to keep it simple and these two styles are exactly that!

Asymmetrical and Heart Shaped Updo

Asymmetrical and Heart Shaped Updo

I like to do pin-up updos whenever I can’t be bothered with my hair, when I want to give my hair a break or when my hair is “old” and in need of a wash/co-wash but I have yet to get around to it (as in this case).

I don’t like adding too much to my hair if I am going to wash it the next day and I also don’t want to spend too much time trying to restyle when I will wash it the next day. So instead, I pin my hair up and away. These two styles can be done in 5 minutes or less, allowing me to quickly get ready for work/head out without any hassle.

I love doing the “Asymmetrical Updo” when I am running late for work.

This “Heart Shaped Updo” is another quick and pretty style.

They are both really simple but in a chic way so you still look “put together” without any effort! 

All I use is:

I have a video of how I do the styles

I hope you enjoy the video and let me know what you think! 

Thanks

Maicurls

Maicurls

Lazy Girl Gibson Tuck (protective style)

Hey Maicurlies,

I (yet again) wanted to share a simple protective style that I seem to turn to whenever I am really not in the mood to fuss around with my hair or if my hair should be washed and I am slacking for the day (don’t judge me it happens!) 😀 

There are a number of  different ways in which I like to do the Gibson Tuck and today I wanted to share this method. 

It really is as simple and easy as it looks. 2 two strand twists on either side, 1 forward “flat twist” at the front (don’t judge my “forward flat twist” I know it is ugly LOL) and then you tuck away the rest of the hair by rolling and tucking it away under the headband. Pin back the twists and presto you are done! 

I use a headband for two reasons. 1. it acts as an accessory and 2. I use it to help tuck away the hair that isn’t twisted. 

Like I said there are several different ways in which you can do the Gibson tuck so on the day when I recorded the video 

I also took a few pictures of another versions of the style and changed up the headband (I really need to make a new headband to spruce things up). 

What do you think, Gibson tucks yay or nay? Do you have favorite Gibson tuck styles? If so let me know, I would love to hear from you! 

Thanks

Maicurls

Maicurls

2 Simple Valentines Day Styles

Hey Maicurlies,

So before I even begin to go through the process, me a minute to explain why I opted to (yet again) show you two simple styles. Ignoring the fact that doing an easy style just is my thing, sometimes overdoing our hair can just be annoying, nerve wrecking (especially if this is going to be a first date) and not to mention it can potential cause damage and/or breakage.

Ok, now that I have come up with my “explanation” (excuse) let me share the two really super easy style options 🙂 

2 Valentines Day Styles

                                                                             2 Valentines Day Styles

In all honesty it is one style – two different looks. The first starts with one chunky side twist (pictures 1 below) & is accessorized with a ribbon. The second look is also a chunky twist but I pin the end of the twist by bringing it forwards and over and use a bobby pin to hold the hair down – I pin the hair underneath (by my ear – pictures 2 below). 

What I use is: a hair bubble, bobby pins and ribbons  (you can use a head band). 

I have a video of the process and the “looks” can be done in no more than 5 minutes! They are simple yet pretty (in my opinion lol) and you don’t have to worry about curls setting, damp frizzy results etc. on Valentines day. 

If you happen to be “celebrating” Valentines Day, I hope you and your significant other have a lovely day/night 🙂 

Happy Valentines Day Maicurlies (in advance) 

Maicurls

Maicurls

My French Bourjois Updo

Hey Maicurlies,

I finally have a styling tutorial!

French Bourjois Updo

                                                         French Bourjois Updo

This is what I like to refer to as my French Bourjois Updo. Now, I have shown you something similar before during my protective challenge in Week 6 (without a tutorial) but this looks a little difference. Even though the method of how I did the style is the same, the main difference is that my hair was taken down from twists during my Protective Style Challenge and in this demo I was working with week old hair that NEEDED a wash!

french bourjoisI will point out that I was on a “carefree” I don’t mind the frizz attitude. I had run out of henna and needed to go to the market to get some before washing my hair, so I didn’t want to add too much to my hair or do too much either.

You can make the style more polished and slick with the use of some gel. I would suggest using a light spray gel so that it is not uber sleek (check my DIY Spray Flaxseed Gel). But like I said I decided I wanted to rock it as is, so I went out frizz and all :). 

Products/Tools:

  • Hair clips (to separate hair)
  • Water – spray bottle
  • Bobby pins (I used 8 in total)
  • Gel (optional – I didn’t use any)

Instructions: much easier explained/understood in video!

Would love some feedback Maicurlies 🙂

Thanks

Maicurls

Maicurls