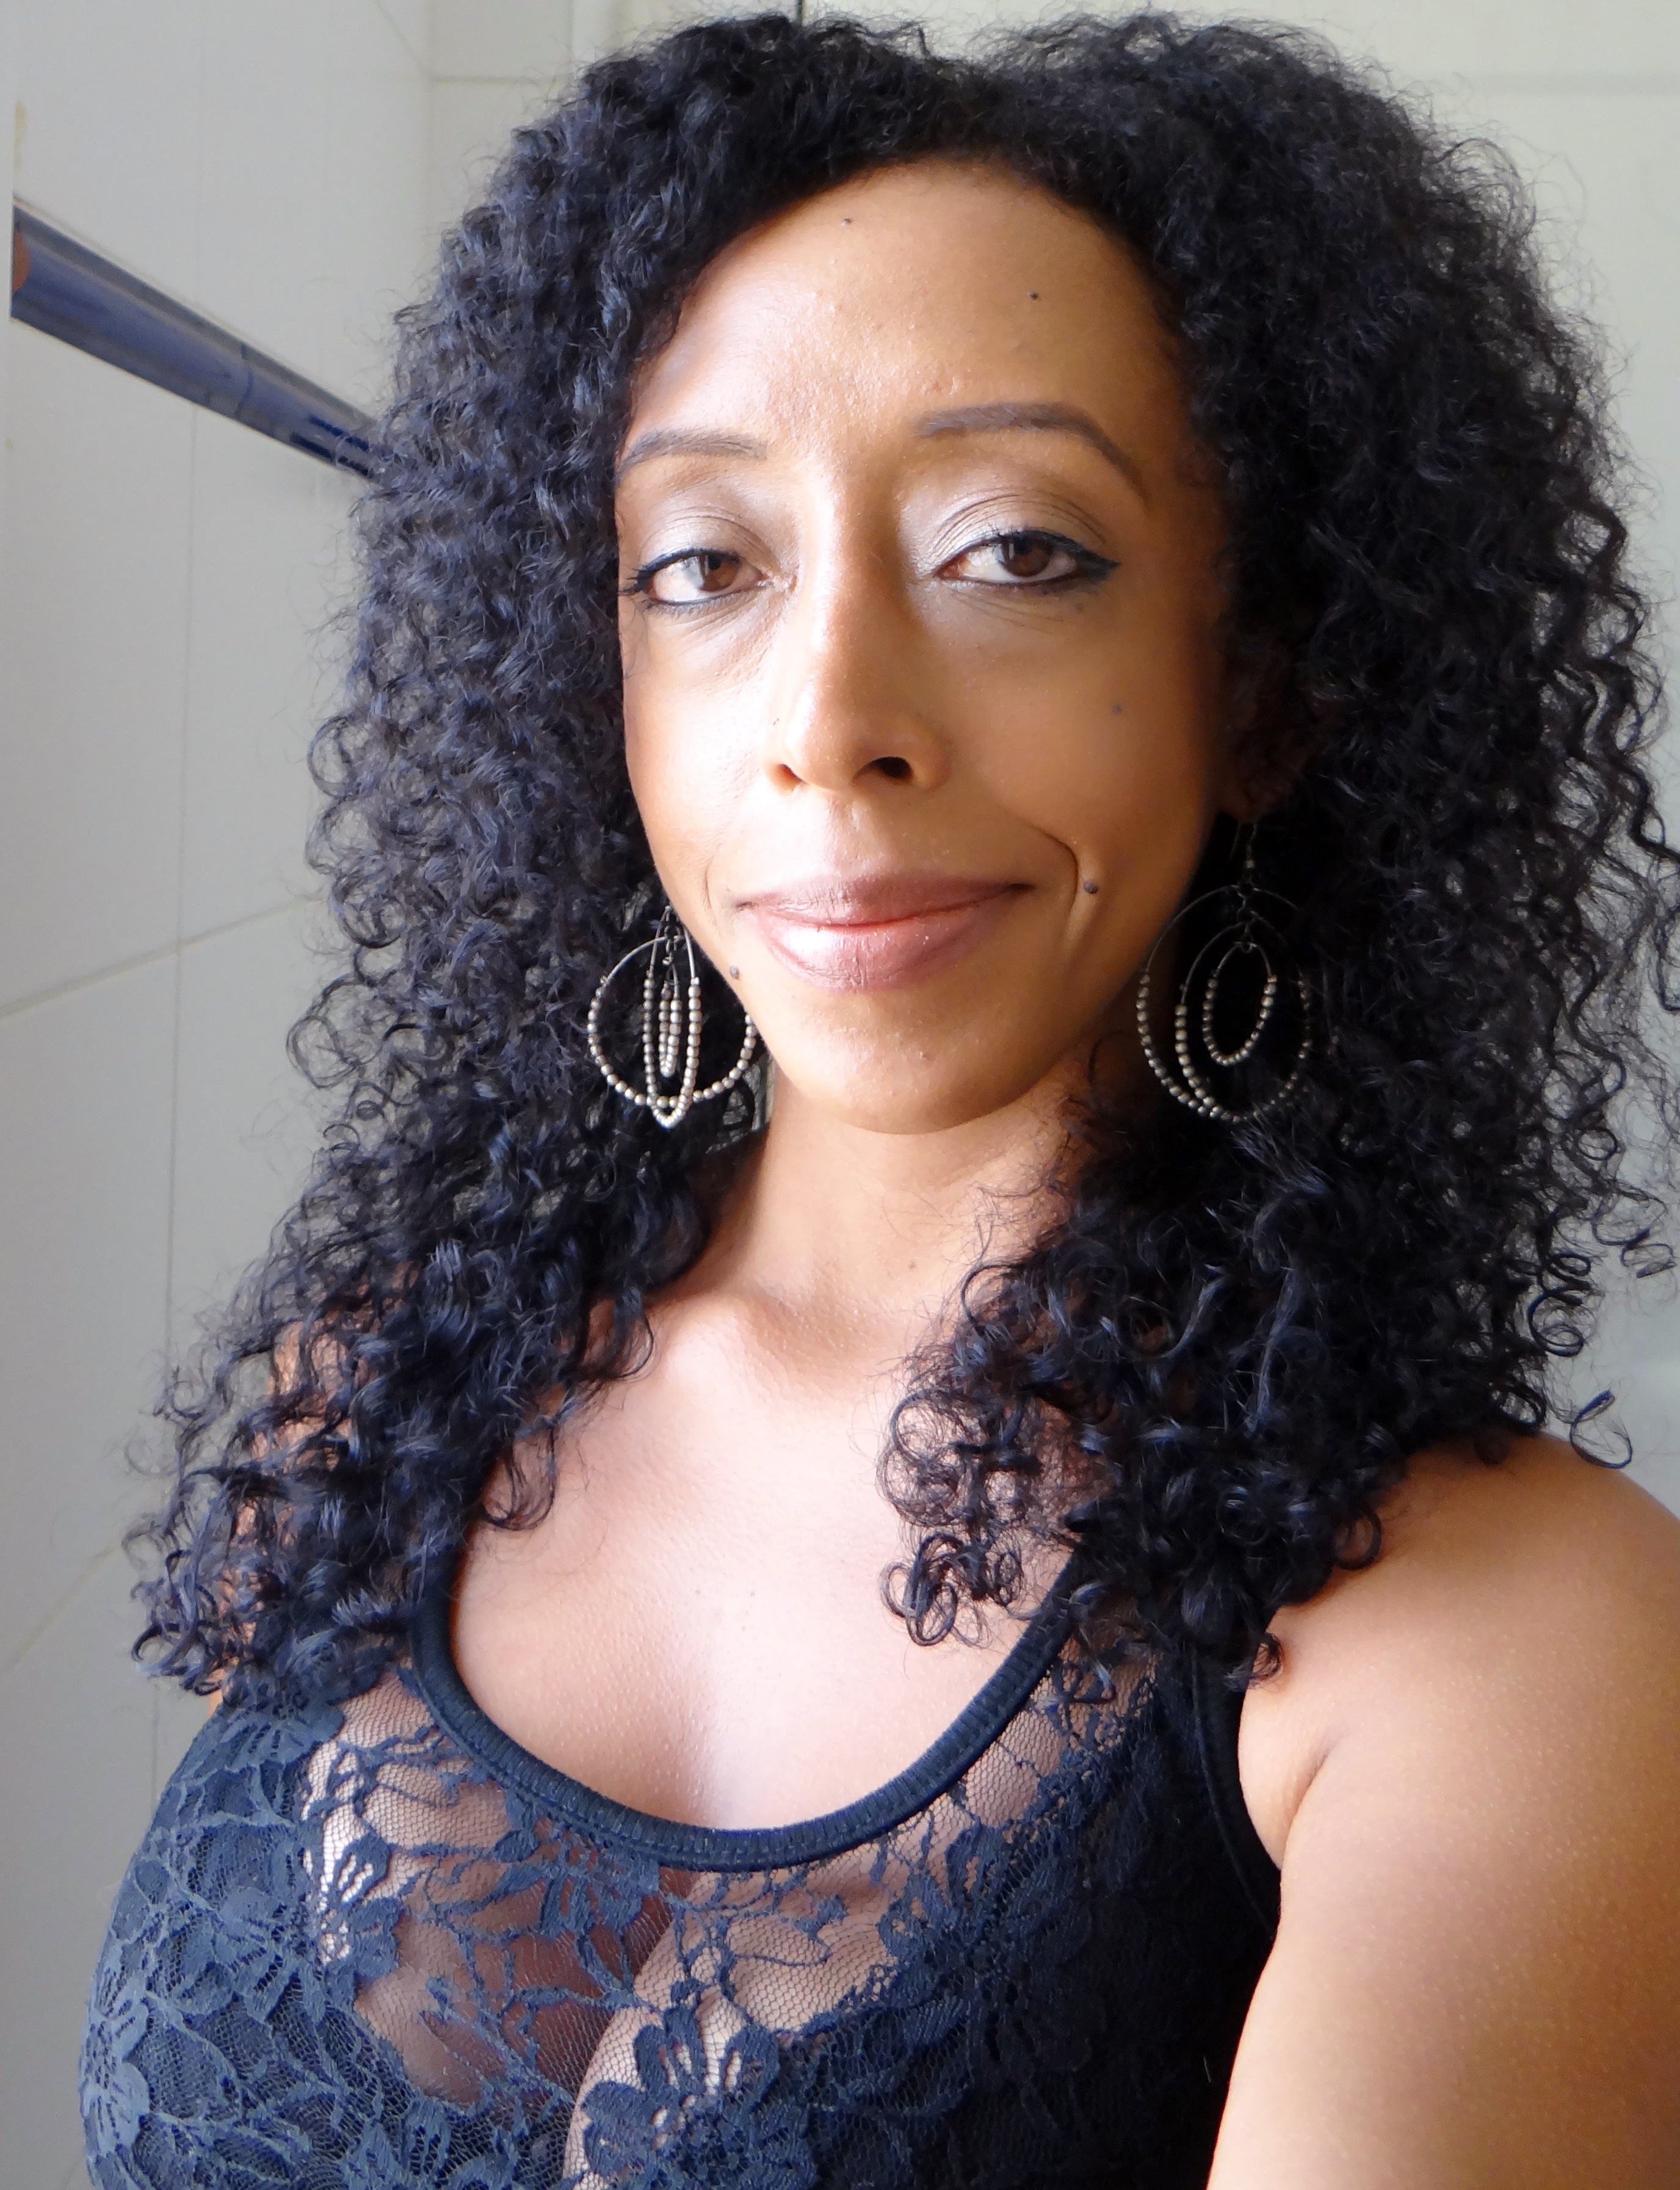
So I managed to record and edit another “Valentine’s Day Look”. I figured since I was redoing my hair I might as well record it and heck why not throw on a dress that makes for a good “Valentine’s Day Date Look”.
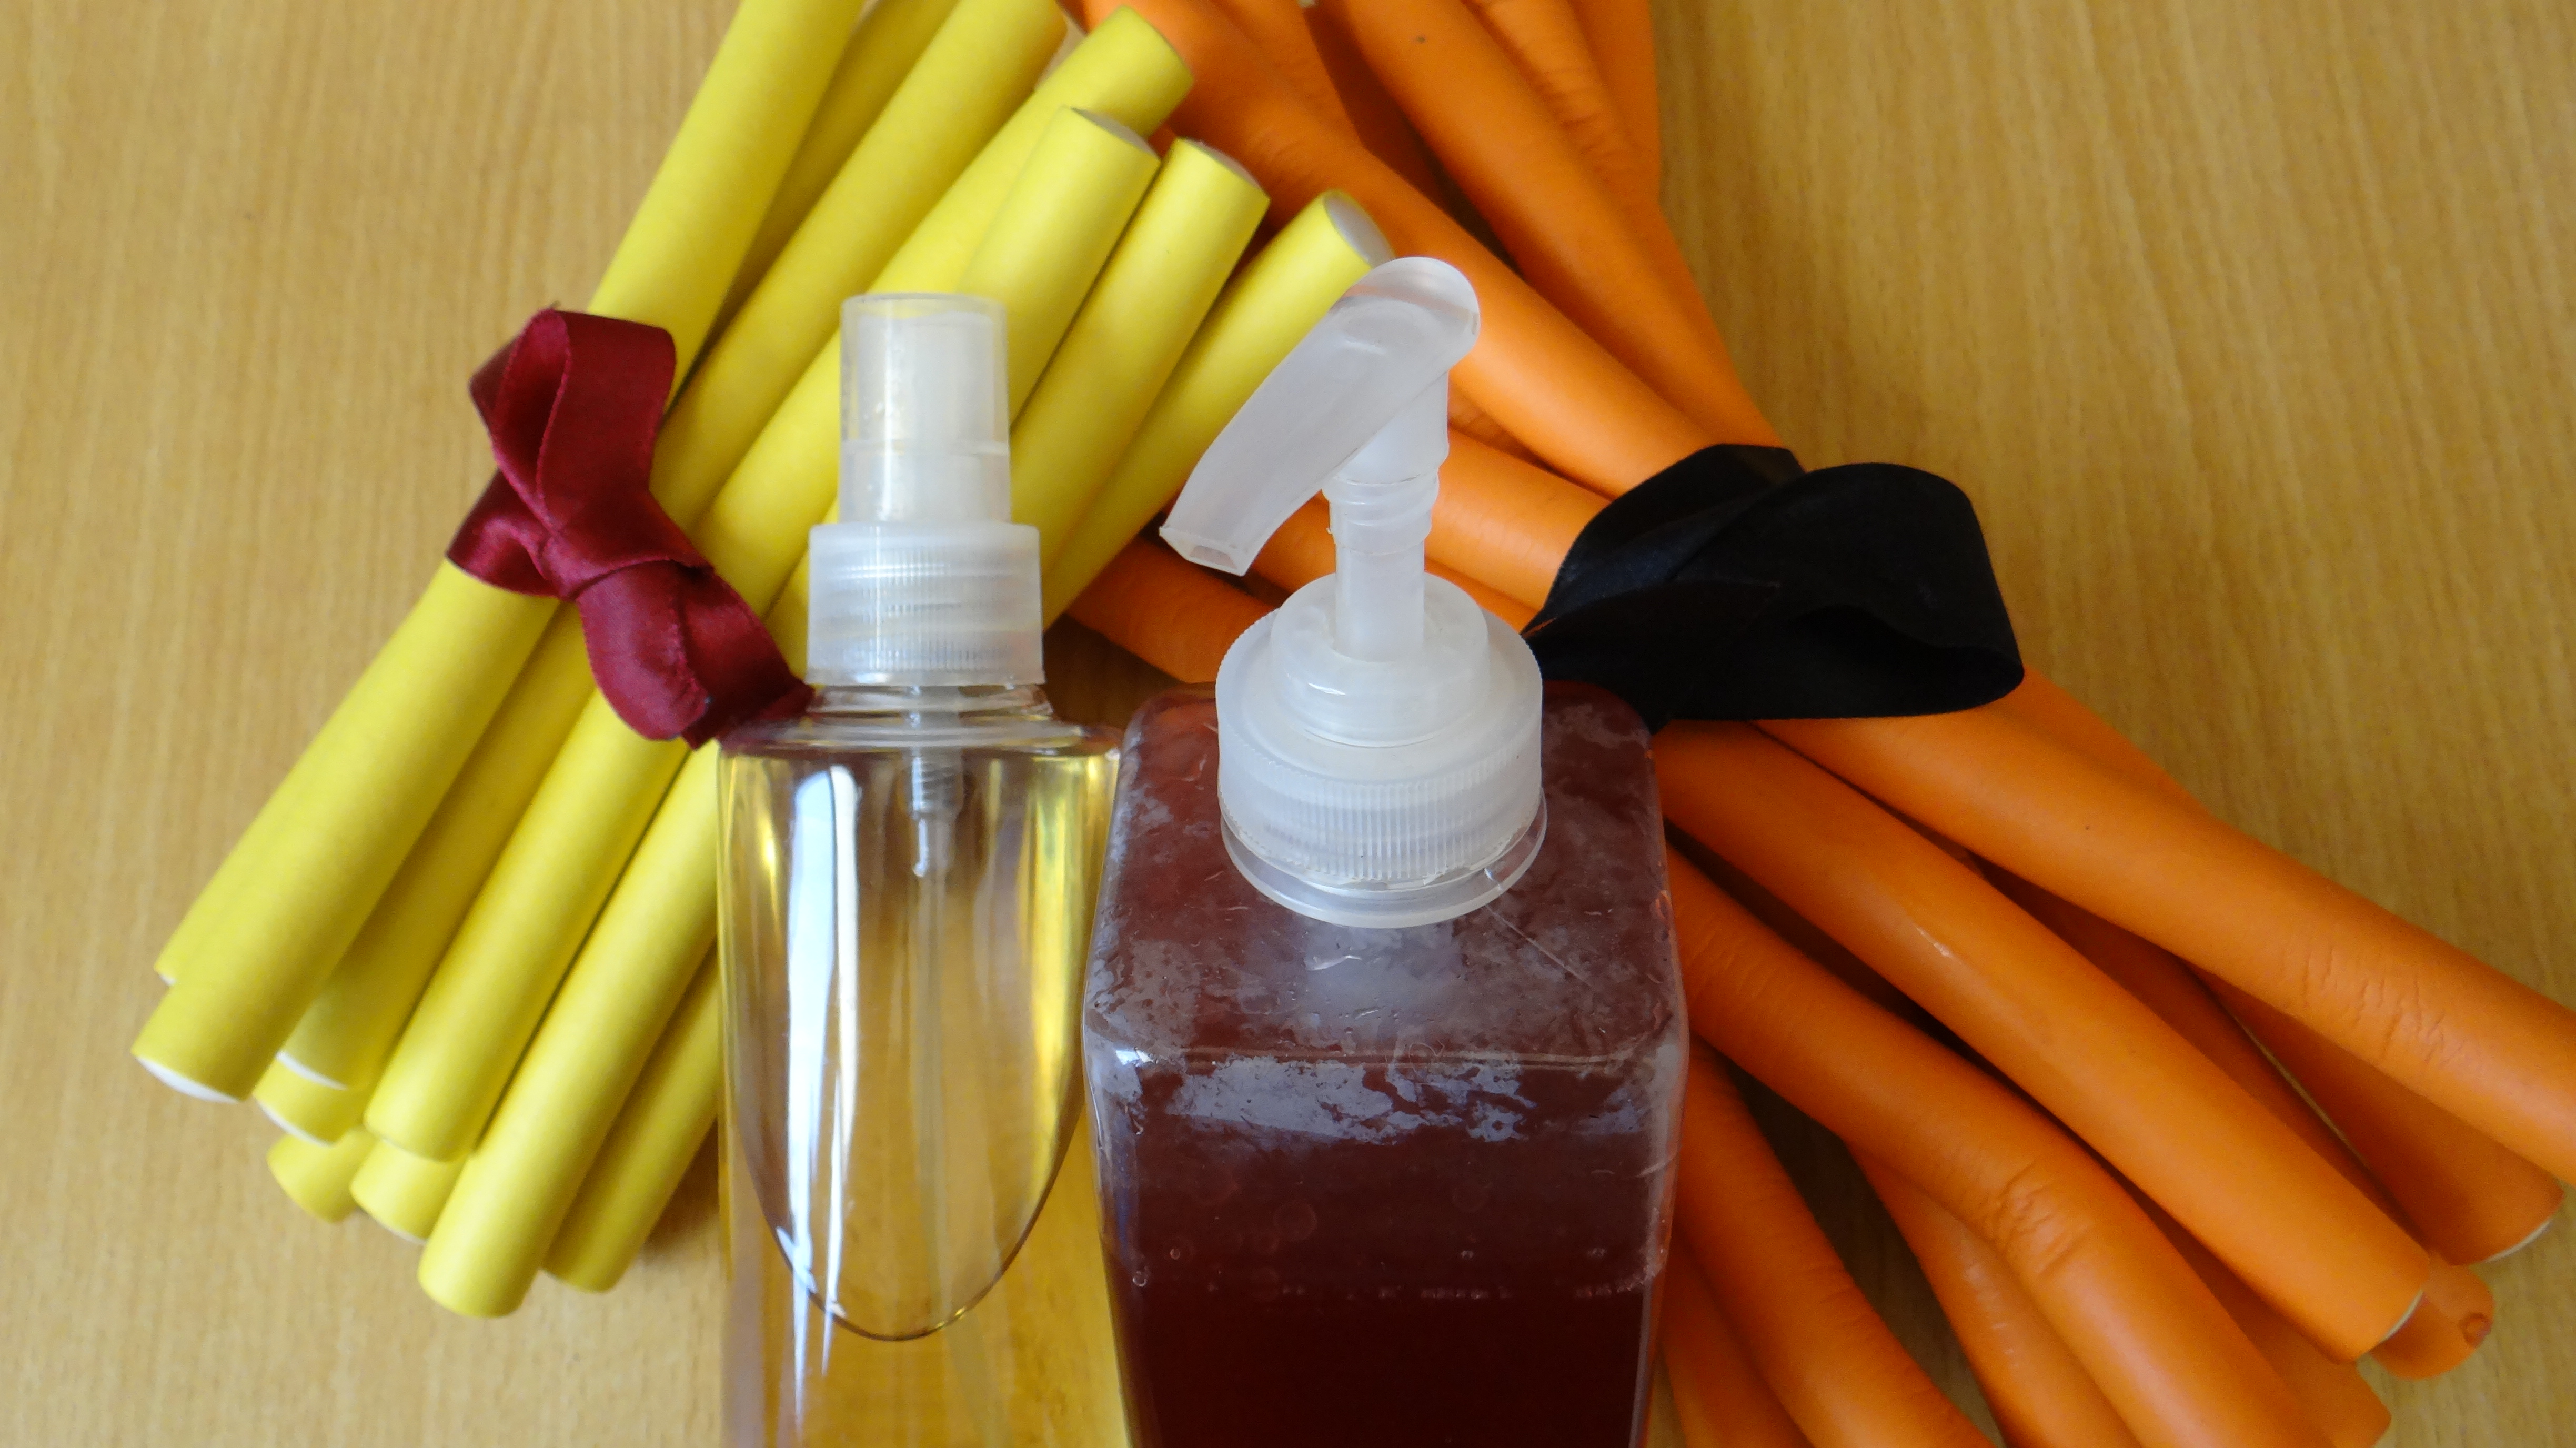
Ok so as the titles says it is a perm rod set and I used all DIY products and a Natural Oil. I ended up using 32 orange perm rods (originally I wanted to use less but forgot that was my initial plan) and let my hair air dry overnight before taking down the rods (with a little oil on my fingertips), separating and then fluffing my curls.
I always feel that having “faux bangs” really isn’t quite “for my face” but then I have a rather noticeable forehead so I want to rock a faux bang to cover it up so I opt for a to the side fringe thing…..anyways you get the point. In the video I tried both but ended up feeling “most like me” with it to the side, so that is what I stuck with for the final look.
Products/Tools Used:
32 Orange Perm Rods
DIY Spray Leave-In Conditioner
DIY Hibiscus Flaxseed Gel
Argan Oil
Wide tooth comb
Afro Pick
Method:
I had sectioned my hair into little mini sections after cowashing my hair. From each section made (a total of 6) I would apply the products in this order:
Spray Leave-In Conditioner
Hibiscus Flaxseed Gel
Argan Oil
After applying the products I detangle with my wide tooth comb (my hair was already detangled before) and then make smaller sections to roll. I start from the ends and work my way up, first rolling the ends of my hair onto itself and then in a slanted angle wind my hair around the rods. After letting my hair air dry overnight I use a little oil to help separate my hairs and reduce frizz while doing so, separate and fluff.
Happy Valentine’s Day to all the lovers out there and as for us single girls/guys Happy Valentine’s Day to us too!
Yes she is finally back with an actual tutorial & video! I know I have been terrible and a little Missing In Action on both my Blog and YouTube (if you don’t already follow me on Instagramplease do because I tend to post a lot on there) but I have been away, getting back into “regular routine” and working on a few projects so I do apologize.
Today’s post is based on a request; I was asked to share my morning and night routine so share I shall. Now before I get into the post and demonstrate (in the video below) I will point out that my night routine tends to be the same pretty much all the time apart from if I re-braid/re-twist/re-bantu knot my hair. So, for the most part if my hair is down then this is what I do every night and yes the same applies for my mornings too.
I take my hair down from my modified Pineapple (explained below) and first try and arrange, separate and gently manipulate my hair to arrange it. I then move onto my beloved scalp massage (read about it here). Then depending on how dry my hair is feeling I either use water, Spray Leave-In Conditioner or my Creamy Leave-In Conditioner to re-moisturize my hair. Again depending on my hair I will follow up with any carrier oil within reach to seal in the moisture. The final step is to use my Afro Pick to lift my roots and I am done!
Night Routine Products/Tools:
Satin/Silk Scarf
Method:
Instead of doing the traditional pineapple (a very loose and high ponytail using a hair bubble) I do the modified version where I skip the hair bubble. I lean forward to get my hair gathered together and cover with my scarf. I feel whenever I use a hair bubble it over stretches my hair (I do not need help on that front, the less the stretch the better for me). That is my night routine!
What is your Day and Night routine would love for you to share!
Quickly jumping on here to share my latest obsession…yes I know I have many “current favorites”….favorite of the moment? Anyways, yes I am here with a styling post.
Braid and Curl
Yes, it is a braid and curl, I LOOOOVE this style Maicurlies! 1. it is simple to do, 2. it is quick to do, 3. it tends to get better (aka bigger and fluffier) as the days go on and 4. look at my volume (even on my fine hair)!
So I will quickly explain the products used, the process I used and then will let the Video demonstration from my YouTube channel do the rest.
I actually (oddly) prefer the results of doing this on wet hair (normally I prefer dry styling) but when I start on wet hair and incorporate the combination of products mentioned above I nearly always (95% of the time) get results I am super pleased with. I start on wet hair that was either co-washed or deep conditioned. While in the shower i detangle, split my hair into 3 and twist each section (left, right and center). My application process is: Leave-In, Oil, Gel. I make a total of 8 braids; 3 left, 3 right and 2 in the center and do not braid all the way down, just a little more than half way before wrapping my hair around the 8 perm rods.
I let my hair air dry overnight by pinning the braids down with bobby pins and covering with a silk scarf. The following morning I take down the braids with a little oil on my fingertips (any will do), separate sections and fluff the heck out of my hair with an Afro pick. That is it!
So today I wanted to share my current obsession (actually I have yet another new one already) Pin Curls!
Let me tell you, I LOVE pin curls!!!!
What do I love about Pin Curls?
EVERYTHING! Since I have fine natural hair I tend to look for styles to helps to give me volume and the illusion of more density and pin curls give me that….they give me life! Generally I normally like to style on dry hair or slightly damp hair because I get more volume if my hair is not really wet but with pin curls regardless of whether I start on freshly washed hair or dry hair I adore the results! In my demo I did medium sized pin curls on freshly washed hair which gave me medium curls with bounce but they can be made smaller for tighter results or bigger for looser curls.
My styling process (especially when I start on wet hair) is to
Set the Pin Curls
Allow them to air dry
Cover with a silk/satin scarf overnight
Take down the bobby pins, separate the curls and style my hair (the following day)
Pin curled hair
Curls taken down, fluffed and styled
However, there are times when I have to go out after setting my hair (example on the day when I recorded my video) so on those days I do my faux huge headwrap.
No one knows my hair is curled up, pinned down and not in a big bun underneath and I don’t have to go out looking a little peculiar 😉 Then the following day I take down my hair and voila!
Here is my video of the process:
I would love to hear what you think! Do you do pin curls, would you try them?
Today I have a review that I would like to share with you!
Now yes I know, I know, this review is going to be based on something that isn’t “correct”……I can live with the fact that I bought something fake (sorry)! So yes, this is all about my knock-off curl formers. You have no idea how much I wanted to buy these for the longest time and I finally was able to get my hands on some (yes not the real deal but still).
Disclaimer: So before I get into this review 1. I bought the knock-offs with my own money and I was not requested to do this review, I just wanted to share my experience and thoughts of them. 2. If you feel strongly (against) buying none originals then please skip this post…because you won’t like it (but then come back and read something else). 😉
Why did I opt for the knock-offs instead of the originals?
To break it down I have several reasons but the main two are: The originals are more than double the price of what I paid, I would have gotten less of the originals, and since I was not sure how much I would like/dislike them I decided it made more sense to pay less (in case I didn’t like them).
Where can you buy the knock-offs?
I know that in the past the Vakind knock-off curl formers were available on Amazon however, I think they must have been blocked and blacklisted (I tried my darnedest to find them without success) so I ended up having to purchase from Ebay. There are different sellers on Ebay offering different sized knock-off curl formers and different widths too. I bought mine hereand this is theseller details.
Details on the knock-offs I bought:
The seller offers (as off 13.03.2016)
10 curlers with 1 hook GBP 4.51 ($6.49)
20 curlers with 1 hook GBP 7.91 ($11.39)
30 curlers with 1 hook GBP 10.81 ($15.56)
The curlers are manufactures and sent from China. When I bought mine I ordered 60 curlers (3 x 20 curlers). First I made an order of just 40 but then decided to add another 20 and paid $33.57 in total. I actually got 1 hook for each 10 curlers so I ended up with a total of 6 hooks even though I paid for 20 curlers and 1 hook…go figure (I am not complaining). My curlers are 45 cm long when stretched and 2.5 cm wide. As I mentioned there are different types of curlers available on Ebay and this seller actually also offers longer curlers on a different page (I didn’t notice this at the time but would have gone for those if I had).
Each packet of curlers came in 10’s – 5 orange and 5 pink along with the hook (there is no colour option). The two colours lay your curls in opposite directions so the curls lay and frame your face nicely.
**
Now I want to mention a few Pro’s and Con’s about the knock-offs along with some of the experiences I had while ordering them to keep you informed and provide as much information as I can.
Con’s:
Packaging – The curlers cam in sandwich bags, there was no pretty packaging so don’t expect to get something sturdy and “pretty” to hold your curlers. If you have a unused container/bag you might want to transder the curlers to that so you have them all together (that is what I did for the most of them).
Instructions – There was no instructions on how to use the curlers. You can find a little guide on the sellers page when you order them but you don’t get instructions with the package. (If you are unsure about how to use them, I suggest watching a ton of YouTube videos beforehand so you know what you are doing and you don’t damage your hair).
Hook – It is very simple to put the hook together but it can be a little tricky (requires a little strength) to pull them apart. I am unsure if it is the same with the origianl curl formers but you do have to pull the hook parts with a little strength to get them separate.
Communication – Communicating with the seller was really quite tedious! English is not his first language and since I don’t speak Chinese it became a little difficult when I contacted him to ask some questions. You will require a little patience (a bit of patience) since Emails can perhaps go back and forth without getting the answers you are looking for at first. In the end it worked out but just remember to be patient. (This can apply for other sellers on Ebay since they too might not speak the same language you do).
Lost Order – I had to have my package resent to me because when I initially made my order, I never recieved the package. I Emailed the seller to inform him and he immedietly resent the package the following day after the email, so the issue was resolved but I feel like I need to mention this point.
Curler ends – Some of the edges of the curlers seemed to be a little stuck together, probably from when they melted the plastic. However, once you put the hook through the curler they open up as normal.
Uncomfortable – This is something that I think applies to all curl formers, at least from the reviews I have seen on YouTube (both originals and knock-offs). Trying to sleep with these in your hair is a nightmare! The curlers are quite hard and uncomfortable so be prepared for a sleepless night if you choose to leave them in!
Installation – When I first tried the curlers it was not all that simple to get the hang of it, but once I got a few of them installed it become easier.
Pro’s
Price – I got to save A LOT of money by opting to go for the knock-off’s it was nearly half the price to get 60 of these compared to double the price of the originals for just 40.
Multiple Hooks – With the originals you get 2 hooks for 40 curlers with this option even if I went for 40 curlers I would have gotten 4 hooks (since I opted for 60 curlers I got 6 hooks) but the bottom line is you get more hooks which means if you break one, you will have extra and you can set up more curlers at a time which saves you time while installing!
More Curlers For Less – More bang for your buck! You get more hooks that you would (in terms of price of the originals)!
Free Shipping – I opted for free international shipping when I ordered which meant that I didn’t have to pay anything to get the package delivered however, going for this option meant having to wait 25 business days. You do have the option of getting the package sent quicker by paying roughly $35 (this was what it would have cost to get it sent from China over here so depending on where you live the price will change) and with that option I was told I would receive the package within 5 – 7 business days but I opted to wait.
Size Options – Talking about buying knock-offs from Ebay, you get a number of length and width options when it comes to the curl formers you can buy so even if you do not opt for this seller, check out other pages on Ebay, I am sure you will find the right knock-offs you are looking for!
Tip:When you order yours keep in mind that you might want to let your hair grow and if you plan on continuing to use them as your hair grows, try go for curlers that are longer than your hair. This way you won’t “out grow” the curlers (this is something I forgot!). However, if you do have curlers that are too short for your hair you can two strand twist your roots and then install the curlers a little lower down (below your roots) to make up for any missing length.
Sometimes if I didn’t get all my hair within the latch of the hook my hair would refuse to want to be pulled through, if that happens STOP, push your hair back and retry! If you continue to try and pull your hair through you will yank your hair out!
I didn’t do a “how to” video on the curl formers since I feel there are thousands of videos out on YouTube already however if you would like to see a tutorial please let me know. I have a video review of the curlers along with a very quick (few second) demo of how I took down my curlers which was initially made for my Instagram page at the end of the review.
Please let me know what you think of this review. If you own curl formers, knock-offs or decide to purchase some from this seller or someone else on Ebay please let me know how it goes, I love hearing from you!
First off I want to wish you all a very Happy New Year! I hope that 2015 ended well and that 2016 will be a bright year full of love, good health, great company, prosperity and happiness for you and your family 🙂
I wanted to start my blog post this year with a styling tutorial. I actually (hopefully) will be a little more “adventurous” with my styling options in 2016. So to kick things off here is my Heatless Wave Curls.
This is my “quick fix” styling option that I love! There are a few things I like about this style: 1. it sets in four hours so no sleeping with rollers in my hair (I have found a method that is not too uncomfortable but still prefer not to). 2. it is a great last minute styling option if I haven’t planned anything but need my hair done for an night out and 3. it gives my fine and thin hair volume!
15 Jumbo Perm Rods (1- 1/4 inches) – details about these here
A little oil (to take down the rods).
Perm rods done
4 hours later!
4 hours later!
4 hours later!
Method:
After spritzing my hair with a tiny bit of water I added a little spray leave-in conditioner to help moisturize my hair (just to lightly moisten but not to make it soaking wet). I lightly detangle my hair to make sure there are no knots and then I spay a tiny bit of my Spray FSG to help give really light hold. My rolling method is to first try and make sure my hair is smooth, I then roll the perm rod up my hair (for one rotation) and then twirl my hair once, roll up again and twirl the perm rod towards the root before closing the perm rods. I literally let it set (without heat) for 4 hours and then take the rods down, separate and I am done!
It is a little easier to understand the “how to” in the video:
As I mentioned this is a “quick fix” styling option that I like to do whenever I haven’t had time the day before to plan for a hairstyle. The hold is really light and does not last for days and days therefore I will usually install the perm rods again after a day or two either during the day or at night (e.g. during the week when I have work and can’t sit in my office with perm rods on my head LOL).
I would love to hear what you think. Have you tried day time jumbo perm rod sets or any other perm rod sets done during the day? I would love to hear from you!
So as always I am here with a super simple styling tutorial (yes in true form). I always mention that I like to keep it simple and these two styles are exactly that!
Asymmetrical and Heart Shaped Updo
I like to do pin-up updos whenever I can’t be bothered with my hair, when I want to give my hair a break or when my hair is “old” and in need of a wash/co-wash but I have yet to get around to it (as in this case).
I don’t like adding too much to my hair if I am going to wash it the next day and I also don’t want to spend too much time trying to restyle when I will wash it the next day. So instead, I pin my hair up and away. These two styles can be done in 5 minutes or less, allowing me to quickly get ready for work/head out without any hassle.
I love doing the “Asymmetrical Updo” when I am running late for work.
Asymmetrical Updo
Asymmetrical Updo
Asymmetrical Updo
Asymmetrical Updo
This “Heart Shaped Updo” is another quick and pretty style.
Heart Shaped Updo
Heart Shaped Updo
Heart Shaped Updo
Heart Shaped Updo
They are both really simple but in a chic way so you still look “put together” without any effort!
So I have recently become a little obsessed with Flexi Rod sets and wanted to share a method that I like to refer to as the (cheat) Twisted Flexi Rod set. I say “cheat” because I basically wear my hair in twists first for a few days and then instead of just taking down my hair for a twist-out I twirl my hair around Flexi Rods overnight and then have a Twisted Flexi Rod set the following day.
In this particular example I had my hair in 23 twists for 5 days and remoisturized them two days before putting in the Flexi Rods. To remoisturize I took them down at night, applied my DIY Moisturizing and Curl Activating Sprayand retwisted. I felt no need to add moisture before using the Flexi Rods so I just went straight into setting my hair with a little gel. I literally rubbed someDIY Rosewater Flaxseed Gel (FSG) over my twisted hair (without undoing the twists) and then followed up with some oil. The FSG does two things: helps provide hold and has moisturizing properties of its own. The oil helps to seal in the moisture from the FSG and also adds shine.
I covered my hair with a scarf overnight and then took down the Flexi Rods, unraveled the twists, separated my hair and then lifted my roots a little with an Afro comb. Le fin!
Today I have an updated styling video today which is my “Finger Twirled Wash and Go”. The method I use basically helps to enhance the curl pattern of my hair. For whatever reason, it tends to allow me to get more days out of a Wash and Go which is always welcomed.
Finger Twirled Wash and Go
In the tutorial I started off with wet freshly co-washed hair that I already sectioned into twists to make it easier to get through my hair.
I first made sure my hair was damp, applied the Leave-In, followed by a few pumps from the FSG and then the oil to seal in everything. My hair was already detangled before I started so when I raked the products through my hair I didn’t have any issues with tangles. Once the products were raked in I twirled small sections of hair around my finger to enhance the curls and then let my hair air dry.
While Damp
After 3 hours my hair was dry. Even after my hair was dry it still looked mousey! I have fine natural hair so it always looks mousey when wet, when I use Gel, if I use too much product etc especially on the initial day of styling. I get rid of this unwanted look by massaging my scalp with my fingertips to lift my roots, head bang (a lot), scrunch and basically just try to make my hair have life!
Dried (Day 1)
The image below is on day 2. I get a little more “ompf” in my hair as the days go on (I also had frizz with the “ompf” but I am happy to get frizz if I also get fullness!)
Day 2
Here is a video of my method:
I would love to hear what you think!
P.S. I am going to go on a Henna Journey soon (I have probably mentioned this before LOL). I use to do a lot of henna treatments (a few years ago) and at the time my hair was soooo happy, thick, shiny etc and I have been meaning to do some kind of challenge. I will keep you updated!
Now I know what you are thinking, “wait a minute don’t you always say you are not a hair guru”… I am not. However, I am not talking about becoming a styling professional or hair “artist”. The article is more about how to become more comfortable with styling your own hair.
For some of us going back natural and having healthy hair also means having control of our hair in terms of styling it by ourselves. For many years hair stylists, hair dressers, mums, aunts, cousins, friends etc. might have been our go to person in terms of getting our hair done. So it can be a little intimidating to finally start to style our own hair.
The article was written to help encourage new naturals, those considering going back natural or even those who already are natural about how to overcome that initial hesitation of self-styling.
Click on the link at the top of the post to read the full article on Global Couture!