Tag Archives: DIY hair care

DIY Ghassoul/Rhassoul Clay Hair Mask

Hey Maicurlies,

It’s all about the Clay today (yay)!

I am finally sharing my DIY Ghassoul Clay Mask.

But first let me share a little information about the Clay:

Ghassoul Clay is derived from deposits within the Moroccan Atlas Mountains. It is an organic byproduct created by the natural geothermal process of volcanic activity. Aside for being known as Ghassoul is is also more commonly referred to as Rhassoul Clay  (but is also known as Red Clay, Red Moroccan Clay or Oxide Clay).

Side note – this clay can be used on both the hair and skin, so yes, I shall also be sharing a DIY Face Clay Mask Recipe (soon to come).

Benefits of Ghassoul Clay:

  • Cleanses the hair – removes impurities, leaving the hair bouncy and voluminous.
  • Cleanses the scalp – heals the scalp from irritations by removing impurities to detox and cleanse the scalp.
  • Softens the hair – due to it’s cleansing properties it removes product build up and toxins in the hair that helps to soften your curls.
  • Nourishes the hair- due to it’s natural properties, it provides the hair with natural minerals.
  • Reduces flakiness – while it cleans the scalp it doesn’t strip the skin of natural oils like some shampoos can so it doesn’t leave the scalp dry or irritated. 
  • Clumps the curls – it’s nourishing properties leaves the hair healthy which allows curls to clump and “pop”. 

Ingredients:

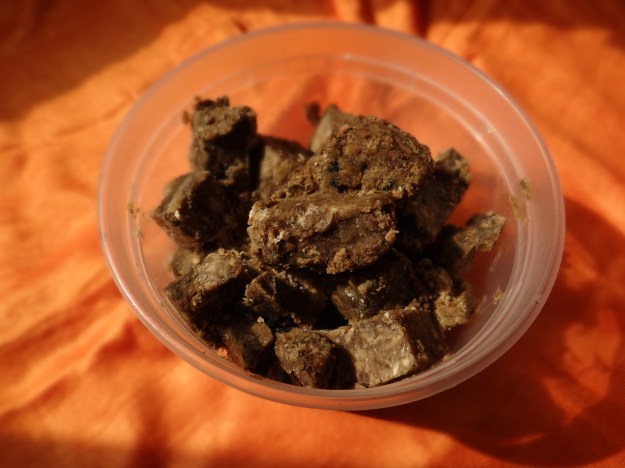
  • 2.6 oz (1/3 cup) Ghassoul Clay
  • 6 oz water*
  • 0.6 oz Apple Cider Vinegar (ACV)**
  • 0.2 oz Coffee Infused Almond Oil
  • 0.2 oz Vegetable Glycerin (optional)
  • 2 capsules Vitamin E Oil
  • 5 drop Peppermint Essential Oil (optional) ***

Alternative Ingredients:

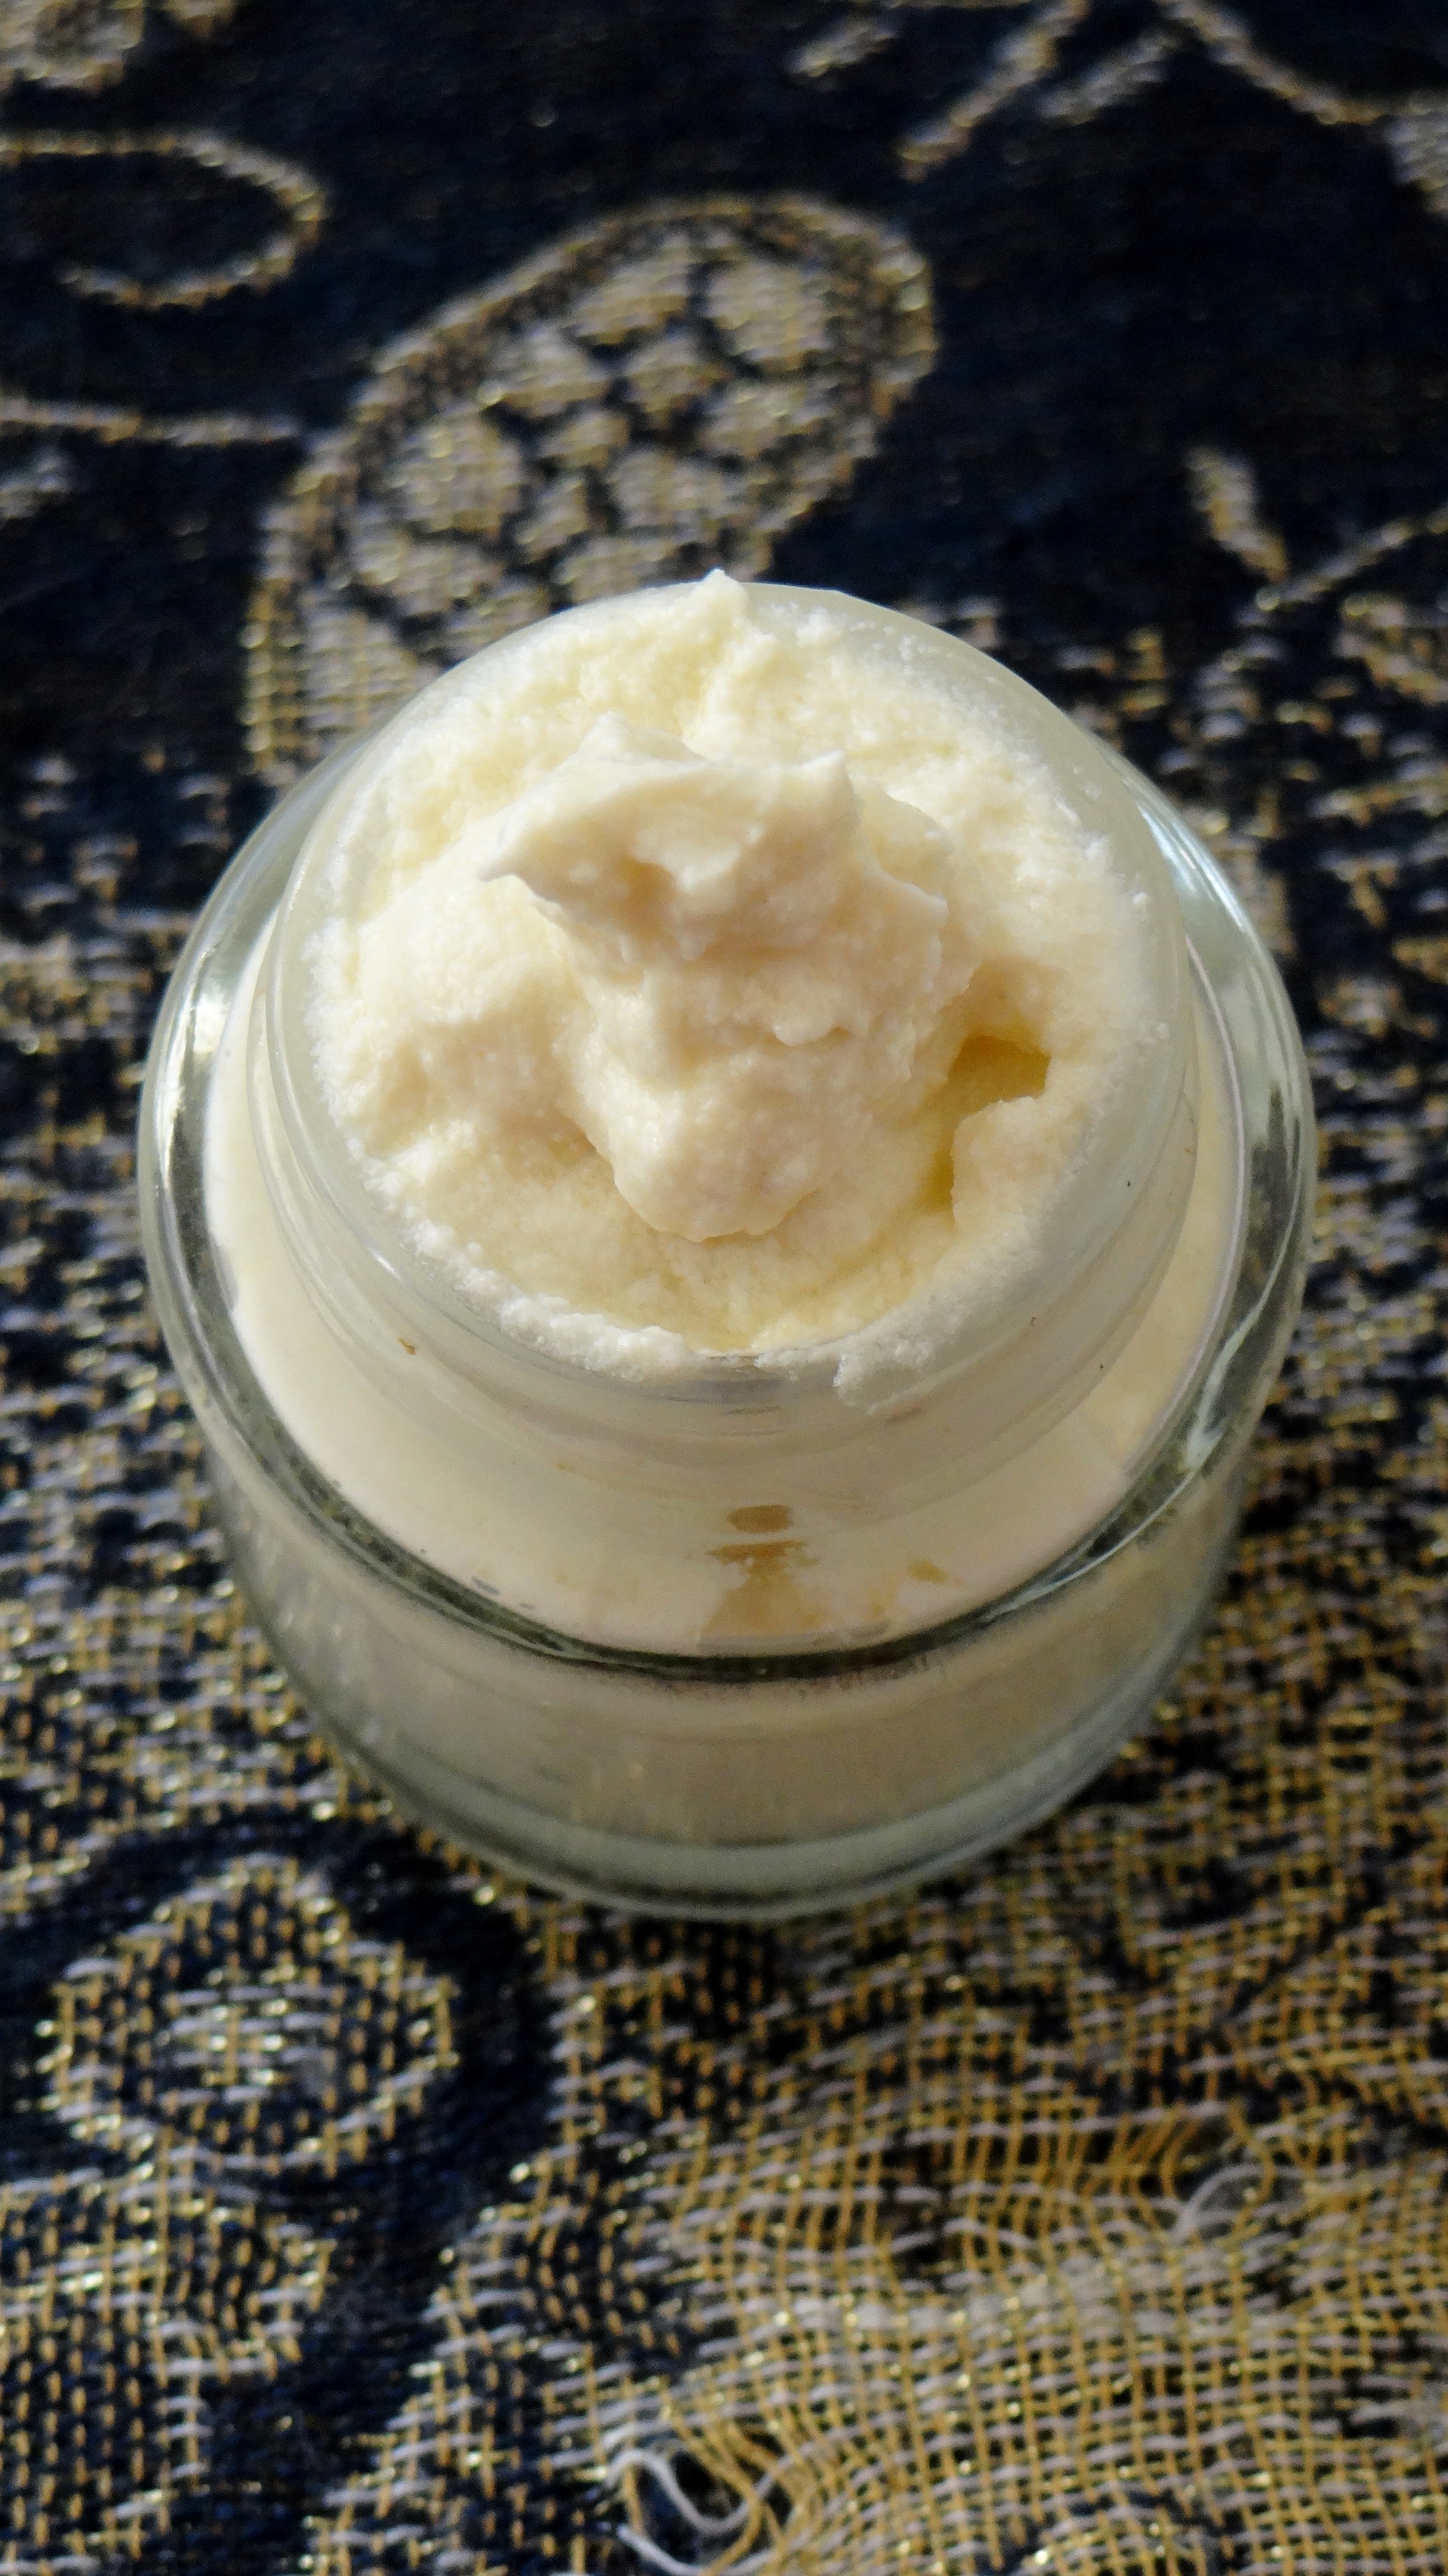
* You can do 50/50 water & rose water. Add less liquid versus powder if you prefer to have a paste consistency. 

** Apple Cider Vinegar can be replaced with Aloe Vera Juice (AVJ). 

*** Essential Oil (EO) is optional and should not be used if you are pregnant. You can use any EO of choice. 

Mixing:

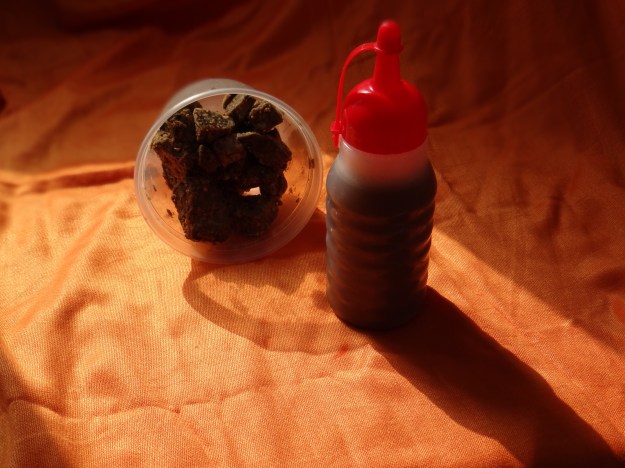
I prefer using the container I use to apply my clay to mix (a nozzle tip applicator bottle) to avoid the clay from flying around (the powder is very light weight and can get carried around by air easily). 

I first add the clay (with the help of a funnel to avoid spilling) and then pour in the the water. The next step is to add my ACV. When you add the ACV or AVJ you will notice that the clay mix starts to foam up and rise, this is normal and due to the pH level of the ACV or AVJ with the clay. I then make sure the clay is well mixed by putting on the nozzle cap and shake the container really well and then add the remaining ingredients and give it one last shake. That’s it! 

Application:

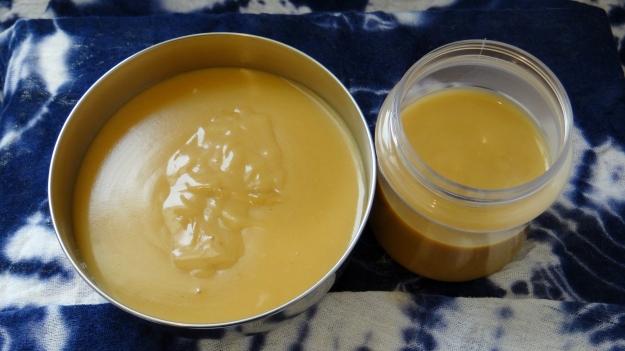
My preferred consistency of this mix is to have it more runny versus a paste (just personal preference, a paste works just as well.). I apply onto damp hair while in the shower to avoid making too much of a mess because the clay will drip. I start from the ends of my hair to my roots making sure each strand is covered and that I have the clay treatment on my scalp as well. I leave it on for roughly 15 minutes covered with a shower cap or plastic bag before rinsing and deep conditioning. I tend to apply this mix when my hair needs it, I can tell when my hair looks “tired” eg. my curls aren’t popping, looks dull or isn’t absorbing my leave-in conditioner as normal (usually happens with product overload/hair coated with ingredients that just sits on the hair).  Please note:  it can get messy with the clay treatment, regardless of if it’s runny or a paste). 

I would love to hear if you use Ghassoul Clay (or any of the other names it goes by). What’s your recipe? 

Maicurls

DIY African Black Soap Shampoo (Liquid)

Hello Maicurlies! 

I am BACK! (again lol) Let’s skip the wishy-washy and get straight into it. 

Today I’ve got a new DIY recipe to share: Black African Soap Shampoo.

DSC03757

So as the name suggestions, it is a hair shampoo, it is all natural and yes, it is simple! 

As with any commercial shampoo (which I personally don’t use) I use this to help cleanse my scalp from product buildup (my roots) and then I slowly work my way down the length of my hair. Previously I had been using Shikakai as a cleanser and I have nothing “bad” to say about it  but I wanted a change and stumbled upon Raw African Black Soap. 

What Is Black African Soap? 

DSC03786

Black African Soap is traditionally made in West Africa from harvested plants such as sun dried dried plantain, cocoa pods, barks of Shea tree and palm leaves. Palm oil, palm kernel oil and water is also added to form the soap, which is left to “cure” before it is ready for use. 

Black African Soap can be used for both your hair and skin ( I will have a separate recipes for the skin – I use it to cleanse my face). Some of the many properties of this soap:

  • Anti-fungal 
  • Antibacterial
  • Cleansing
  • Reducing Oil productions (for overly oil skin since it does contain moisturizing properties to help balance the natural sebum produced by the skin).
  • Moisturizing
  • Helps sooth irritated skin
  • Reduces acne, blemishes and fine scars/lines

Recipe:

  • 1 oz Raw Black African Soap.
  • 8 oz warm Water (I use bottled water because my facet has hard water).
  • 1 tsp Almond Oil
  • 1 tsp Grapeseed Oil
  • 1 tsp Glycerin Oil
  • 5 drops Peppermint Essential Oil
  • 5 drops Lavender Essential Oil

Ingredient Alternatives:

You can use any oil/oils you have at home, you must not stick by what I personally use. You can skip the use of Essential Oils (or replace them with your favorites) I like using Peppermint Essential Oil because it has a tingling effect on the scalp that helps to stimulate blood flow which helps to stimulate growth, it also has cleansing properties, anti-fungal & anti bacterial properties and smells AMAZING! Lavender Essential Oil has a relaxing and soothing effect. I add glycerin to my recipe because it is a humectant and while Black Soap has moisturizing properties on its own I don’t find it moisturizing enough so the addition of glycerin seems to boost that (but it is optional). 

If you use Black African Soap, please leave me a comment below with your own recipe! I love learning and love sharing your recipes with my readers! And if you happen to try mine, please do leave me some feedback on what you think! 

Thanks

logo 2

Maicurls

Caramel Hair Softener – Recipe from: Hair Care Rehab

Hello Maicurlies,

I have come back with ANOTHER DIY!!! 

DIY Caramel Hair Softener from "Hair Care Rehab" - Audrey Davis Sivasothy

DIY Caramel Hair Softener from “Hair Care Rehab” – Audrey Davis Sivasothy

I can not take credit for this gorgeous, delicious, luscious looking DIY  recipe though, all credit goes to the talented author and Naturalista Audrey Davis Sivasothy and her wonderful book Hair Care Rehab. You can read all about how much I love this book in my review here.

I contacted Audrey to check if it would be alright for me to use her recipe in a “how to” video/blog post and she was happy for me to share, so here it is! And Thank You Audrey!!! 

According to the book (and my own personal experience) this recipe will:

  • Soften & hydrate the hair
  • Reduce Frizz
  • Strengthen the hair
  • Lengthen curls
  • Improve curl definition

I also found it:

  • Provides shine
  • Reduces tangles 
  • Provides bounce

Now before I move on I will reiterate what the book says: you will want to do this on a day when you have “me time”, so I suggest doing this on a “pamper day” when you know you will not be rushed simply because for some of you after application you might want to follow up with shampoo and a quick Deep Condition (more about this further down). 

Ingredients/Tools:

Caramel Hair Softener Ingredients

  • 2 overripe Bananas (the more ripe they are the better)
  • 4 oz Water 
  • 1 oz Lemon Juice (in the original recipe it mentions using 2 oz but I use less*)
  • 2 oz Raw/Natural Honey
  • 4 oz Maple Syrup or Molasses
  • 2 oz Extra Virgin Olive Oil (EVOO)
  • 1 oz Plain Flour
  • Mixing container
  • Blender
  • Sieve
  • Spoon
  • Pot

*I use less Lemon Juice because it tends to be too acidic for my hair and can dry it out, I suggest for your first attempt using less than 2 oz and then increasing if you so please.  

Ratio/Ingredient Alternatives:

  • Replace Honey with Agave Nectar
  • Use either Maple Syrup or Molasses
  • Use any carrier oil you wish in place of the EVOO (e.g. Extra Virgin Coconut Oil, Grapeseed Oil, Almond Oil, Avocado Oil etc)
  • Use Corn Flour in place of Plain Flour
  • Baby Banana food in place of real bananas (I always find real bananas work better)

You can use half the ingredients mentioned to make less.

Mixing Instructions:

I first cut the bananas into 2 – 3 pieces and then blend them, you want to make sure they basically turn into banana “mushy juice”. (This is where using overripe bananas come into play because the more ripe they are the easier it will be to get a smooth mix without too many bits). Next I add the water and lemon juice and re-blend. After this I highly suggest using a sieve, this will help further eliminate banana bits (which are so difficult to get out of curly/kinky hair). You then can add the honey, maple syrup, EVOO and stir. The last ingredient is the flour which, should be done in halves and blended in between to make sure it is lump free.

The last step is warming up the mix. You only want to lightly warm it up, NOT boil it! The warming up will only take a few minutes and as soon as this happens you will notice the mixture thickening. Turn off the stove as soon as you notice the thickening otherwise you will be left with a lumpy and thick hard to use mix. 

Application:

You must allow the recipe to cool down to room temperature before you apply (please do not burn your fingers or scalp!) I prefer to apply onto damp hair (doesn’t have to be freshly washed) and then cover with a shower cap, plastic bag and scarf for 1.5 hours (you can leave it on for 45 minutes – 1.5 hours no more time is required). I normally only follow up with a conditioner to rinse my hair and then move onto styling without the need to Shampoo or do an Apple Cider Vinegar (ACV) rinse or a Deep Conditioner.

Of course I have a video of my mixing process:

Things to keep in mind:

  1. This is NOT a temporary relaxer! I have seen a few videos/blog stating that the caramel treatment works as a “mild/temporary relaxer” for the hair….I don’t know how one could come up with that but NO! The recipe provides the hair with so much moisture and nourishment that dry hair (at least my dry hair) basically absorbs all that goodness which ends up making my curls “heavy” (for lack of a better word). This heaviness makes my curls appear longer which I guess is why some people claim it is a “temporary relaxer” but again NO, it just leaves your hair not dry!
  2. If you can know you will not be able to use all the mix in one go either use less of the ingredients, give some away or as a last resort store the remaining in your freezer. Do not leave it in your fridge for more than a few days because it will go moldy!
  3. If you store it in your freezer, I suggest gently double broiling in a heat proof glass bowl over water since it will become really thick and almost impossible to manipulate onto your hair once it has been frozen. 
  4. Some of you might feel the need to follow up with shampoo afterwards or perhaps an ACV rinse. If you use shampoo then you might consider doing a quick 10 minute deep condition just to make sure your hair doesn’t feel stripped because of the shampoo. 
  5. If you are allergic to ANY of the ingredients please DO NOT USE THEM! There are always alternative ingredients, such as those mentioned above or other recipes you can use without risking your health.
  6. If any of the ingredients are new to your routine, please do a patch test before you apply it all over your hair, to avoid any unforeseen allergic reactions. 

I would love to hear what you think if you give this a try, or if you already have used the Caramel Hair Softener please let me know what you thought!

Thanks

Maicurls

Maicurls

DIY Conditioning Bars with Cleansing Properties

Hello Maicurlies,

It has been a while (a little over a month) since I last shared a DIY and over the last few weeks I have been asked “when will you share a DIY again”, you request and I shall deliver 😉 

DIY Conditioning Bar With Cleansing Properties

DIY Conditioning Bar With Cleansing Properties

My “DIY Conditioning Bar with Cleansing Properties” is a mix that my hair LOVES! As the name indicates it helps to condition my hair while leaving my curls feeling clean (thanks to cleansing properties) but it does not result in dry or stripped clean hair thanks to the conditioning elements! 

Ingredients/Tools:

DIY Conditioning Bar With Cleansing Properties - Ingredients

  • 1.1 oz Amla
  • 1.5 oz Shikakai
  • 0.7 oz Water
  • 3 oz Unrefined Cocoa Butter (I got mine from SheaButter Cottage
  • 0.7 oz Virgin Coconut Oil
  • 3 Capsules Vitamin E Oil (roughly 0.15 oz) 
  • 2 drops Peppermint Essential Oil (optional) – use any Essential Oil you like*
  • 0.2 oz Glycerin (optional)** 
  • Pot & Bowl for double broiler
  • Spoon 
  • Container
  • Silicon Moulds & Cling Film (if you choose to make blocks) 

Note: *If you are pregnant please do not use any Essential oil. Essential Oil needs to be sufficiently diluted & certain oils have more “strength”. ** If you hair does not like Glycerin skip this ingredient (see Alternative Suggestions for other options). 

Mixing Method:

I first combine the dry ingredients (powders) together and mix them well. I then add the water and stir before adding the butter and remaining ingredients. When I add the butter and oils etc it is done step-by-step (do not pour everything in one go since you want to make sure you are not adding more than you want and to make sure everything is mixed well). 

Storage/Setting:

DSC06357

If you are going to use this right after making the mix, then skip this step and move onto “Adding Your Mixing Liquid” (below). If you are making blocks, pour into silicon molds which will be covered with cling film in order for them to set (Once set, I store mine in a sandwich bag for future use).

Adding Your Mixing Liquid:

Depending on your preference you can basically add any liquid of choice (e.g. Flax Seed Water, Tea, Water, Coconut Milk, Coconut Cream). First gently double broil the blocks (do not completely melt them down) you just want them to melt a little since you will be adding warm mixing liquid which will completely melt down the bars. My mixing liquid of choice is Flax Seed Water. I literally let the seeds (2 oz) just reach a gentle rolling boil in plain water (8.8 oz) for no more than 5 minutes on low heat. I immediately sieve the seeds (which I store for reuse) and pour the Flax Seed Water to my semi melted blocks and stir stir stir. 

Application:

Melted Conditioning Bars

Melted Conditioning Bars

Once the Flax Seed Water has been added it turns into this lovely consistency and I highly recommend applying on lightly damp hair (best on detangled hair to avoid tangles and to allow for easy application). I cover my hair with a shower cap and scarf for a minimum of 20 – 30 minutes and then rinse it out with a dab of conditioner (the conditioner is optional but I prefer using it to make sure I don’t have any “bits” in my hair). 

Ingredient Benefits:

  • Amla – holds conditioning properties, provides shine, strengthens the hair, helps slow down early on set greying/darkens the hair (subtly), helps keep a clean & healthy Scalp.
  • Shikakai – helps to cleanse the hair & scalp.
  • Water – best moisturizing ingredient.
  • Unrefined Cocoa Butter – helps moisturize the hair, reduces hair loss, reduces breakage & alleviates scalp itching and irritations.
  • Virgin Coconut Oil – provides shine and strength, penetrates into the hair shaft to strengthen from within, soothes an irritated scalp & helps elimate frizz.
  • Vitamin E Oil –  helps extend homemade products shelf life, rejuvenates and offers protection for the scalp & hair. 
  • Peppermint Essential Oil – helps to stimulate blood flow to the scalp which results in hair growth, soothes an irritated scalp, cleanses the scalp & also helps extend the shelf life of homemade products. 
  • Glycerin – a humectant that attracts water in the air (humidity) to the area applied. 

Alternative Ingredients: 

  • Unrefined Cocoa Butter – can be replaced with any other butter of choice e.g. Shea Butter, Mango Butter or a combination.
  • Virgin Coconut Oil – can be replaced with any carrier oil of choice.
  • Glycerin – can be replaced with Honey or Agave Nectar (if you hair likes Humectants).
  • Shikakai – can be replaced with Aritha (soap nut) which has even more cleansing abilities.
  • Water – can be used together with Rose Water e.g 0.35 oz Water & 0.35 oz Rose Water.
  • Peppermint Essential Oil – you can replace this with any oil of choice or omit it completely.

When To Use:

There is no “time frame” for this, you can use it whenever you like. I do suggest that if your hair is in need of a little TLC and you want to switch between deep conditioning you can use this in place of a Deep Conditioner from time to time. 

I would love to hear what you think! If you use this recipe or change a few things please let me know, I would love to hear from you! 

Thanks

Maicurls

Maicurls


DIY: Itchy Dry Scalp Treatment (Protective Style Spray)

Hey Maicurlies,

I am back (finally, I know I have been away) with another DIY. This recipe is for the scalp and is helpful for those of us that suffer from an itchy, dry, irritated, flaky scalp especially when rocking a Protective Style (PS).

DSC07145

While rocking a PS, it can become a little difficult to maintain a healthy scalp while still keeping the integrity of the PS and this mix will hopefully make it easier to keep your scalp clean and healthy while attending to scalp issues. You are of course still going to wash your hair/scalp as normal however whenever you experience itchiness, dryness, irritations etc you can reach for this without having to over wash your scalp to try and sooth the issue. 

Note: This mix can be used on your scalp even if you hair is not in a PS but this post was intended to focus on maintaining a healthy scalp  care during PS mode.

Ingredients/Tools

DSC07140

  • 1 oz Fresh Aloe Vera Juice
  • 0.2 oz Apple Cider Vinegar (natural/organic)
  • 0.5 oz Plain Water
  • 5 drops Peppermint Essential Oil (EO)*
  • 3 capsules Vitamin E  Oil
  • Spray Bottle

*If you are pregnant please do not use any EO and always consult with your doctor/dermatologist if you are trying something new. 

NOTE: This mix is not for medicinal purposes, it is simply for informational purposes. ALWAYS consult with a professional doctor/dermatologist prior to integrating anything new to your routine! 

Ingredient Benefits:

Aloe Vera Juice – a natural humectant that attracts moisture in the air to the area applied (the scalp). It is packed with essential vitamins and minerals that helps to reduce dry itchiness on the scalp, stimulates hair growth and is said to help with very mild cases of Alopecia. It balances and conditions both the scalp and roots leaving no traces of “product” build-up, has natural astringent properties to leave you with a clean scalp and aids in moisturizing dry hair. 

Apple Cider Vinegar – has natural astringent properties, while diluted (e.g. with water & AVJ) it provides the scalp and hair (roots) with an optimal pH level and is also known for its ability to remove product build up. It helps to not only remove product but also helps to close the pores on the scalp while at the same time closing the cuticle of the hair which provides it with shine. 

Peppermint Essential Oil – has astringent properties as well which helps to eliminate product build up and to remove sweat and dirt on the scalp. It helps stimulate blood circulation in the scalp which in turns helps to promote hair growth. The oil is known for combating dry irritated scalps which can help eliminate dandruff. Due to its stimulating properties (it will make your scalp feel fresh and tingly) this can help tackle the issue of itchiness while at the same time cleansing the scalp to eliminate the problem all together. 

Vitamin E Oil – in this mix it can help extend the shelf life of the spray (but does not work as a preservative!). The oil is packed with antioxidants that helps to moisturize the scalp, keeps it healthy, less prone to dryness and thus aids in the growth of healthy hair as well. It allows the hair to grow soft, full of shine and suppleness and also can aid in slowing down the onset of premature greying. The oil is known to help generate new skin cells which allows your scalp to remain healthy and thanks to its moisturizing and healing properties this allows for quicker and healthier hair growth. 

Water – need I say more? H2o is a naturals best friend since it is a vital source of moisture for both the scalp and hair! 

Additional Options/Ratio Alternatives:

The purpose of this mix is to help keep a clean and healthy scalp therefore it is advisable to use ingredients that have cleansing and moisturizing properties while not clogging up the pores of your scalp. Along with the ingredients above you could also add some Rose Water to this mix e.g 0.2 oz of Rose Water for additional moisturizing elements, soothing effects and a wonderful scent! Tea Tree Essential Oil is an alternative EO that can be used in place of Peppermint. 

DSC07144

Mixing Method:

Combine all the ingredients together in your spray bottle and make sure to shake well before applying.

Application:

There are two methods that I highly recommend when applying the mix instead of simply spraying onto your roots/scalp. Either spray some clean ear cleaners (unused!) and run them along your partings. The other option is cotton pads/buds which is my favorite. 

Storage:

It is highly recommended to store this mix in the fridge for no more than 1 – 1.5 months maximum but constantly check to make sure there is no nasty fungus growing (you will be able to tell especially if you use a see through spray bottle). Keeping it in the fridge also means that it will have a soothing effect on the scalp and will help close the cuticles of your roots and the pores on your scalp! 

I would love to hear what you think! If you use a scalp spray (or try this one) please do let me know, I love hearing from you! 

Thanks

Maicurls

Maicurls


DIY – Moisturizing Dry Brittle Ends (Humectant Free)

Hello Maicurlies,

Today I am back with an alternative recipe version of a mix I already shared a few weeks ago! I have a post & video about moisturizing dry & brittle ends with a humectant based recipe here and was then requested to do a humectnt free version and here it is!

DIY: Moisturizing Dry Brittle End (Humectant Free)

I have mentioned this a few times in my blog, not everyone’s hair appreciates humectants, it all boils down to hair preference and weather conditions in the area where you live. This recipe works in a similar way to my humectant based mix, just without the addition of ingredients that draw moisture in the air (humidity) to the area applied (the hair).

Ingredients/tools:

Ingredients

  • 1.7oz Plain Full Fat Yogurt
  • 1oz Cocoa Butter
  • 0.5oz Rose Water
  • 0.5oz Plain Water
  • 0.5oz Virgin Coconut Oil
  • 3 capsules Vitamin E Oil (roughly 0.15oz)
  • 3-5 drops Peppermint Essential Oil (Optional) – use any*
  • Clean and disinfected heatproof container
  • Pot 
  • Clean and disinfected spoon
  • Gloves (optional to keep mix sanitized)

*If you are pregnant do not use Essential Oil and always consult your personal physician whenever using something new!

Ingredient alternatives:

You can replace the 0.5oz Rose Water with more 0.5oz Plain Water if you do not have access to Rose Water. Virgin Coconut Oil can be replaced with any other carrier oil e.g. Almond Oil, Grape Seed Oil, Jojoba Oil etc Cocoa Butter can be replaced with any other butter e.g. Shea or Mango Butter. Depending on your preference you can either use any Essential Oil of choice or opt not to use any.

Mixing:

1.Melt down the cocoa butter by double broiling for 5 – 7 minutes. 2. add the yogurt and stir really well. (If you haven’t fully melted down the butter it will become a bit lumpy with the addition of the yogurt so place the container back in the pot with hot water for a few minutes till it is fully melted. 3. add the water and rose water a little at a time while continuously stirring. 4. add the virgin coconut oil and stir well. 5 add the Vitamin E oil and finally 6. add the essential oil (if using) and stir. I like to place the mix in my fridge in a squeeze container for a few minutes as this allows it to thicken up but this is optional.

Application:

I like to apply this to slightly damp hair that has been detangled. I mainly focus the mix on my ends – at the most going to the mid-length of my hair since the ingredients are a little on the heavy side and can weigh down my curls if I apply it on my length of my hair. However, this can be used on the entire length of your hair (it depends from person to person).

Storage:

DIY: Moisturizing Dry Brittle Ends (Humectant Free)

I keep it for no longer than 10 days in the fridge, IT MUST BE STORED IN THE FRIDGE. If you know you won’t be able to use it all up then I suggest storing in the freezer if you want it to last for more than 10 days.

Ingredient Benefits:

Plain Full Fat Yogurt – helps provide strength to the hair thanks to the traces of protein. Leaves hair feeling soft and eases detangling. Provides shine while smoothing the hair stands and fighting frizz.

Cocoa Butter – reduces hair loss and breakage. Since it is a fat, it can be used to replenish lost oils. Strengthens the hair, tames frizz and flyaway hair.

Plain Water – the optional moisturizing element for the hair!

Rose Water – revitalizes the quality of the hair due to Its natural moisturizing and nourishing properties. It helps stabilize the natural p.H level of the hair which helps to heal the porosity of the cuticle providing shine and it smells divine!

Virgin Coconut Oil – provides shine and strength, penetrates into the hair shaft strengthening from within. Helps seal in moisture from the other ingredients used in the mix e.g. water & rose water. Helps to fight against frizzy and brittle hair.

Vitamin E Oil – helps to extend the products shelf life (extends not preserves). Rejuvenates the hair strands, fights against frizz, provides shine and helps to slow down premature greying. 

Would love to hear what you think, especially if you use this recipe!

Thanks

Maicurls

Maicurls

DIY: (Recipe) Moisturizing Dry & Brittle Ends

Hello Maicurlies,

I brought my DIY (you know what) back on the blog to share…drum roll please…a DIY Recipe for the hair! (And the crowd goes wild!)  

Moisturizing Dry & Brittle Ends

This particular recipe is one that I like to mainly focus on my ends since it does include a few “heavy” ingredients (heavy for my hair) that can potentially weigh my fine hair strands down. If however, you happen to have thick/coarse hair you probably can get away with applying this throughout the length of your hair without it stopping your curls/kinks/coils from being big and fierce! 

Ingredients/Tools

  • Mixing Bowl (dry, clean and disinfected)
  • 1.5 oz Plain Full Fat Yogurt
  • 0.2 oz Raw/Natural Honey or Agave Nectar
  • 0.2 oz (optional) Glycerine or Fresh Aloe Vera Juice
  • 0.5 oz Rose Water
  • 0.2 oz Virgin Olive Oil*
  • 3 capsules Vitamin E Oil (roughly 0.15 oz)
  • **3-5 drops any Essential Oil (I used Citronella) 
  • Spoon (dry, clean and disinfected)
  • Gloves (to be “extra” but not absolutely necessary)

**Note: Please do not use Essential Oils if you are pregnant of breastfeeding. Always consult with your doctor/dermatologist or a professional. Always make sure not to use too much Essential Oil since this can make the mix extremely “potent” and harsh, potentially causing you skin irritations. 

Mixing Instructions:

All you need to do is combine all the ingredients together and mix really well once the Virgin Olive Oil has been added and that is it!

Application:

I prefer applying this on lightly damp detangled hair (the ends) as it makes it easier to distribute versus working on dry hair. I usually put my hair up in a bun and cover with a shower cap for 15-30 minutes then rinse it off with conditioner and cold water. The cold water helps to close the hair’s cuticles which allows for moisture to stay in my hair and since the cuticles are laying flat (closed) it also provides extra shine! 

Ingredient Alternatives:

This is a humectant based recipe and some of you might find that humectants and your hair are not friends, it really depends on what your hair likes and the weather in your area. Humectants draws humidity in the air (moisture) to the area applied, if you have the right amount of humidity (neither too much nor too little) this creates additional moisture for dry curls/kinks/coils. If your hair does not like humectants you can limit the amount used e.g. Instead of using both Honey/Agave Nectar AND Glycerine/Aloe Vera Juice you can go for either Honey/Agave Nectar or Glycerine/Aloe Vera Juice. 

Extra Virgin Olive Oil – can be replaced with any carrier oil of choice however I would suggest using one that is known to penetrate the hair strands e.g Virgin Coconut Oil.

Essential Oil – you can use any Essential Oil of choice or skip this all together (I am not the biggest fan of the smell of yogurt so the Rose water and Essential Oil helps to mask that).

If you have coarse/thick hair and would like to use this on the entire length of your hair then simply double the amounts apart from the Rose Water and Essential Oil. Instead use 0.7 oz Rose Water (so it does not become too runny) and keep the Essential oil at no more than 5-7 drops.

Storage:

I always use what I have made and then place the remaining in my freezer. I simply let it defrost on its own (no heat) during the following application. 

P.S. in case some of you would like a humectant free recipe please do let me know I would be happy to create something along those lines. 

Thanks

Maicurls

Maicurls

DIY Coconut Conditioning Cream

Hello Maicurlies,

It is yet again time for a Do It Yourself (DIY) because I of course do not share enough of these normally ;).

DIY Coconut Conditioning Cream

So as the name indicates today I have got a DIY Conditioning Cream recipe and surprise surprise the mix contains…….coconut cream!!! Jokes aside, apart from the Coconut Cream it also contains Flax Seeds, Fenugreek Seeds and two different types of infused carrier oils (coffee bean infused almond oil and coffee bean infused coconut oil) along with some Essential Oil at the end. Another additional ingredient is a moisturizing conditioner with can be added to the mix otherwise should be used after rinsing the mix from your hair (more details about this below). For now, let’s break down the ingredients and their benefits.

Flax Seeds:

  • Helps with hair growth due to the rich source of vitamin E.
  • Due to the Vitamin E oil it is said to help slow down premature grey hairs.
  • Contains Omega-3 fatty acids which helps provide the hair with strength and elasticity.
  • Helps fight hair loss (excessive shedding).
  • Can help ease scalp irritations such as dryness and dandruff.
  • Nourishes the hair roots, shaft, and the scalp.

Fenugreek Seeds (aka Methi):

(Tip: Fenugreek is a popular ingredient in Asian dishes (mainly India) so in case you can’t find the seeds in your local supermarket/grocery store – (the “ethnic” isle) check your local Indian markets you will be able to find them there).

  • Aids in hair growth thanks to the proteins and nicotinic acid
  • Provides strength to the hair thanks to lecithin
  • Provides moisture to the hair
  • Helps fight dandruff
  • Soothes an irritated scalp
  • Conditions the hair

Coconut Cream*:

  • Helps to sooth scalp irritations
  • Penetrates the hair strands
  • Provides the hair with luster & shine 
  • Provides strength to the hair
  • Enforces hair growth 
  • Reduces hair shedding
  • Reduces hair breakage
  • Makes the hair soft
  • Said to help slow down premature grey hairs

*NOTE: Due to the presence of protein in coconut cream some of you might find that it makes your hair feel hard. It is recommended that if you do not use a moisturizing conditioner as part of the mix that you rinse your hair with a moisturizing conditioner after you rinse your hair.

Oils:

I use coffee based oils since it has a whole number of benefits e.g stimulates blood flow therefore growth in the hair, helps keep the scalp clean, provides luster to the hair, provides shine, helps to subtly darken the hair and so much more. I have a lot of details about coffee infused oil here but you can use any oil of choice. 

Products/Tools Used:

DIY Coconut Conditioning Cream

  • 2 oz Flaxseeds
  • 2 oz Fenugreek Seeds
  • 8 oz water (used the night before to soak the seeds)
  • 7 oz coconut cream
  • 0.2 oz Coffee Bean Infused Almond Oil
  • 0.5 oz Coffee Bean Infused Coconut Oil
  • 7 oz water (to boil the seeds)
    – Optional – Essential Oil (after the mix cools)
    – Optional – 2 – 3 tablespoons Rinse out conditioner
  • Pot
  • Sieve
  • Bowl/container
  • Spoon
  • Gloves (optional to keep things sanitized) 
  • Squeeze bottle (clean and disinfected) 
  • Funnel (to pour the mix into your squeeze bottle) 

Method:

Before I begin the recipe I first soak the seeds in 8oz of plain water overnight (you can choose to soak them for less time or skip this all together). Boil the seeds in 7oz of plain water on low heat just until it starts a rolling boil (string the whole time). Pour the liquid through a strainer and reserve the seeds (they can be stored and reused later if kept in the freezer). Rinse out the pot and warm up the coconut cream just till it starts to thicken (no more than 3 – 5 minutes). Add the warm coconut cream to the liquid and stir thoroughly. (If you choose to add conditioner to the mix directly, do so now) then add the oils, stir and pour into the container. Once the mix cools you can add Essential oil (optional). 

Instead of adding the conditioner to the mix I like to use it after I have rinsed my hair and the water runs clear. I do this because I am not the biggest fan of the scent of Fenugreek seeds. Some have said that they get a “maple syrup” scent when they use Fenugreek seeds, I get no such smell! To me the seeds have a spice scent that I am not a fan of but that is way I add essential oil (usually peppermint) once the mix cools and then do a final rinse with conditioner.If you use conditioner in the recipe this will give your mix additional slip and that will help detangle the hair even further. 

Application/Rinse:

Apply the mix to freshly washed, clean and detangled hair going from the ends to your roots. Use your fingers to gently “finger comb” and distribute the mix, cover with a shower cap and let it sit for 10 – 15 minutes and rinse your hair using warm water. If you feel like you need to follow up with a moisturizing conditioner do so after the water runs clear. 

You should be left with hair the feels stronger but not dry, shiny but not sticky, basically your hair should be feeling happy! 

NOTE: If you have any leftover conditioning cream you can store it in your freezer for future use (I always have some left over). You also can freeze your coconut cream in case you don’t use the rest for cooking – it is delicious in curries btw ;).

I would love to hear if you have ever used Fenugreek seeds before. If you have, please let me know if you get that “maple syrup” scent from your seeds. 

Thanks

Maicurls

Maicurls

DIY Whipped Moisturizing Conditioning Butter

Hey Maicurlies,

Today I have the second recipe for my Whipped Butter “series”.

DIY Whipped Moisturizing Conditioning Butter

                                            DIY Whipped Moisturizing Conditioning Butter

This Whipped Moisturizing Conditioning Butter is quite simply wonderful for the hair! The recipe is quick to make and literally can be done with 2 ingredients (I use an extra ingredient to make it super moisturizing but this is optional).

Why is this a Moisturizing Conditioning Whipped Butter?

I have been asked if whipped butter (on its own) is moisturizing for the hair and in my opinion it isn’t really “moisturizing” because I find that in order for a product to be truly moisturizing it should have proper moisturizing ingredients – basically it should have water included in some way. Water, at least for my hair, is the beginning and end of moisture. Regular whipped butter (on its own) doesn’t usually include water (especially if it is homemade) unless you have also added preservatives to keep it from going rancid and growing bacteria. I find regular whipped butter to be excellent at sealing, providing shine, making the hair soft, but not necessarily a moisturizing product in itself. For example, I would not abandon using leave-in conditioner in place of regular whipped butter.

So the combination of the moisturizing leave-in with the whipped butter makes this a moisturizing conditioning butter! To make sure you are using a moisturizing leave-in look at the back of your product to see if water is listed within the top three ingredients (if it is the very first ingredient even better).

Products/Tools:

DIY Whipped Moisturizing Conditioning Butter

DIY Whipped Moisturizing Conditioning Butter

  • 1 oz Whipped Shea Butter (you can use any whipped butter, I used my DIY Whipped Butter)
  • 0.7 oz Moisturizing Leave-In Conditioner (you might need to experiment with different leave-ins)
  • 0.2 oz Glycerin (Optional for additional moisture)
  • Whisk
  • Bowl
  • Gloves
  • Airtight container

When & how do I like to use this mix?:

I consider this an ‘all in one’ product. It has moisturizing properties, the ability to seal in moisture and at the same time also helps to give a little definition. I normally apply the butter mid-week on hair that was already properly moisturized and sealed after it was washed. I use it to help restyle my hair, giving back curl definition on styles like a twist-out, braid-out, Bantu knot-out, pin curls etc. I usually lightly spritz my hair with water and then follow up with the mix and move onto setting my hair. If my hair is feeling uber dry I will use my DIY Spray Leave-In Conditioner or my DIY Moisturizing and Curl Activating Spray. I do not follow up with an oil since the whipped butter already contains oil.

Storage/Shelf life:

I make small batches of this since I do not use preservatives. The combo of the leave-in and butter can result in bacteria/mould growth if it is left for weeks and weeks before being used up or properly stored. I have kept my mix for 4 weeks without any issues (by week 4 I had used everything up) but I strongly recommend making small batches especially when you are first trying out the recipe because not all leave-ins will mix well with your chosen whipped butter. You can store it in your fridge to help extend its shelf life for a little longer, just keep in mind the cold temperatures in the fridge will make the mix a little hard so take it out at least 30 minutes before you want to use it. 

I have a video demo of how I make my Whipped Moisturizing Conditioning Butter:

Ingredient benefits:

Shea Butter: Shea butter acts as an excellent sealant and is known to help “trap in” moisture and moisturizing products applied to hair. Shea butter is actually considered to have some moisturizing properties and is therefore wonderful for the scalp as well as the hair. Shea Butter provides nourishment to dry or damaged hair from the roots to tips and is said to help repair and protect against weather damage, dryness and brittleness. It also has a smoothing effect that helps provide shine to the hair.

Water Based Leave-In: Water based leave-ins are a vital part of proving our naturally dry hair with moisture and should be part of our moisturizing routine. Leave-ins help to continue to condition the hair over the days they are left on and therefore help to prolong moisture in the hair while at the same time keeping the hair soft and supple. Leave-ins help to refresh styles, revitalizes our curls and help to smooth the hair cuticle, leaving us with shiny hair.

Glycerin: Vegetable Glycerin is a humectant that attracts water in the air (humidity) and directs it to the area applied (the hair.) Due to its oily nature it can also be used as a sealant however should be used sparingly and should be diluted since it is thick and sticky. Vegetable Glycerin is better served when used in moderately humid climate, if used where there is a lack of humidity in the air it can do the opposite, extract moisture from the hair to the air. At the same time too much humidity in the air can cause frizz. (Not all naturals like to use glycerin so this is a head to head preference). 

I would love to hear what you think about this mix, especially if you try it out! 

Thanks

Maicurls

Maicurls

DIY Ayurvedic Hair Mask – Amla Shikakai Rose

Hey Maicurlies,

Today I want to share a DIY Hair Mask (Masque) with you. I actually started using this as a alternative to a Clay Mask (Masque) since I can’t seem to get the Clay here locally so I will probably buy some at some point to try experiment with and write about.

But for now this is my baby! 

DSC00624

DIY Ayurvedic Hair Mask (Amla Shikakai Rose)

 I LOVE using this mix on my hair for several reasons:

  • Its strengthening property
  • Conditioning ability
  • The sheen provided by the mask
  • Light cleansing property
  • Detoxifying ability (due to its cleansing property) 
  • Darkening ability (I like my hair in a brown/red tone thanks to henna and amla) 
  • Curl popping power (my curls come back to life after this mask)

Now what is in this wonder mask I hear you asking right? Well the recipe is simple and as always is built around ingredients I use regularly on my hair. You should be able to find most of these in your grocery store (perhaps the “ethnic” section), your local Indian store or if all else fails you can find them all Online. Butters-n-Bars is a good place to check, as is Sheabutter Cottage and if you find a good reliable source Amazon is another alternative. I am able to find all the ingredients used locally.

(NOTE: I was not paid, compensated or requested to mention any company names these are just suggestions of places where you can purchase some of the ingredients. I bought my products locally and paid for them with my own money). 

DSC00625

Ingredients:

  • 3.5 oz Amla powder (I use the Hesh Brand) 
  • 0.5 oz Shikakai (I use the Hesh Brand)
  • 0.2 oz Amla Infused Coconut Oil (can be replaced with regular coconut oil or any other carrier oil)
  • 0.1 oz Glycerine (Optional)
  • 2.5 oz Rose Water
  • 5.5 oz Plain Water (I use bottled Water) 

Additional Ingredients/Replacements

  • Honey/Agave Nectar – In place of the Glycerine
  • Essential Oils (EO’s) – you can use any Essential Oil you like. I am currently always in the mood of Rose water so I am not adding any EO’s to mine. 
  • Cassia – in place of the Amla you can replace it with Cassia which will not darken your hair. It has conditioning properties just like Amla as well as strengthening abilities. 
  • Other Ayurvedic Herbs – you can actually replace the Shikakai with any other herb such as Aritha, Brahmi, Neem just to mention a few. 

Mixing Instructions:

I first combine the Ayurvedic Herbs together in a bowl and mix. Stir it carefully because they powders are really light and will fly around everywhere. Next I add the Oil, Glycerine and Rose water and stir again. The final step is adding the water. I like to add the water a little at a time and mix. You might want to add more/less water depending on how thick/thin you want the mask, I like mine to be a little thicker than pancake batter. 

Application

1. I first dampen my hair with a spray bottle, I like my hair to be damp but not sopping wet. 2. I apply the mask liberally all over my hair starting at the ends and make my way to my roots. (Do not comb or manipulate your hair once it is applied because otherwise you are asking for breakage!) 3. I wrap my hair around my head and cover with a shower cap and usually some material too to keep my head warm and leave it on for 30 – 60 minutes. 4. I rinse out the mask and *co-wash my hair. 

* For some the Amla might be a little acidic and therefore can leave your hair feeling a little rough and therefore a simple co-wash might not sufficient. If that is the case do a moisturising Deep Condition afterwards. 

Application process

Storage

I make a lot of this mask and use it all up because I like to coat my hair with it and my hair is a little long. You might need more/less depending on your hair length/density however if you have any leftovers you can cover and store it in the freezer just make sure to put a date on it to remember when it was made.

I would love to hear what you think if you try this mask/masque. I would also love to hear about your Clay Hair Masks so I can have a recipe list to follow when I try it 😀 

Thanks

Maicurls

Maicurls