I have been busy trying to record videos back to back because I will be out of the country in 2 weeks (on holidayaaayyyy) so please forgive my delays.
Today I am going to be sharing a new Skin DIY! And yes, the title of the post gives it away, it will be a face mask that helps to detoxify the skin.
DIY Detox Mask
Benefits
Brightens the skin (NOT LIGHTENS but brightens).
Leaves you with a youthful glowy finish.
Helps reduce redness.
Soothes the skin.
Helps to remove toxins in the skin.
Helps to remove dead skin cells.
Closes the pores.
Leaves your face smooth and soft.
Ingredients/Tools used
0.8oz Amla Powder
1.4oz Water (I use plain bottled water)
0.5oz Rose Water
0.4oz Natural/Raw Honey
Squeeze of Fresh Lemon Juice
3 Capsules Vitamin E Oil (roughly 0.15oz)
(Optional) Essential Oil
Clean and disinfected Bowl
Clean and disinfected spoon
Gloves (optional to keep things sanitized)
Mixing
I add both the water and rose water a little at a time to the amla powder while continuously stirring. I then add the honey, lemon juice and Vitamin E Oil (Essential Oil if using).
Ingredient/Ratio Alternatives
Should you not have access to rose water, you can just replace it with plain water.
Natural/Raw Honey can be replaced with Agave Nectar or even Molasses.
Application
I like to apply the mask onto makeup free skin that is slightly damp. I use my fingers to apply the mask AVOIDING THE EYE & EYEBROW AREA! Let the mask dry for 15 – 25 minutes, splash lukewarm water on my face and slowly wipe away the mask using a damp face cloth. I follow up with my toner & moisturizer. NOTE: as the mask dries it will start to tighten the skin, this is normal.
If you use this mask please let me know what you think!
I am back with yet another DIY! Yes you read that right, a DIY Henna Spray! This one is actually inspired by another Naturalista that has her on stash of DIY Goodies Curly Proverbz. She is GAAAWGEOUS btw! If you haven’t been following her you NEED TO!
So first off, Thank you Curly Proverbz for the inspiration!!!!
I modified her original recipe so it would fit my hair needs and I recommend you alter any ingredients you feel will not benefit your hair to fit your own needs too! (I have alternative suggestions a little lower down).
Prior to you attempting to use Henna, Amla, Shikakai or any other Ayurvedic, herbs I HIGHLY SUGGEST that you do some research prior to application just so you are well informed about the ingredients & their benefits/disadvantages. I have a henna blog post where I also mention Shikakai and Amla in there since I regularly use them in my hair care.
Even if you know nothing about henna, amla, shikaikai and decide not to research (bad idea btw) PLEASE NOTE:
Ayurvedic, herbs can be drying on the hair therefore it is highly recommended that you thoroughly moisturize prior to/after using the spray.
Do not overdo the applications, it will cause your hair to feel dry and brittle due to the strength the herbs provide to the hair (lack of elasticity = breakage).
You might notice a colour change in your hair e.g. reddish/brown (henna & amla) therefore if you are not looking for this, DO NOT USE this recipe.
Use clothes & a towel you do not mind getting stained while spraying your hair!
Ingredients/Tools Use:
0.1oz Amla
0.1oz Shikakai
0.25oz Henna
4oz Water
4oz Rose Water
0.15oz Argan Oil
2-3 drops Alcohol Free Rose Fragrance
Coffee Filter (or cheese cloth)
Cup
Spoon
Spray Bottle
Gloves (optional)
Optional Ingredients/Ratios:
You can replace the Amla and Shikakai with any other Ayurvedic, herb such as Bhringaraj, Neem, Brahmi etc. In case you do not have Rose Water the amount can be replaced with more plain water. You can add some glycerin to the spray for added moisture (if necessary/desired). The fragrance oil can be replaced with Essential Oil.
Mixing Instructions:
You want to put your herbs into a coffee filter or cheese cloth and let it soak in boiled water. I add rose water (without boiling it) and let the herbs sit overnight. The following morning I take out the herbs, add the oil and fragrance oil, pour into my spray bottle and presto!
Application:
My two ways of application is: 1. after deep conditioning my hair (prior to moisturizing) I will spray the henna onto my hair and proceed with moisturizing and styling. 2. On occasion if I feel like I need to provide strength to my hair mid-week, I first spray a little henna onto my hair and then remoisturize. You can also do this as a rinse, without leaving the henna on your hair (which is what I do).
Storage:
You must store the mix in your fridge (otherwise you plan on growing nasty mold!)
It has been a while (a little over a month) since I last shared a DIY and over the last few weeks I have been asked “when will you share a DIY again”, you request and I shall deliver 😉
DIY Conditioning Bar With Cleansing Properties
My “DIY Conditioning Bar with Cleansing Properties” is a mix that my hair LOVES! As the name indicates it helps to condition my hair while leaving my curls feeling clean (thanks to cleansing properties) but it does not result in dry or stripped clean hair thanks to the conditioning elements!
2 drops Peppermint Essential Oil (optional) – use any Essential Oil you like*
0.2 oz Glycerin (optional)**
Pot & Bowl for double broiler
Spoon
Container
Silicon Moulds & Cling Film (if you choose to make blocks)
Note:*If you are pregnant please do not use any Essential oil. Essential Oil needs to be sufficiently diluted & certain oils have more “strength”. ** If you hair does not like Glycerin skip this ingredient (see Alternative Suggestions for other options).
Mixing Method:
I first combine the dry ingredients (powders) together and mix them well. I then add the water and stir before adding the butter and remaining ingredients. When I add the butter and oils etc it is done step-by-step (do not pour everything in one go since you want to make sure you are not adding more than you want and to make sure everything is mixed well).
Storage/Setting:
If you are going to use this right after making the mix, then skip this step and move onto “Adding Your Mixing Liquid” (below). If you are making blocks, pour into silicon molds which will be covered with cling film in order for them to set (Once set, I store mine in a sandwich bag for future use).
Adding Your Mixing Liquid:
Bars in double broiler
Melting bars
Depending on your preference you can basically add any liquid of choice (e.g. Flax Seed Water, Tea, Water, Coconut Milk, Coconut Cream). First gently double broil the blocks (do not completely melt them down) you just want them to melt a little since you will be adding warm mixing liquid which will completely melt down the bars. My mixing liquid of choice is Flax Seed Water. I literally let the seeds (2 oz) just reach a gentle rolling boil in plain water (8.8 oz) for no more than 5 minutes on low heat. I immediately sieve the seeds (which I store for reuse) and pour the Flax Seed Water to my semi melted blocks and stir stir stir.
Application:
Melted Conditioning Bars
Once the Flax Seed Water has been added it turns into this lovely consistency and I highly recommend applying on lightly damp hair (best on detangled hair to avoid tangles and to allow for easy application). I cover my hair with a shower cap and scarf for a minimum of 20 – 30 minutes and then rinse it out with a dab of conditioner (the conditioner is optional but I prefer using it to make sure I don’t have any “bits” in my hair).
Ingredient Benefits:
Amla – holds conditioning properties, provides shine, strengthens the hair, helps slow down early on set greying/darkens the hair (subtly), helps keep a clean & healthy Scalp.
Shikakai – helps to cleanse the hair & scalp.
Water – best moisturizing ingredient.
Unrefined Cocoa Butter – helps moisturize the hair, reduces hair loss, reduces breakage & alleviates scalp itching and irritations.
Virgin Coconut Oil – provides shine and strength, penetrates into the hair shaft to strengthen from within, soothes an irritated scalp & helps elimate frizz.
Vitamin E Oil – helps extend homemade products shelf life, rejuvenates and offers protection for the scalp & hair.
Peppermint Essential Oil – helps to stimulate blood flow to the scalp which results in hair growth, soothes an irritated scalp, cleanses the scalp & also helps extend the shelf life of homemade products.
Glycerin – a humectant that attracts water in the air (humidity) to the area applied.
Alternative Ingredients:
Unrefined Cocoa Butter – can be replaced with any other butter of choice e.g. Shea Butter, Mango Butter or a combination.
Virgin Coconut Oil – can be replaced with any carrier oil of choice.
Glycerin – can be replaced with Honey or Agave Nectar (if you hair likes Humectants).
Shikakai – can be replaced with Aritha (soap nut) which has even more cleansing abilities.
Water – can be used together with Rose Water e.g 0.35 oz Water & 0.35 oz Rose Water.
Peppermint Essential Oil – you can replace this with any oil of choice or omit it completely.
When To Use:
There is no “time frame” for this, you can use it whenever you like. I do suggest that if your hair is in need of a little TLC and you want to switch between deep conditioning you can use this in place of a Deep Conditioner from time to time.
I would love to hear what you think! If you use this recipe or change a few things please let me know, I would love to hear from you!
Today I’ve got another DIY and this also sort of ties in with my recent re-addiction to all things henna 😀
I first want to share my updated henna paste (full strength henna) which focuses only on ayurvedic herbs – Henna, Amla and Hibiscus mixed with Green Tea.
This mix is somewhat similar to my “old” henna paste which you can read about (here) except that I now add hibiscus. I have already written about the wonders of hibiscus herep.s. it is awesome for a number of different reasons! Another aspect that is different is that I keep my henna paste “clean” by not adding anything additional e.g. conditioner, coconut milk etc after I see dye release. There is no harm in adding conditioner/coconut milk/oil etc to the paste, they actually help to make your hair feel less dry after you rinse out the henna however, at the moment I am more focused on the ayurvedic benefits which is why I opt not to add anything to the mix.
(I turn to my DIY Henna Gloss Bars on days when I want to henna without the punch that is packed in my full strength henna paste).
Henna Paste
Ingredients/Tools:
Henna 5 oz
Amla 0.7 oz
Hibiscus 1.2 oz
Green Tea 6 oz
Glass Bowl
Spatula
Old material/newspaper to cover the work space
Mixing:
I first combine all the dry ingredients and then add my warm green tea (not boiling hot – I let it cool down first) and stir. I like making my paste quite thick because I don’t like the henna to drip down my face/neck.
After mixing I will cover the paste with Clingfilm and wait for dye release. When I start to see dye release I add a tiny bit of lukewarm tea (no more than 1.5 oz) just so the paste isn’t too thick and will spread easily on my hair. It usually takes my henna no more than 4 hours to see the initial stages of dye release and I like to apply it when I start to see dye release since I leave the henna on overnight and the dye will continue to release while I sleep.
Application:
I always apply henna on damp detangled and cleansed hair, starting at the back working my way to the front. I cover my hair with Clingfilm, a shower cap, sometimes a plastic bag and then a scarf to make sure everything is really nice and warm. ALWAYS USE GLOVES otherwise your palms and nails will get stained! After I have left the henna on overnight I rinse out the henna with water first, follow up with rinses with conditioner and then I apply a Moisturizing Deep Conditioner (DC) once the water runs clear. I leave the DC on for no less than 2 hours and then I am done!
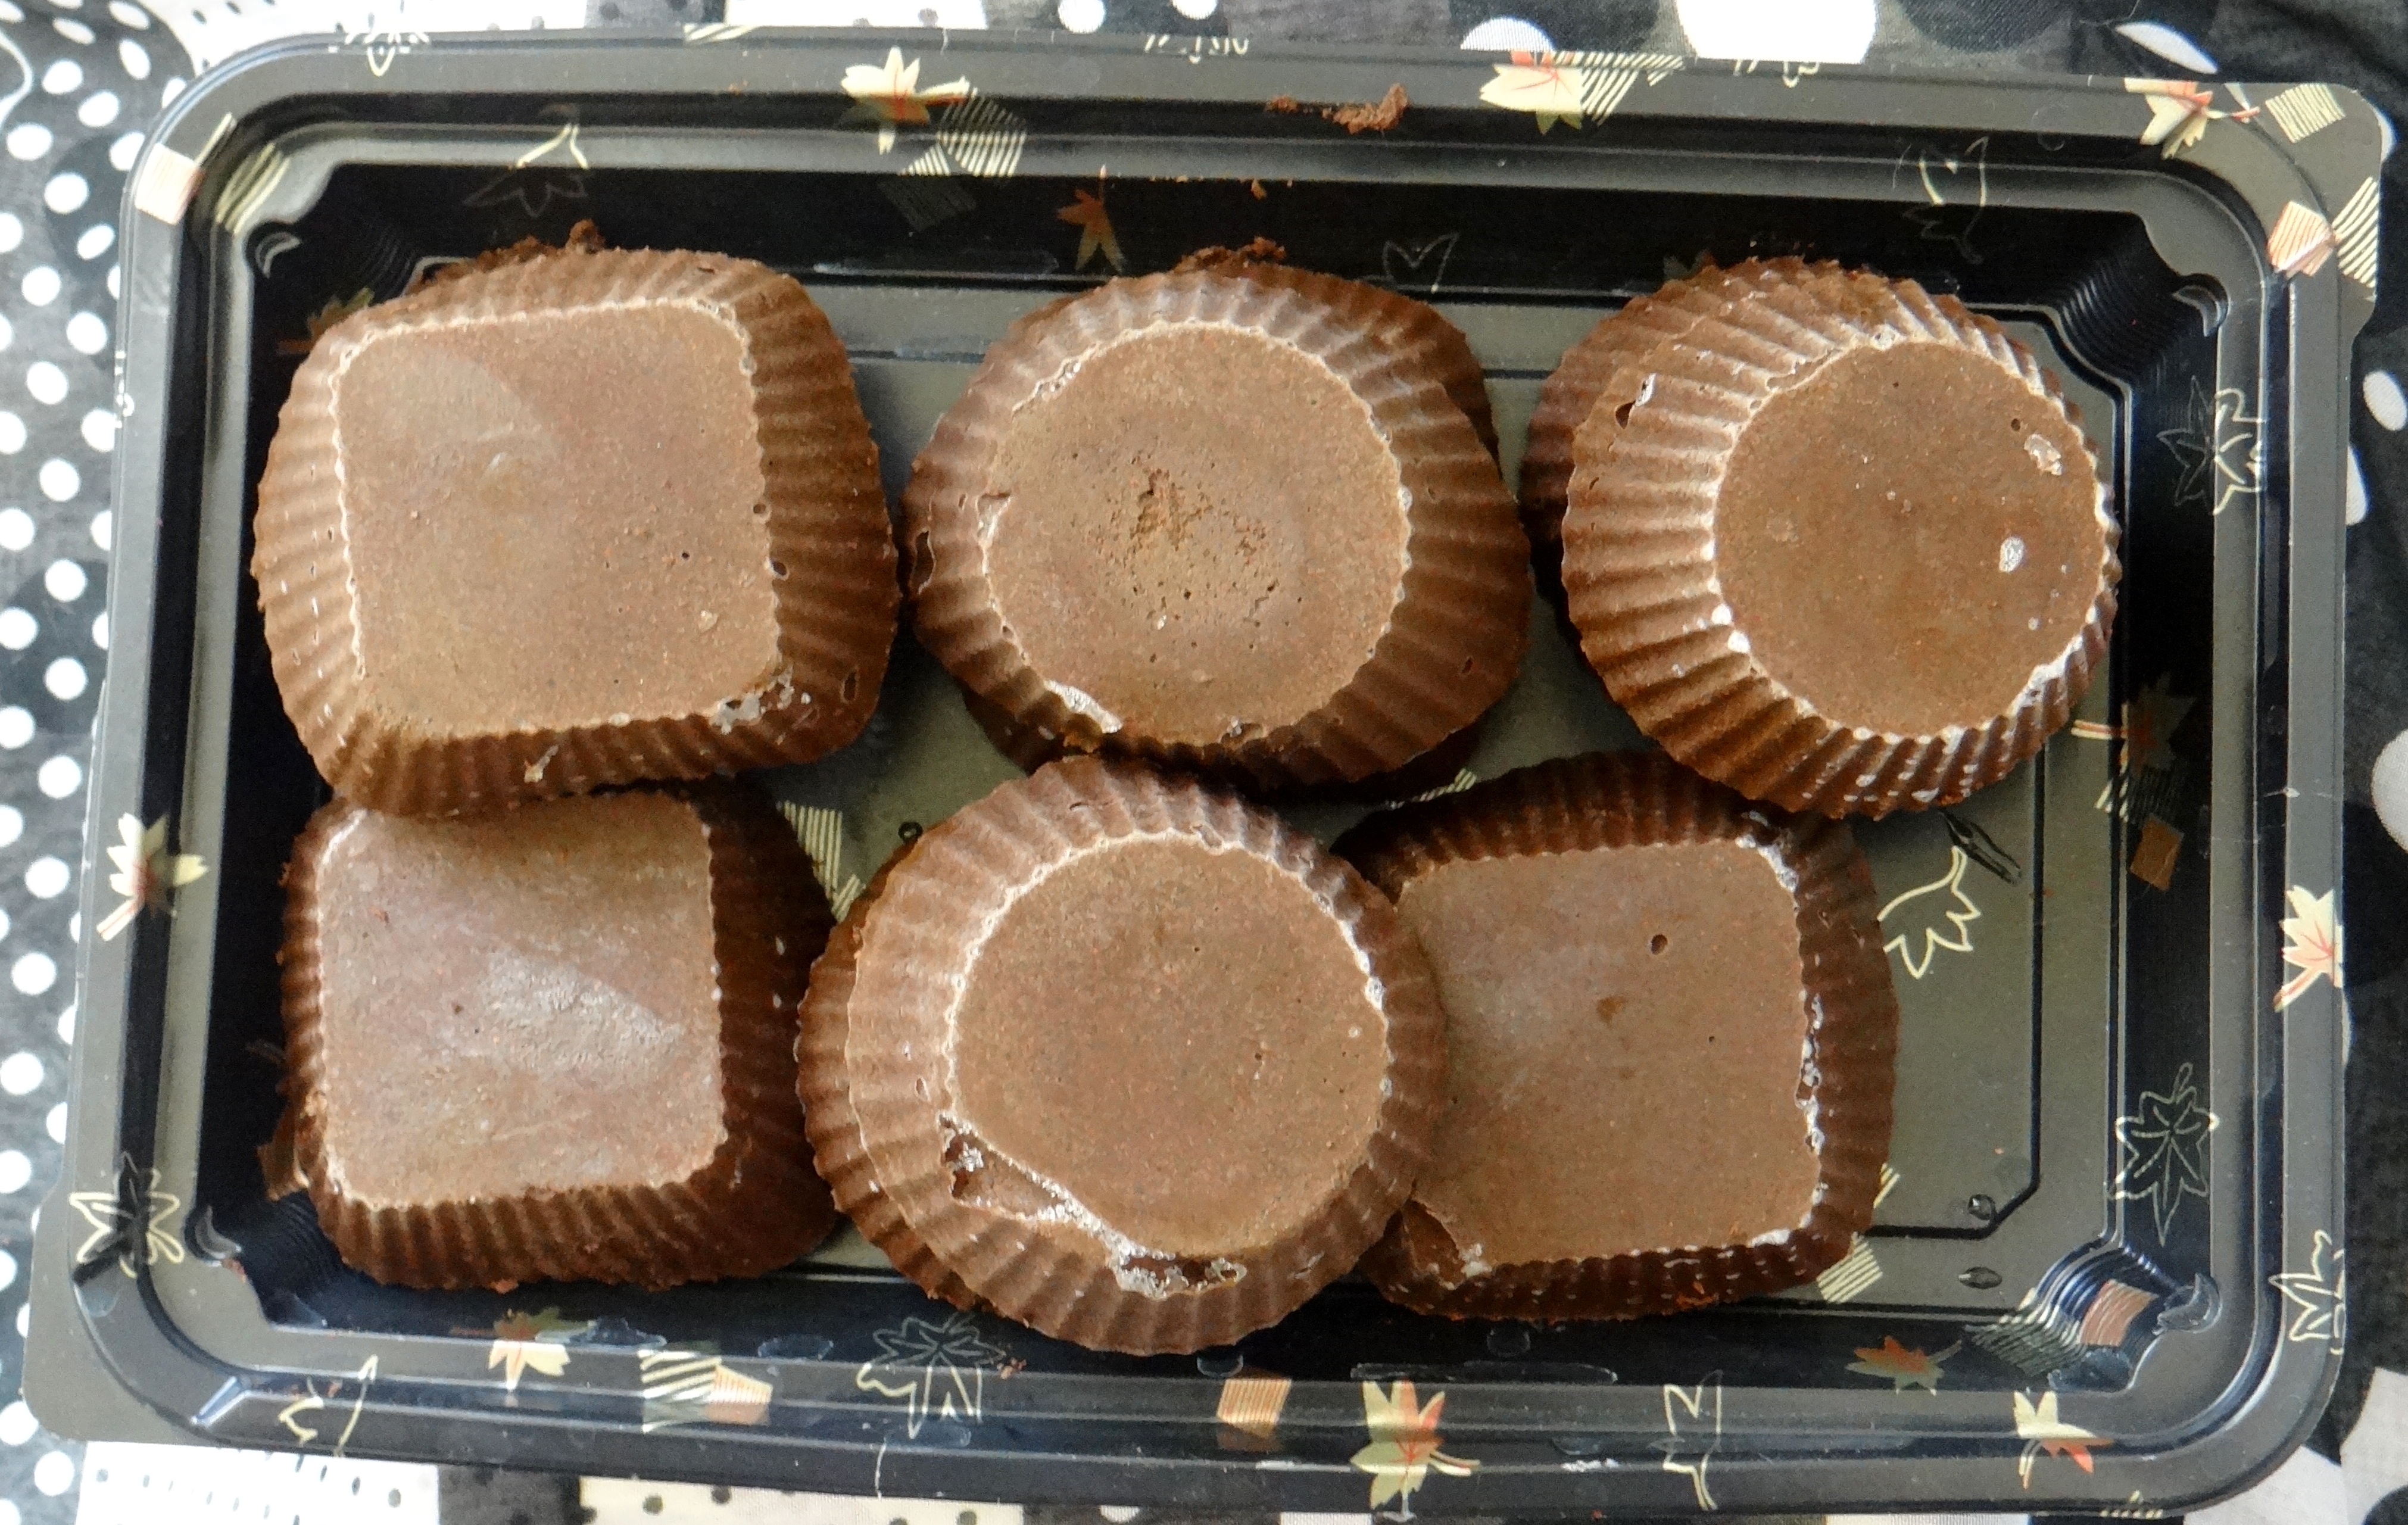
Henna (Ice) Blocks
Frozen Henna (Ice) Blocks
What I now love doing is turning my henna paste into henna (Ice) Blocks. I like making the blocks because:
I mix up quite a bit of henna and store it in my freezer waiting for it to be used. This makes it less time consuming in the long run since everything is ready and just needs to be melted.
Whenever I have henna in my freezer, the red dye is much more intense compared to when I just use my paste after dye release.
Ingredients/Tools:
Henna Paste (recipe above)
Silicone moulds
Spatula
Clingfilm
Sandwich bag
Old material/newspaper to cover the work space
Making the bars:
Henna (Ice) Blocks before freezing them
After making the henna paste I simply pour the paste into silicone molds, cover with Clingfilm and then place them in my freezer. (If you do not have silicone molds you can use ice cube trays but I would keep the moulds and ice cube trays separate from those you use to make normal ice blocks, bake etc. I keep everything I use for my hair separate from other tools in my kitchen).
Clingfilm covered henna (Ice) Blocks
I recommend letting the bars freeze for no less than 12 hours ideally letting them sit in the freezer for longer because the longer you let them sit the more intense the red dye! Once the bars have frozen I cover each bar with Clingfilm and store them in a sandwich bag until they are needed. I have left mine in the freezer for 2 months and still got great dye release and conditioning benefits. (You might get away with more storage time but I have not tried).
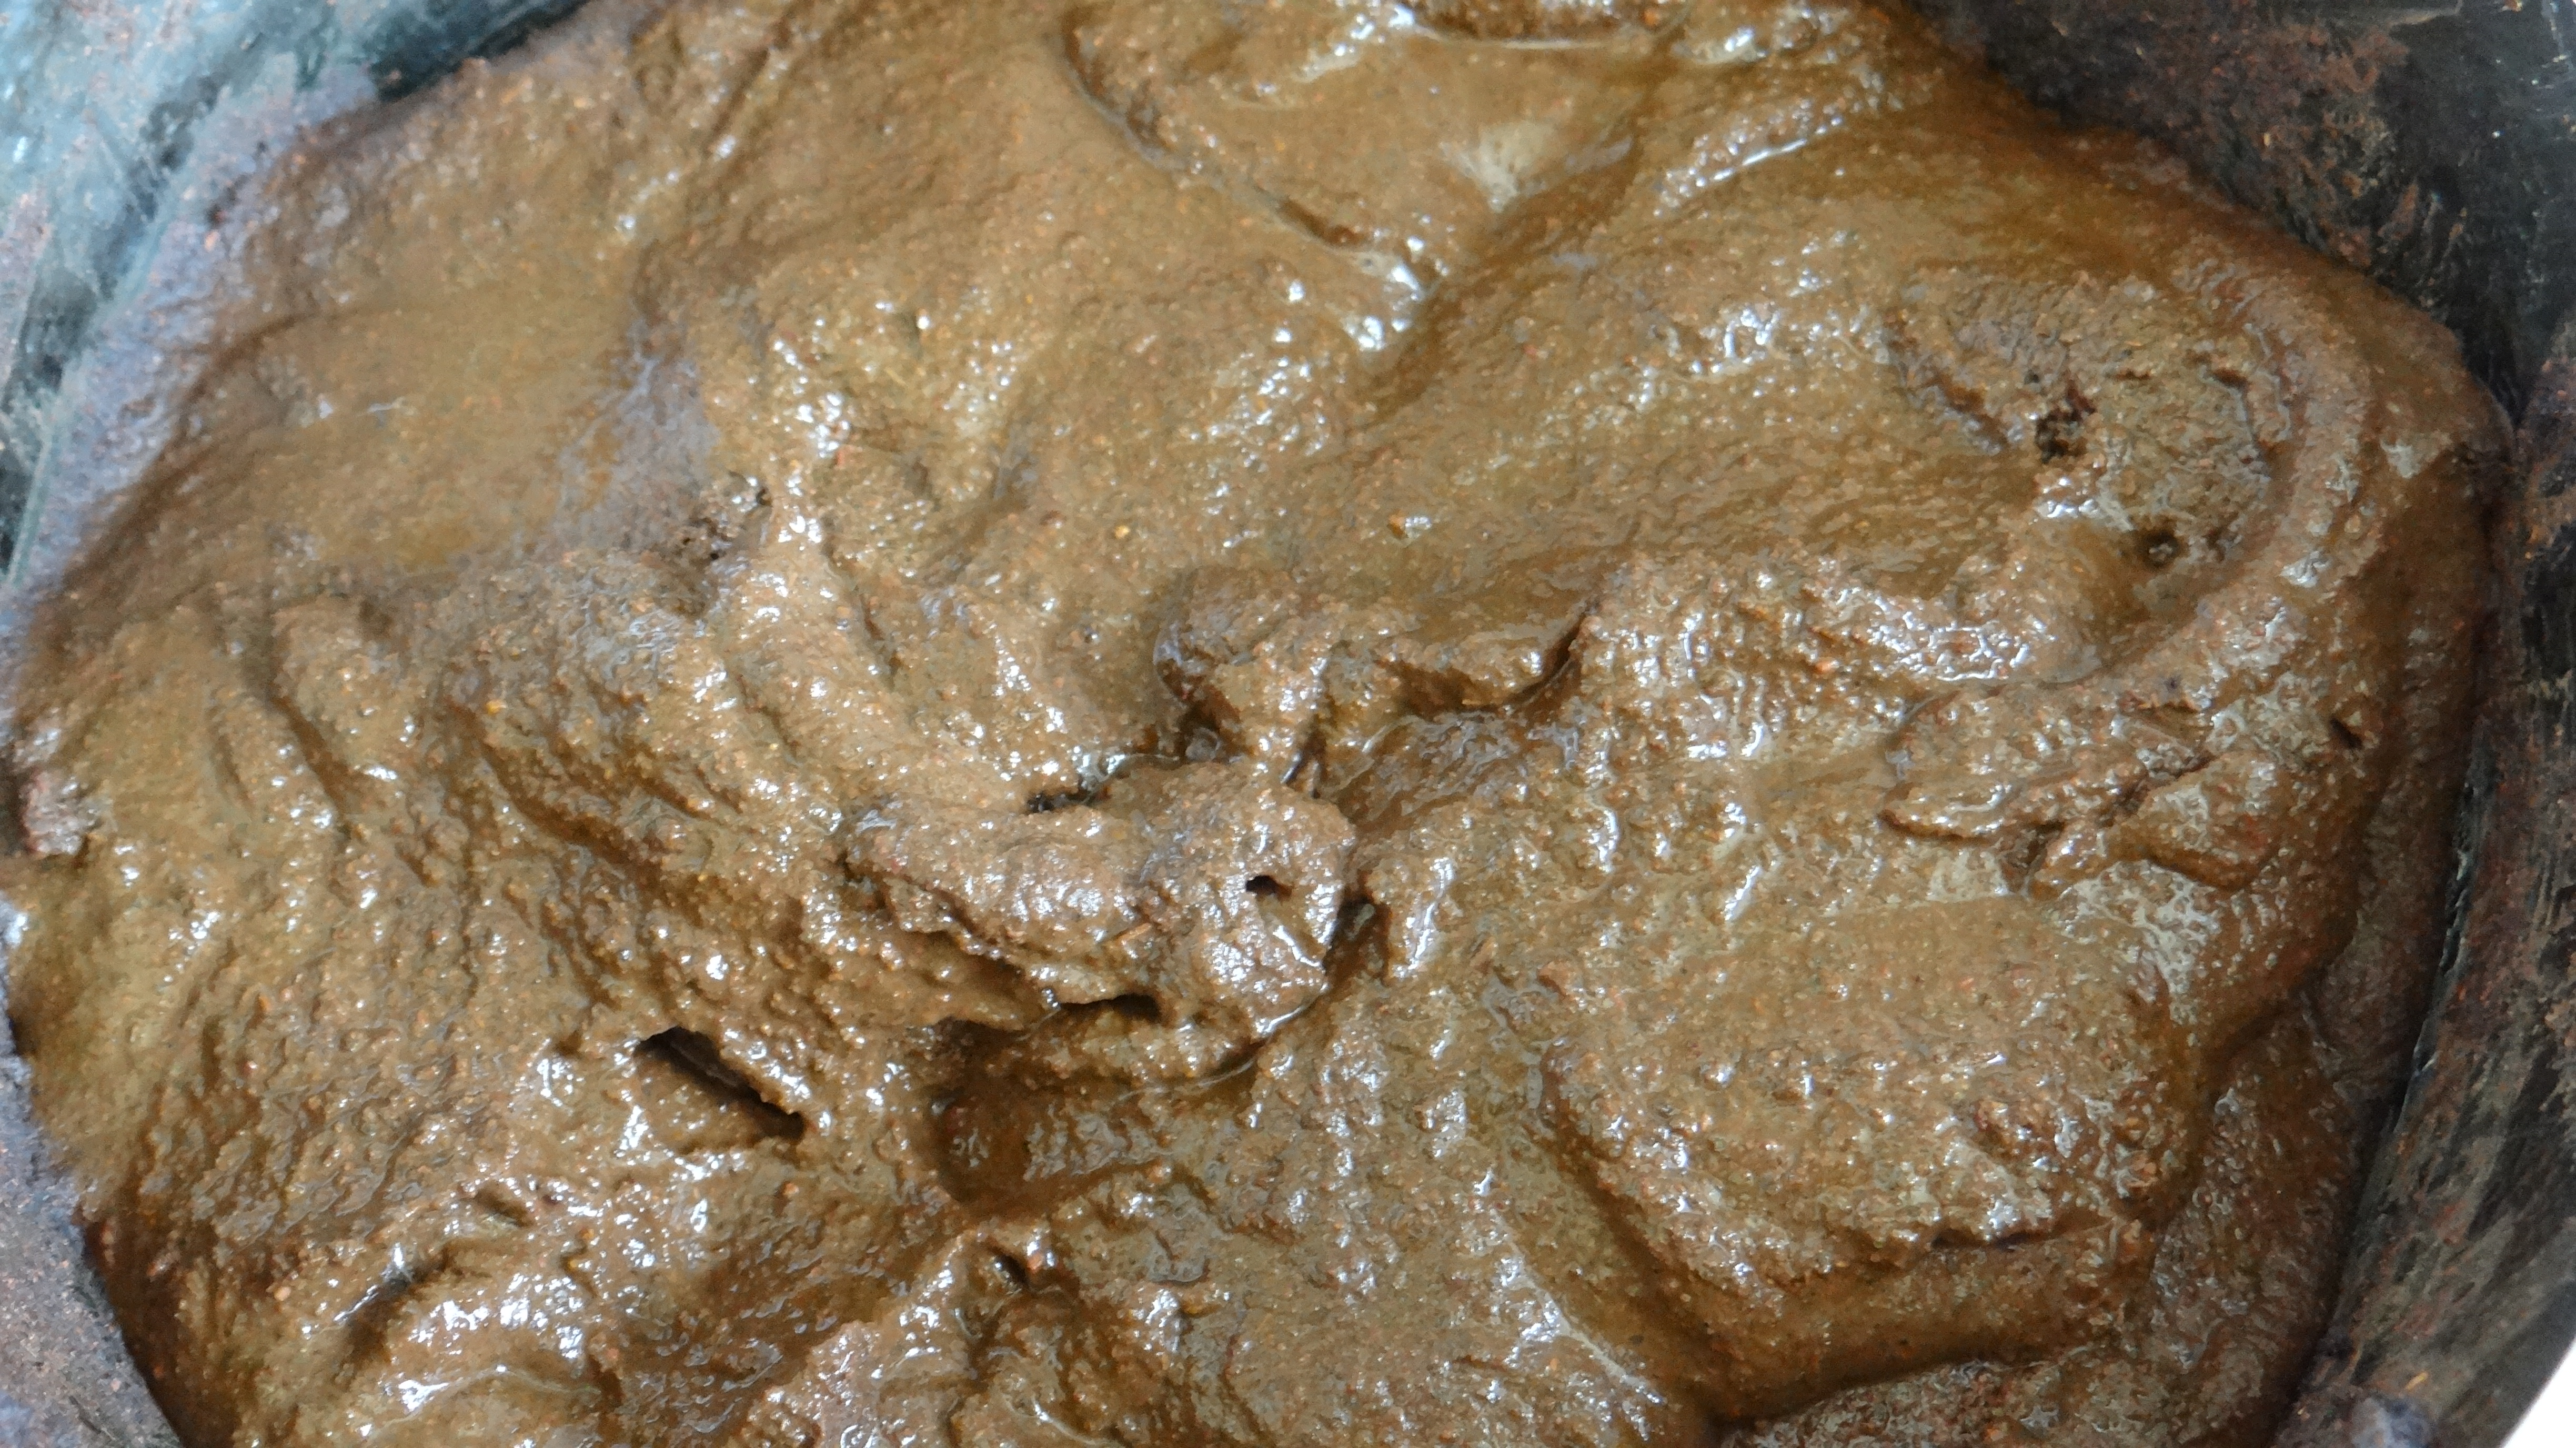
Melting the bars:
Melting Frozen Henna (Ice) Blocks
Heatproof bowl
A little water
Spatula
Henna Bars
Green tea (no more than 2 oz)
Gloves
Old Piece of cloth/newspaper to cover the work space
Put a pot on the stove with a little bit of water. Place the bars in the heatproof bowl and put the bowl over the pot. Allow the bars to slowly melt down on low heat for 7 – 10 minutes while stirring. Once the bars have melted I tend to add a little bit of lukewarm tea (no more than 2 oz) just to make sure the paste is neither too thick/thin. I apply & rinse as normal (see above) and that is it!
So I just did a my Strengthening Deep Conditioner (DC) – Henna & Amla (well I did it a few days ago) and let me tell you I do not know why I was so lazy with this DC AGAIN. (I slacked a lot recently) but every time I redo it I fall in love with these Ayurvedic Herbs all over again! I made two different videos, edited them and have them up! My “Henna and Amla Explanation“ video does as the name implies: explains what I use, why I use it and how I use the DC. I also added in extra information such as the benefits of using Ayurvedic Herbs. (I only lightly touched on the topic in the video because it started to get too long!)
The second video “Strengthening Deep Conditioner“ demonstrates how I actually mix up my DC as well as how I apply it, I think my DIY Henna /Amla DC section under ‘Mai Hair Routines’ pretty much covers the content of both the videos.