Hello Maicurlies,
The DIY freak is back and this shall be my last whipped butter as part of this “series” for now.
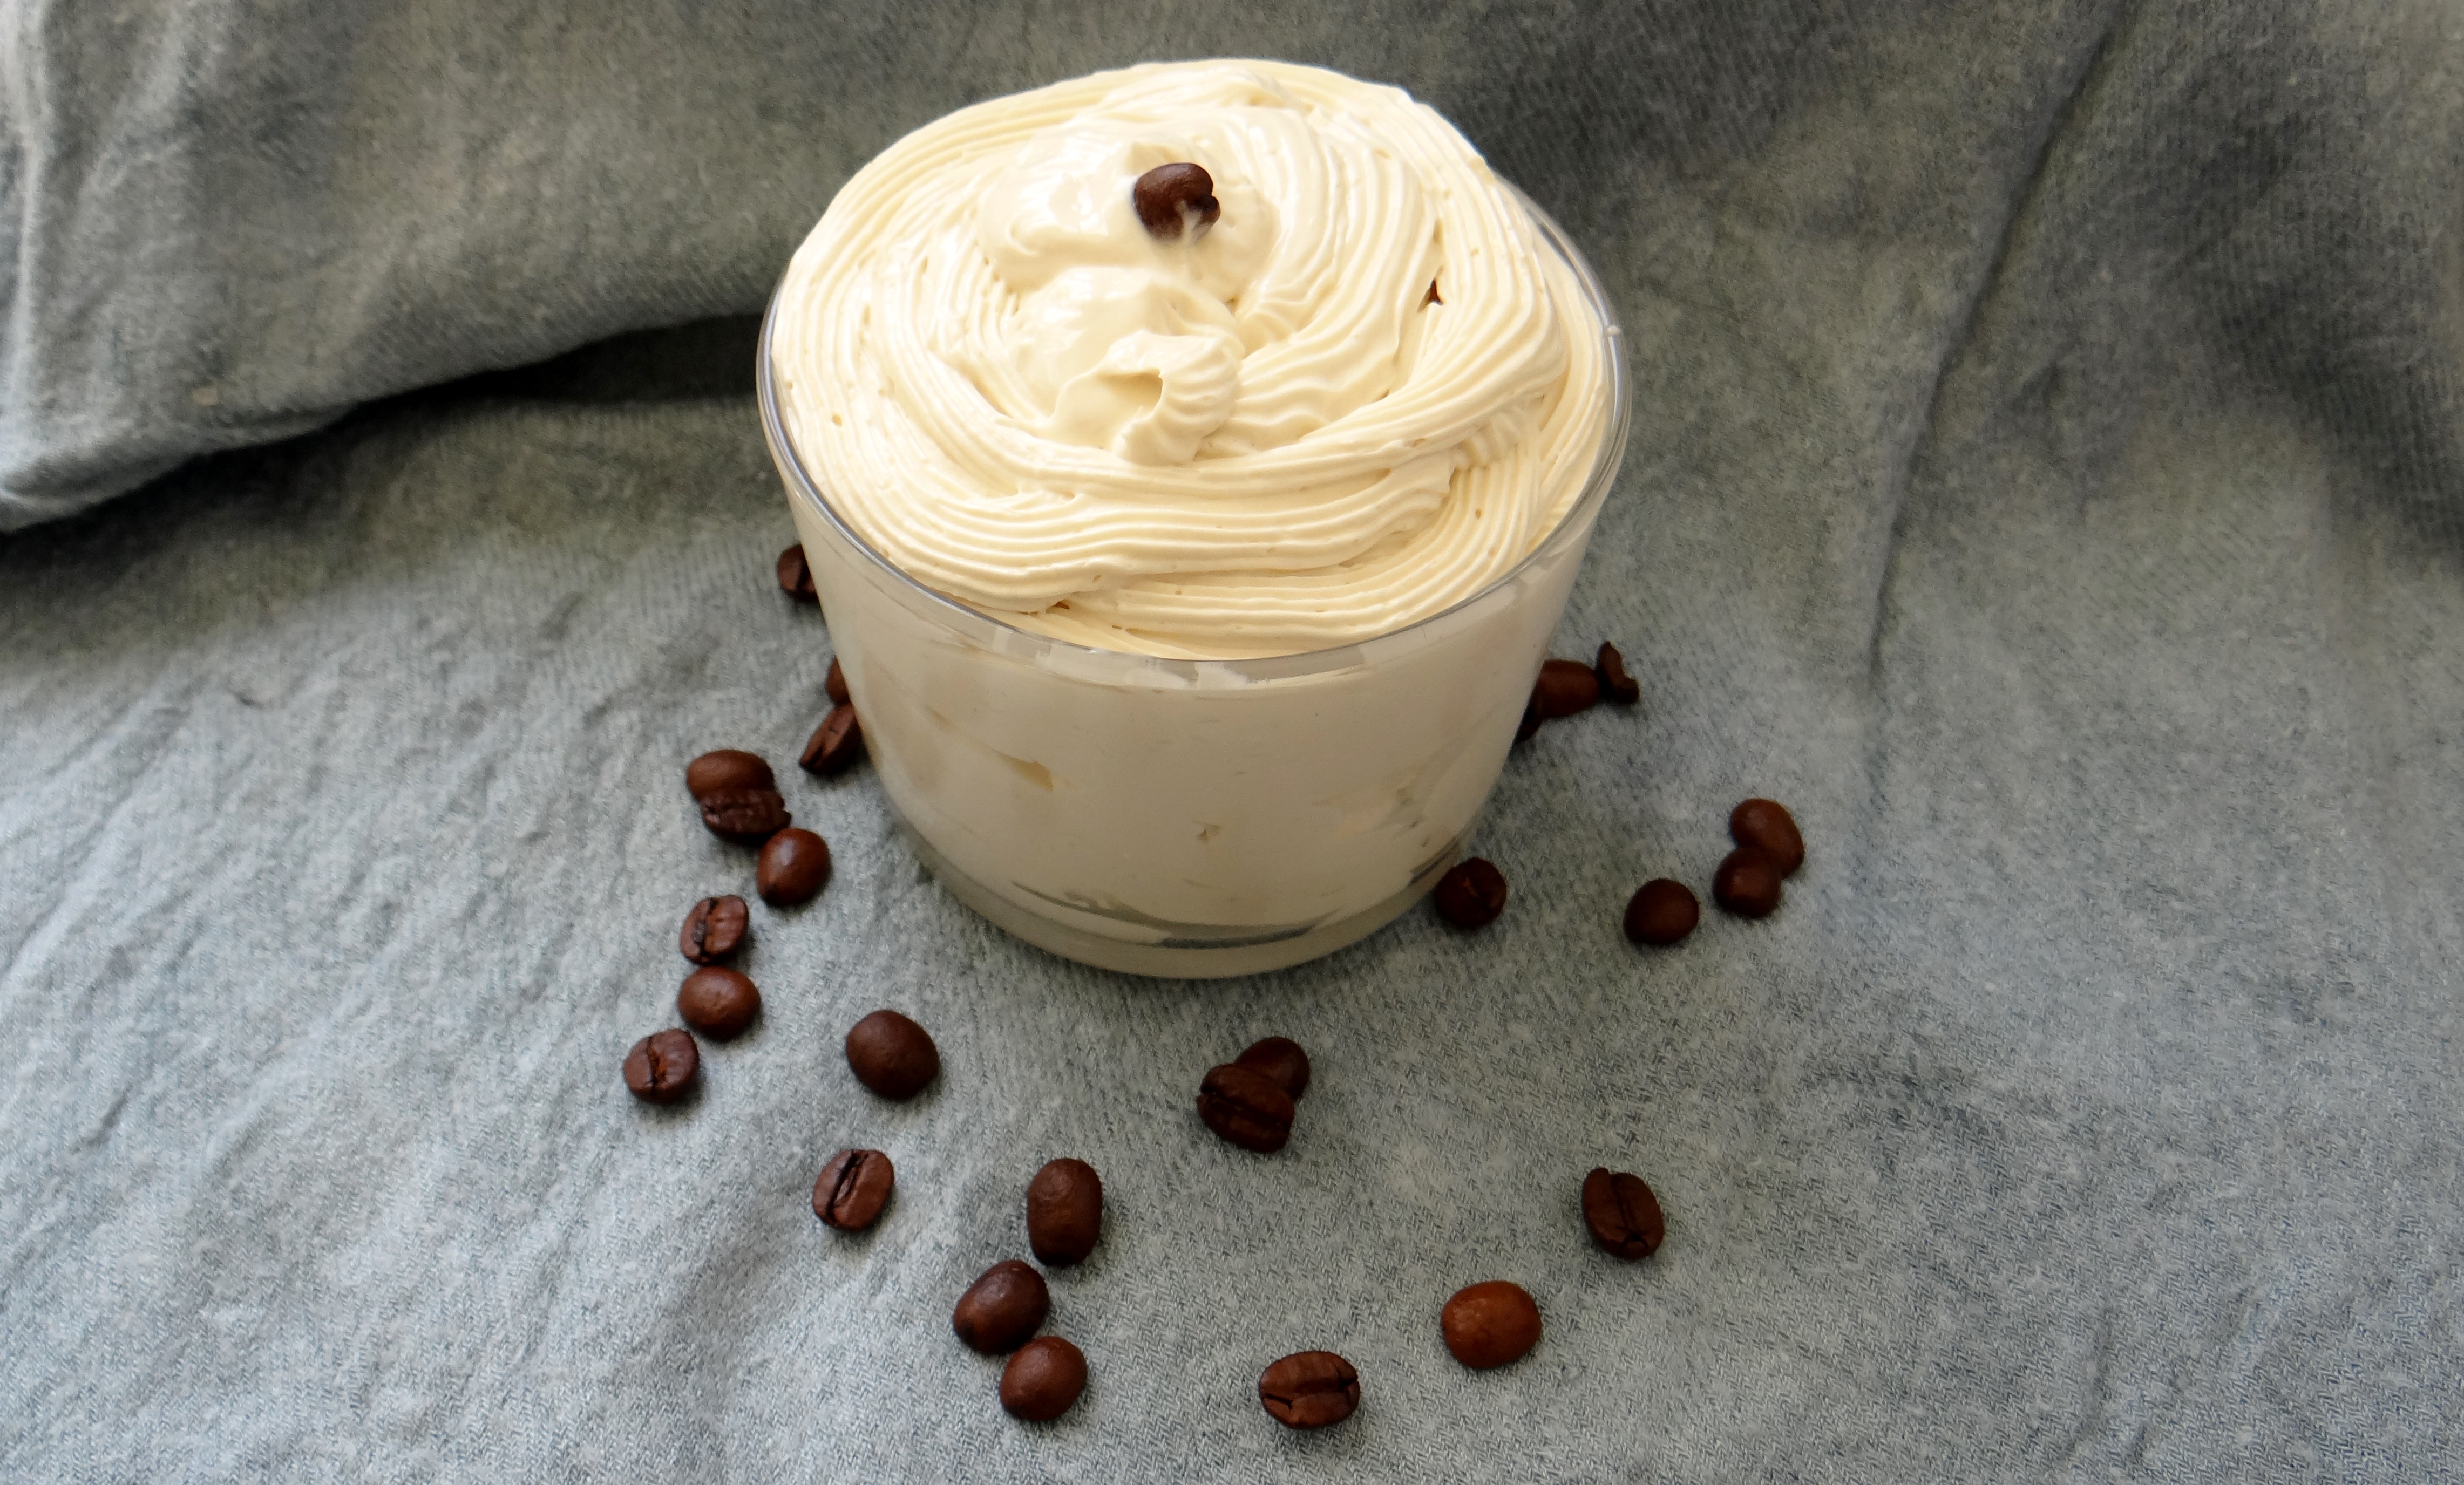
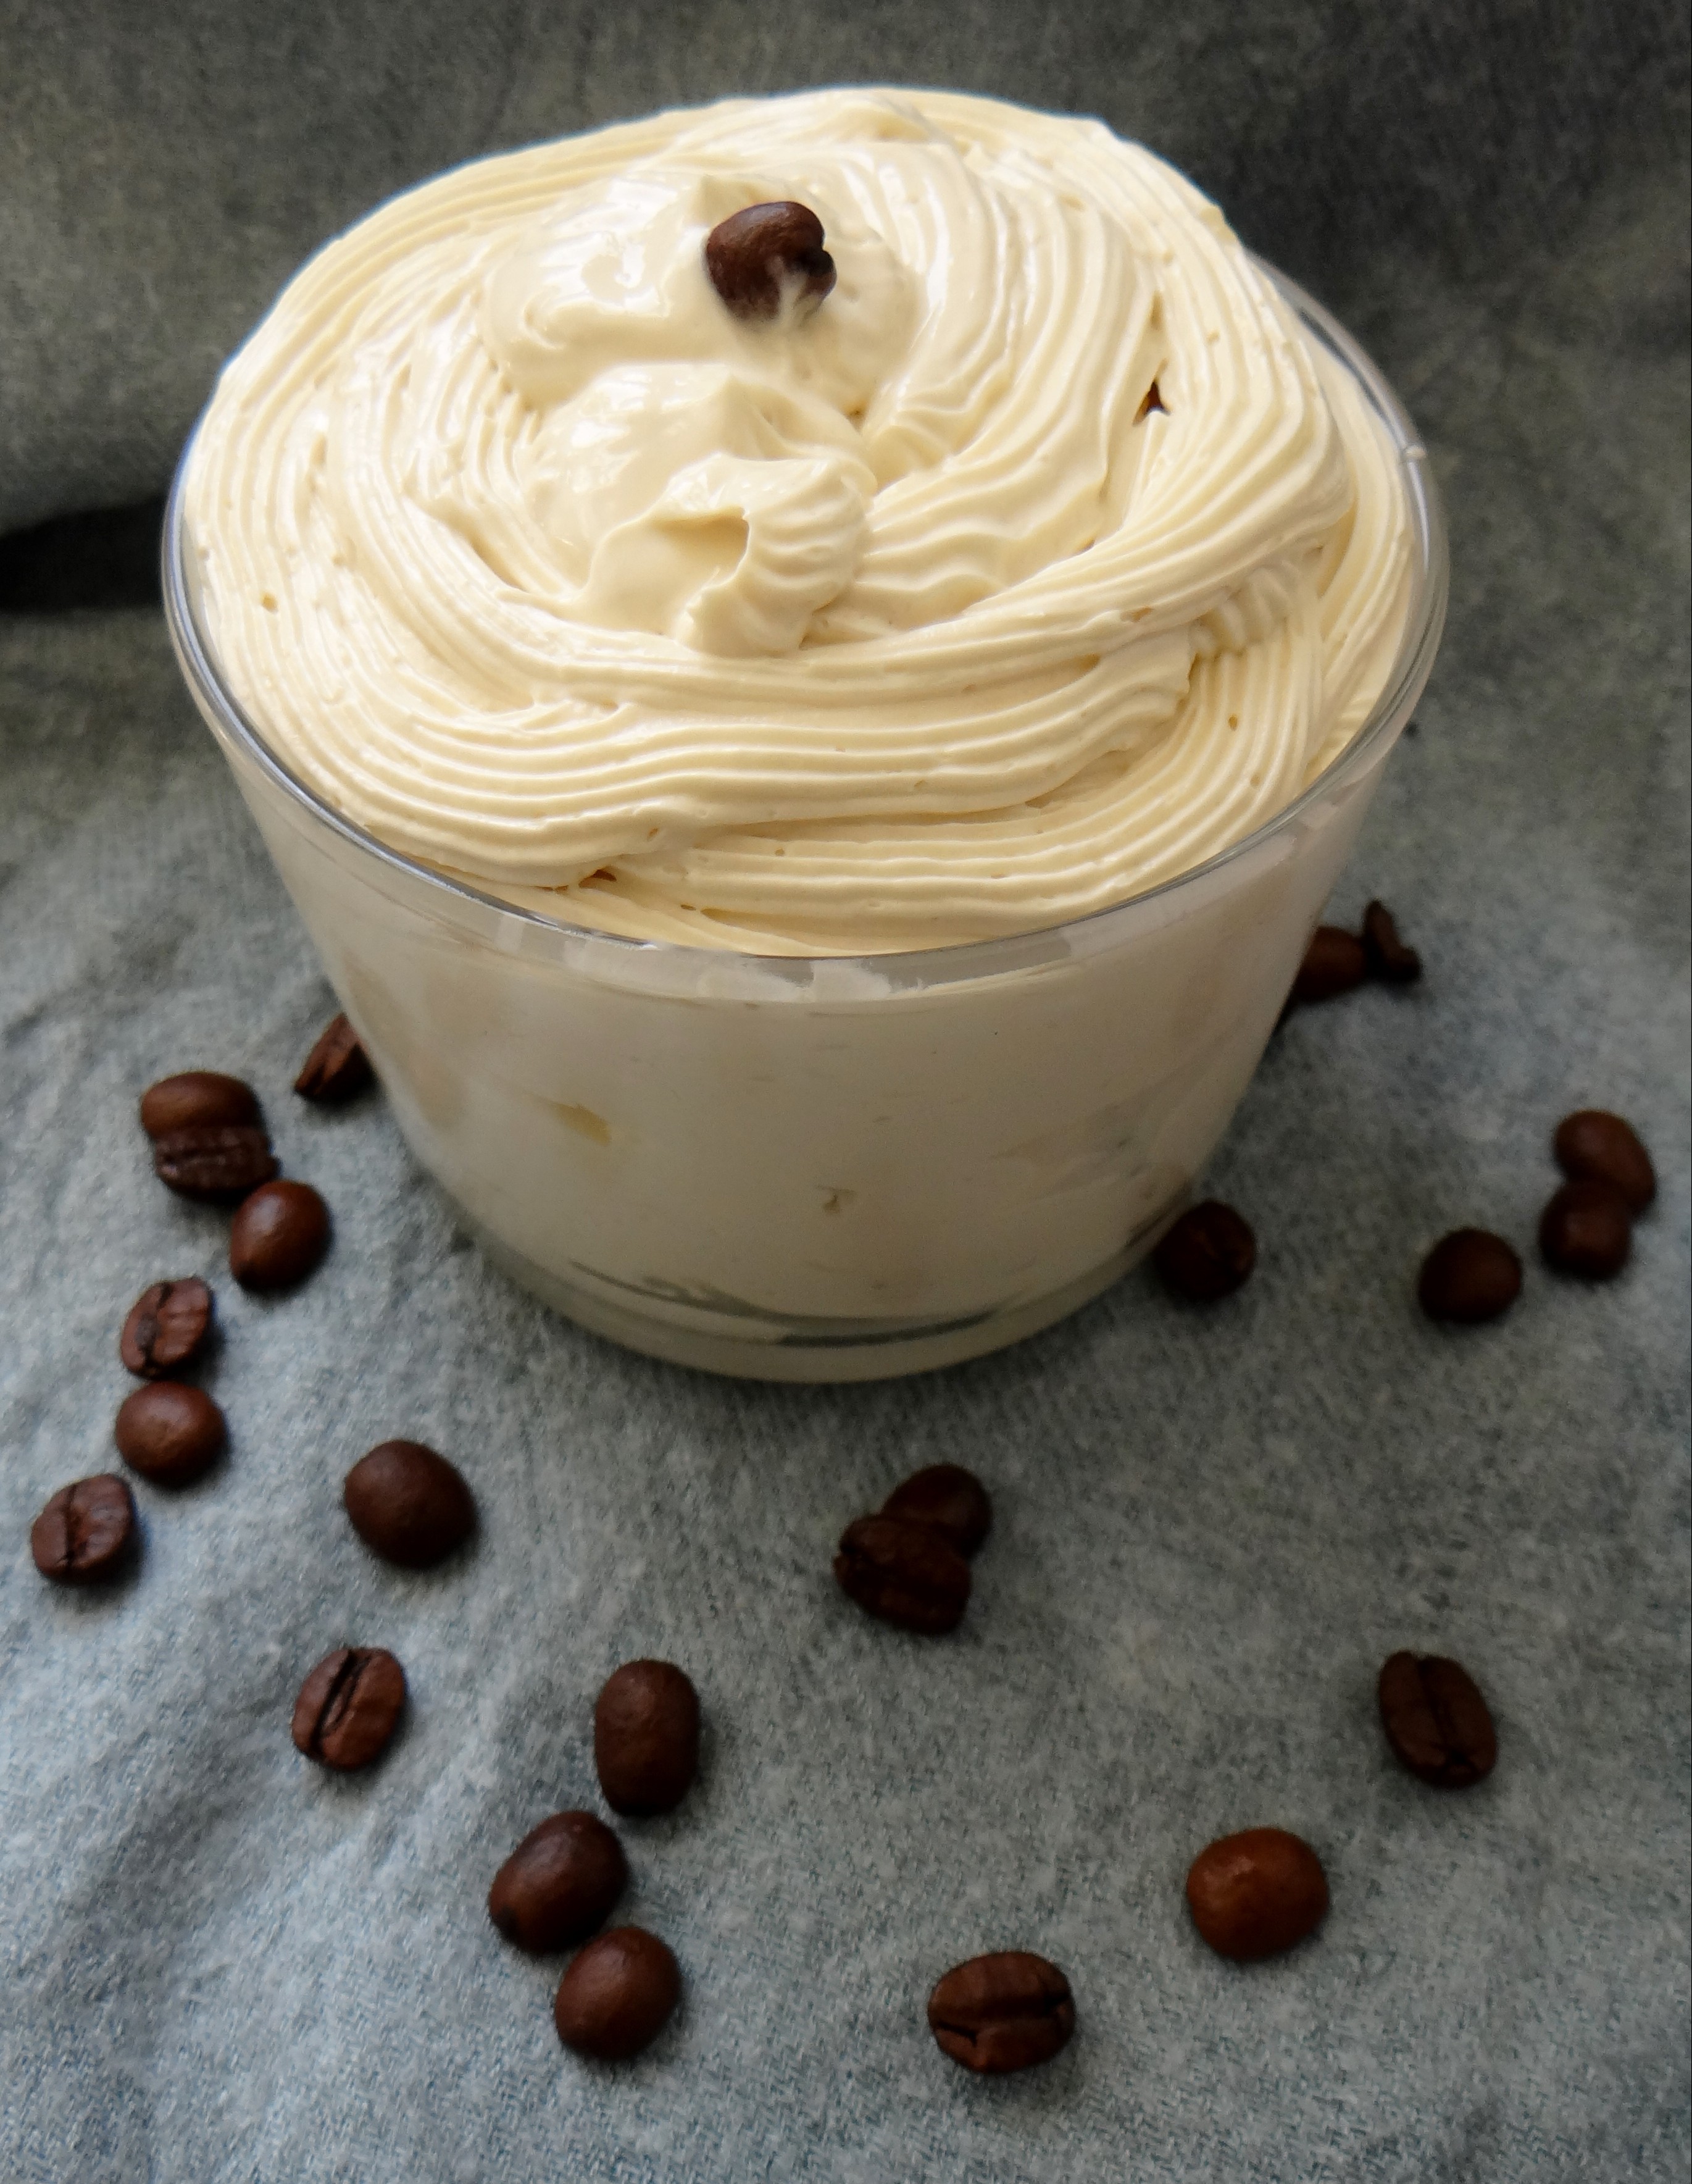
Whipped Double Coffee Butter
Fret not (I can hear you screaming whaaaat), I shall have 2 more tutorials that will be released within the next 2 months that will be strength based thanks to an inspiration from a YouTube viewer (thank you)! I am just taking a break to actually have time to use up the whips I already have.
Anyways back to this whipped butter, I can honestly say that this Double Coffee Butter is my favorite (I have probably said this a few times but I truly love this) 😀
From all the mixes/recipes/concoctions I have made, this one has the highest concentration of coffee… coffee is my friend is my love. My curls seem to thrive on products that include coffee/caffeine so why would I not use use different types of coffee butter along with some coffee infused oil right?
I can go on and on about the benefits of coffee for the hair and skin and I of course already have, you can read all about it here where I introduce my DIY Coffee Bean Infused Butter and here my DIY Coffee Bean Infused Almond Oil
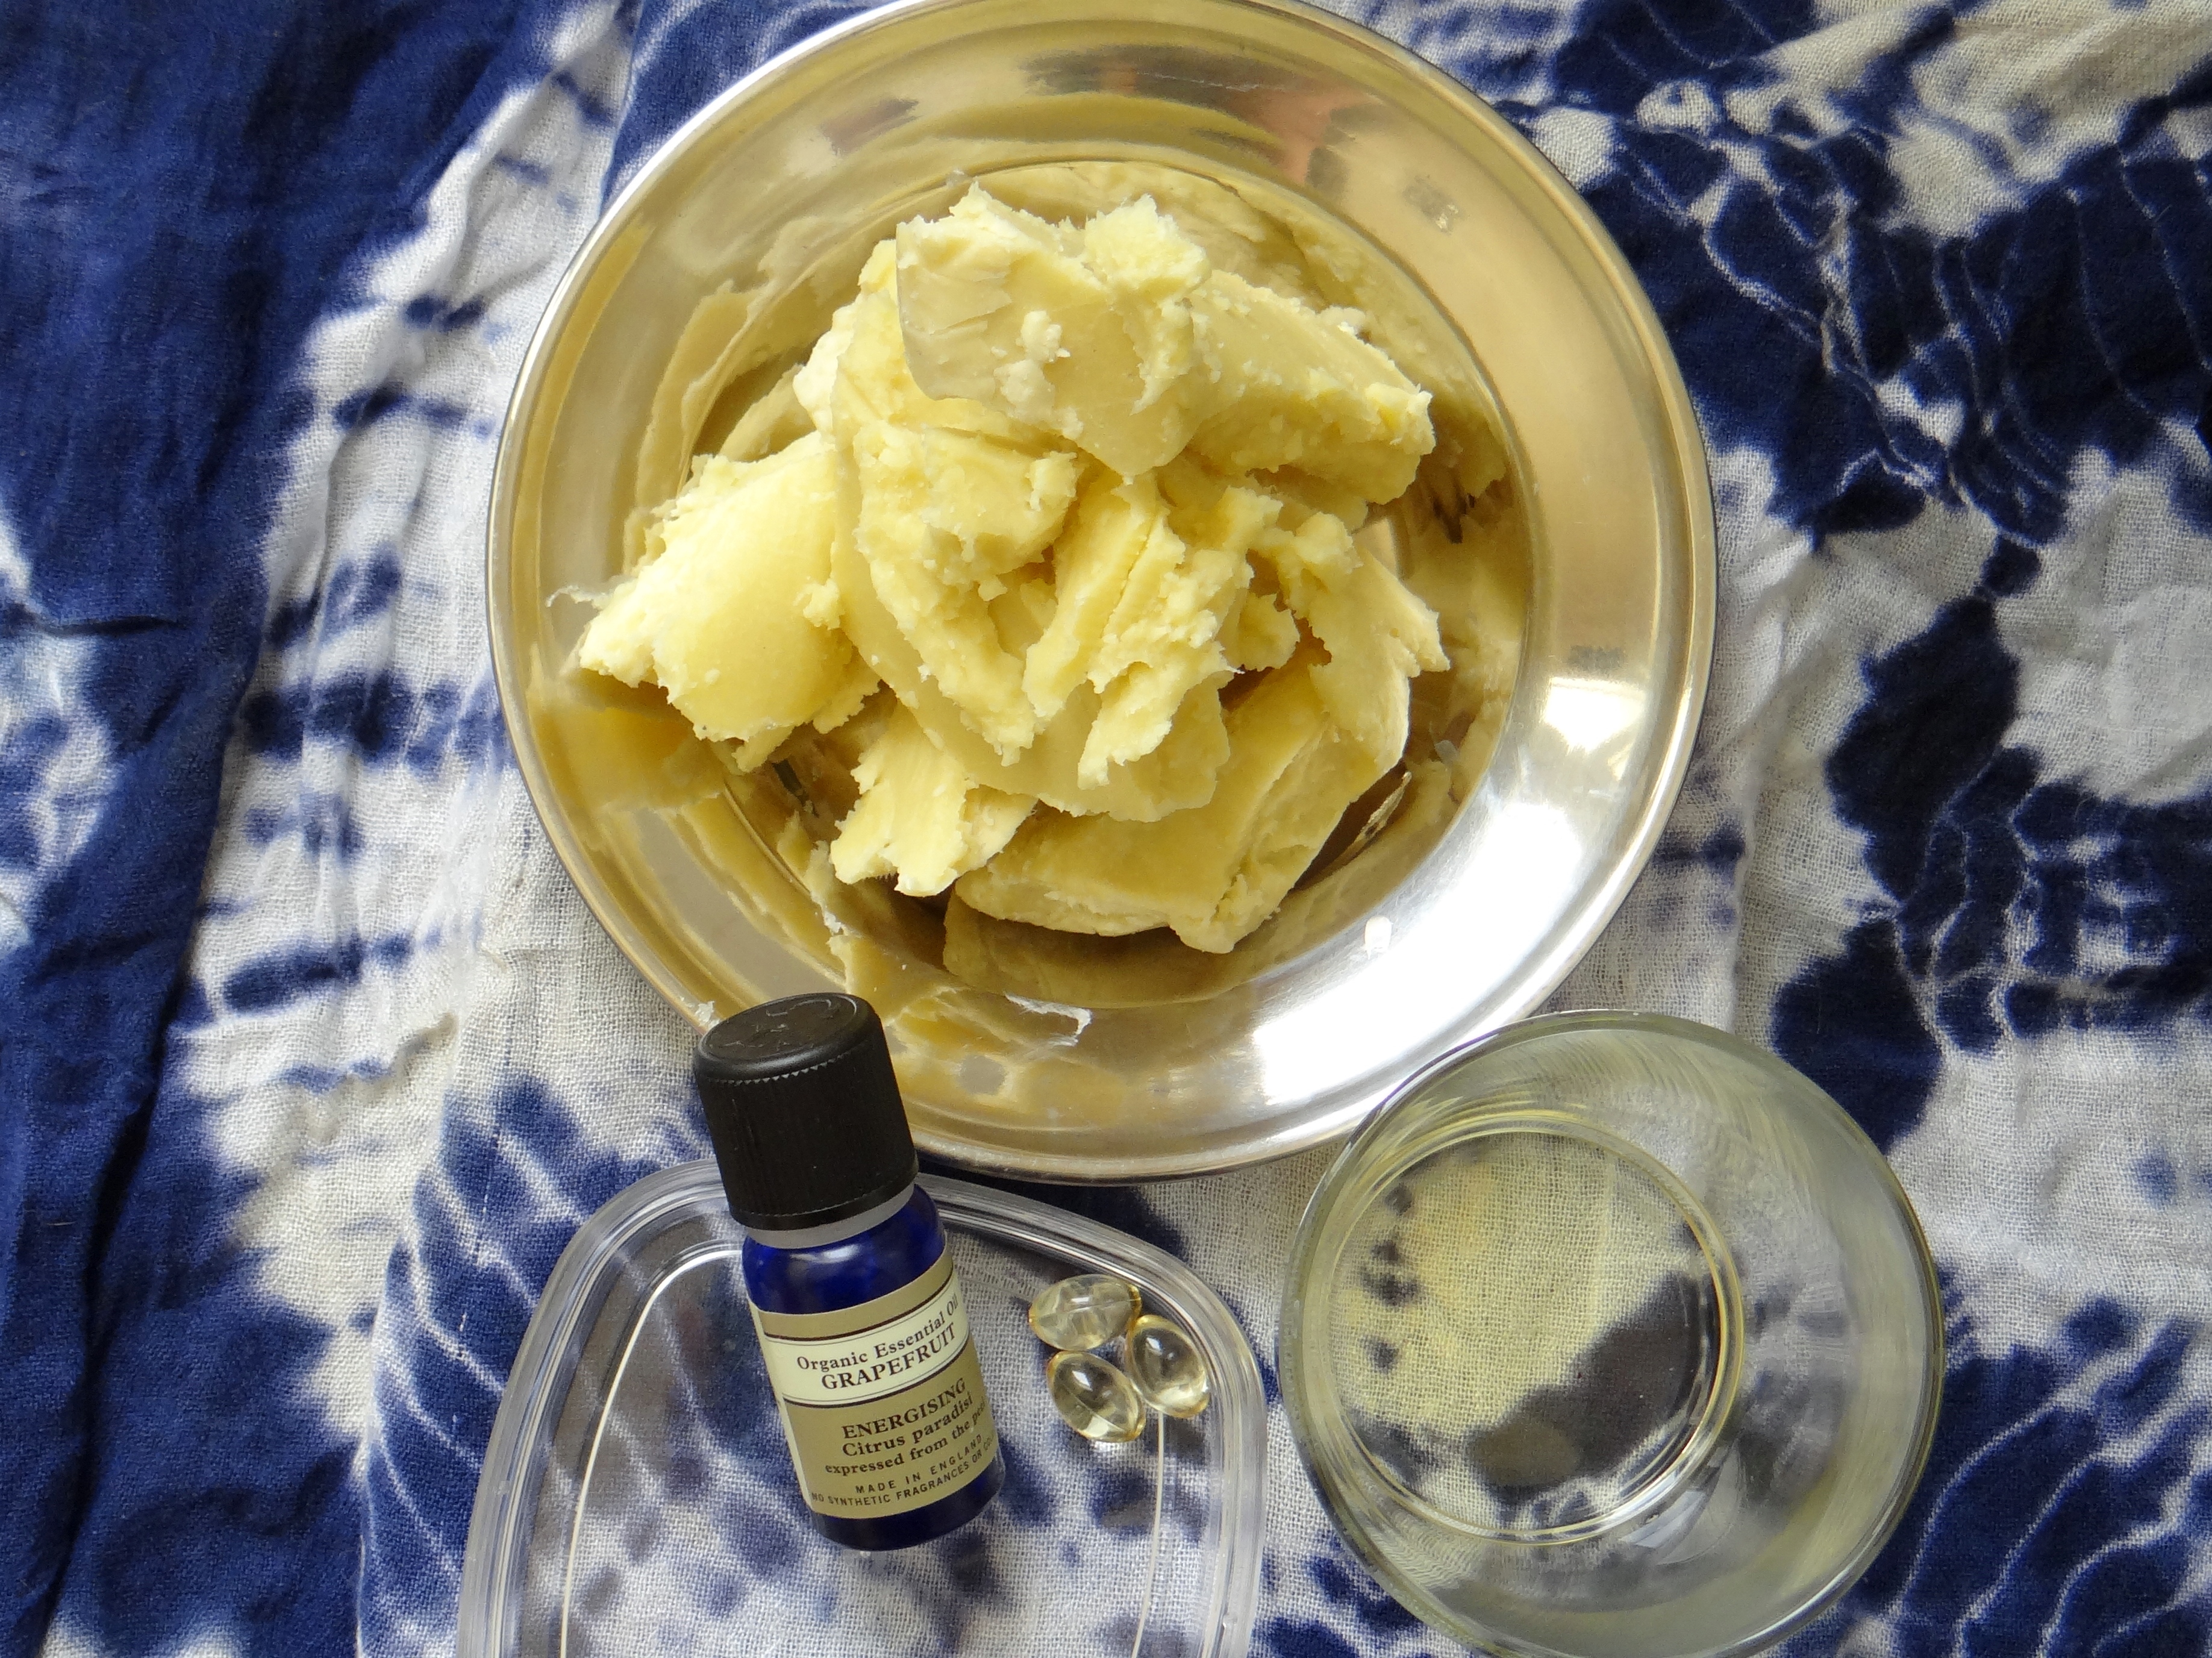
Ingredients/Tools: (makes 10.3 oz whipped butter)
- 5.5 oz Coffee Bean Infused Butter (Cocoa/Shea Combination)
- 3 oz Coffee Butter (I bought mine from SheaButter Cottage)
- 1.1 oz Coffee Bean Infused Almond Oil
- 0.5 oz Vanilla Bean Infused Almond Oil
- 0.15 oz Glycerin (optional)
- 3 capsules Vitamin E Oil (roughly 0.15 oz)
- Heatproof Bowl
- Whisk
- Gloves
- Airtight Container
- Spatula
- Piping Bag (optional) – a sandwich bag can do the trick or a spoon/spatula to transfer the whip to your container)
Note: I want to remind you that I live in the desert so normally during the summer I prefer my mix to be a little more firm therefore I use more butter than oil. If you live in colder climates and especially during autumn & winter I suggest that you add more oil that I do (see below).
Ratio Alternatives/Ingredient Alternatives:
In my opinion the infused coffee bean and the coffee butter are what makes this a double coffee butter however, should you not have any infused coffee bean butter (recipe) you can replace it with either Shea Butter or a Shea & Cocoa Butter combination (40% Cocoa 60% Shea butter). For a less firm whip particularly in autumn/winter I would suggest using 2 oz – 3 oz carrier oils. Technically you can use any carrier oil you prefer, they do not have to be coffee bean or vanilla bean infused oils however again, to make this a coffee focused butter I would suggest using more coffee bean infused oil (recipe) such as 70% coffee oil 30% vanilla bean oil. Other oil alternatives could be: Extra Virgin Coconut Oil, Pure Almond Oil, Grapeseed Oil, Avocado Oil, Extra Virgin Olive Oil etc. Glycerin is an optional ingredient that does not need to be added especially if your hair does not like it. It can either be omitted or even replaced with raw honey.
Method:


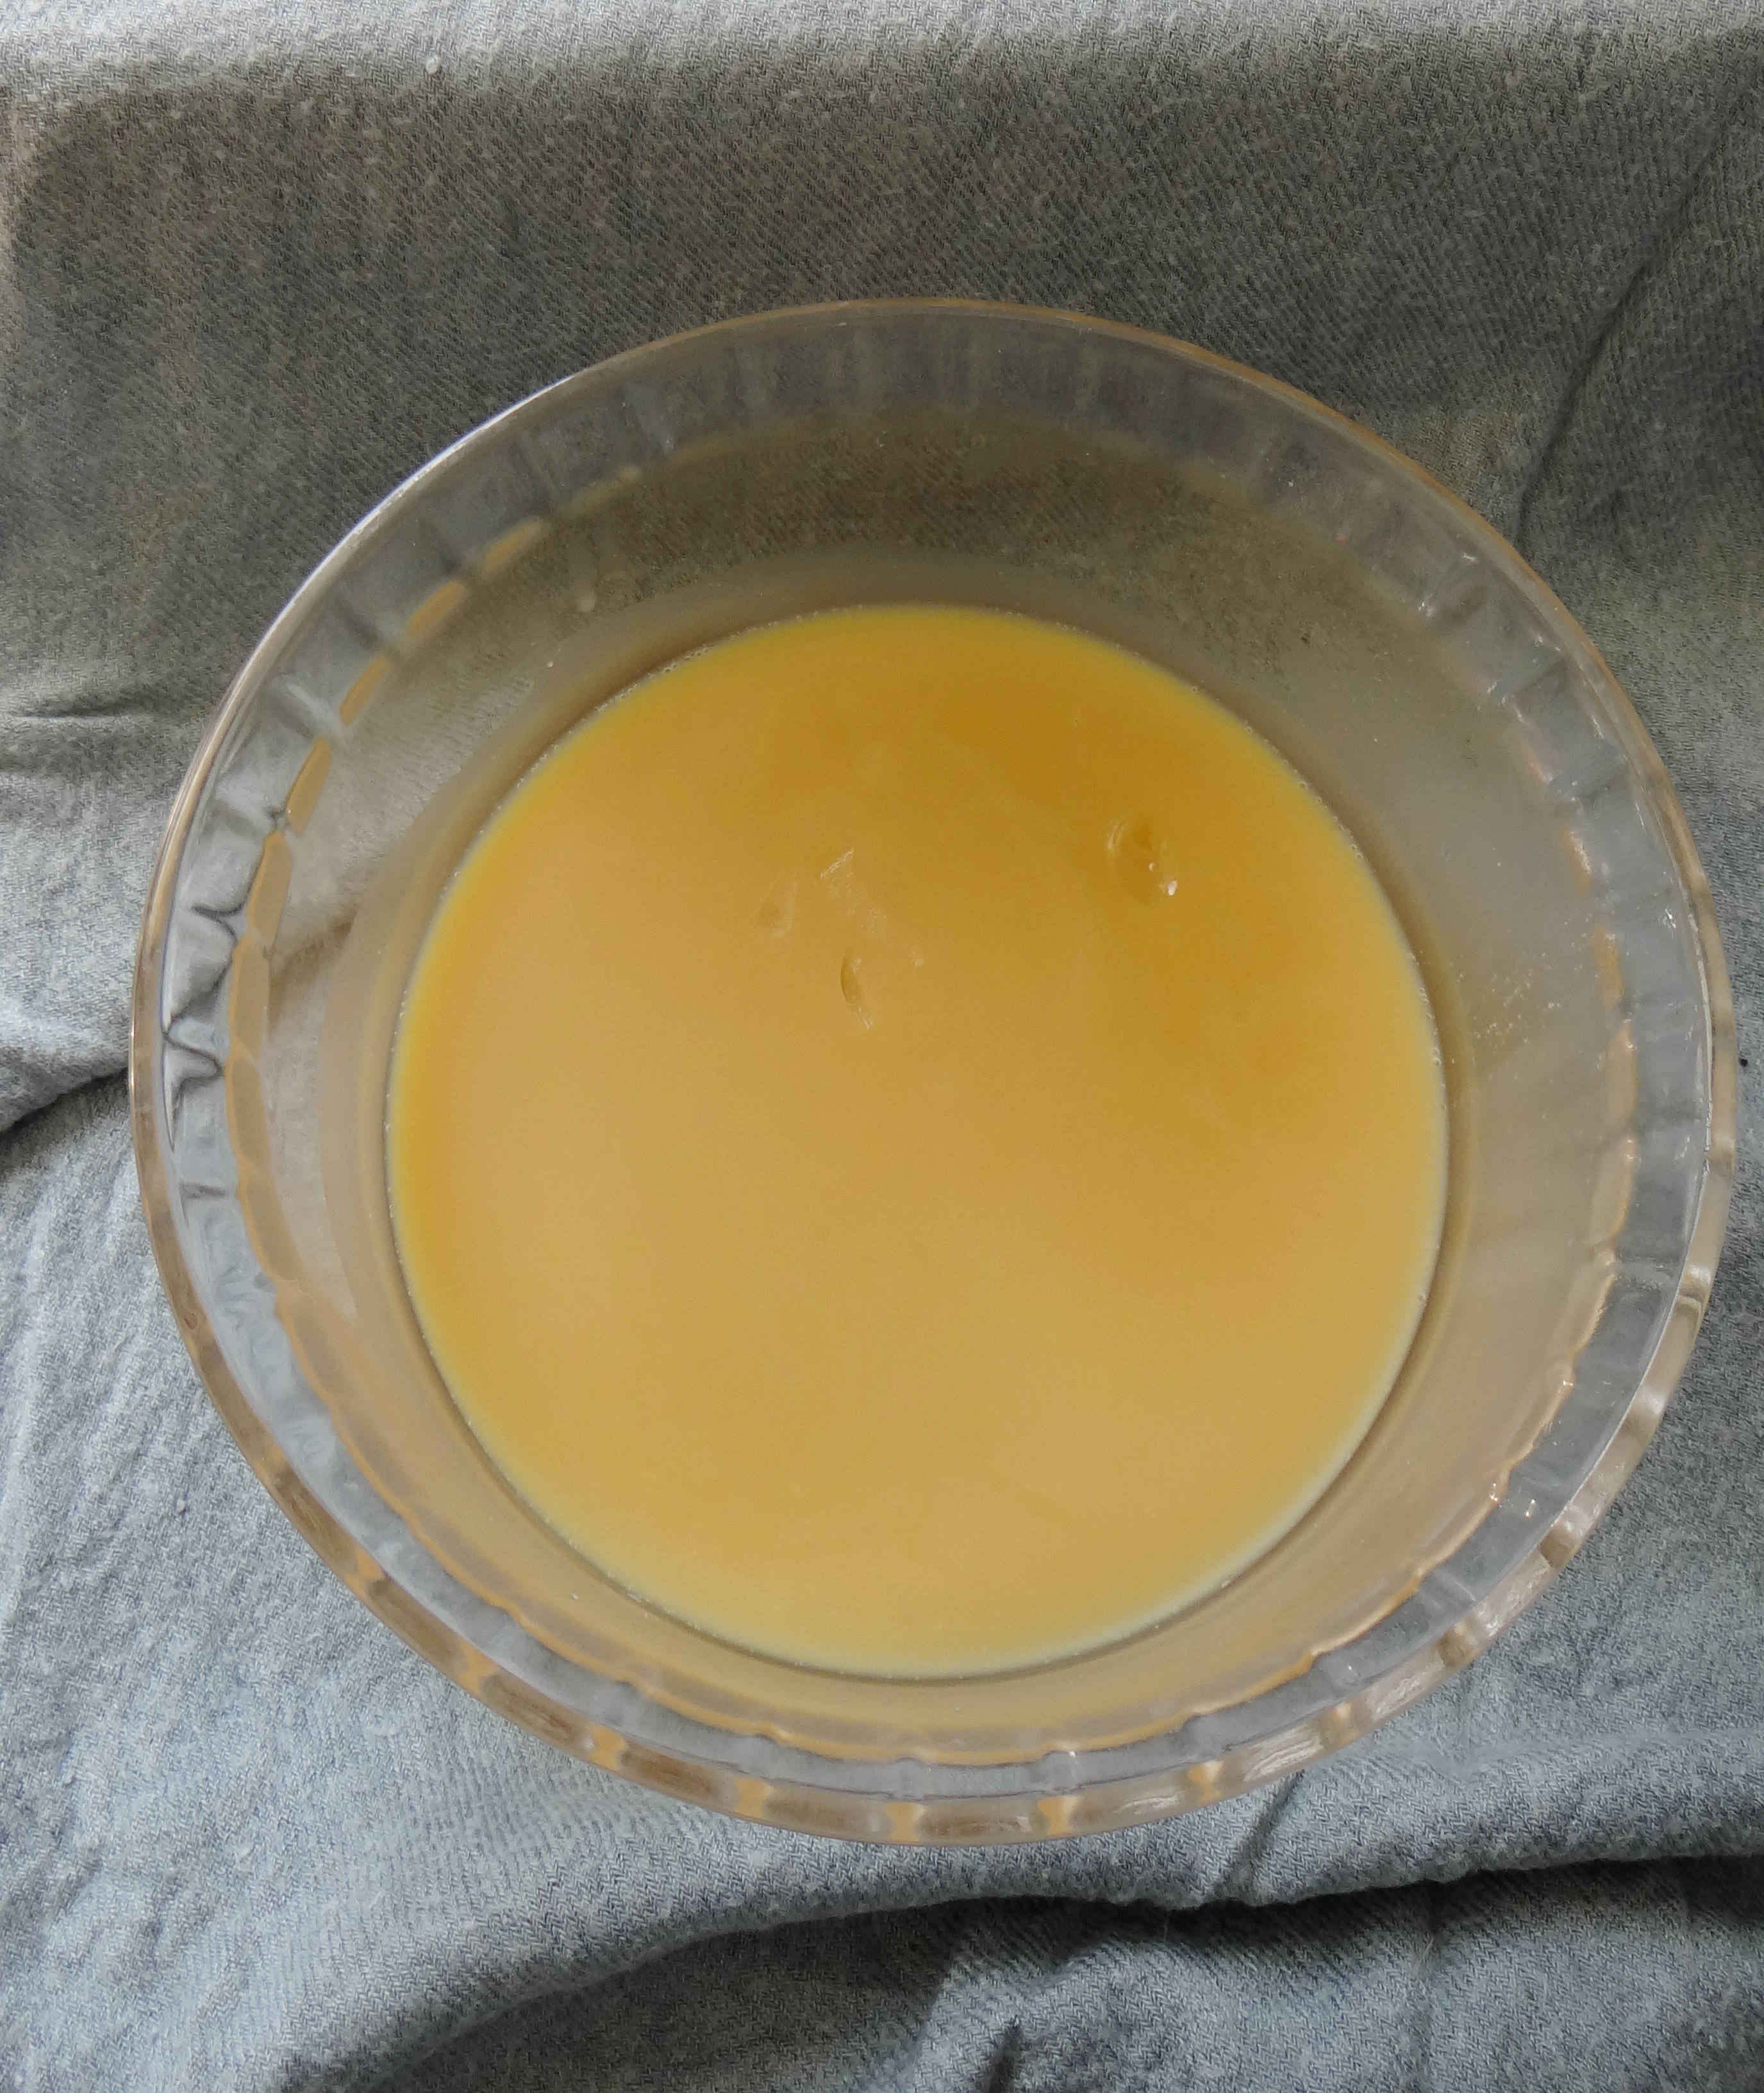
Once the coffee bean infused butter has been double broiled I add the coffee butter. The warmth from the melted butter will help melt down the coffee butter without the need of additional broiling. I then add 0.8 oz of the Coffee Bean Infused Almond Oil and 0.5 oz Vanilla Bean Infused Almond Oil and stir.
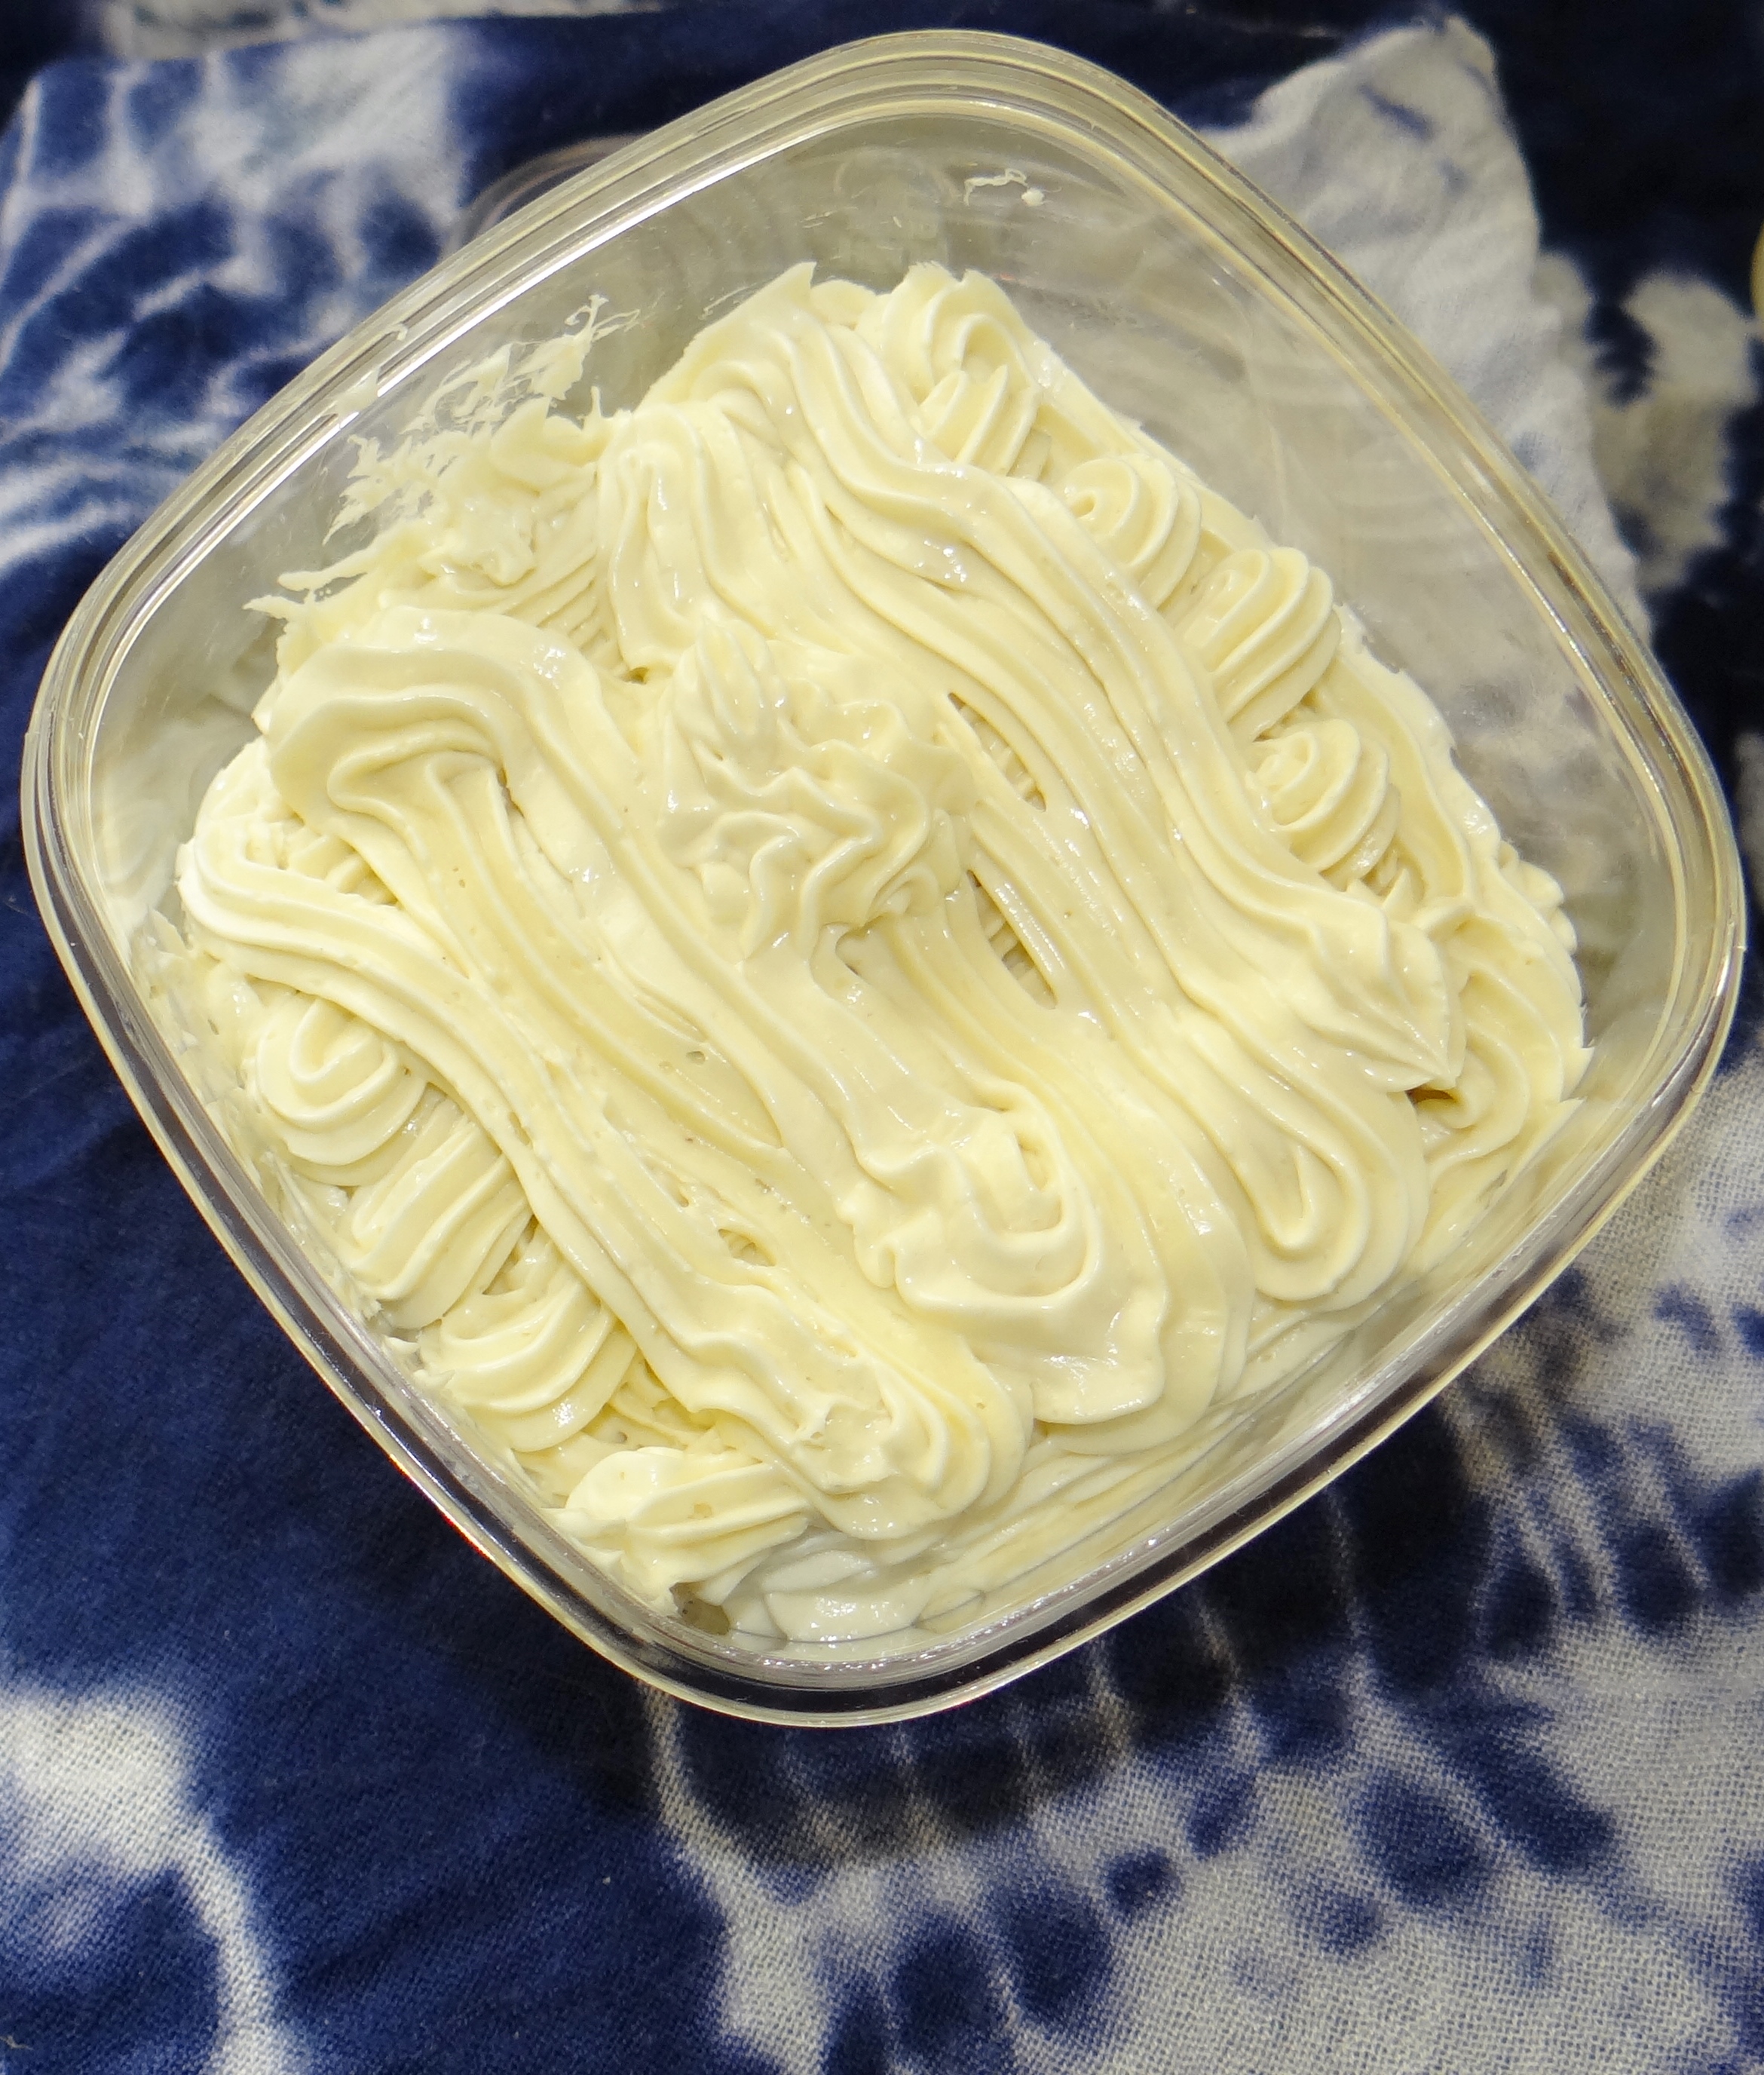
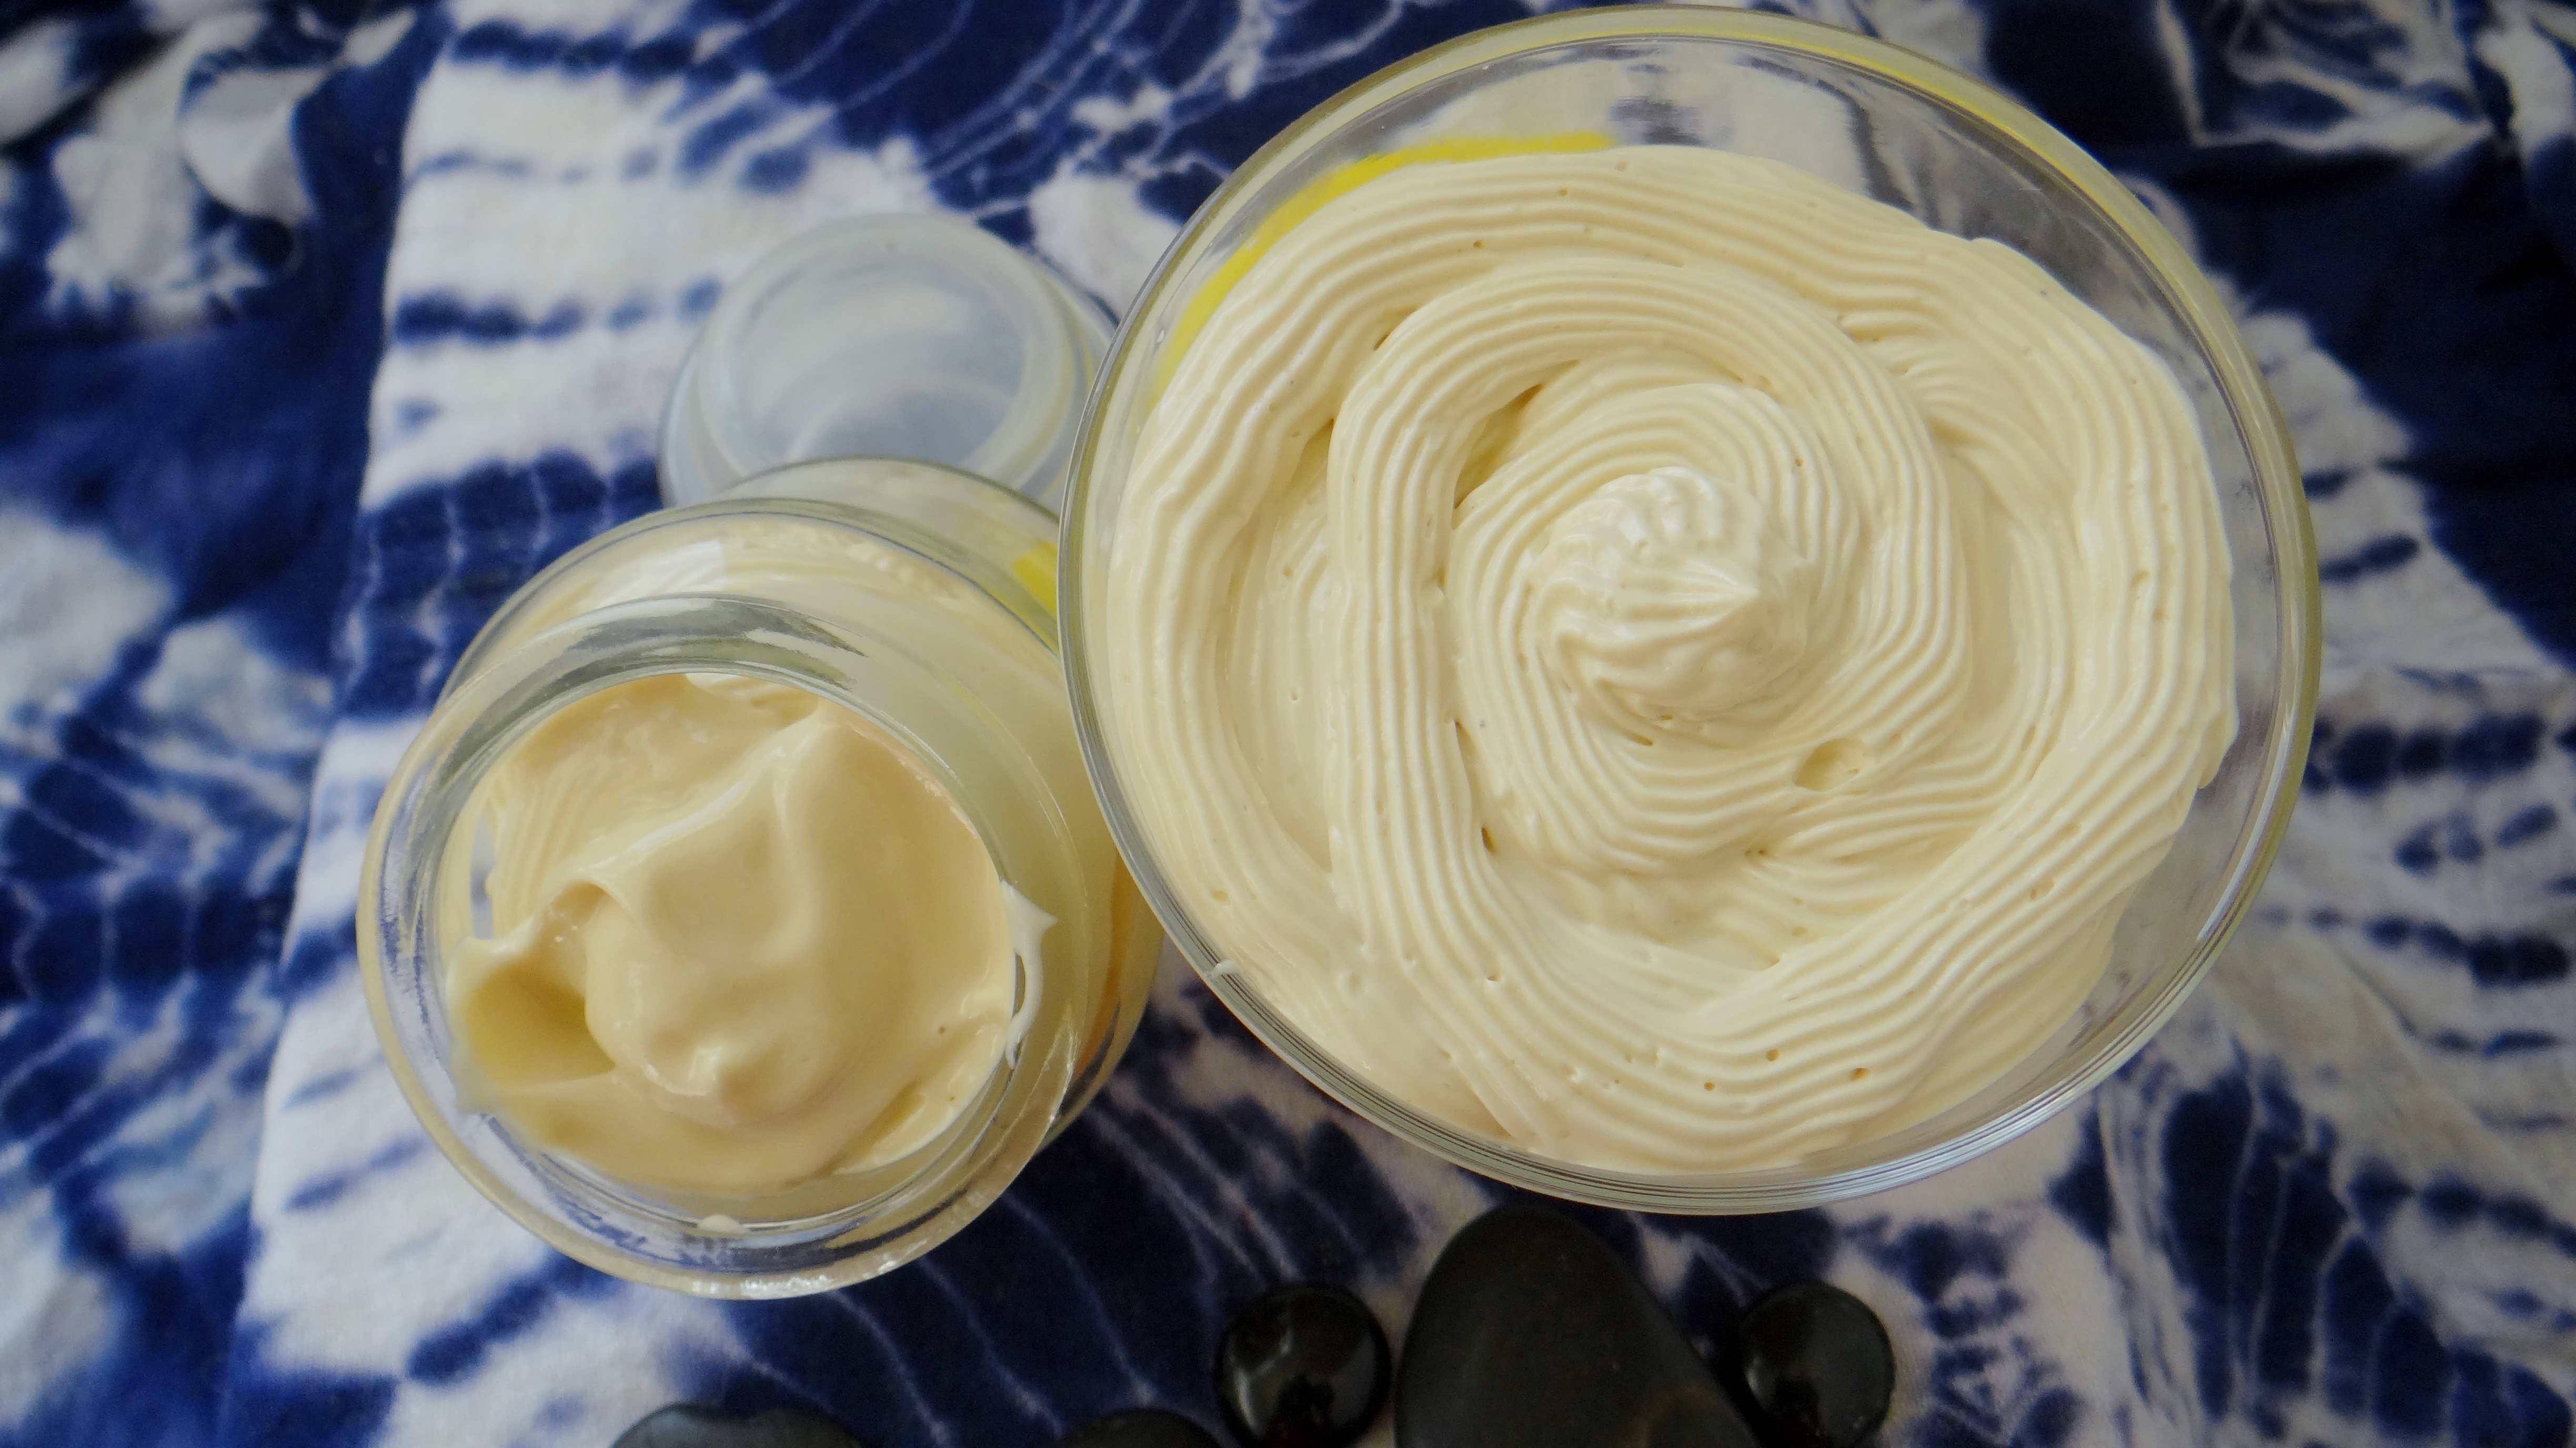
I then place it in my freezer for 10 – 15 minutes till it begins to thicken. Once this happens, I scrape the mix together and then begin to whisk. I whisk for a good 3 – 5 minutes and then add the remaining 0.3 oz of Coffee Bean Infused Almond Oil, 0.15 oz Glycerin (optional) and 3 capsules Vitamin E Oil. I continue to whisk for at least 3 – 5 minutes.
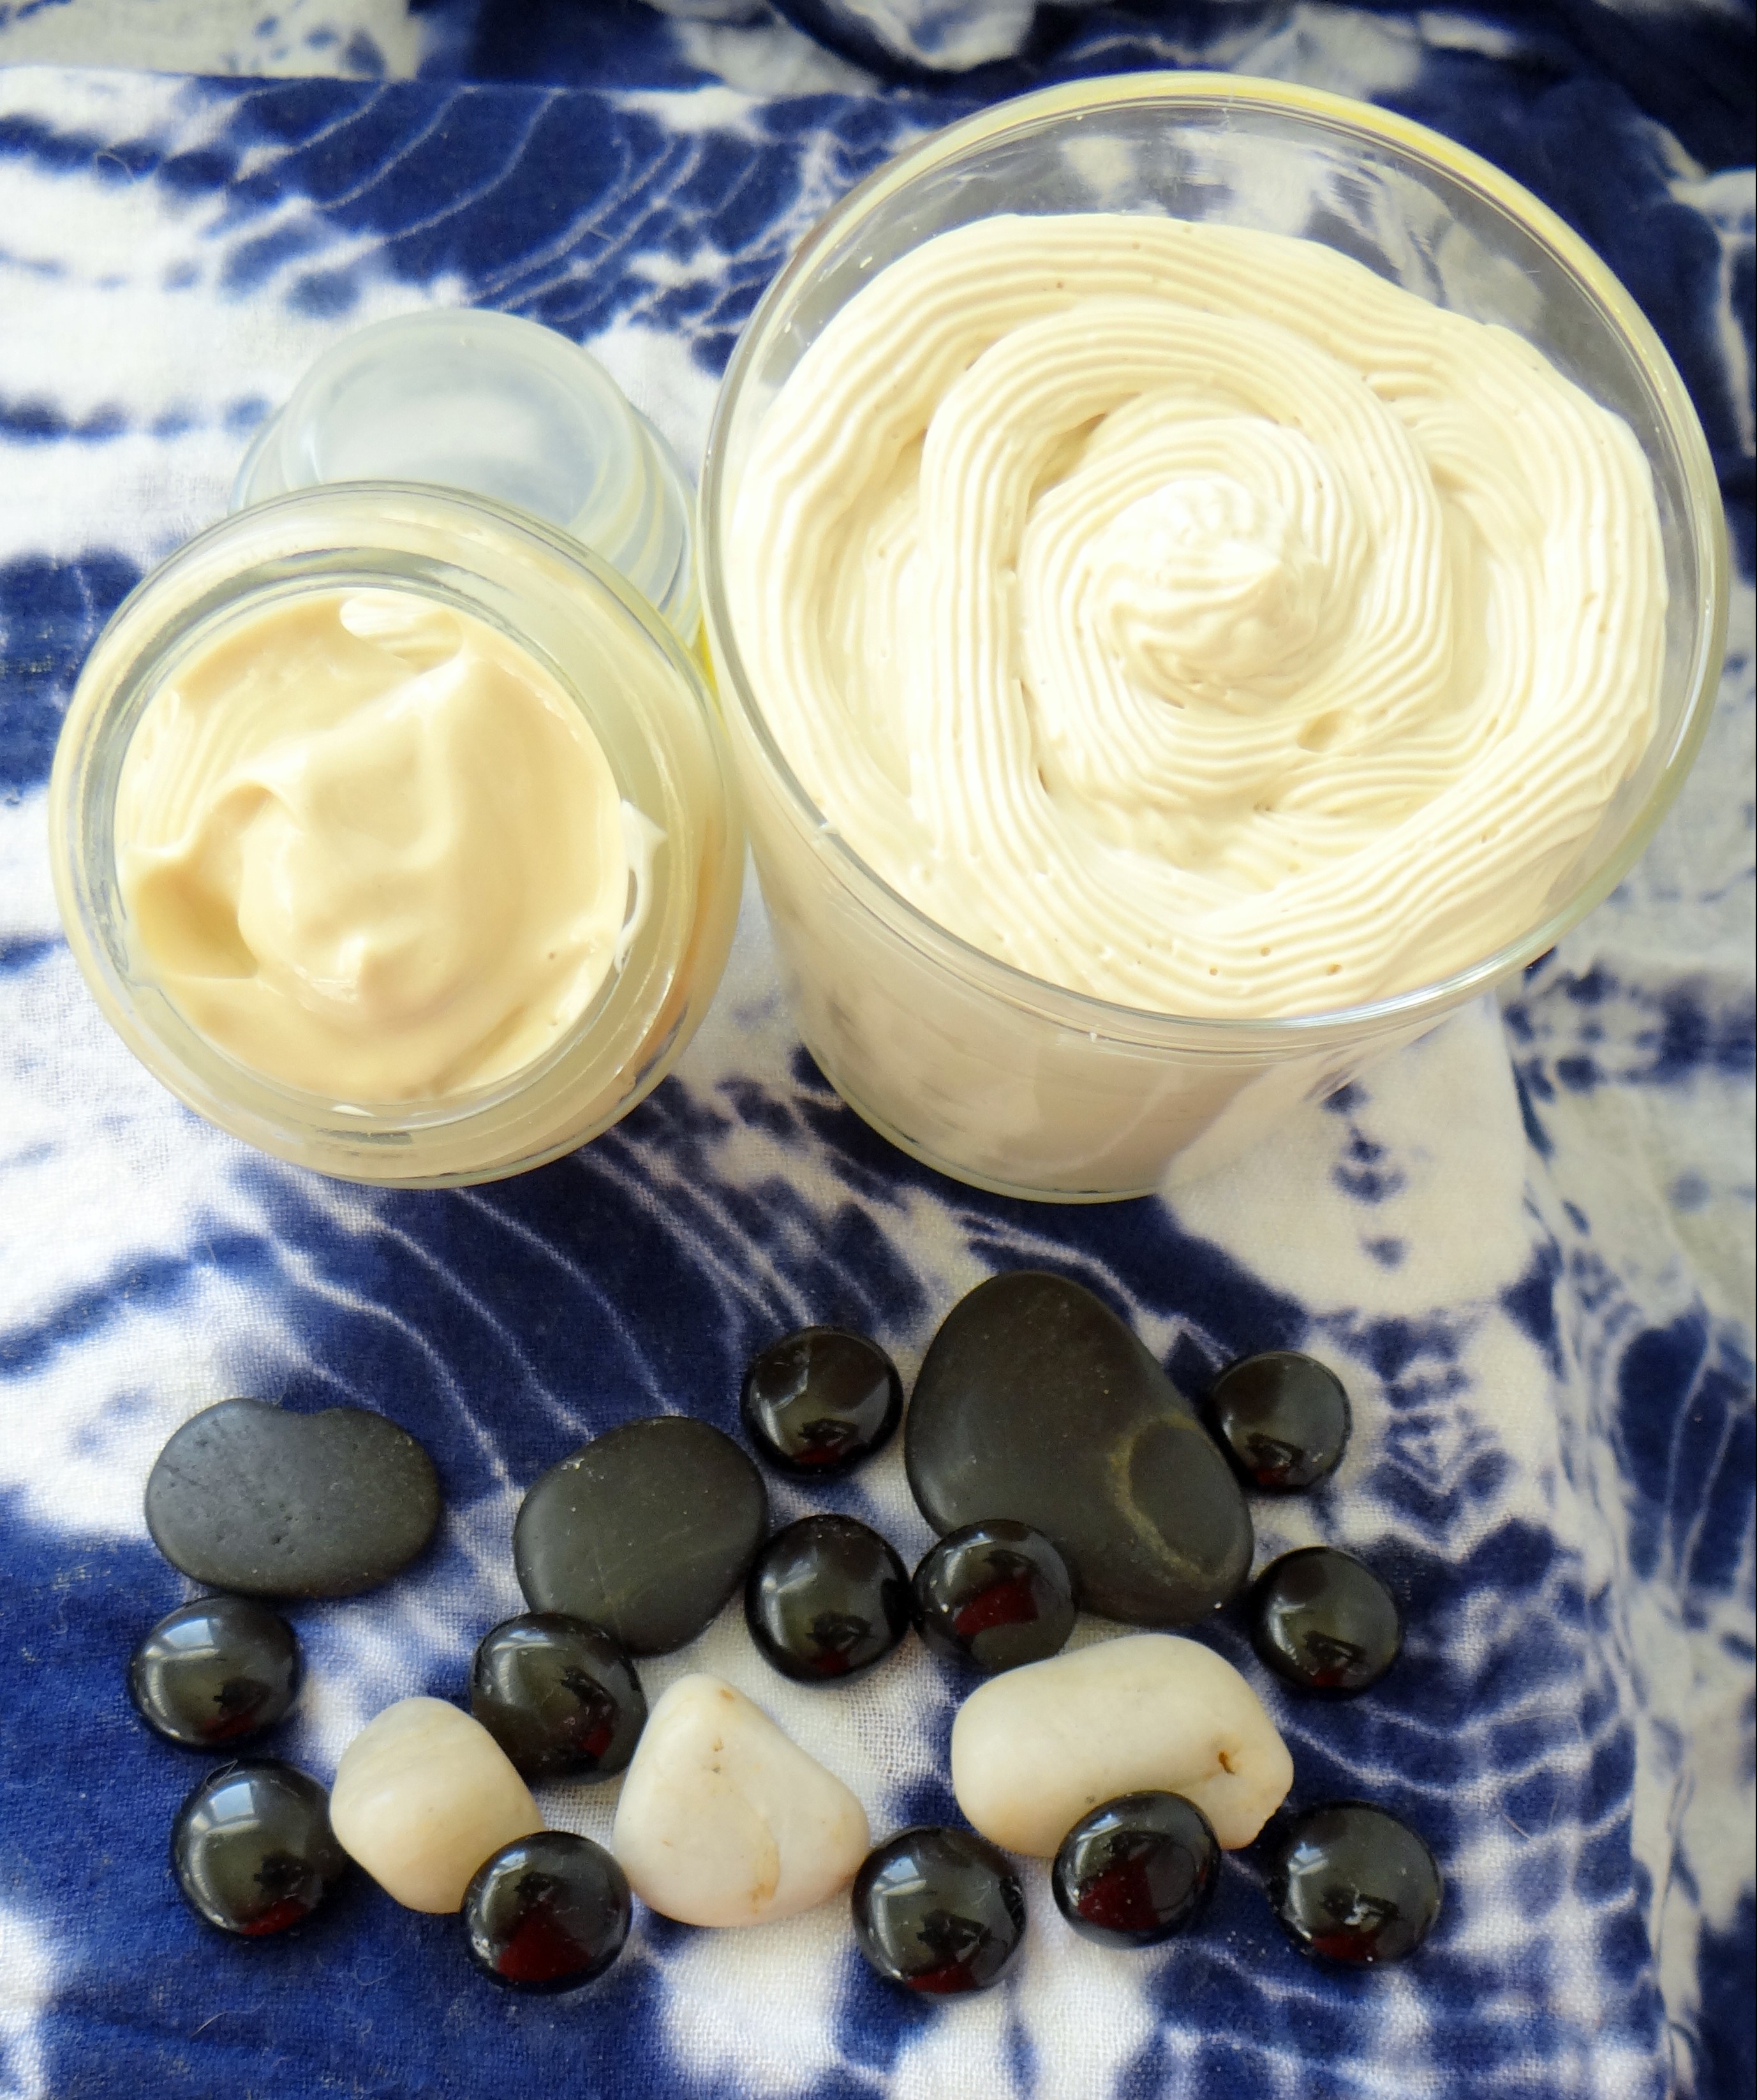
Depending on the consistency you prefer you can stop here and transfer it to an airtight container but I prefer mine to have a fluffy texture so I place it in my fridge, this time for 10 minutes till it becomes a little hard on the top. I then take it out and whisk for the last 5 – 7 minutes and I am happy with the texture. Using a spatula I scoop the whip into a piping bag (because I like being “extra”) and transfer to my container. (The piping bag really isn’t necessary but it makes the butter look extra pretty and is a nice touch if you are giving it away as a gift).
Uses:
It is not just the inclusion of coffee and coffee butter that makes this an excellent choice for your hair and skin care but also the inclusion of cocoa butter, Shea butter, almond oil, vitamin E oil and glycerin (read about the benefits of these ingredients for the Hair and Skin). I like to use this butter on damp/slightly damp hair after I have moisturized to help seal in moisture for styles likes twists, twist outs, braid outs, Bantu knots, Straw Sets, Perm rod sets, Pin curls, Flexi rod sets… basically everything! Whenever I use Flax Seed Gel(FSG) which is full of nourishing benefits and is all natural, I actually like to seal in the FSG too by applying the butter as my last product. If however you are using a store bought commercial gel, you might find it more beneficial to apply the whip before you apply your gel. When it comes to the skin, I like to apply this after a shower to slightly damp skin to help seal in the moisture. It makes my skin super soft, smooth and lush looking and also helps with faint marks!
I of course had to record my tutorial as well:
I would love to hear from you if you try this delicious whipped butter!
Thanks
Maicurls