This literally is a just a quick “For Your Information” post to inform you that Nikki Walton (a.k.a. CurlyNikki) has released her second book! Her new book “When Good Hair Goes Bad”*drum roll please* can be downloaded for FREE! Yes, I said for FREE!!!! (I would hurry as the eBook might only be out for free for a limited time).
NOTE: I was neither paid, compensated nor requested to share this information, I happen to be subscribed to curlynikki.com and received a Newsletter update with information about the book’s publication and eBook version.
Her first book “Better Than Good Hair” was published three years ago and was all about empowering woman to take control of their hair care and providing emotional support. This time “When Good Hair Goes Bad” has a compilation of quick hair fixes, tips and tricks at just the turn of a page!
I will leave it at that for the moment since I have only had a chance to glance over the eBook (I love what I have seen so far) plus I might just have to squeeze in another eBook review so I don’t want to give too much away just yet.
Anyways, happy downloading and happy reading Maicurlies!
If you get a chance to read it please let me know what you think, you know I love hearing from you!
DISCLAIMER: Please note, I want to make it clear that I was contacted by a representative working for Kimberly to see if I would be interested to to review her eBook on my Blog/YouTube Channel and I was pleased to do so.
I have always insisted on openness and honesty on my blog/channel and would never compromise my integrity to provide truthful information whether it is in the form of information sharing, a review, a DIY mix or a product suggestion. That holds true with this review, and having been sent the eBook did not influence my thoughts on it, one way or the other. All thoughts expressed in this review are my own honest opinions. I was not paid or compensated to state anything mentioned in the video and/or my blog post.
“Curly Halo – Your Natural Hair Care Reference Guide & Workbook”
Who are the target readers?:Those that have been natural for a while can benefit from the book thanks to the fact that it includes helpful information that any natural can use along their continued Natural Hair Journey (regardless of how far along they are). It includes hair and scalp care tips which again is why I suggest “long term” naturals can benefit from it. Now for those that are either considering going back natural, those transitioning or those of you that might have recently Big Chopped (BC) I highly suggest Curly Halo for you! It is packed with suggestions, tips and advice to help you along your journey (which can be a little daunting at first, especially if you are threading in unfamiliar water)!
Pages & Chapters: The eBook consists of 80 pages (in total) and has been broken down into 10 chapters.
How to “use” it:Since this is an eBook, I got a link with the eBook and then downloaded the file. It can be read on any software that allows you to read a PDF file. I actually used my eBookshelf (software I downloaded on my Samsung) but it can also be read on a regular PDF reader.
Text: Curly Halo takes you through hair and scalp care right from the start and not only provides information on how one can provide healthy hair and scalp care but also some steps that can be taken in case you come across any hair/scalp issues throughout your journey. It is a really easy read, it is not jam-packed with too much text, includes images and tip boxes and most notably worksheets! The worksheets can be used as interactive pages that you can use for note taking – part of your Natural Hair Journal. (P.s. I highly recommend you get yourself a Hair Journal if you have not already done so)! The language used is very simple which makes it easy to read and digest and does not require you to have a science degree or even any prior knowledge of hair care. I love the simple yet elegant appearance of the eBook as well!
Highlights for me: First and foremost I LOVE the “holistic” approach Kimberly used in the eBook. This of course works really well with DIY hair care so you can be sure that I LOVE this aspect! Thanks to its simplicity it provides readers with easy to do healthy hair/scalp care options while still providing alternative suggestions for those that are not too crazy about taking a more “hands on” approach to their hair/scalp care (not everyone is tickled to death about DIY hair care). Another part of the eBook that I love are the worksheets. As I mentioned, they are interactive and can help guide you to make decisions, take note of experiences/thoughts and keep track of trial & error “experiments”. Having a place where you keep all this information is really important, regardless of whether you have recently returned back natural of have been natural for a while (we can not keep track of everything in our head)!
Would I recommend the eBook?: In closing, YES I really did enjoy reading Curly Halo and do recommend others to pick up a soft copy from Kimberly’s site!
If you have come across the eBook please share your own personal thoughts, I would love to hear from you!
Today I am here with something new, two book reviews! I am excited to share my thoughts on these two books written by the talented (and stunningly beautiful) author: Audrey David-Sivasothy. The books are “The Science of Black Hair” and “Hair Care Rehab”.
Disclaimer: Please note that I won both the books in an Instagram (IG) Giveaway (thanks to my friend Necey) that was done by Audrey. (Little shout-out to both of you ladies)! Here is Audrey’s IG page: https://www.instagram.com/blackhair101/). I was not sent the books for reviews (there were tons of winners btw) I just wanted to share my thoughts on the books. I have based this review SOLELY on my own personal thoughts and opinions (I am not a “book critic” by any stretch of the imagination).
Biographgy of Audrey Davis-Sivasothy (Retrieved from Amazon.com)
Audrey Davis-Sivasothy is a certified trichologist, lecturer and consultant to the cosmetology industry. A health scientist and member of the Society of Cosmetic Chemists, Sivasothy is also author of the international best-selling book—The Science of Black Hair. This foundational text on black hair care has been used to train cosmetologists all over the world, and is the bestselling and most highly-rated reference textbook on textured hair today.
Sivasothy has been a guest expert on The Dr. Oz Show, and her work has been featured in Good Housekeeping, Woman’s World, The Huffington Post, Essence, Sophisticate’s Black Hair, and Hype Hair Magazines.
Amazon.com
“The Science of Black Hair”
The Science of Black Hair – Image Source: Amazon.com
Who are the target readers? :Regardless of how much or little knowledge you might have about black hair, this book is suitable for those that are new to taking care of their own hair, those that are struggling with their hair care or even Hair Professionals (e.g. stylists, hair dresses).
As the name suggests, the book is tailored for those of us with Black hair and under that category, it doesn’t matter whether you are natural, transitioning, relaxed or telaxed, etc., there is so much helpful information in the book that covers all aspects of black hair. The books sets out to help you better understand your hair, how to care for it, how to care for your scalp and how to maintain a healthy hair & scalp routine for the long term. It teaches you how to maintain chemically treated or natural hair to optimal health, helps you regulate optimal product pH balance, helps you grow longer stronger and healthy hair and the most important aspect (in my opinion) is that the book highlights the importance of protein/moisture balance and how to achieve this in order to prevent breakage, retain & grow healthy hair.
Pages & Chapters : There are 13 chapters in the book and it consists of 256 pages (in total including index).
Text: It is a really easy book to read through and follow, you do not need a science degree nor any kind of former understanding about hair/hair care. You basically can learn straight from the book. The pages are spread out and includes images & illustrations (those of you that are really visual learners, you might want to opt for the colour version of the book versus the black & white option).
Highlights for me: Personally, as I mentioned one of the most interesting parts of the book was the focus on protein & moisture balance. It is something that I have commonly mentioned in my blog and videos since the hair is mainly made up of protein and requires moisture to stay balanced. Audrey does a really good job on highlighting the processes in which one can maintain a protein/moisture balance along with explaining why each process is important. Another section in the book that I really enjoyed is the explanation of the LOIS Hair Typing system (aka: L.O.I.S). I find this method a lot more helpful than the commonly known Andre Walker Hair Typing System – where hair is broken down in numbers (1 – 4) and alphabets (a – c). Now I am not the biggest fan of “hair typing” in general, especially in terms of people trying to find out ‘what kind of curl I have’ simply to categorize “manageable and unmanageable hair. I think the Walker system can be used to identify what type of curl you have BUT should be used together with aspects such as density, hair width etc otherwise in my opinion it is pointless. (I have written about both of Density and Width).
Anyways back to the LOIS typing system: it goes a step further than just identifying the “type” of curl one has by basically looking at the structure and characteristics of ones hair by identifying curl pattern, strand size and hair texture. In my opinion understanding those characteristics is A LOT more helpful!
I plan on doing a Video & Blog Post about the LOIS System in a few weeks so please stay tuned for that!
Where Can I purchase the Book? :
The book is available in 4 options (found on Amazon) – please be mindful when ordering to make sure you choose the specific one you want:
Would I recommend the book? : Absolutly! I highly recommend this book for anyone that has black hair!
“Hair Care Rehab”
Hair Care Rehab – Image Source: Amazon.com
Target Readers:The second book “Hair Care Rehab” has a special place in my hearth! While I highly recommend both books, I just ADORE “Hair Care Rehab”! Audrey created another wonderfully written book that is comprehensive while not overwhelming, easy to read, easy to understand and this book caters to ALL hair types. So if you happen to have Caucasian straight hair, African/Black Natural hair, Transitioning hair, Relaxed hair whatever the case might be this is for EVERYONE!
Pages & Chapter: It consists of 277 pages, broken down into 3 Units and is a paperback Black & White book (I have not found a colour version of this book).
Text: Audrey yet again crafted a wonderful guide that takes you through three stages of hair & scalp care that is filled with illustrations, images, easy to read text and helpful informative information that really gives you a great understanding of how to care for your hair all by yourself!
Highlights for me: There are so many parts of the book that I love but if I had to pick I would say that the biggest Unit of the book that helps you determine any potential hair/scalp issues you might be facing is one of my favorite sections of the book. It not only explains the type and cause of the issue but most importantly (in my opinion) it explains how you can overcome the situation and hopefully prevent it from reoccurring, since you have an understanding if its cause! I wouldn’t be myself if I didn’t mention the little Do It Yourself (DIY) section that Audrey wrote about! Yes, there is a little section on DIY mixes and you know I LOVE the fact that this has been included! I actually plan on doing one DIY for my Blog and Channel (I spoke with Audrey and she was happy for me to share….Thank You Audrey)!
Would I recommend the book? :I think the question is a little pointless but YES ABSOLUTLY!
So in closing as I said, I recommend both books. You can opt to go for one book first and then the second however regardless of the one you pick I think it is worth a read!
If you know of any other books that you have read and would recommend, please leave me a message below, I would love to hear from you!
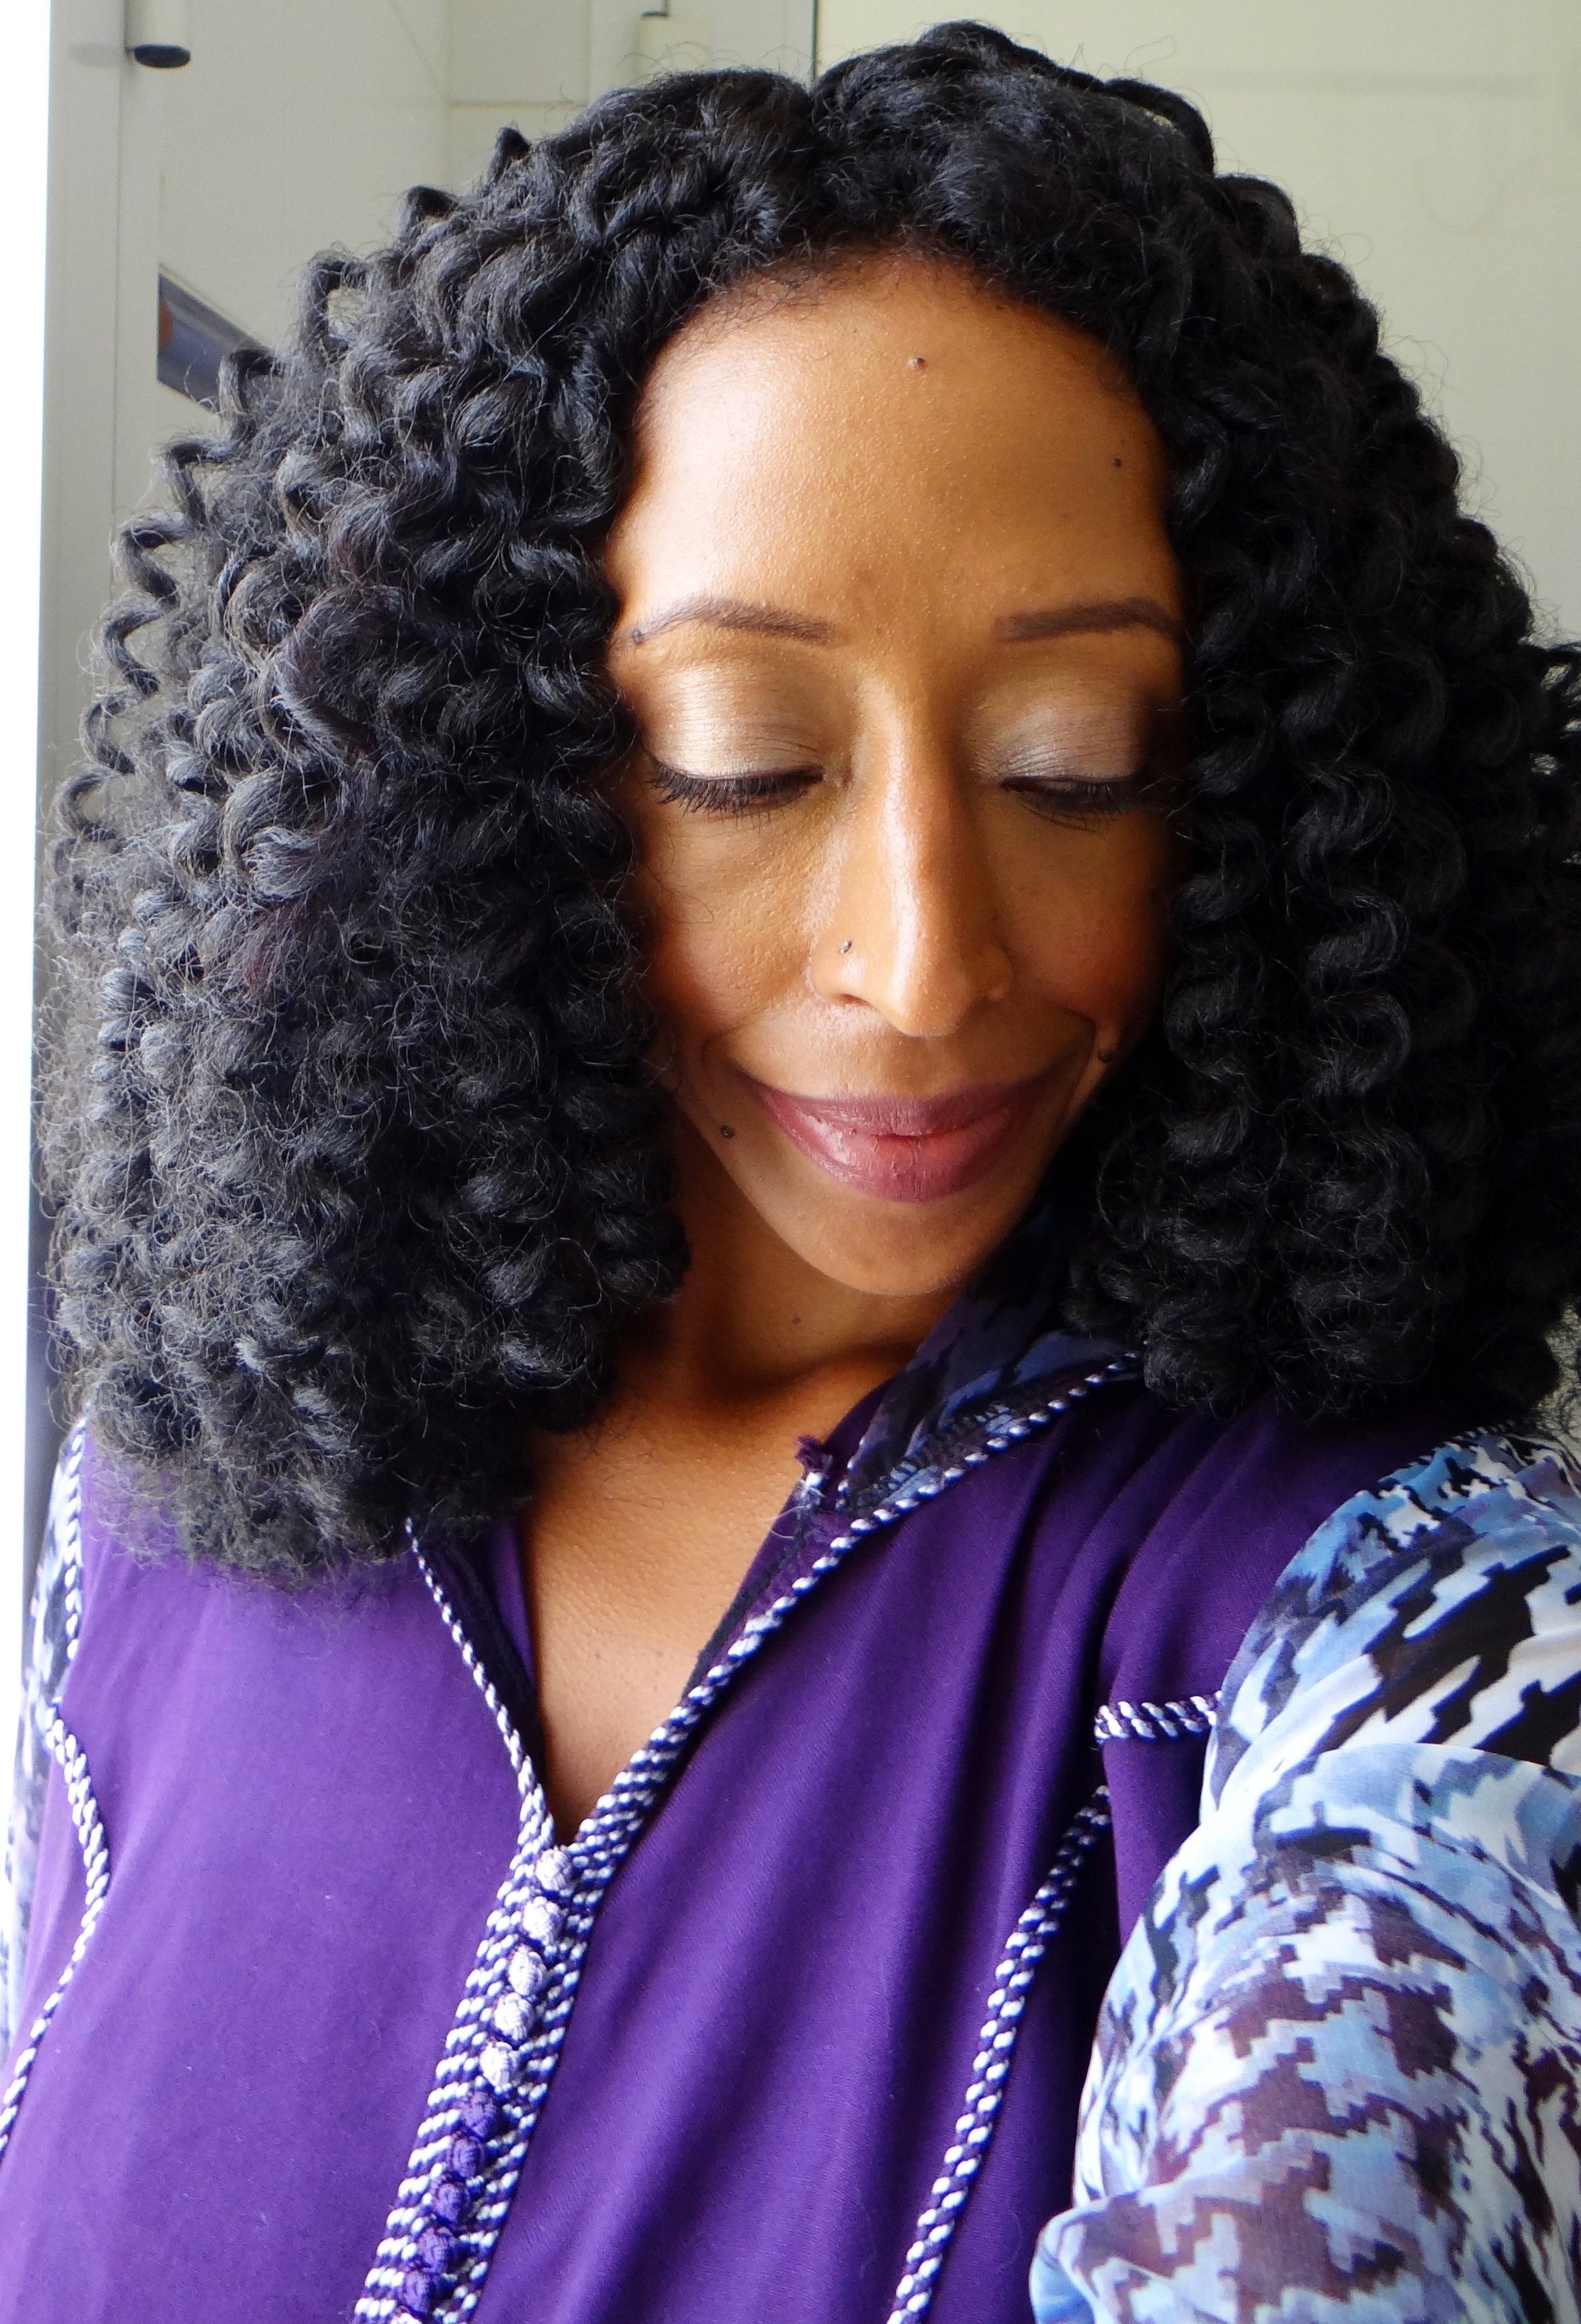
So today I wanted to share my current obsession (actually I have yet another new one already) Pin Curls!
Let me tell you, I LOVE pin curls!!!!
What do I love about Pin Curls?
EVERYTHING! Since I have fine natural hair I tend to look for styles to helps to give me volume and the illusion of more density and pin curls give me that….they give me life! Generally I normally like to style on dry hair or slightly damp hair because I get more volume if my hair is not really wet but with pin curls regardless of whether I start on freshly washed hair or dry hair I adore the results! In my demo I did medium sized pin curls on freshly washed hair which gave me medium curls with bounce but they can be made smaller for tighter results or bigger for looser curls.
My styling process (especially when I start on wet hair) is to
Set the Pin Curls
Allow them to air dry
Cover with a silk/satin scarf overnight
Take down the bobby pins, separate the curls and style my hair (the following day)
Pin curled hair
Curls taken down, fluffed and styled
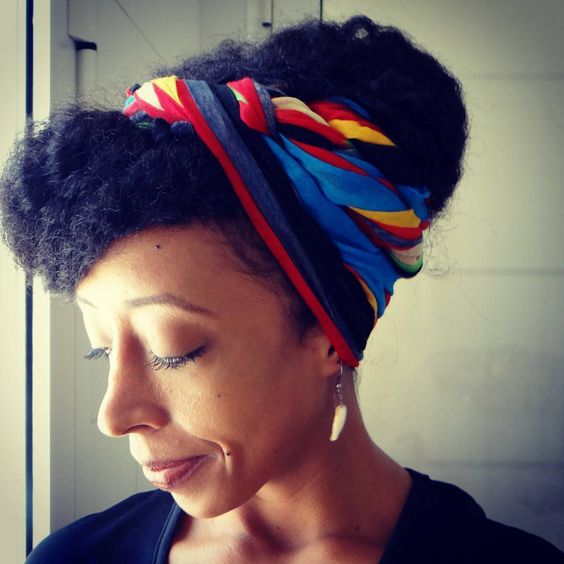
However, there are times when I have to go out after setting my hair (example on the day when I recorded my video) so on those days I do my faux huge headwrap.
No one knows my hair is curled up, pinned down and not in a big bun underneath and I don’t have to go out looking a little peculiar 😉 Then the following day I take down my hair and voila!
Here is my video of the process:
I would love to hear what you think! Do you do pin curls, would you try them?
I watched a number of videos on YouTube before I proceeded to make my own wig however, I quickly found out that while some of the stunning & talented women in the videos were able to make their wigs in a “few hours” it took me forever! Literally I split the process over two days (the weekend) and spent about 10 hours in total. This was only after I had initially made 2 failed attempts (two weekend before) with the Freetress Crochet Braiding hair – Bouncy Twist Out (colour 2).
Freetress Crochet Braiding Hair – Bouncy Twist out
Freetress Crochet Braiding Hair – Bouncy Twist out
I initially wanted to make my wig to look the same as the crochet braids on the hair model however, it proved to be a challenge for me. The hair was just so thick it not only looked overly “fake” on my small face but it was overwhelmingly bulky. So in order not to give up I ended up changing the curl pattern of the hair by: moisturizing, detanglng, separating and re-curling with flexi rods and hot water. Once that was done I was able to make Annabelle with a lot more ease!
I have a detailed review about the crochet hair which I purchased online from Tisun Beauty(you can read about here.)
It is a lot easier to explain my wig making process via video which you will find below.
Would love to hear from you, if you have attempted a DIY wig let me know how it went!
I am currently away on holiday but I prepared a post in advance for my time away and today I shall be doing a detailed review on some Crochet Braiding Hair I bought and used to make a DIY Crochet Wig! The hair I will be reviewing is: Freetress Crochet Braiding Hair Bouncy Twist Outthat is part of theShake-n-Go collection.
Freetress Crochet Braiding Hair – Bouncy Twist out
Before purchasing this particular hair I wanted to read some reviews however, I found out that there was literally hardly any information about the hair (at least from my search). So I decided to buy it anyways because I was in love with the models hairstyle and decided I would try and recreate it but instead of doing crochet braids, I opted to try and make my own DIY Wig. Please note – this review is not about how I made the wig or details on the wig itself, it is simply about the hair used.
NOTE: I paid for the hair myself and I was not requested to do a review on the hair. I simply wanted to share my experience in case some of you come across the hair and want to know what others think about it.
I shall break this review down into two parts: the first will be about the beauty supply store where I purchased the hair from and the second part will be about the hair itself.
I bought the hair online from Tisun Beauty, a beauty supply store that sells not just crochet hair but also weaving hair, braiding hair, clip-ins, wigs, skin care products and hair care products. They also have a store front that you can physically visit in North Carolina (check the bottom of the post for the full addresses). I highly recommend purchasing from Tisun Beauty, they offer a number of different style options, different brands, colours, lengths and hair textures! Another aspect I love is the company’s excellent customer service! I was in touch with Steve and he was extremely helpful! He answered all my questions promptly, provided me with suggestions and was super helpful when it came to the shipping options available to me (shipping outside the States). If you are looking for a source to buy hair, I really do suggest giving them a try and if you get in touch with Steve, rest assured you will be in good hands!
P.s. I have a discount code for any of you that do decide to purchase from Tisun: http://tisun.refr.cc/5XBXKRV. You will get $5 knocked off your order if you use the code and when you purchase from them you automatically get enrolled in the $5 discount referral program too! I got enrolled after making my purchase,
5x Freetress Crochet Braiding Hair Bouncy Twist Out – 23″ in the colour 2 (Dark Brown) $5.99 per packet.
Each packet contained about 10 – 12 strands per pack.
******
Cons:
Dry & Rough –When I took the hair straight out of the packet I will be honest, it did feel really really dry and rough. Now I know the texture is suppose to mimic natural (black) hair however, I feel like it was just a tad bit too much on the dry side. Solution – I first washed the hair since I have super sensitive skin (2 oz of apple cider vinegar to a lot of water) & to restore some moisture to the hair I added a little conditioner (that helped). P.S when using the hair I sprayed it with a little plain water and rubbed some whipped Shea butter before installing the hair, this completely softened and moisturized the hair.
Tangles & Frizz –this hair really tangles up quite easily and quickly. There is a quite a bit of frizz once the wig was made which can get really annoying since it ends up making the individual curls I have to sort of “tango together”. Solution – I recurled the hair roughly 3 times (approximatly once a week) and once it was reculred the frizz and tangles were gone (the hair requires maintaince in order for it to not look like a tangled mess!
Uber Thick Strands – I tried using the hair in its original curl pattern (bouncy twist out) and while I love how beautiful and full each strand of hair is, they are just so thick! I can not imagine how each strand is installed into someones actual hair (cornrows) due to how thick and “chunky” the strands are! I made 2 (failed) attempts at making the wig with the curl pattern but had to redo them and then gave up. – Solution – I opted to change the curl pattern in the end because the wig ended up looking like a chunky, bulky pile of hair on my head!
Can Not Separate –I know some of you will wonder “well why didn’t you separate the strands in half” I did….and that didn’t work. Once I tried to separate the stands in half I ended up destroying the beautiful curl pattern and was left with half curled, mainly frizzed strands! Solution – same as above, I combed out the hair, separated the strands and then made my own curl pattern (not a bouncy twist-out).
Pros:
Changeable Curl Pattern – while I did not end up with the original look I had envisioned the hair can be used to create different curls by wrapping it around flexi-rods or perm rods, pouring hot water over them and voila a new look!
Beautiful Original Curl Pattern – now while I was unable to use the hair in its original state for a wig, perhaps it is more effective as crochet braids (especially since that is what the model had) and the original curl pattern really is gorgeous!
Not Very Expensive –as I mentioned, each packet comes with roughly 10 – 12 strands in them and each pack costs $5.99. If you are able to recreate the original crochet braid look like the model I would imagine that you would need a maximum of 3 packets (maybe a little less) since the hair is so full and thick. That is not too much on the pocket for a protective style that you can keep in for a few good weeks!
Colour/Length Options – while I went for the 23″ option (I did trim the hair to give it shape) and you can also select from a number of different colours, blended colours etc.
Looks Natural –the natural texture of the hair has that “natural look” and by that I mean it does not have that “fake” shiny appearance even though it is synthetic hair! Sometimes synthetic hair can give off that uber shiny appearance after heat is used on it (e.g. hot water) but this still kept its natural look.
Accepts Heat –in order to change the curl pattern of the hair I had to pour and soak the curled sections in boiling hot water (no more than 30 seconds – 60 seconds maximum) and this didn’t cause any damage to the integrity of the hair. The package instructions actually states: “Do not use hot curler at regular setting. This fiber can only be curled 350 degrees Fahrenheit – 400 degrees Fahrenheit”.
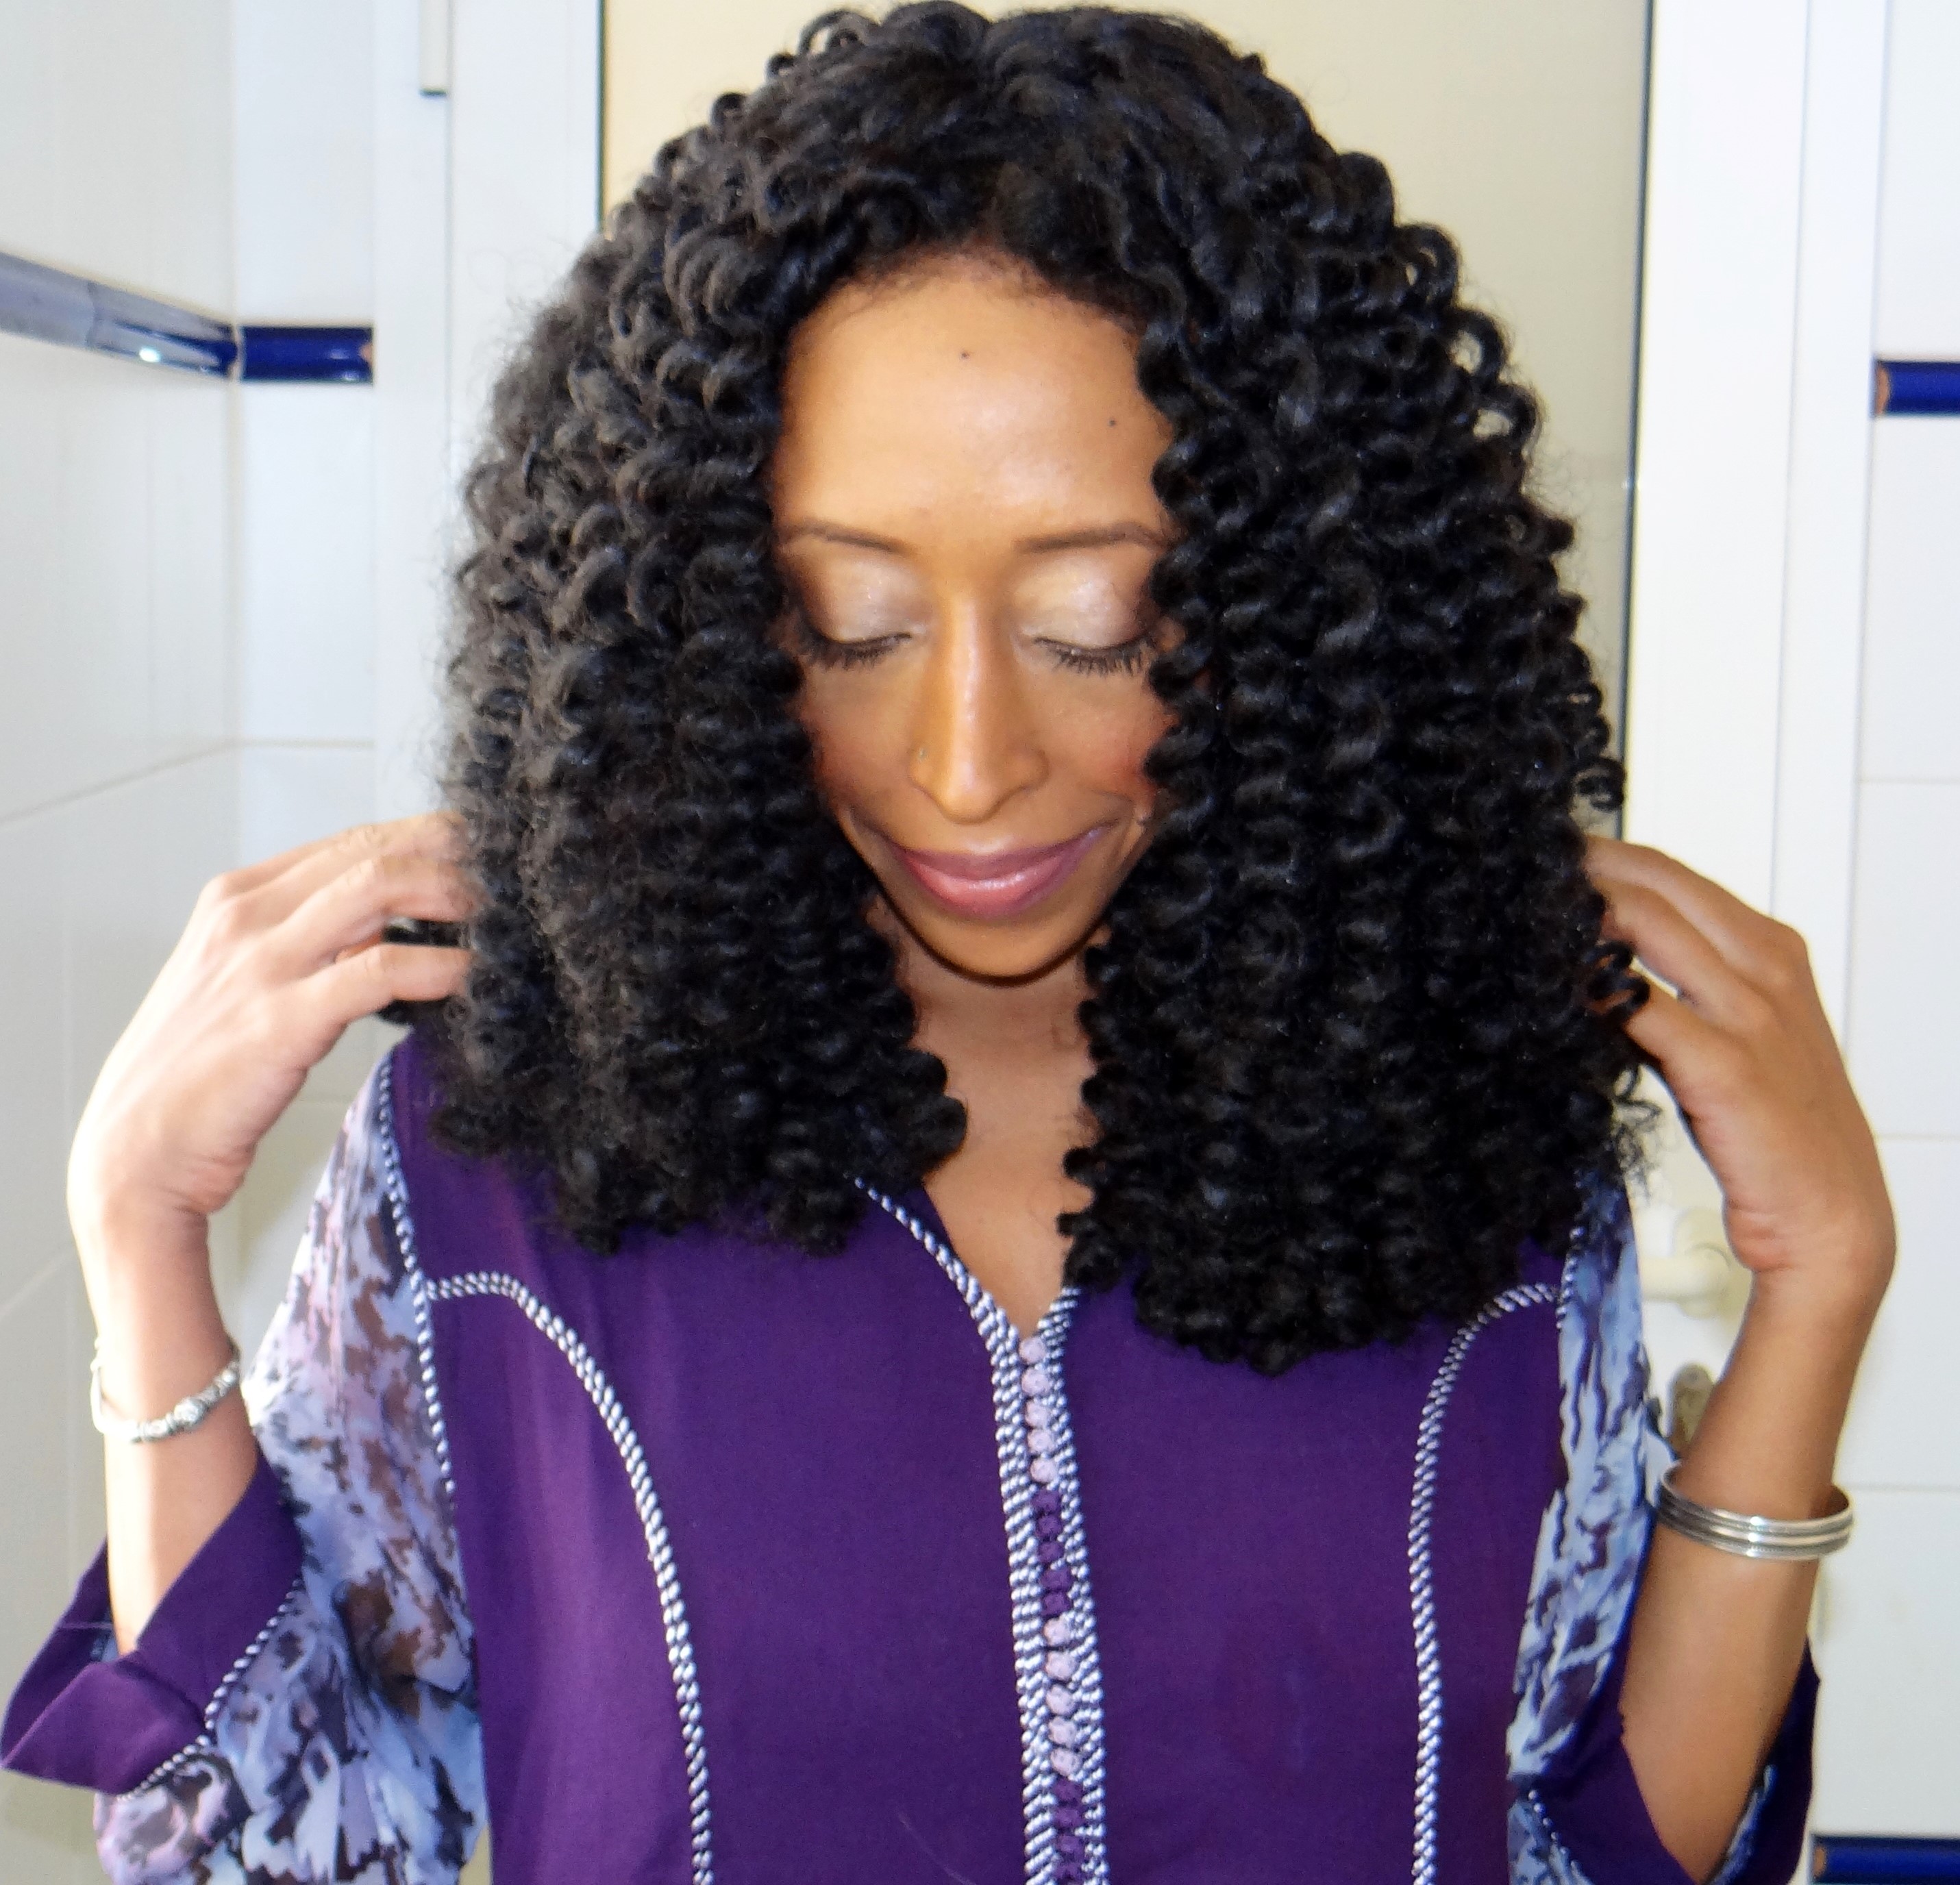
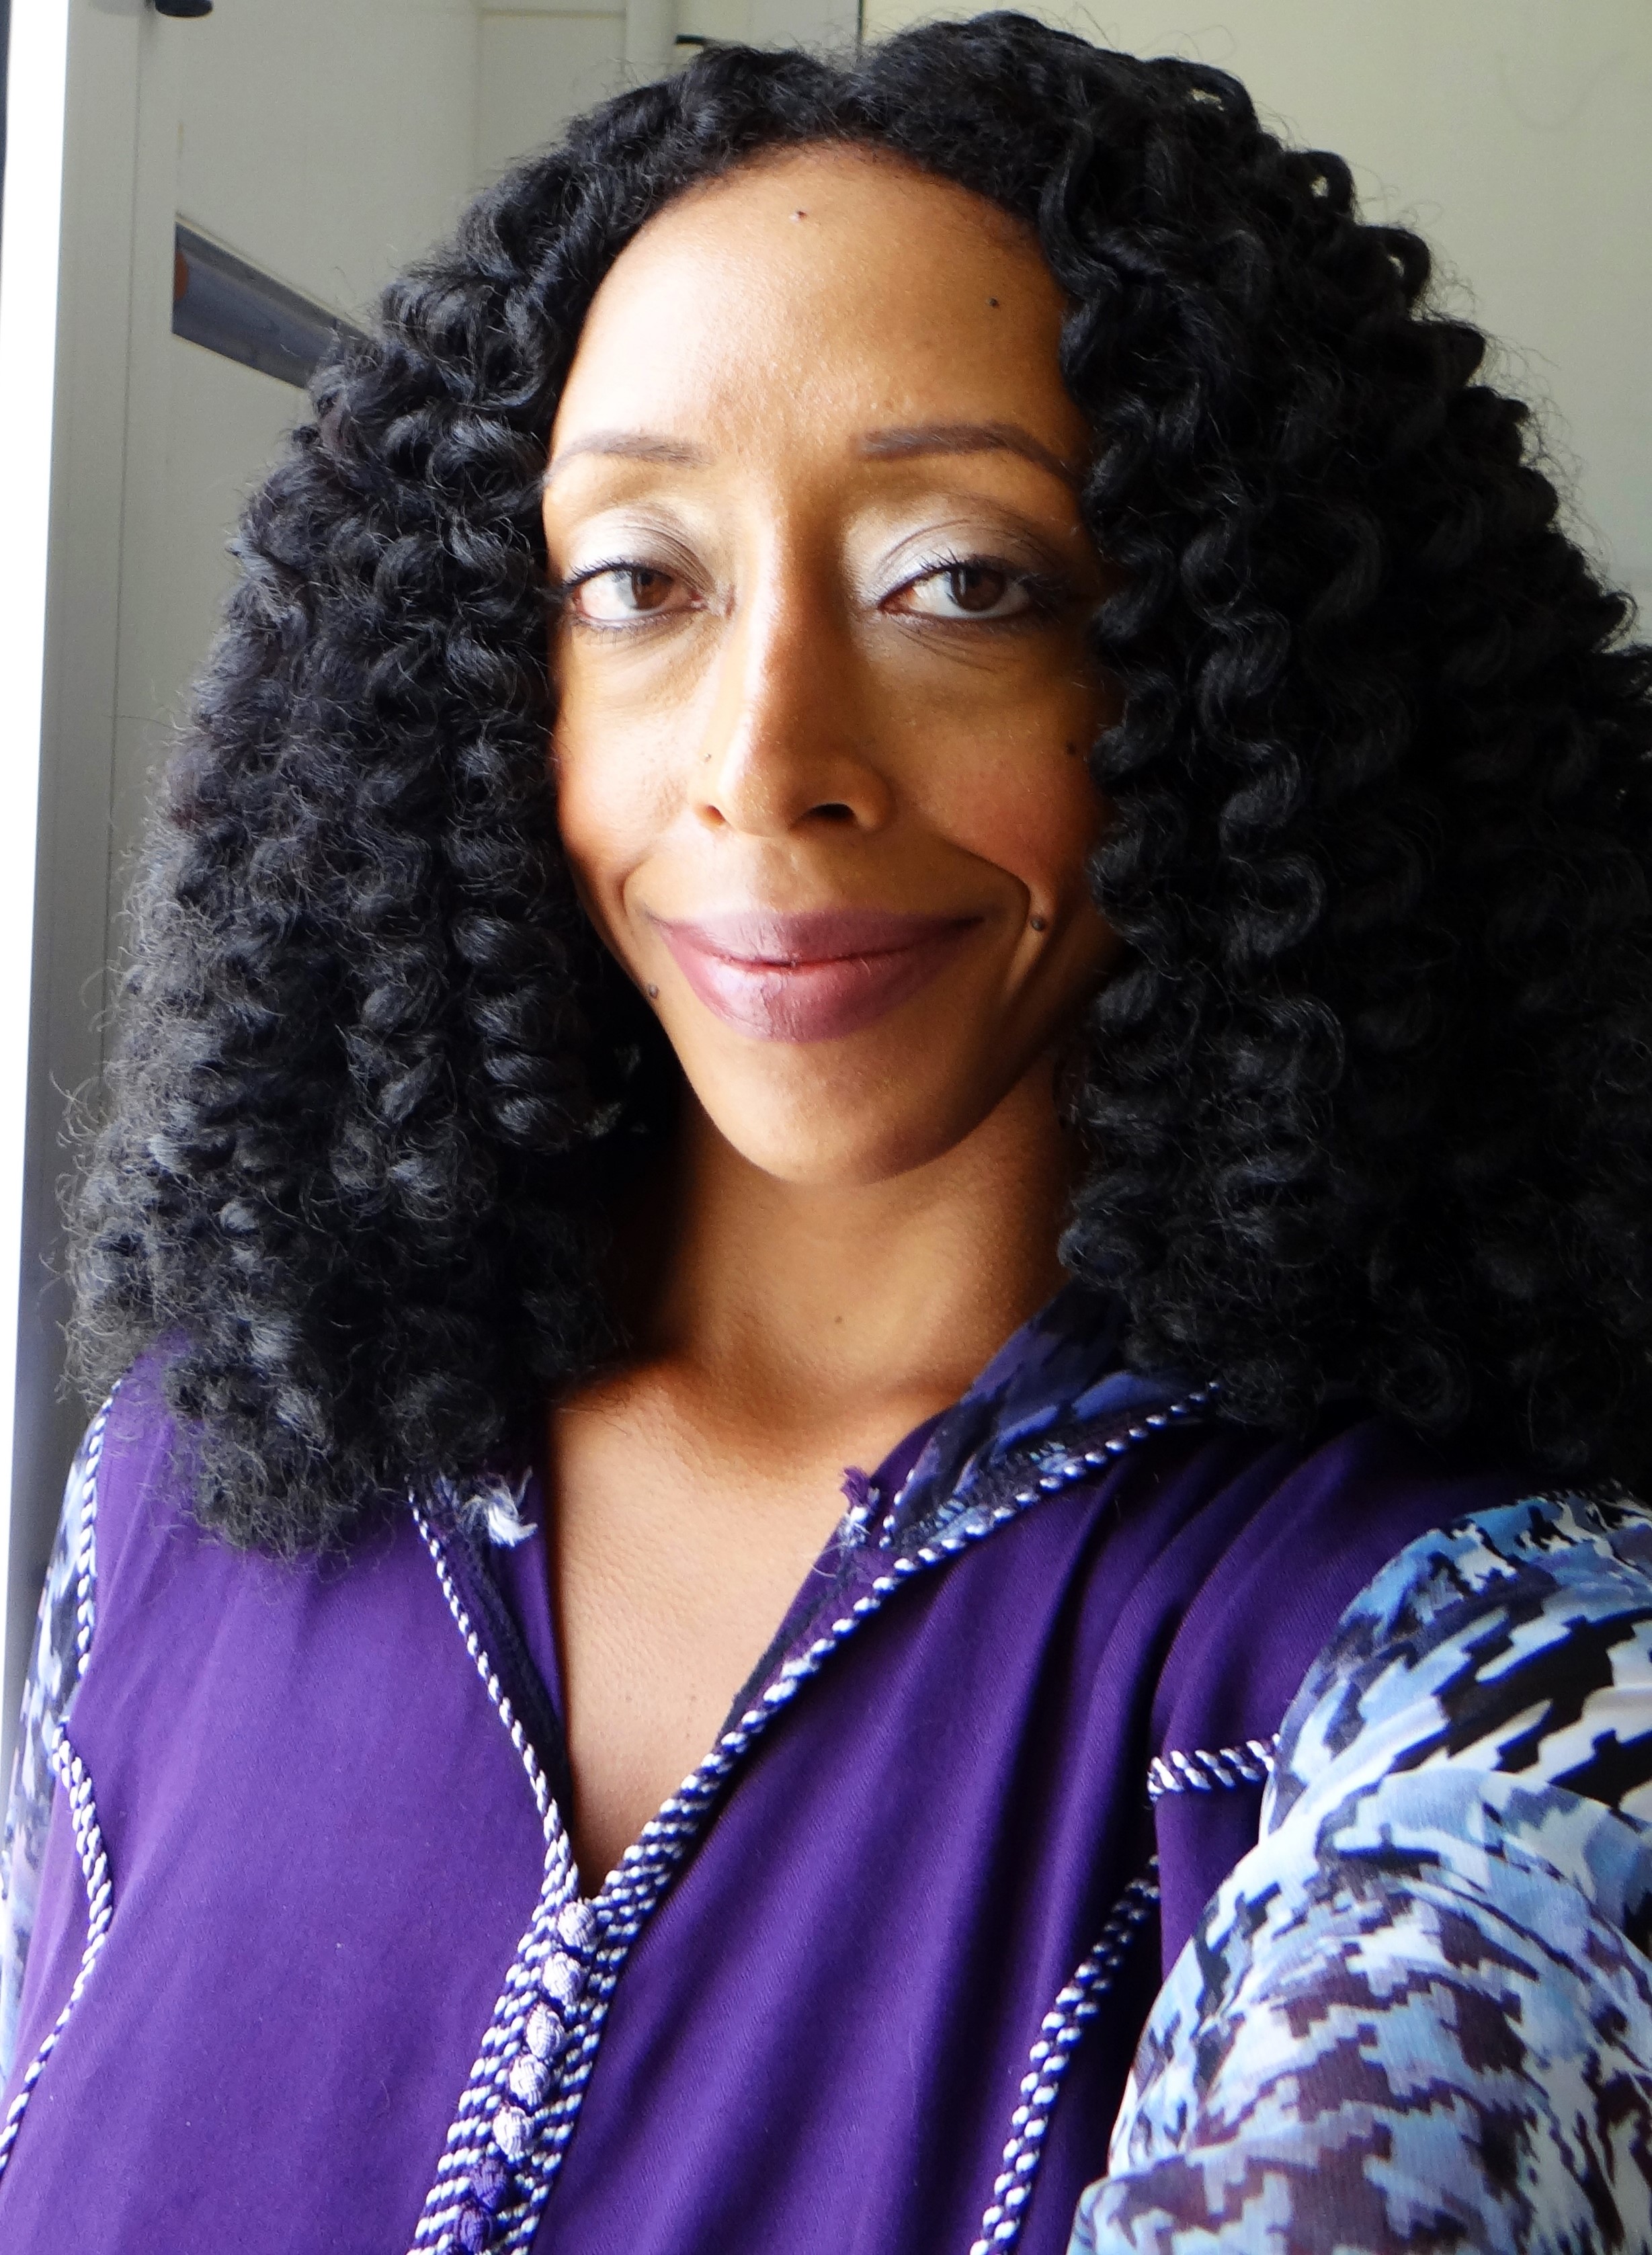
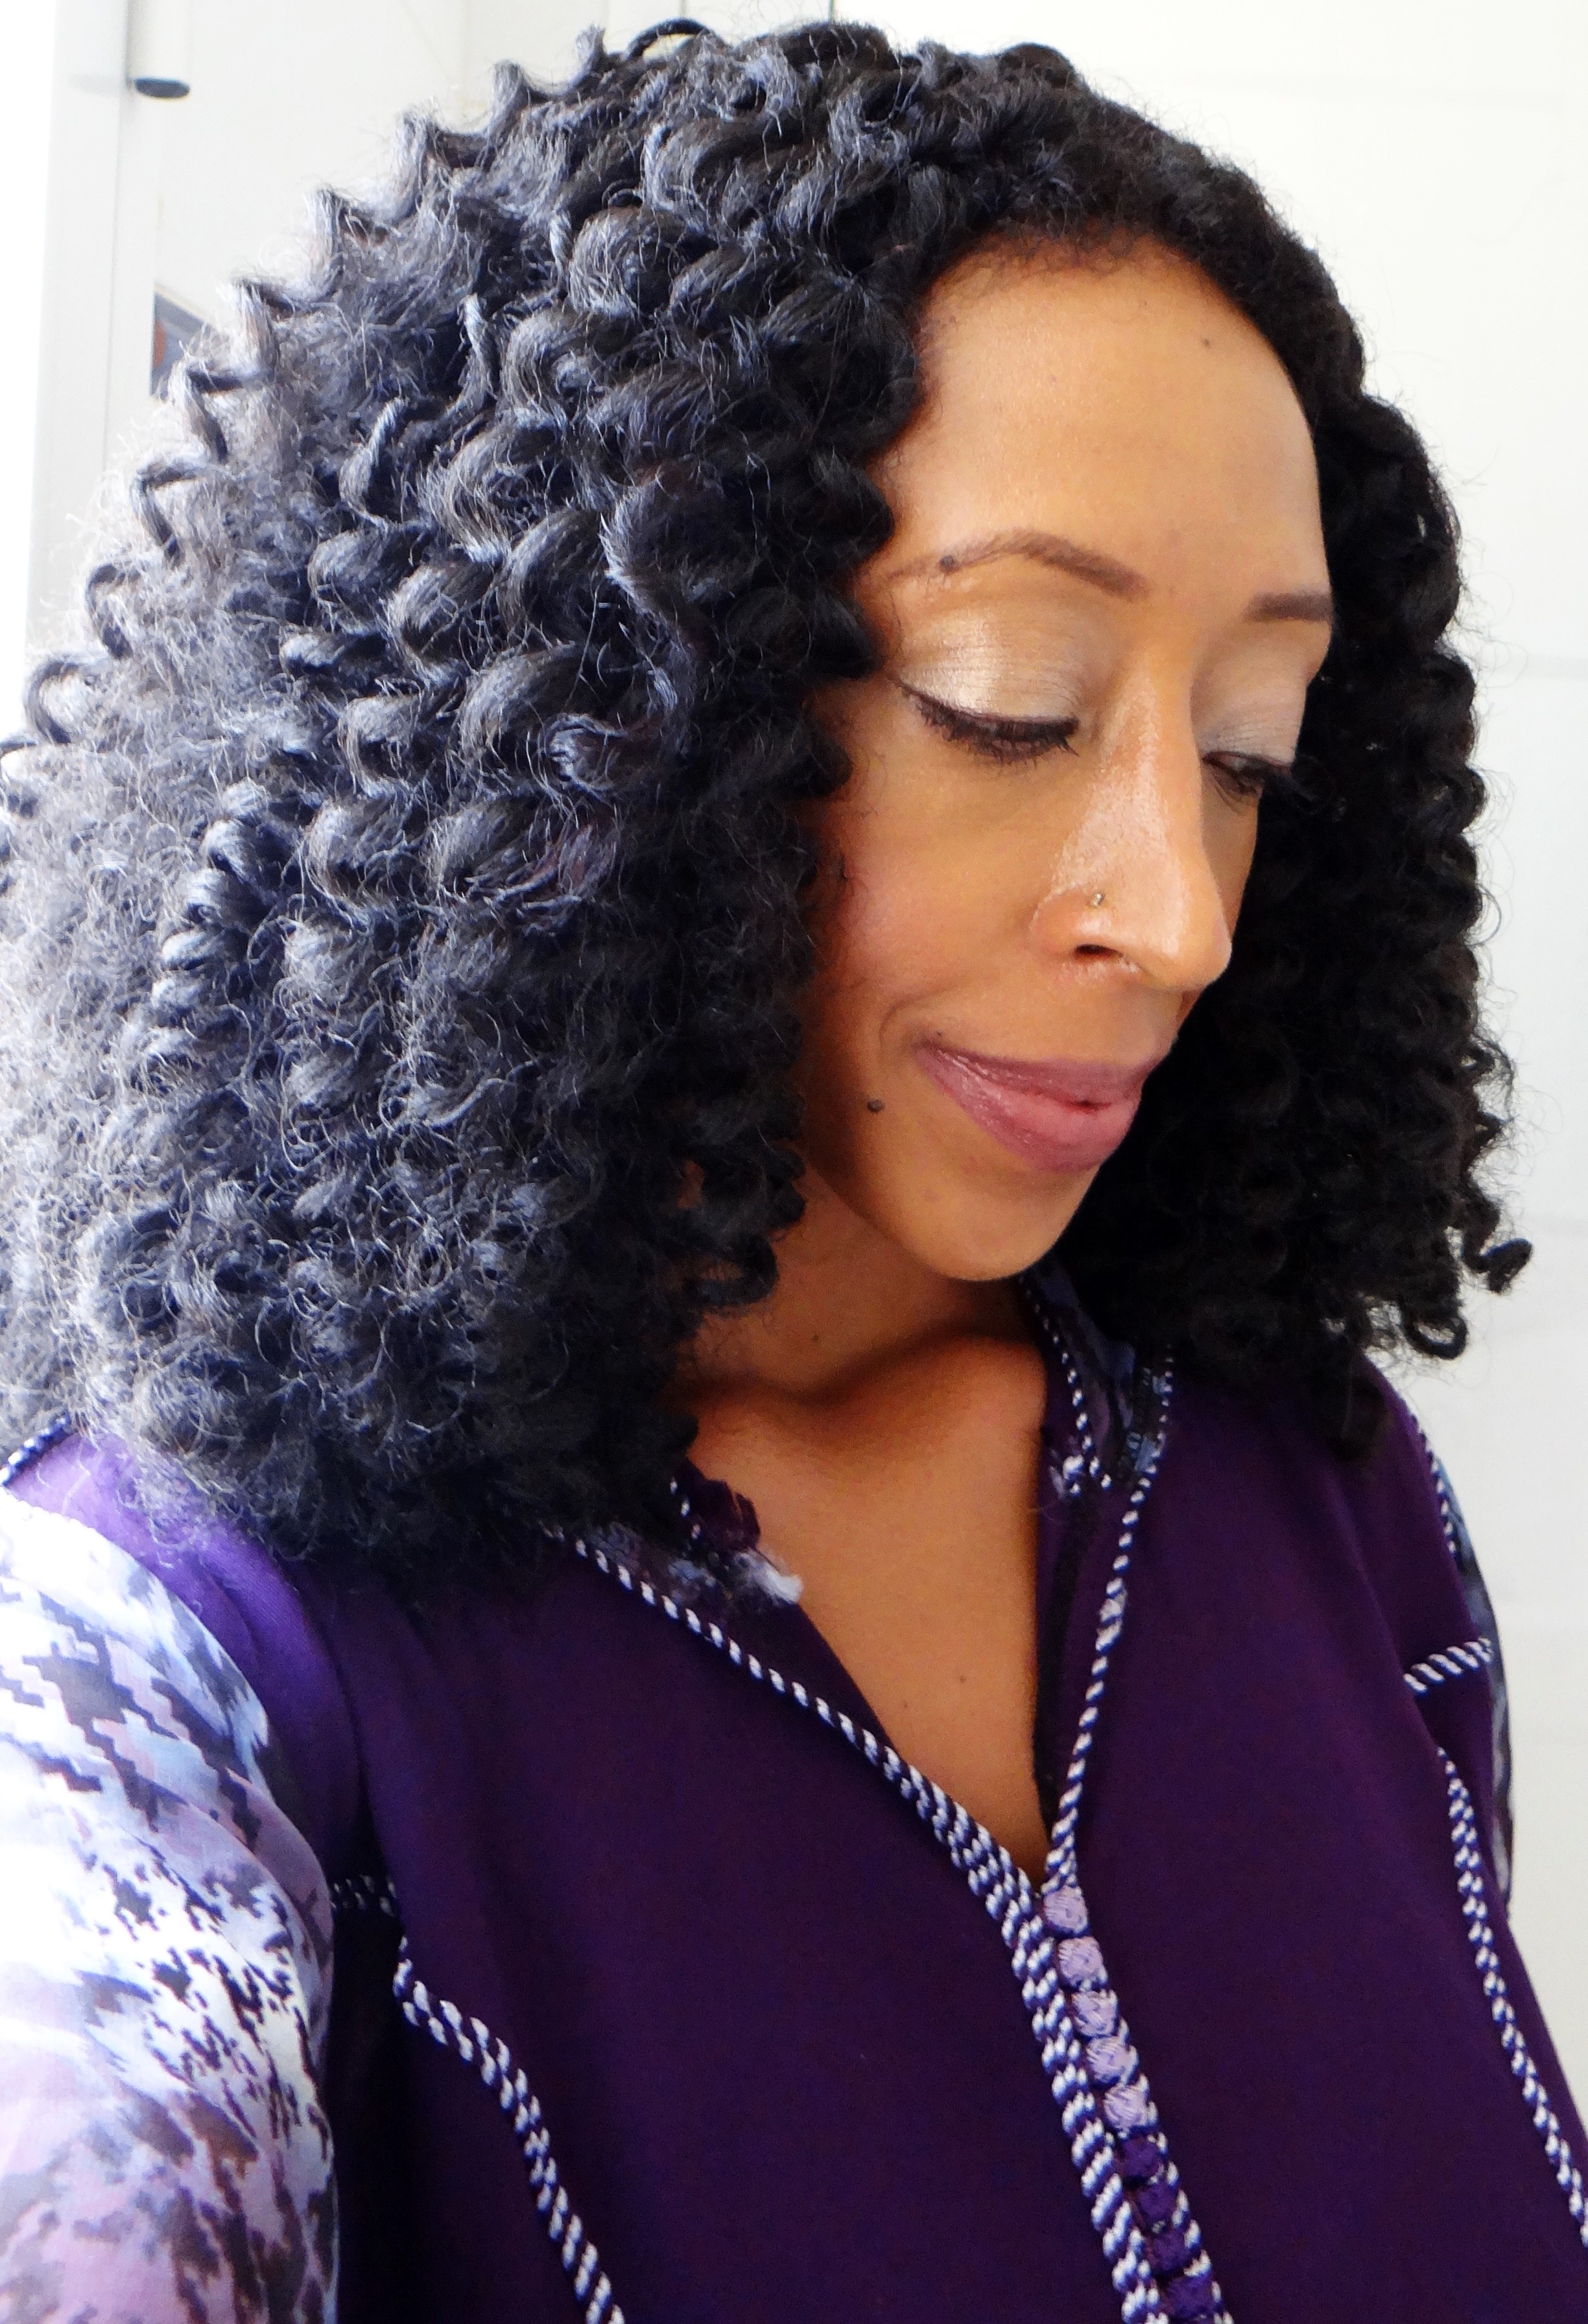
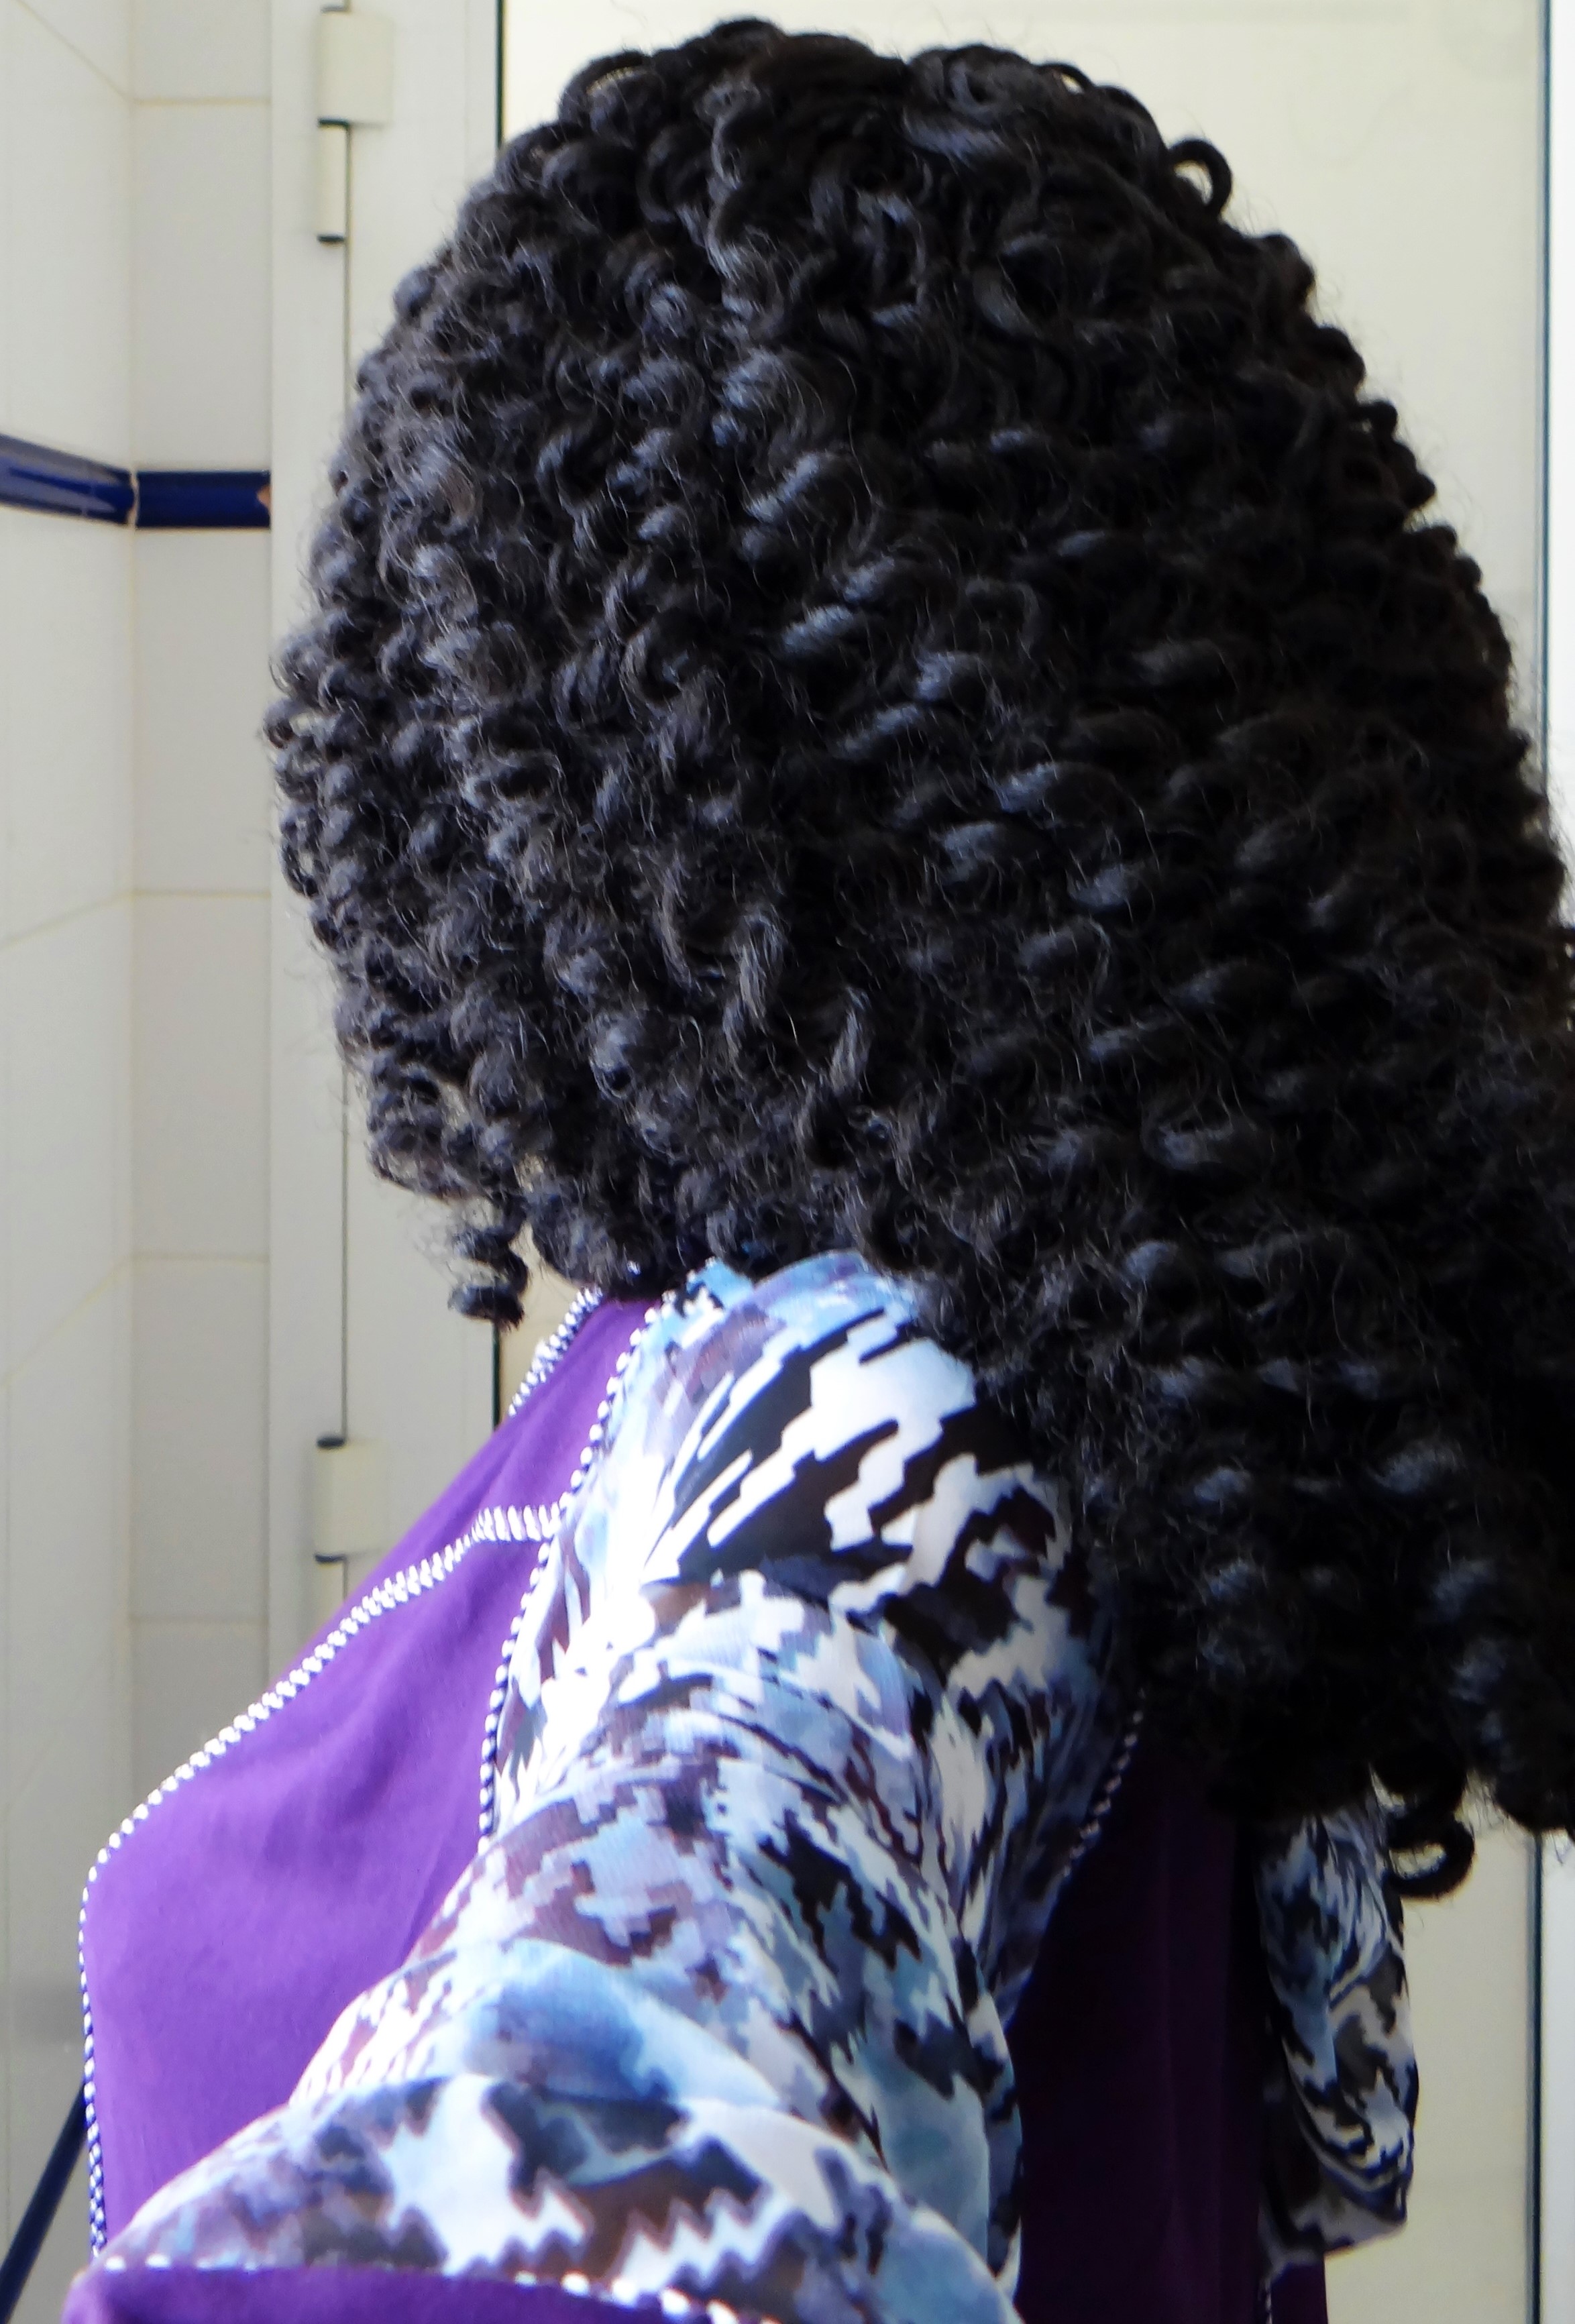
Below is an image gallery of the hair along with some photos of how it looked after I changed the curl pattern & made the wig.
Freetress Crochet Braiding Hair – Bouncy Twist out
Freshly washed and conditioned Freetress Crochet Braiding Hair – Bouncy Twist out
Bouncy Twist Out – Turned DIY Crochet Flexi Rod Curl Wig (Annabelle)
Bouncy Twist Out – Turned DIY Crochet Flexi Rod Curl Wig (Annabelle)
Bouncy Twist Out – Turned DIY Crochet Flexi Rod Curl Wig (Annabelle)
Bouncy Twist Out – Turned DIY Crochet Flexi Rod Curl Wig (Annabelle)
Bouncy Twist Out – Turned DIY Crochet Flexi Rod Curl Wig (Annabelle)
Bouncy Twist Out – Turned DIY Crochet Flexi Rod Curl Wig (Annabelle)
Overall:Would I purchase this hair again? I probably would not simply because I had initally bought it to use the hair in its original curl pattern and was unable to do so however, I might potentially consider buying it if I learn how to crochet braid my hair in order to try and get that beautiful look I primarily wanted! Side note – I do have a few ideas for some new hair I want to buy and I already have some hair that I plan to use for another protective style!
Tisun Store physical location:
Tisun Beauty 5420 North Tryon St #1, Charlotte, NC 28213
Have any of you used Freetress Crochet Braiding Hair Bouncy Twist Out before? If so did you use it to do crochet braids, a wig, another type of protective style? I would love to hear from you!
Today’s post is all about my love for Argan Oil (Argania Spinosa) also known as Liquid Gold.
What is Argan Oil:
Argan oil native to Morocco, is an organic product that is extracted from the kernels (nuts) of argan trees. Due to its nourishing and nutritional benefits it was/is an extremely popular ingredient in many cosmetic products and nothing is better than using it in its natural pure form!
Where Can I Get it?:
You can pick argan oil from Pharmacies, some grocery stores, Vitamin Stores and of course Online. (My sister brought me two bottles of Liquid Gold directly from the source). From what my sister told me she picked up the bottle from a local women’s group who work argan tree farms to help supplement their household. When I heard that I loved the oil a little more (thank you sis)!
I have seen a number of hair care manufacturers that produce argan Oil however, I tend to say buy 100% natural pure oil versus something that claims to be argan oil but contains other ingredients as well (always check your labels). 9 times out of 10 a Brand Oil that is labeled with argan Oil but contains other oils usually means you are not really getting your monies worth! Having other oils in the bottle is not necessarily a bad thing but since it usually costs a bit of money to purchase anything with argan Oil on its label you want to know you are getting something out of the product. Many times companies that include a mix of oils also include other ingredients that you might not be aware of e.g. silicons (cones) and perhaps even the dreaded mineral oil/paraffinum liquidum. For some of us, cones are not a “bad” thing either however you need to keep in mind that cons are water insoluble which means, that you will need some kind of cleansing agent (e.g. shampoo) to get rid of them when you wash your hair in order to really remove product build up from products with cones in them. Cones do not penetrate the hair strands and do not contain any independent health benifits for the hair but what they are able to do is to provide shine, the feeling of softness and work as barriers- closing the cutilce of our hair which gives your hair a feeling of softness. It is the barrier effect that can sometimes cause issues for some of us. When it comes to paraffinum liquidum, I need to stress that I always suggest to stay away from products that includes paraffinum liquidum.
Benefits of Argan Oil For Hair:
Argan oil is known to make the hair soft, smooth and shiny. Thanks to the antioxidants and essential fatty acids present in the oil It also has the ability to condition the hair, reduce frizz and improve the overall health of the hair. The oil is not only ideal to lock in moisture (apply after you have moisturized your hair) but since it is able to penetrate the hair strands to its core, it is able to provide the hair with nourishing properties from the inside out. Those with a dry, itchy or irritated scalp can benefit from using argan oil since it is known to help sooth the scalp. This is also beneficial for those that suffer from dandruff as it is easily absorbed into the scalps pores, providing moisturizing elements to the skin (scalp) and boost new skin cell growth.
Benefits of Argan Oil For Skin:
The oil is packed with vitamin A & vitamin E which are known for their healing abilities along with a high fatty acid content. It also has anti-oxidants properties, filled with Omega-6 fatty acids and linoleic acid all of which help with inflammation and moisturizing the skin. The vitamin E in the oil helps to boost the regeneration of new skin cells which helps to provide you with a youthful skin that “glows”. Those suffering with acne might benefit from using the oil to help sooth the skin and heal blemishes. Argan oil can be used on your whole body (including your face) and since it is a non-greasy oil it quickly is absorbed into the skin. The application of the oil on your skin can help reduce the appearance of fine lines, light stretch marks, razor burns/bumps and can even be used to help soften dry and cracked heals, dry hands and brittle nails. Those that suffer from dry cracked lips (e.g. yours truly) can apply a drop of oil on your lips to help heal cracks, keep your lips soft, smooth, moisturized and conditioned.
How I Use Argan Oil:
Since the oil is not particularly cheap (and the two I got where gifts from Morocco) I use them sparingly and choose not to experiment with the oil or blend it in with some of my DIY mixes. Instead, I like to use it as a scalp massage oil in the morning or as part of the L.O.C method (liquid/leave-in, Oil, Cream) when I moisturize my hair. (I have details on the L.O.C methodhere). I am also using it for my skin as well as my super dry lips!
Do you use argan oil? If so, do you use it for your hair and/or skin? I would love to hear from you!
Today I have a review that I would like to share with you!
Now yes I know, I know, this review is going to be based on something that isn’t “correct”……I can live with the fact that I bought something fake (sorry)! So yes, this is all about my knock-off curl formers. You have no idea how much I wanted to buy these for the longest time and I finally was able to get my hands on some (yes not the real deal but still).
Disclaimer: So before I get into this review 1. I bought the knock-offs with my own money and I was not requested to do this review, I just wanted to share my experience and thoughts of them. 2. If you feel strongly (against) buying none originals then please skip this post…because you won’t like it (but then come back and read something else). 😉
Why did I opt for the knock-offs instead of the originals?
To break it down I have several reasons but the main two are: The originals are more than double the price of what I paid, I would have gotten less of the originals, and since I was not sure how much I would like/dislike them I decided it made more sense to pay less (in case I didn’t like them).
Where can you buy the knock-offs?
I know that in the past the Vakind knock-off curl formers were available on Amazon however, I think they must have been blocked and blacklisted (I tried my darnedest to find them without success) so I ended up having to purchase from Ebay. There are different sellers on Ebay offering different sized knock-off curl formers and different widths too. I bought mine hereand this is theseller details.
Details on the knock-offs I bought:
The seller offers (as off 13.03.2016)
10 curlers with 1 hook GBP 4.51 ($6.49)
20 curlers with 1 hook GBP 7.91 ($11.39)
30 curlers with 1 hook GBP 10.81 ($15.56)
The curlers are manufactures and sent from China. When I bought mine I ordered 60 curlers (3 x 20 curlers). First I made an order of just 40 but then decided to add another 20 and paid $33.57 in total. I actually got 1 hook for each 10 curlers so I ended up with a total of 6 hooks even though I paid for 20 curlers and 1 hook…go figure (I am not complaining). My curlers are 45 cm long when stretched and 2.5 cm wide. As I mentioned there are different types of curlers available on Ebay and this seller actually also offers longer curlers on a different page (I didn’t notice this at the time but would have gone for those if I had).
Each packet of curlers came in 10’s – 5 orange and 5 pink along with the hook (there is no colour option). The two colours lay your curls in opposite directions so the curls lay and frame your face nicely.
**
Now I want to mention a few Pro’s and Con’s about the knock-offs along with some of the experiences I had while ordering them to keep you informed and provide as much information as I can.
Con’s:
Packaging – The curlers cam in sandwich bags, there was no pretty packaging so don’t expect to get something sturdy and “pretty” to hold your curlers. If you have a unused container/bag you might want to transder the curlers to that so you have them all together (that is what I did for the most of them).
Instructions – There was no instructions on how to use the curlers. You can find a little guide on the sellers page when you order them but you don’t get instructions with the package. (If you are unsure about how to use them, I suggest watching a ton of YouTube videos beforehand so you know what you are doing and you don’t damage your hair).
Hook – It is very simple to put the hook together but it can be a little tricky (requires a little strength) to pull them apart. I am unsure if it is the same with the origianl curl formers but you do have to pull the hook parts with a little strength to get them separate.
Communication – Communicating with the seller was really quite tedious! English is not his first language and since I don’t speak Chinese it became a little difficult when I contacted him to ask some questions. You will require a little patience (a bit of patience) since Emails can perhaps go back and forth without getting the answers you are looking for at first. In the end it worked out but just remember to be patient. (This can apply for other sellers on Ebay since they too might not speak the same language you do).
Lost Order – I had to have my package resent to me because when I initially made my order, I never recieved the package. I Emailed the seller to inform him and he immedietly resent the package the following day after the email, so the issue was resolved but I feel like I need to mention this point.
Curler ends – Some of the edges of the curlers seemed to be a little stuck together, probably from when they melted the plastic. However, once you put the hook through the curler they open up as normal.
Uncomfortable – This is something that I think applies to all curl formers, at least from the reviews I have seen on YouTube (both originals and knock-offs). Trying to sleep with these in your hair is a nightmare! The curlers are quite hard and uncomfortable so be prepared for a sleepless night if you choose to leave them in!
Installation – When I first tried the curlers it was not all that simple to get the hang of it, but once I got a few of them installed it become easier.
Pro’s
Price – I got to save A LOT of money by opting to go for the knock-off’s it was nearly half the price to get 60 of these compared to double the price of the originals for just 40.
Multiple Hooks – With the originals you get 2 hooks for 40 curlers with this option even if I went for 40 curlers I would have gotten 4 hooks (since I opted for 60 curlers I got 6 hooks) but the bottom line is you get more hooks which means if you break one, you will have extra and you can set up more curlers at a time which saves you time while installing!
More Curlers For Less – More bang for your buck! You get more hooks that you would (in terms of price of the originals)!
Free Shipping – I opted for free international shipping when I ordered which meant that I didn’t have to pay anything to get the package delivered however, going for this option meant having to wait 25 business days. You do have the option of getting the package sent quicker by paying roughly $35 (this was what it would have cost to get it sent from China over here so depending on where you live the price will change) and with that option I was told I would receive the package within 5 – 7 business days but I opted to wait.
Size Options – Talking about buying knock-offs from Ebay, you get a number of length and width options when it comes to the curl formers you can buy so even if you do not opt for this seller, check out other pages on Ebay, I am sure you will find the right knock-offs you are looking for!
Tip:When you order yours keep in mind that you might want to let your hair grow and if you plan on continuing to use them as your hair grows, try go for curlers that are longer than your hair. This way you won’t “out grow” the curlers (this is something I forgot!). However, if you do have curlers that are too short for your hair you can two strand twist your roots and then install the curlers a little lower down (below your roots) to make up for any missing length.
Sometimes if I didn’t get all my hair within the latch of the hook my hair would refuse to want to be pulled through, if that happens STOP, push your hair back and retry! If you continue to try and pull your hair through you will yank your hair out!
I didn’t do a “how to” video on the curl formers since I feel there are thousands of videos out on YouTube already however if you would like to see a tutorial please let me know. I have a video review of the curlers along with a very quick (few second) demo of how I took down my curlers which was initially made for my Instagram page at the end of the review.
Please let me know what you think of this review. If you own curl formers, knock-offs or decide to purchase some from this seller or someone else on Ebay please let me know how it goes, I love hearing from you!
Today I have something that I hope will help save you some money and perhaps even turn some of your least favorite conditioners (that you have stashed away collecting dust) into favorable ones!
Whether you returned natural just a few months ago or have been natural for a while, finding “staple” or favorite products (e.g. conditioners) are one of things we want to achieve. It can become a little difficult to find products that work for our hair without some trial and error, which can be quite frustrating.
We tend to look for conditioners that:
Provides moisture (if we are not seeking a protein conditioner)
Has sufficient slip to ease detangling
Smooths the hair
Softens the hair
Provides shine
Provides elasticity
In this particular DIY example I used TRESemmé Naturals but you can use any of the conditioners in your shelf. Note: some might not mix all that well with the gel but since it is not going to be left in your hair and will be rinsed out that shouldn’t be a problem.
The crux of this whole thing is to add Flaxseed Gel (FSG) to your conditioner of choice and that pretty much is it!
Why add Flaxseed Gel:
Apart from the fact that adding Flaxseed gel will help provide slip to the conditioner here are some of the other benefits:
Rich source of vitamin E. Vitamin E.
Provides moisture to the hair.
Provides nourishment to the hair thanks to the Omega – 3 fatty acids.
Helps reduce breakage and split ends.
Helps slowdown the process of premature gray hair.
It helps reduce shed hair.
Helps fight scalp irritations and dandruff.
Ingredients:(I get 2 uses from this recipe)
8 Oz Conditioner (if you have shorter/thicker hair you might need to use less or more conditioner).
8 Oz Plain Water
2 Oz Flaxseeds (I like my gel to be thick since that provides slip).
(Optional) 5 – 7 drops Essential Oil (EO)*
Pot
Sieve
Clean and disinfected container
Spoon/Spatula
Gloves (to be extra sure you don’t contaminate the product)
*Essential Oils should be used with caution and only requires a few drops. If you are pregnant please do not use any!
Method:
I add the flaxseeds to the water (before it boils) and allow it to slowly come to a boil on low heat for 10 minutes while continuously stirring. Once I have the gel at a consistency I am happy with I immediately sieve the seeds (keep the seeds for reuse in a ziplock bag in the freezer and quickly pour water in the pot). I add the gel to my conditioner, mix really well then add the EO stir again, fini!
Storage:
If you have any remaining conditioner and plan to use it the following week I do suggest storing it in the fridge however, I have left mine in an airtight container in my bathroom to be used the following week without anything nasty growing in the container. I am always “extra” and use a clean, disinfect and dry spoon whenever I scoop out any hand prepared products just to make sure no bacteria, dirt etc comes in contact and grows anything funky so I suggest you doing the same (don’t dip your fingers in the container unless you use it all up in one go).
Ratio/Ingredient Alternatives:
If you are using a thin/runny conditioner and want to really thicken it use 3 Oz flaxseeds.
You can add some Rose Water to this by replacing half of the water e.g. 4 Oz Plain Water & 4 Oz Rose Water.
You can add a Humectant (if your hair likes them) e.g. Honey/Agave Nectar/Glycerine or Aloe Vera Juice (0.5 Oz).
You can also use a combination of Fenukgreek Seeds together with the flaxseeds e.g. 1 Oz Fenugreek 1 Oz Flaxseeds.
P.S. You can also add some FSG to your shampoo! Use 1 tablespoon of FSG to your shampoo in a bowl & stir. It will provide slip but also help to reduce the amount of stripping from the shampoo.
I really would love to hear if you try this DIY and what your results were!
Today I wanted to share one of the methods I use to remoisturize old hair & how I style my hair in a low manipulation style (when I went camping for 2 nights).
So I was off to a beach camping trip for 2 nights and my hair was a MESS! I had it in a twist out that turned into a messy bun. The curls were tangled, dry and just not in a good way! Since I was camping I knew I didn’t want to do anything “drastic” especially since I would be washing my hair once I got back. I also knew I wanted my hair tucked away since sand and my hair just don’t play nice at all so I figured I would remoisturize, bring back some texture but still keep my hair tucked away.
My remoisturizing method was simple, the L.O.C method (Leave-in/liquid, Oil, Cream/Whipped butter) I also used permrods and that was it. I did not use a comb to get through my hair since I wanted low manipulation and to protect my hair during the trip I used a scarf to keep my hair up and away from my shoulders and presto.
Braid and Perm Rod Set
Braid and curl
Braid and curl after separating
Braid and curl
Products/Tools Used:
DIY Spray Leave-In Conditioner (I have two versions on my blog: here and here)
I parted my hair into sections (roughly 15 – 18 in total), spritzed my hair with my DIY Spray Leave-In Conditioner followed by my oil. I then gently, carefully and slowly detangled my hair and get rid of shed hair. I braided my hair but left my ends unbraided. I added a little extra spray leave-in on the ends, smoothed on some whipped butter before wrapping them around the perm rods and then rolling up to my roots.
wrapped up braid out
wrapped up braid out
wrapped up braid out
wrapped up braid out
Once I was done I covered my hair at night (I kept it uncovered right until I went to bed). The following morning I took down the perm rods and using a little oil on my fingertips I undid the braids. Now if you want to have definition then take the braids down carefully to keep the integrity of the curl pattern (since I just wanted a little texture, a little volume and was going to cover my hair it didn’t really matter for me). After I took down the braids I separated my hair a tiny bit and covered my hair with the scarf, leaving a swooped bang at the front (the ends tucked away) and pinned the rest of my hair upwards. Presto: happy moisturized and protected hair ready for camping!
I have a video of the whole process:
P.s. In case you were wondering, here is a peak at the spot where we camped.
What is your go to method to remoisturize “old hair” mid-week/before washing your hair?