DIY Green Tea Tea Spray/Rinse

Hey Maicurlies,

I am back with the second of my Tea Sprays I like using on my hair – Green Tea.
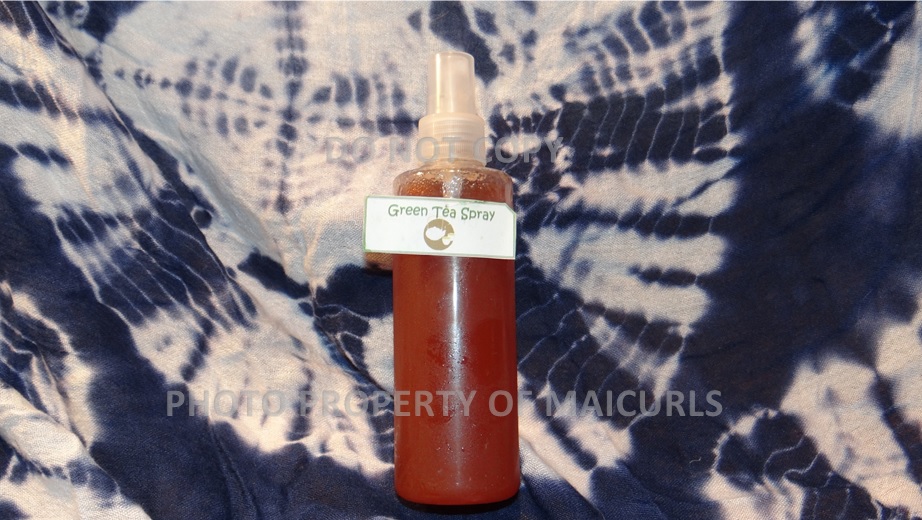
Green Tea Spray

Green Tea Spray

I have already mentioned the other tea I like using which is Hibiscus and you can read about my spray recipe here but in case neither Hibiscus nor Green Tea tickles your fancy I have a list of other teas you can use.

Green Tea is popular for its health benefits when consumed due to the fact that it is packed with antioxidants that are known to fight free radicals and hinder the production of bacteria internally. Some of the antioxidants in Green Tea are polyphenols,which are said to not only help you attain a healthy body, skin and hair, but are also said to block the growth of cancer cells as well, so drink up ladies & gents!

Benefits:

When it comes to the hair, the reasons why I like using Green Tea is because it:

  • Helps grow healthy hair
  • Stops excessive hair shedding
  • Provides the hair with a boost of luster and bounce
  • Soothes scalp irritations
  • Adds a natural shine to the hair
  • Strengthens the hair to help reduce breakage
  • Helps reduce dandruff
  • Helps conditions the hair
  • Darkens the hair naturally over time and with continuous use*
  • Slows down the early onset of greying* (it will NOT STOP you from EVER having grey hair)

*If you have bleached, dyed or lightened your hair and do not want it to darken do not use Green Tea

Ingredients of the spray

  • 2 Green Tea Bags (1 – 2 tablespoons loose leafs)
  • 1 cups Water
  • 1 teaspoon Glycerin – 0.1oz (optional – you can substitute this with another moisturizing ingredient mentioned below).
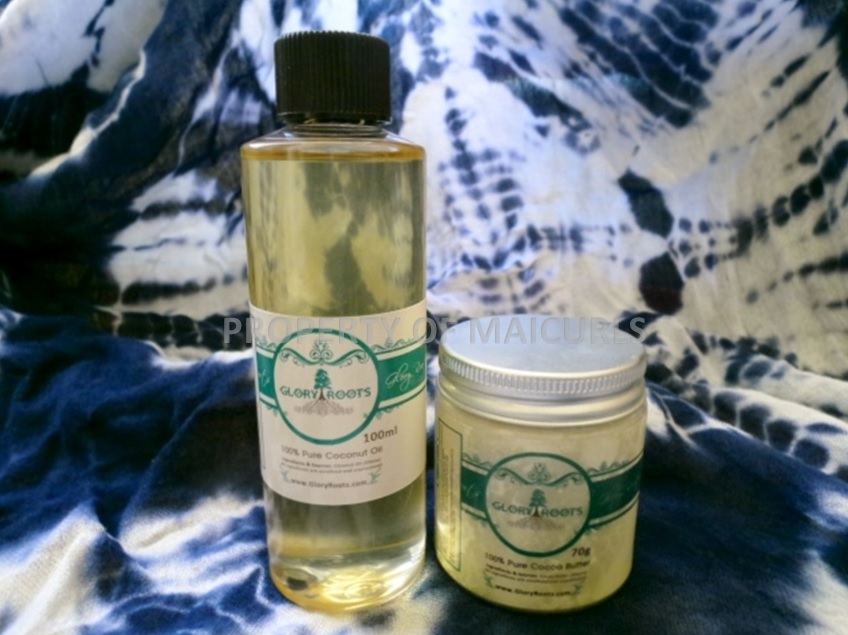
  • 2 teaspoon Coffee Infused Oil – 0.2oz (you can use any Carrier Oil of choice)
  • 3 drops Peppermint Essential oil (EO)* (you can use any Essential Oil of choice)

*If you are pregnant please do not use EO and consult your Doctor before you decide to use tea on your hair.

If Green Tea is new to your routine I would recommend that you make the tea a little “weak” by starting off with 1 tea bag/1 teaspoon so that it is not too strong for your hair. I would also recommend that you rinse it off after application (you can leave it on for 15 – 30 minutes) and space out the applications. This way you can determine if your hair likes the tea and you can increase the amount and strength depending on your hair preferences.

While Green Tea is less “potent” than Black Tea, it can still be a little drying therefore, you can add other ingredients to the tea to make it a little more moisturizing. This is why I add glycerin – it is a humectant that draws moisture in the air to the area applied but if your hair does not like glycerin you can substitute it with honey, Aloe Vera Juice, Agave Nectar or omit it completely. My DIY Coffee Infused Grapeseed Oil is great for reducing hair shedding, reducing breakage, it is known to help darken the hair a little and even slowdown premature graying. The oil is extremely light and will not weigh down the hair (I have fine hair). I add Peppermint EO because it smells awesome but also because it helps fight dandruff, keeps the scalp clean, stimulate hair growth and helps to slowdown bacterial growth in the tea. Always store the tea in the fridge!

“How to”:

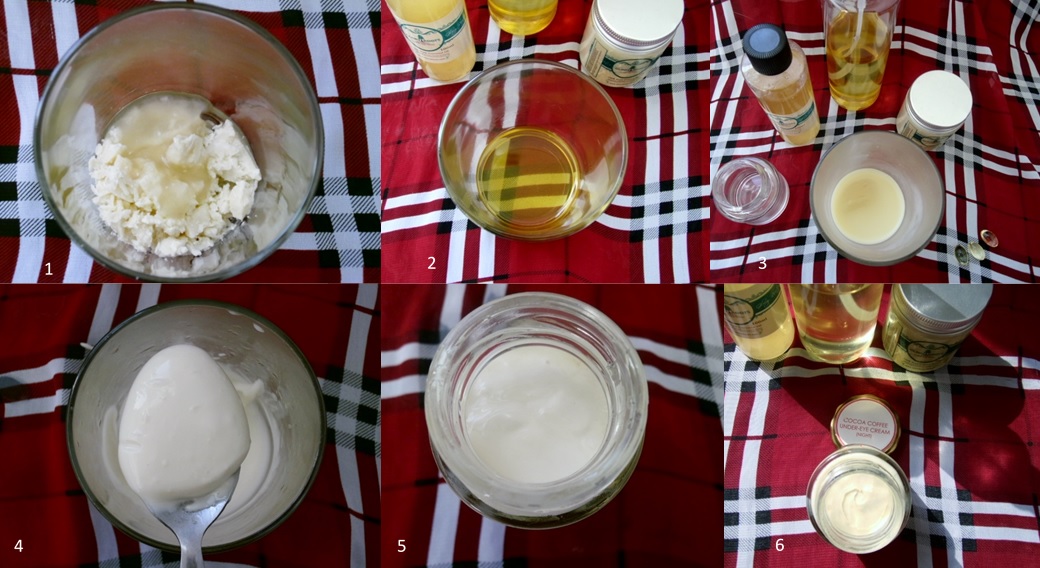
All you do is boil the Green Tea bags in the water for no more than 5 minutes on low heat and then allow it to come down to room temperature. Once cooled down add the remaining ingredients (Coffee Infused Grapeseed oil, glycerin and Peppermint EO) and stir really well. Transfer it either into a spray bottle or a container you will use to pour over your hair and you are done.

How I use my Green Tea:

I like using a spray bottle because I can control how much/little is applied instead of pouring the tea all over my hair. I spray my roots (dry or lightly damp hair) and allow it to completely dry without rinsing it off. I store the bottle in my fridge for 1 week and then remake a new batch.

While teas are excellent for your hair, too much of a good thing can be bad therefore if this is new to your routine and hair I recommend rinsing out the tea. The information provided is for educational purposes only. I am not a doctor nor a medical professional therefore, please consult with your personal doctor or a medical professional before starting anything new and if you are pregnant always consult your personal doctor or medical professional. 

Do you use Green Tea for your hair? If so how does it help the overall health of your hair?

Thanks

Maicurls

Maicurls

Glory Roots Product Review & my DIY Nighttime Under-eye Cream

Hey Maicurlies,

Glory Roots Product ReviewToday I wanted to do a 2 in 1 post (it’s a little long), but first let me set the scene. I was gawking at natural hair pictures on Instagram (IG), when I came across a page: Glory Roots. The products caught my attention because 1. there were a lot of organic/natural and/or unrefined products and 2. a lot of their products come from Africa, mainly Ghana.

After a little search I left a message along the lines of “all your products look awesome” on one of their pictures. Shortly thereafter I was contacted by the company and they very kindly offered to send me two products to try out. (THANK YOU Glory Roots!!) 

Please note, While I was sent the products I was not requested to write a review. I decided to do so on my own since I planned to use them in DIY experiments and wanted to share my results with all of you. I informed them that I planned to write a honest review based on my own personal opinions, which they encouraged since they wanted honest feedback.

The company is based in the Uk and I copied a snippet about Glory Roots from their Site:

Glory Roots is a specialist health & wellbeing online store offering a large range of organic and unrefined products. This includes our own Glory Roots range and many other trusted specialist imported brands that have been faithful staples over the years of many households and native lifestyles. Available products include: – body butters – herbal remedies – bitters – soaps – essential oils – creams & lotions – ointments – nuts & seeds, and many many more!

Source: http://www.gloryroots.com/

They offered to send me one product they recommend and I could select one of my choice. The 100% Pure Coconut Oil from Ghana (unrefined and unprocessed) was their selection and mine was the 100% Pure Cocoa Butter also sourced from Ghana (unrefined and unprocessed).

What I did was to try both products on their own and then in a DIY mix.

100% Pure Coconut Oil (100ml) – £5.00

100% Pure Coconut Oil - 100ml

100% Pure Coconut Oil – 100ml

Scent – It has a mild coconut scent to it. I will state that the Virgin Coconut Oil I normally use for both my hair and skin does seem to be a little more “coco-nutty”.

Colour – The Virgin Coconut Oil I normally use seems to be a little less yellow, (paler) compared to their oil. I am not sure but perhaps the type of coconut, how it is grown and where it grows makes a difference in the scent and colour (my Virgin Coconut Oil comes from India). Regardless,  I did see a slight colour difference between mine and theirs.

Package/Consistency/Feel The bottle was sturdy and the plastic used along with the lid did not let any of the oil spill out. When I first received the oil, the weather was still pretty warm so it was a fluid liquid. However, when I tested it out the weather had gotten colder and that of course started to turn the oil into more of a thick liquid state (which is normal). When applied, the oil was quickly absorbed into my skin leaving me with smooth, shiny (not greasy) as well as moisturized skin. I also used it to seal moisture in my hair and again my hair looked shiny without feeling greasy and I was left with a mild coconut scent, yum.

100% Pure Cocoa Butter 70g £3.50

100% Pure Cocoa Butter - 70g

100% Pure Cocoa Butter – 70g

Scent – There is a subtle chocolate smell to their 100% Pure Cocoa Butter. In comparison to my “normal” Unrefined Cocoa Butter I probably would have been happier if theirs had a stronger chocolate scent (since I love chocolate) however, for those that are sensitive to strong scents, it is not overpowering.

Colour – it has a slightly off white color similar to my “normal” Unrefined Cocoa Butter. (In the image the Cocoa butter looks a little white but it is off white in person).

Package/Consistency/Feel – Again the package is sturdy and you can tell it held the butter well because during transportation the butter must have melted a little bit (due to temperature differences) and at some point when it became a solid again the package was placed sideways which is why it solidified at an angle before I received it (notice the gap in the image). Keep in mind that does not impact its effectiveness or quality or the product. Due to the changes in temperature the butter was ever so slightly grainy but it melted down completely as soon as I rubbed a bit of it in my palms and left me with super moist skin that looked supple yet not greasy (no graininess either).

Overview: I enjoy using both of the products on their own and in DIY product mixes and think both work really when they are applied on my hair and skin. The only thing is my nose wishes the Cocoa Butter smelt a little more like chocolate and the Coconut Oil smelt a little more “coco-nutty”. As I mentioned I got the 70g Cocoa Butter and 100ml Coconut Oil which are ideal sizes if you want to see how your skin/hair likes them. They have different sized products available on Glory Roots Site but I would suggest going for the larger ones after you have tried them out. Then again, the little bottles might be sufficient for some, but since I am a DIY freak, little bottles are not enough for me :D. I really appreciate the fact that Glory Roots allowed me to try out their lovely products (thanks again!) and I would say if you are looking for raw products, check out their site.

DIY Under-Eye Cream (for the night)

DIY Under eye cream

DIY Under eye cream

Mix Instructions – (I used a 1.7oz container)

  1. I measure out 0.5oz Pure Cocoa Butter and 0.3 oz Pure Coconut Oil and placed them in a heat proof glass to double broil.
  2. I double broil for less than 5 minutes on medium heat, take it off the heat and add 0.1 oz of my DIY Coffee Infused Oil. (You do not have to use this particular carrier oil however coffee/caffeine is excellent for reducing puffiness).
  3. I place the mix in my freezer for 10 minutes to let it become a little thick and hard.
  4. I mix everything together with a spoon, add 3 capsules of Vitamin E Oil (roughly 0.15 oz) and mix again for 5 minutes till it becomes a smooth yogurt like consistency. (You might need to rigorously mix).
  5. I transferred the mix into my container and let it rest. (In picture 5 the “cream” still has a yogurt-like consistency right after mixing.)
  6. After it has “set” the consistency resembles more of a thick cream which is a little firm but easily comes out of the jar with a simple pat with your finger over the cream.

Application

After you have washed your face and removed your makeup, make sure your hands are clean and dry before applying. You only need to use a tiny tiny dab under each eye at night and gently glide your finger over your skin. It will melt immediately upon contact and will absorb easily (just make sure not to use too much!) With frequent use it should help reduce puffy under eyes, dark circles as well as help reduce fine lines. Please keep in mind, in some cases puffy under-eyes and dark circles can be hereditary or a sign of illness and this cream is not meant to be a replacement for any medication/ointments provided from medical professionals. Do not get the cream in your eyes because it might sting and remember a little goes a LOOONG way!

TIP: This mix should last you a long time if you use it lightly and the shelf life should be at least 6 months (if not 1 year). Always use clean and dry hands when applying the product to avoid contamination in the jar since there are no preservatives and try to use an airtight container for longer shelf life. You can store the cream in your fridge during the summer, this will make the cream hard but it still will melt upon contact with your skin nonetheless. 

 *I have a list of all the benefits and properties of each ingredient used here*

Have you tried Glory Roots before, if so which products and what do you think? Have you made your own nighttime under-eye cream? I would love to hear if you try my mix!

Thanks

Maicurls

Maicurls

My French Bourjois Updo

Hey Maicurlies,

I finally have a styling tutorial!

French Bourjois Updo

                                                         French Bourjois Updo

This is what I like to refer to as my French Bourjois Updo. Now, I have shown you something similar before during my protective challenge in Week 6 (without a tutorial) but this looks a little difference. Even though the method of how I did the style is the same, the main difference is that my hair was taken down from twists during my Protective Style Challenge and in this demo I was working with week old hair that NEEDED a wash!

french bourjoisI will point out that I was on a “carefree” I don’t mind the frizz attitude. I had run out of henna and needed to go to the market to get some before washing my hair, so I didn’t want to add too much to my hair or do too much either.

You can make the style more polished and slick with the use of some gel. I would suggest using a light spray gel so that it is not uber sleek (check my DIY Spray Flaxseed Gel). But like I said I decided I wanted to rock it as is, so I went out frizz and all :). 

Products/Tools:

  • Hair clips (to separate hair)
  • Water – spray bottle
  • Bobby pins (I used 8 in total)
  • Gel (optional – I didn’t use any)

Instructions: much easier explained/understood in video!

Would love some feedback Maicurlies 🙂

Thanks

Maicurls

Maicurls

Setting “hair goals” for the New Year – Global Couture

Hey Maicurlies,

As we are about to embark on a new year a lot of us make lists on things we would like to change, achieve or try. For some of us our lists will include family resolutions, financial saving plans, health related promises and yes Hair goals. I wrote an article about how I like to set my hair goals whenever a new year rolls along on Global Couture.

Setting hair goals for the New Year

Setting hair goals for the New Year

In the article “Setting “hair goals” for the New Year” I touch upon the “Keep It Simple Stupid” (K.I.S.S) principle that I personally find helpful. While it is great to dream and think big, it is important to try and keep our plans and goals realistic as well because if we don’t, we might end up being extremely disappointed & demotivated when we are unable to meet our goals (which might have been unachievable in the first place due to improper planning and unrealistic goals). I also touch upon the importance of a hair journal/dairy and how keeping one can really be helpful as the weeks and months go by. (Read my previous post about Hair Journals)

As for me, I have a few hair goals/resolutions that I will be sharing with you in my next post. Do you have any for 2015? I would love to hear what they are.

Happy New Year Maicurlies!

Maicurls

Maicurls

DIY Body Butter Bars (2 recipes)

Hey Maicurlies,

At long last I have a skin care tutorial & video! This is going to be about my DIY Body Butter Bars, I LOVE these gems! They are excellent for the winter months when the weather is cold and dry resulting in dry and sensitive skin.

Body Butter Bars

Body Butter Bars

I have 2 different recipes my CoSheaCo Bars (I add some exfoliating ingredients to make a few exfoliating Body Bars) and my Simple CocoaCo Bars which only consists of 2 ingredients.

What are Body Butter Bars?

Literally they are bars made up of oils and melted butters to help moisturize and seal in moisture. You can add additional ingredients to make them super moisturizing e.g. glycerin/honey/agave nectar or coffee beans/dried roses/dried lavender/sea salt etc to make them exfoliating Body Butter Bars. They can be used in place of lotions or creams after a shower or bath.

Ingredients

CoSheaCo Bars (recipe yields 6 large and 3 small bars)

CoSheaCo body butter bars

  • 125ml Unrefined Cocoa butter (4.2oz)
  • 80ml Unrefined Shea Butter (2.7oz)
  • 60ml Virgin Coconut Oil (2oz)
  • 40ml Coffee infused almond oil (use any carrier oil of choice) (1.4oz)
  • 1 teaspoon glycerin (optional) – can replace with raw honey (my teaspoon is 0.1oz or 3ml)
  • 20 drops grapefruit essential oil (optional) – use any essential oil of choice. (If you are pregnant do not use essential oils!)

CocoaCo Bars (recipe yields 4 small bars)

CocoaCo Bars

Instructions

1. I slowly melt the butters using a double broiler in a heat proof glass bowl. 2. I take the melted butters off the heat and add the Virgin Coconut Oil. 3. I add the other ingredients (e.g. Glycerin, Coffee infused oil and Essential oil in the CoSheaCo bars) once I know the butters are not really warm. 4. If you are making exfoliating bars put your chosen ingredients (coffee beans and rose petals) in the molds and then pour the melted butters and oils into the mold. 5. I let the mixture sit on a counter for a few minutes and then place the molds in my fridge.  I prefer setting mine overnight (let them set for no less than 4 – 5 hours until they are completely firm, longer if possible). 6. Once they are set, gently pull back the edges of the molds and the bars will slide out.

I use silicon molds but for the purposes of this demo I also used metal molds in case you don’t have silicon ones. 

Storing the bars:

I always store my bars in the fridge in an airtight container. Since I do not use Beeswax in my recipe there is the potential of the bars melting in warm climates or hot households (more likely in summer) but I do not risk it so I store all but the one I will be using in the fridge*. The fridge and airtight container also helps to keep the bars from going “off” too quickly, but the general shelf life of the bars should be 6 months – 1 year since no bacteria inviting ingredients (e.g water, Aloe Vera juice etc) are used in combination with the oils and butters in the recipe. I keep the bar being used in an airtight container in a dark cupboard in my bathroom room.

* There is nothing “wrong” with beeswax, it is a natural ingredient but I choose not to use it simply because it tends to sit on my skin and I do not like that feeling (I have sensitive skin). There are thousands of Body Butter Bar recipes online that follow the same ingredients I use but also include beeswax.

How to use:

After a shower I don’t completely dry off all the water with a towel, I then rub the bar between my dry palms and apply like I would a body cream. The bar will help trap in moisture from the water and also add amazing benefits from the butters and oils. With the exfoliating bars I rub the bar itself onto my skin to get the additional scrubbing effect.

Benefits of the ingredients used:

Cocoa butter – is known for its deep hydrating and moisturizing properties due to its high fatty acid content. It is said that the butter can help reduce stretch marks and the fact that Cocoa butter is packed with antioxidants, means that it can help fight off free radicals and skin irritations such as eczema and dermatitis.

Coffee bean infused almond oil – is rich in vitamins A, B, D, and E, has been used to improve the skins complexion and its emollient properties soften the skin. Almond oil is quickly absorb into the skin and has healing and hydrating properties. The coffee bean infusion helps to tighten the skin giving you a youthful fresh glow, reduce the appearance of cellulite, reduce redness and skin inflammation and is known to fight free radicals thanks to the antioxidants contained in caffeine.

Coconut oil (Virgin) – is very good at re-hydrating the skin because it is absorbed into the skin and conditions, moisturizes, and softens the skin. Coconut oil naturally clears away dirt, grime, and dead skin cells and due to its anti-bacterial and anti-viral properties. The oil acts as a good protectant against skin irritations and rashes. It is known to soothe insect bites, flaking skin and mildly sun damaged skin.

Glycerin (Vegetable) – is a natural humectant that draws moisture onto the skin by extracting it out of the air. Apart from its ability to draw in moisture, it is also known to help retain moisture in the skin. This makes Glycerin a great agent in fighting rough, dry, irritated and dull skin. It also makes it an excellent skin plumping product.

Grapefruit essential oil – aside from its delicious scent, it has antiseptic qualities and helps to clean and clear congested skin and to treat oily skin.

Rose petals & Coffee beans – used as exfoliating ingredients to help remove dead skin cells and stimulating blood flow.

Shea butter – is highly moisturizing, improves the skin’s softness, suppleness as well as soothes burns. Shea butter can also be used as a mild “sun protectant”, soothes, moisturizes and is an effective anti-aging & anti-wrinkling butter.

I have a video on my YouTube Channel (below) showing you exactly how I make both Body Butter Bars.

Have you used/made a Body Butter Bar before? What is your favorite? I would love to hear from you 🙂

Maicurls

Maicurls

It has been a wonderful year Thank You!

Hello Maicurlies,

I made a quick video to say thank you for all the support I’ve got over the last year, which has been a wonderful year by the way. I truly appreciate every single one of you! While saying THANK YOU is not nearly enough to express how much all of your support means to me I can only reiterate I really do appreciate every single comment, follow, share, like, question, suggestion and message of support I’ve received from you, so THANK YOU again! 

I also explain what I will be doing on my YouTube Channel, this Blog as well as the other social media platforms I am on (Pinterest, Instagram, Bloglovin). I basically plan on sticking with what I know best and am most comfortable in, DIY’s and a few styling  videos. I do plan on doing more styling videos/tutorials and will try my best to be a little more creative 🙂

Along with that I also shared my Christmas Eve and Christmas Day hairstyles which, you probably already guessed were simple! Yes, I was being true to myself.

So with the buildup to Christmas over now comes the buildup to New Years Eve. I am still not sure what I will be doing in terms of hair but If I come up with something a little more exciting than a simple flat twist I will record a video ;).

Until next time Maicurlies!

Maicurls

Maicurls

Christmas & New Years Eve Outfits

Hey Maicurlies,
 
So it is that time of year again and apart from spending time with family and friends, the other thing I enjoy is dressing up for the occasion. These are just a few ideas for a Christmas Eve dinner outfit (left) and a cute little number to ring in the New Year (right).
 
Wishing you, your family and loved ones a Merry Christmas and a Happy New Year in advance!

Christmas & New Years Eve Outfits - http://maicurlz.polyvore.com/

Christmas & New Years Eve Outfits – http://maicurlz.polyvore.com/

Maicurls

Maicurls


Hand In Hair Syndrome – Global Couture

Hey Maicurlies,

I wrote a new article for Global Couture that I think a few of us might have/are/will go through as a naturalista: Hand In Hair Syndrome (HIH).

Hand In Hair syndrome and how to try to combat it

                                Hand In Hair syndrome and how to try to combat it

In case the term is new to you all it basically means it that you “suffer” from constantly touching your hair – your hands are constantly in and and around your hair.

During my hair journey I was always touching my hair, wanting to feel my natural texture and play with my curls. Admittedly I will sometimes still play with my hair whenever I am really digging a style. In case you “suffer” from a bad case of  HIH, I provide a few potential consequences of the syndrome as well as a few solutions to try and stop touching your hair in the article: “Hand In Hair syndrome and how to try to combat it”.’

Do you “suffer” from HIH? What steps do you take to try and stop touching your hair throughout the day?

Maicurls

Maicurls