Category Archives: Natural Hair

DIY – Moisturizing Dry Brittle Ends (Humectant Free)

Hello Maicurlies,

Today I am back with an alternative recipe version of a mix I already shared a few weeks ago! I have a post & video about moisturizing dry & brittle ends with a humectant based recipe here and was then requested to do a humectnt free version and here it is!

DIY: Moisturizing Dry Brittle End (Humectant Free)

I have mentioned this a few times in my blog, not everyone’s hair appreciates humectants, it all boils down to hair preference and weather conditions in the area where you live. This recipe works in a similar way to my humectant based mix, just without the addition of ingredients that draw moisture in the air (humidity) to the area applied (the hair).

Ingredients/tools:

Ingredients

  • 1.7oz Plain Full Fat Yogurt
  • 1oz Cocoa Butter
  • 0.5oz Rose Water
  • 0.5oz Plain Water
  • 0.5oz Virgin Coconut Oil
  • 3 capsules Vitamin E Oil (roughly 0.15oz)
  • 3-5 drops Peppermint Essential Oil (Optional) – use any*
  • Clean and disinfected heatproof container
  • Pot 
  • Clean and disinfected spoon
  • Gloves (optional to keep mix sanitized)

*If you are pregnant do not use Essential Oil and always consult your personal physician whenever using something new!

Ingredient alternatives:

You can replace the 0.5oz Rose Water with more 0.5oz Plain Water if you do not have access to Rose Water. Virgin Coconut Oil can be replaced with any other carrier oil e.g. Almond Oil, Grape Seed Oil, Jojoba Oil etc Cocoa Butter can be replaced with any other butter e.g. Shea or Mango Butter. Depending on your preference you can either use any Essential Oil of choice or opt not to use any.

Mixing:

1.Melt down the cocoa butter by double broiling for 5 – 7 minutes. 2. add the yogurt and stir really well. (If you haven’t fully melted down the butter it will become a bit lumpy with the addition of the yogurt so place the container back in the pot with hot water for a few minutes till it is fully melted. 3. add the water and rose water a little at a time while continuously stirring. 4. add the virgin coconut oil and stir well. 5 add the Vitamin E oil and finally 6. add the essential oil (if using) and stir. I like to place the mix in my fridge in a squeeze container for a few minutes as this allows it to thicken up but this is optional.

Application:

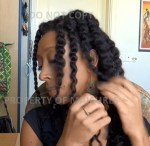
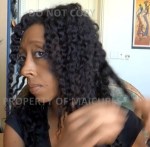
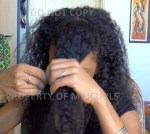
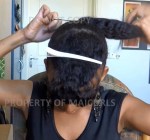
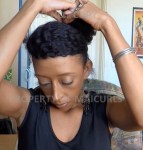
I like to apply this to slightly damp hair that has been detangled. I mainly focus the mix on my ends – at the most going to the mid-length of my hair since the ingredients are a little on the heavy side and can weigh down my curls if I apply it on my length of my hair. However, this can be used on the entire length of your hair (it depends from person to person).

Storage:

DIY: Moisturizing Dry Brittle Ends (Humectant Free)

I keep it for no longer than 10 days in the fridge, IT MUST BE STORED IN THE FRIDGE. If you know you won’t be able to use it all up then I suggest storing in the freezer if you want it to last for more than 10 days.

Ingredient Benefits:

Plain Full Fat Yogurt – helps provide strength to the hair thanks to the traces of protein. Leaves hair feeling soft and eases detangling. Provides shine while smoothing the hair stands and fighting frizz.

Cocoa Butter – reduces hair loss and breakage. Since it is a fat, it can be used to replenish lost oils. Strengthens the hair, tames frizz and flyaway hair.

Plain Water – the optional moisturizing element for the hair!

Rose Water – revitalizes the quality of the hair due to Its natural moisturizing and nourishing properties. It helps stabilize the natural p.H level of the hair which helps to heal the porosity of the cuticle providing shine and it smells divine!

Virgin Coconut Oil – provides shine and strength, penetrates into the hair shaft strengthening from within. Helps seal in moisture from the other ingredients used in the mix e.g. water & rose water. Helps to fight against frizzy and brittle hair.

Vitamin E Oil – helps to extend the products shelf life (extends not preserves). Rejuvenates the hair strands, fights against frizz, provides shine and helps to slow down premature greying. 

Would love to hear what you think, especially if you use this recipe!

Thanks

Maicurls

Maicurls

DIY: (Recipe) Moisturizing Dry & Brittle Ends

Hello Maicurlies,

I brought my DIY (you know what) back on the blog to share…drum roll please…a DIY Recipe for the hair! (And the crowd goes wild!)  

Moisturizing Dry & Brittle Ends

This particular recipe is one that I like to mainly focus on my ends since it does include a few “heavy” ingredients (heavy for my hair) that can potentially weigh my fine hair strands down. If however, you happen to have thick/coarse hair you probably can get away with applying this throughout the length of your hair without it stopping your curls/kinks/coils from being big and fierce! 

Ingredients/Tools

  • Mixing Bowl (dry, clean and disinfected)
  • 1.5 oz Plain Full Fat Yogurt
  • 0.2 oz Raw/Natural Honey or Agave Nectar
  • 0.2 oz (optional) Glycerine or Fresh Aloe Vera Juice
  • 0.5 oz Rose Water
  • 0.2 oz Virgin Olive Oil*
  • 3 capsules Vitamin E Oil (roughly 0.15 oz)
  • **3-5 drops any Essential Oil (I used Citronella) 
  • Spoon (dry, clean and disinfected)
  • Gloves (to be “extra” but not absolutely necessary)

**Note: Please do not use Essential Oils if you are pregnant of breastfeeding. Always consult with your doctor/dermatologist or a professional. Always make sure not to use too much Essential Oil since this can make the mix extremely “potent” and harsh, potentially causing you skin irritations. 

Mixing Instructions:

All you need to do is combine all the ingredients together and mix really well once the Virgin Olive Oil has been added and that is it!

Application:

I prefer applying this on lightly damp detangled hair (the ends) as it makes it easier to distribute versus working on dry hair. I usually put my hair up in a bun and cover with a shower cap for 15-30 minutes then rinse it off with conditioner and cold water. The cold water helps to close the hair’s cuticles which allows for moisture to stay in my hair and since the cuticles are laying flat (closed) it also provides extra shine! 

Ingredient Alternatives:

This is a humectant based recipe and some of you might find that humectants and your hair are not friends, it really depends on what your hair likes and the weather in your area. Humectants draws humidity in the air (moisture) to the area applied, if you have the right amount of humidity (neither too much nor too little) this creates additional moisture for dry curls/kinks/coils. If your hair does not like humectants you can limit the amount used e.g. Instead of using both Honey/Agave Nectar AND Glycerine/Aloe Vera Juice you can go for either Honey/Agave Nectar or Glycerine/Aloe Vera Juice. 

Extra Virgin Olive Oil – can be replaced with any carrier oil of choice however I would suggest using one that is known to penetrate the hair strands e.g Virgin Coconut Oil.

Essential Oil – you can use any Essential Oil of choice or skip this all together (I am not the biggest fan of the smell of yogurt so the Rose water and Essential Oil helps to mask that).

If you have coarse/thick hair and would like to use this on the entire length of your hair then simply double the amounts apart from the Rose Water and Essential Oil. Instead use 0.7 oz Rose Water (so it does not become too runny) and keep the Essential oil at no more than 5-7 drops.

Storage:

I always use what I have made and then place the remaining in my freezer. I simply let it defrost on its own (no heat) during the following application. 

P.S. in case some of you would like a humectant free recipe please do let me know I would be happy to create something along those lines. 

Thanks

Maicurls

Maicurls

How To: Adding slip to conditioners to make detangling easier.

Hey Maicurlies,

Today I have something that I hope will help save you some money and perhaps even turn some of your least favorite conditioners (that you have stashed away collecting dust) into favorable ones!

Making Conditioner with Slip

Whether you returned natural just a few months ago or have been natural for a while, finding “staple” or favorite products (e.g. conditioners) are one of things we want to achieve. It can become a little difficult to find products that work for our hair without some trial and error, which can be quite frustrating. 

We tend to look for conditioners that:

  • Provides moisture (if we are not seeking a protein conditioner)
  • Has sufficient slip to ease detangling
  • Smooths the hair
  • Softens the hair
  • Provides shine
  • Provides elasticity

In this particular DIY example I used TRESemmé Naturals but you can use any of the conditioners in your shelf. Note: some might not mix all that well with the gel but since it is not going to be left in your hair and will be rinsed out that shouldn’t be a problem.

The crux of this whole thing is to add Flaxseed Gel (FSG) to your conditioner of choice and that pretty much is it! 

Why add Flaxseed Gel:

Apart from the fact that adding Flaxseed gel will help provide slip to the conditioner here are some of the other benefits:

  • Rich source of vitamin E. Vitamin E.
  • Provides moisture to the hair.
  • Provides nourishment to the hair thanks to the Omega – 3 fatty acids.
  • Helps reduce breakage and split ends.
  • Helps slowdown the process of premature gray hair.
  • It helps reduce shed hair.
  • Helps fight scalp irritations and dandruff.

Ingredients: (I get 2 uses from this recipe)

ingredients 1

  • 8 Oz Conditioner (if you have shorter/thicker hair you might need to use less or more conditioner).
  • 8 Oz Plain Water
  • 2 Oz Flaxseeds (I like my gel to be thick since that provides slip).
  • (Optional) 5 – 7 drops Essential Oil (EO)*
  • Pot
  • Sieve
  • Clean and disinfected container
  • Spoon/Spatula
  • Gloves (to be extra sure you don’t contaminate the product)

*Essential Oils should be used with caution and only requires a few drops. If you are pregnant please do not use any!

Method:

DSC05128

I add the flaxseeds to the water (before it boils) and allow it to slowly come to a boil on low heat for 10 minutes while continuously stirring. Once I have the gel at a consistency I am happy with I immediately sieve the seeds (keep the seeds for reuse in a ziplock bag in the freezer and quickly pour water in the pot). I add the gel to my conditioner, mix really well then add the EO stir again, fini!

Storage:

If you have any remaining conditioner and plan to use it the following week I do suggest storing it in the fridge however, I have left mine in an airtight container in my bathroom to be used the following week without anything nasty growing in the container. I am always “extra” and use a clean, disinfect and dry spoon whenever I scoop out any hand prepared products just to make sure no bacteria, dirt etc comes in contact and grows anything funky so I suggest you doing the same (don’t dip your fingers in the container unless you use it all up in one go).

Ratio/Ingredient Alternatives:

  • If you are using a thin/runny conditioner and want to really thicken it use 3 Oz flaxseeds.
  • You can add some Rose Water to this by replacing half of the water e.g. 4 Oz Plain Water & 4 Oz Rose Water.
  • You can add a Humectant (if your hair likes them) e.g. Honey/Agave Nectar/Glycerine or Aloe Vera Juice (0.5 Oz).
  • You can also use a combination of Fenukgreek Seeds together with the flaxseeds e.g. 1 Oz Fenugreek 1 Oz Flaxseeds.

P.S. You can also add some FSG to your shampoo! Use 1 tablespoon of FSG to your shampoo in a bowl & stir. It will provide slip but also help to reduce the amount of stripping from the shampoo.

I really would love to hear if you try this DIY and what your results were!

Thanks

Maicurls

Maicurls

How To: (Dry) Perm Rod Set on Fine Natural Hair

Hey Maicurlies,

I am back with another styling video. 

(Dry) Perm Rod Set on Fine Natural Hair

                                          (Dry) Perm Rod Set on Fine Natural Hair

This is my Perm Rod Set done using orange perm rods. I bought the perm rods on Amazon (here). 

36 x Perm Rods Jumbo Tangerine (3/4 inch diameter)

                     36 x Perm Rods Jumbo Tangerine (3/4 inch diameter)

My method is the same as everyone else’s (nothing special at all) but I love the results I get. 

If you have seen my hair before you will know that I have what I call fine and thin natural hair. It is long but still on the fine and thin side and I usually prefer setting my styles on dry hair versus wet hair. Starting with dry hair usually results in fluffier and fuller looking curls. When I set on wet/damp hair I get great definition but it lacks the fullness I like so I opt for dry styling. 

Tools/Products Used:

The following morning:

Method:

Starting on dry hair that was stretched out I first separate my hair into sections (about 8) from which 2 – 3 perm rods will be used per section. I ever so slightly spritz my hair with water, followed by my DIY Creamy Leave-in and detangle. I then use a tiny dab of gel for hold and definition and then twist the root of my hair (twirling it)  2 – 3 times and then wrap my hair around the rod. I do a twisting motion at the same time as I wrap my hair around the rod. I used a total of 26 perm rods, leave them in overnight with a scarf protecting my hair during the night. The next morning I take a little oil to my fingertips to take down the perm rods. I then separate my hair by unwinding the root in the opposite direction of how I twirled my hair and then separating the hair. Once I have separated at least once I lift my roots and fluff my hair with an afro comb and continue to separate and shape till I am satisfied with the results. 

My “how to” tutorial: 

Thanks

Maicurls

Maicurls

My contribution work on Global Couture

Hey Maicurlies,

I have been a little off about posting the different articles I have contributed to Global Couture. If you haven’t already visited the site then you really should! It is a wonderful source of information and inspiration! 

I just wanted to share some of the previous articles along with the links to them. 

I would love to hear what you think if you read any of them.

Thanks

Maicurls

Maicurls

How to: Heatless Wave Curls on Fine Natural Hair – Jumbo Perm Rods

Hey Maicurlies,

First off I want to wish you all a very Happy New Year! I hope that 2015 ended well and that 2016 will be a bright year full of love, good health, great company, prosperity and happiness for you and your family 🙂 

I wanted to start my blog post this year with a styling tutorial. I actually (hopefully) will be a little more “adventurous” with my styling options in 2016. So to kick things off here is my Heatless Wave Curls.

DSC03485

This is my “quick fix” styling option that I love! There are a few things I like about this style: 1. it sets in four hours so no sleeping with rollers in my hair (I have found a method that is not too uncomfortable but still prefer not to). 2. it is a great last minute styling option if I haven’t planned anything but need my hair done for an night out and 3. it gives my fine and thin hair volume! 

Products/Tools Used:

Method:

After spritzing my hair with a tiny bit of water I added a little spray leave-in conditioner to help moisturize my hair (just to lightly moisten but not to make it soaking wet). I lightly detangle my hair to make sure there are no knots and then I spay a tiny bit of my Spray FSG to help give really light hold. My rolling method is to first try and make sure my hair is smooth, I then roll the perm rod up my hair (for one rotation) and then twirl my hair once, roll up again and twirl the perm rod towards the root before closing the perm rods. I literally let it set (without heat) for 4 hours and then take the rods down, separate and I am done! 

It is a little easier to understand the “how to” in the video: 

As I mentioned this is a “quick fix” styling option that I like to do whenever I haven’t had time the day before to plan for a hairstyle. The hold is really light and does not last for days and days therefore I will usually install the perm rods again after a day or two either during the day or at night (e.g. during the week when I have work and can’t sit in my office with perm rods on my head LOL). 

I would love to hear what you think. Have you tried day time jumbo perm rod sets or any other perm rod sets done during the day? I would love to hear from you! 

Thanks

Maicurls

Maicurls

1st Attempt with Super Large Perm Rods

Hello Beautiful Maicurlies,

So today I wanted to do a quick post on my first attempt with one of my newest hair tools – Super Large Perm rods!

Large Perm Rod Curls

I actually purchased two different perm rods sizes from Amazon (I will provide links to both the sets at the end of this post) but for this particular style I used the black Jumbo Perm Rods.

DSC00439

I bought:

  • 36 x Diane Cold Wave Head Band ( 1-1/4 inch diameters) – Each pack contained 6 perm rods so I got 6 packs.

81aM3N3LWlL._SL1500_

  • 36 x Perm Rods Jumbo Tangerine (3/4 inch diameter) – Each pack contained 12 perm rods so I went for the option of 3 packs (it worked out cheaper that way)

61d49FoqRYL._SL1050_

I will say that the rods arrived as promised actually even earlier than anticipated! Payment and delivery went smoothly and like I said the perm rods turned up as anticipated so I do recommend buying from these sellers (based on my own experience). Please note: I was not asked or paid to mention the rods, the buyer experience or the point of purchase and I bought the rods with my own money. 

My Process:

I was working with super stretched hair (heat free) which started of as a twist out, then was stretched when I used a hair donought to make a bun and finally I had two flattwists. I used a little of my DIY Spray Leave-In Conditioner to very very lightly mist my hair (it was barely damp) just so my hair would take on the curl shape of the rods and I also use a tiny bit of gel right before twirling my hair around the rods.Using a hair net and satin scarf I let my hair set overnight (sleeping wasn’t as bad as I’d imagine it would be). The next morning using a little DIY Coffee Bean Infused Almond Oil on my fingers I took my hair down and separated the curls and that was it.

I really do love the results! 

I need to practice a little on how I roll my hair because since the rods are so large it took a little getting use to (you know I am styling challenged lol). I will try different ways of rolling my hair to see if I get different curl results but for a first attempt I was happy.  😀

These are photos from day 3 of the same perm rod curls. Of course I was even happier with the results on day 3 because my hair was fluffier and bigger! Give me volume…give it to me!!!! 😀 

Have you tried Jumbo perm rods? Do you have a particular rolling method? I would love to hear from you! 

Diane Cold Wave Head Band, DCW125, 1-1/4 Inch: http://amzn.to/1OOfP6s

Perm Rods Jumbo Tangerine Lot of 3 Dozen: http://amzn.to/1PBBfV7

Thanks

Maicurls

Maicurls

What I’ve been up to – Instagram & Pinterest

Hey Maicurlies,

If you didn’t know I have become a Instagram (IG) FREAK! Seriously, it is an addiction. Before I was a Pinterest addict and now IG has become my fascination. My Instagram profile is not limited only to all things hair, I do put up posts about skin care and health (but yes hair is a big part of it.) I also have snippets of my YouTube videos on there too. What I love the most about IG is that there is so much inspiration and you get constant updates! Natural beautiful crowns and everything in between all the time! 

Anyways, the purpose of this post is to share some of the things I have been doing with my hair, skin and health. These images are all on my IG page so if you aren’t following me yet, please do! While you are at it, you might as well follow me on Pinterest too (yes I am being cheeky :D) 

So, as a way to perhaps encourage you to follow me on IG I put together a collage of some of the recent photos I have up on there (putting on every single one would too self promoting and self obsessed lol).

Hope to see you on my IG & Pinterest pages! If you have IG or Pinterest please let me know, I love supporting others! 

Thanks

Maicurls

Maicurls

It has been a wonderful year Thank You!

Hello Maicurlies,

I made a quick video to say thank you for all the support I’ve got over the last year, which has been a wonderful year by the way. I truly appreciate every single one of you! While saying THANK YOU is not nearly enough to express how much all of your support means to me I can only reiterate I really do appreciate every single comment, follow, share, like, question, suggestion and message of support I’ve received from you, so THANK YOU again! 

I also explain what I will be doing on my YouTube Channel, this Blog as well as the other social media platforms I am on (Pinterest, Instagram, Bloglovin). I basically plan on sticking with what I know best and am most comfortable in, DIY’s and a few styling  videos. I do plan on doing more styling videos/tutorials and will try my best to be a little more creative 🙂

Along with that I also shared my Christmas Eve and Christmas Day hairstyles which, you probably already guessed were simple! Yes, I was being true to myself.

So with the buildup to Christmas over now comes the buildup to New Years Eve. I am still not sure what I will be doing in terms of hair but If I come up with something a little more exciting than a simple flat twist I will record a video ;).

Until next time Maicurlies!

Maicurls

Maicurls

Big Bun with a Side Bang (Styling Tutorial)

Hello Maicurlies,

It feels like it’s been forever since I made a styling video (it has been) so without further ado, I want to share my “how to” tutorial of my Big Bun with a Side Bang.

Big Bun with a Side Bang

Big Bun with a Side Bang

Now, I have to give credit where credit is due: I actually got inspired to do this style through one of Mo Knows Hair amazing videos. I did make some alterations to my version such as not working with blow dried hair  and I also formed the bun a little differently to hers but the concept came from her. Please check out her video here like I said, she is amazing!

I have a few images of the steps (below) along with a video of how I did the style on my YouTube Channel.

Big Bun with a Side BangIt is really simple to do.

I hope you like it!

Maicurls

Maicurls