Category Archives: Ayurvedic Hers for Skin Care

DIY Neem Infused Coconut Oil (Recipe 5)

Hi Maicurlies,

This is my second to last Infused Oil (I promise)

Infusing Neem Leaves

Infusing Neem Leaves

I already wrote about Neem and the benefits of Neem Infused Oil over here. To summarize:

  • It contains antibacterial, antifungal, and antiviral properties
  • Eases skin irritations, rashes, itchiness and is said to help ease eczema (I am not a doctor nor a dermatologist therefore always check with a professional).
  • Reduces the appearance of light burns and scars
  • Helps reduce hair shedding & breakage
  • Known to help slow down premature graying & the appearance of grey hairs
  • Naturally and gradually darkens the hair
  • Provides the hair with shine & luster
  • Promotes hair growth.

Ingredients/tools:

  • Spoon
  • Measuring cups
  • Container
  • Sieve
  • 1.5 cups of dried Neem Leaves (you can use powder e.g. 1/4 cup*)
  • 2 cups of Virgin Coconut Oil (you can use any oil of choice)
  • 8 drops grapefruit essential oil (optional – you can use any oil of choice but if you are pregnant do not use any essential oil).

*If you use the powder I would recommend putting it in a coffee filter or cheese cloth to help keep the oil and powder separate.

Mixing Process:

 I have a video up on my process:

NOTE: I am not a dermatologist nor a doctor. I provide this for informational purposes only so please consult with a professional before you apply anything new to your skin or hair. Should you be taking medication or creams from a medical professional please do not replace that with my DIY recipe – consult your medical professional first! If you are allergic to any of the ingredients I use do not use them. Do a small patch test on the inside of your arm when trying anything new before applying it all over your hair/skin. Always ensure to dilute the Essential Oils (EO) in a carrier oil as they can cause skin irritations if used undiluted. If you are pregnant you should NOT use any EO.

If you try this please let me know how it turns out. If you make your own Infused Neem Oil I would love to hear from you!

Maicurls

Maicurls

Benefits of Infused Neem Oil

Good Morning Maicurlies,

This is going to be a post all about Neem, Infused Neem Oil to be specific.

Fresh Neem Leaves

Fresh Neem Leaves

As a part of my “Infused Oil Series” I also make Neem Infused Coconut Oil and will have a video & writeup of how to make it shortly. For now I just wanted to point out the reasons why I like the oil and why you might want to try it.

What is Neem?

Like a lot of Ayurvedic plants & hebrs, the Neem tree is located mainly in Asia and is most predominantly popular India. Its leaves, nuts, twigs and barks can be used for Ayurvedic purposes. Pure Neem Oil that is cold pressed from the whole nut is exceptionally rich and full of nourishing properties as well as Vitamin E and essential fatty acids, but the one “negative” aspects of pure Neem Oil is that it has a strong pungent smell. However, if you can stomach the scent, your skin and hair can benefit greatly from its nourishing properties.

I of course use an infused version of the oil since I can not make the cold pressed version at home, so mine is not as strong however, I still get benefits from infusing the leaves (it is also not as “smelly”). Neem Oil and Neem Infused Oil can be used for your hair and skin thanks to its multipurpose properties. 

Where can I find Neem?

There are a few websites online that actually sell Neem powder such as Butters n Bars. If you have a local Indian store nearby look out for the Neem Hesh brand locally otherwise check the ethnic section of your super market. If you have Neem trees readily available to you, you can use the leaves and/or make your own powder by blending up dried leaves. If you do blend the leaves it might end up being a little bitty so it is best to put them in a coffee filter or cheese cloth.

If you want to use fresh leaves then you need to use the oil up after production because otherwise you WILL grow bacteria in the container. For infusing – you will need to use either dried Neem leaves or powder.

Infusing Neem Leaves

Infusing Neem Leaves

For the Skin:

Its natural antibacterial, antifungal, and antiviral properties can help ease skin irritations, rashes as well as relieve itchiness (which can affect the face, body and scalp) . It is said to help ease eczema (I am not a doctor nor a dermatologist therefore always check with a professional). It can help reduce the appearance of light burns and scars – if massaged on the skin regularly and frequently.

For the Hair

The oil can help reduce hair shedding and strengthens the hair to help reduce breakage. Neem is also known to help slow down premature graying & the appearance of grey hairs due to the fact that it is known to naturally and gradually darken the hair*. It provides the hair with shine, luster, works as an excellent sealant and helps to promote hair growth.

*You will not end up with jet black hair but it can darken the hair and has a similar effect on light, bleached or blond hair and if that is not something you want then I would suggest not using this oil.

So those are the reasons why I like the oil 🙂

Stay tuned for my how to video and writeup Maicurlies!

Have you used Neem oil or Neem infused oil before? If so how do you use it and what do you think about it? I would love to hear from you.

Maicurls

Maicurls

DIY Amla Infused Grapeseed Oil (Recipe 4)

Hello Maicurlies,

I promise we are close to the end of my DIY Infused Oil obsession just two more to go after this (I will probably make more for myself but don’t want to push it by making you guys hear about EVERYTHING I make) 😀

I will be sharing how I make my DIY Amla Infused Grapeseed Oil.

DIY Amla Infused Grapeseed Oil

                                           DIY Amla Infused Grapeseed Oil

I have already mentioned the benefits of using Amla infused oil which you can read over here and in case you’re new to my blog (Hi there!) or perhaps missed my previous oil Infusion posts you can find links to them below:

DIY Rose Infused Grapeseed Oil

DIY Hibiscus infused Almond Oil

Before I go any further I want to mention I was not requested or compensated for anything used in this DIY recipe. All products used were paid for with my own money. Amla oil is said to help darken the hair so if you do not want this attribute then this recipe might not be the one for you.

With that out the way – I have a video demonstrating how I make my Amla Infused oil on my YouTube Channel:

I also wanted to provide a write-up so here we go Maicurlies!

Ingredients/tools:

  • Spoon
  • Measuring cups
  • Container
  • Coffee filter
  • String (to close the coffee filter)
  • 1/4 cup of Amla powder (Hesh)
  • 1.5 cups cup of Grapeseed Oil (you can use any oil of choice)
  • 15 drops Grapefruit essential oil (optional – you can use any oil of choice)

*NOTE: I am not a dermatologist nor a doctor. I provide this for informational purposes only so please consult with a professional before you apply anything new to your skin or hair. Should you be taking medication or creams from a medical professional please do not replace that with my DIY recipe – consult your medical professional first! If you are allergic to any of the ingredients I use do not use them. Do a small patch test on the inside of your arm when trying anything new before applying it all over your hair/skin. Always ensure to dilute the Essential Oils (EO) in a carrier oil as they can cause skin irritations if used undiluted. If you are pregnant you should NOT use any EO.

Here are some of the ways you can use the oil:

  • To seal in moisture
  • Part of you deep condition mix
  • A pre-poo
  • In your whipped butter mix
  • For a scalp massage

I would love to hear if you have or will use Amla Infused Oil . I would also love to hear how you use the oil!

Thanks

Maicurls

Maicurls

Benefits of DIY Amla Infused Grapeseed Oil

Hey Maicurlies,

I just fished editing my DIY Amla Infused Grapeseed oil and wanted to explain why I personally like using it. I have already mentioned how and why I like using Amla powder as part of my Henna/Amla Treatment and have a video of my process but also wanted to touch upon the benefits of the oil.

photo credit: Henna Sooq via photopin cc

photo credit: Henna Sooq via photopin cc

What is Amla?

Amal (Gooseberry) is a green fruit renowned in Asia – mainly in India. It is rich in Vitamin-C and minerals and is considered a powerful antioxidant agent that has several uses (not just for the hair and skin.) The fruit itself tastes extremely taut and bitter but can be made into a juice or eaten as a fruit. Due to is high Vitamin-C content, it is known to be used against coughs and colds, can help boost the body’s immune system and is refereed to as a detoxifier that can help cleanse the liver and kidney. Amla juice has been said to be effective in lowering the fat content in the body which can help in weight loss and is even said to be beneficial for your eyes due to the presence of antioxidants.

Now looking at it as an oil: it can be used for both your hair and skin – I love multipurpose products!

Skin

Amla infused oil can be used to trap in moisture (after you have showered), provide a glow to your skin and delay the appearance of fine lines and wrinkles (with frequent use). Its antiseptic properties makes it a good skin cleanser and is known to help reduce blemishes & dark circles under the eyes.

Hair

Amla infused oil can help darken the hair (with frequent use*), promote growth, strengthen the hair from roots to ends, enhance luster and shine, reduce shedding, thicken the hair and help promote its overall condition.

*If you have light or bleached hair and do not want it darkened then this oil might not be for you. The oil will not make make grey/white hair black but it can gradually darken its appearance.

Scalp

It is known to help combat mild scalp irritations and dandruff due to its anti-inflammatory, antibacterial, antiviral, anti-fungal, and antioxidant properties (check with your doctor/dermatologist).

Oils for infusion:

Depending on your preference you can use any carrier oil of choice. The additional benefits you will get from the oil will all depend on what you choose to use. I usually use Grapeseed oil due to the fact that it is light and easily absorbed. Click on the link for a list of different carrier oils and their benefits for the hair and skin.

I will have a new post with my video and an explanation of how I make the oil shortly!

Thanks

Maicurls

Maicurls

DIY Infused Oil “Mini-Series”

HELLLOOO Maicurlies,

I hope all is well!

I have been BUSY making DIY mixes, recording videos (editing), taking photos and have come up with an Infused Oil “series”! Do I hear you say: HOW EXCITING! (Yes, it is!)

Infused Oils

                                                                                      Infused Oils

If you are wondering why would you want to make an infused oil? I say why not?!

In all seriousness, infused oils give you the option of incorporating your favorite ingredients to your favorite carrier oil – adding more punch, nourishment and benefits for your hair and/or skin.

Uses of infused oils for the hair

Infused oils can be used in a number of different ways such as: Pre-poo’s, hot oil treatments, scalp massages, Deep Conditioners, leave-in conditioners, whipped butters, sealing…ANYTHING! Their benefits depend on the ingredients used for infusion and the carrier oil you use. With each of my infusions I  will list the benefits of each and how I personally use them.

Infused oil for skin

You can incorporate infused oils into a DIY Body butters, sugar scrubs or even directly onto your skin to trap in moisture after a shower.

So which Oils have I made (are in the making?)

  • Rose Infused Grapeseed Oil
  • Hibiscus Infused Almond Oil
  • Amla Infused Grapeseed Oil
  • Coffee Infused Almond Oil
  • Neem Infused Coconut Oil

Heads up – Rose Infused Grapeseed Oil will be first!

I hope you enjoy this “mini series”.

Do you make your own infused oil? If so what do you make and how? I would love to hear from you!

Thanks

Maicurls

Maicurls

Aritha Review Video Up on YouTube

Good Evening Maicurlies,

Hesh Aritha

                                                        Hesh Aritha

I recorded another video! (I am trying to keep video making consistent but I over analyze EVERYTHING!) Anyways, this is part 2 of my experiments and reviews of natural Auverdic shampooos. I  have already written about Aritha which you can read here. The video explains where you can purchase it, my experiments and personal “verdict” of the  Auverdic shampoo.

You can watch the video below:

Please remember that this is my personal experience with the product and the review is based on the results I got after trying the product in different ways. I was not asked or compensated to mention or use the product. I bought the Aritha with my own money and have provided my own honest opinion about it. 

I really would love to know if you have used Aritha before or any other Ayurvedic powder as a shampoo. 

Thanks!

Maicurls

Maicurls

Making your own Hibiscus petals and powder (video)

Hey Maicurlies,

I hope all is well and you are enjoying the football (soccer) bug as much I am 😀

Right let me get back to business.

Hibiscus Petals and Powder

                                            Hibiscus Petals and Powder

I have already mentioned Hibiscus in a previous post “Hibiscus for Hair, Health and Skin”, and so I finally made a video as well which you can watch below or on my YouTube Channel:

I personally use Hibiscus for my hair, skin and internally.

  • For my hair: I add it to my Henna
  • For my skin: I have used it as a toner* (although my Rosewater toner is hands down my favorite)
  • Internally: I use it as a tea

*Hibiscus does give off a purple/red tint so you might want to splash off the toner after applying it to a cotton swab and rubbing it over your face.

If you feel like doing a little extra DIY then you can use Hibiscus petals from your garden and either sun-dry them or use your oven to dry them*.

Fresh Hibiscus Petals from my garden

                     Fresh Hibiscus Petals from my garden

*It is “faster” to oven-dry the petals however a lot more difficult to do without burning them (trust me I’ve tried)! Sun-drying requires a little more time but you do not run the risk of burning the hibiscus.

Apart from collecting the petals yourself, an easier way is to use prepackaged hibiscus petals or powder. I personally get mine from a local Indian store but there are several sources where you can find them in case you do not have a local Indian store near you. Just to mention a few Amazon, Butters-n-Bars and SheaButter Cottage are three places where you can find either the petals or powder (just some suggestions).

Packaged Dried Hibiscus

                                   Packaged Dried Hibiscus

Please note: I was not requested, paid, or compensated to mention the sources above. I paid (with my own money) for the hibiscus petals I use and just wanted to share where you can find the product in case you are interested.  

I get whole petals from the store but I like to use both whole petals as well as the powdered form. I make my own powder by simply blending the dried petals, sieving them (a couple of times) and that is it! See below:

I like to use the whole petals for my tea and whenever I make my hibiscus toner for my skin. I use the powder when I mix my henna as it gives my hair an extra punch of red! 🙂

My video goes into detail about how exactly I make each of the three DIY products so please take a look at that.

I would love to hear if you use Hibiscus powder or petals and how!

Thanks

Maicurls

Maicurls


Aritha– Ayurvedic all Natural Shampoo (Option 2)

Hi Maicurlies,

As promised, today I will cover part 2 of my all natural Auyvedic shampoo experiments. In my previous review (part 1) I wrote about Shikakai powder and today I will be covering Aritha powder.

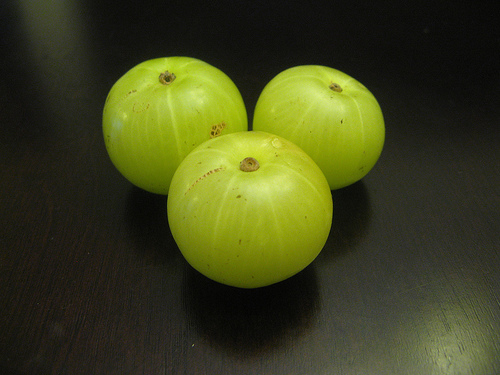
Similar to Shikakai, Aritha predominetly comes from Asia – mainly in India and is derived from a fruit. It is most commonly known as soapnut or Sapindus Trifoliatus.

In Asia Aritha is popular alternative to commercial shampoo due to the fact that it does not contain unnatural elements and harsh chemicals.
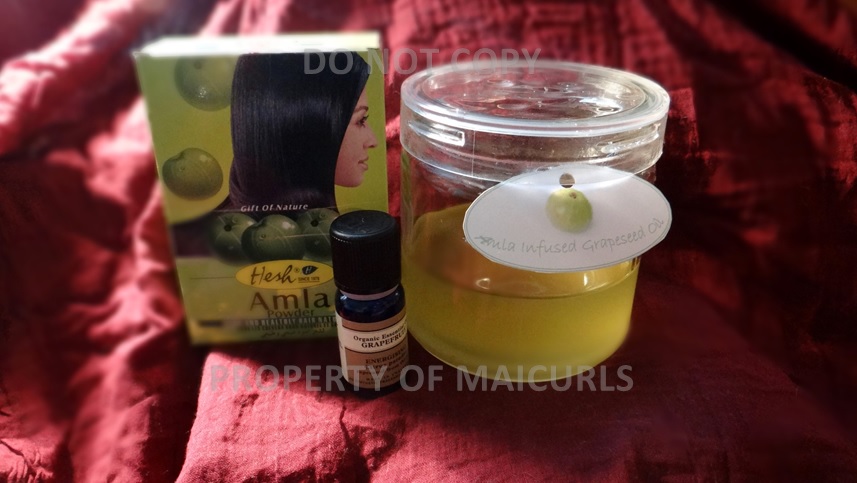
Aritha - Hesh

                                     Aritha – Hesh

The brand of Aritha I used is Hesh  and apart from being a natural shampoo, Aritha has a number of different uses. For one it can be used for the skin:

  • Cleanses the pores
  • Helps the skin breath better
  • Improves the texture of skin (with frequent use)

I have used it for my skin and it did a really good job of cleaning, clearing up my pores as well as helping fight my oily T-zone. I would suggest this for those who have oily skin as apposed to dry skin because it can cause more dryness.

According to the box, it is also said to be an effective agent to wash silk, wool clothes, silver and gold ornaments and utensils. I did not try this personally

Now for the shampoo part. The box says it:

  • Completely cleans the hair
  • Works an efficient natural shampoo
  • Best for extremely oily (dirty) hair
  • Gives the hair natural gloss and bounce
  • Cleans dirt accumulated on the scalp

To use Aritha you do not need any additional ingredients apart from water however, I know some people might add a little oil to the mix. Note: Aritha will have a moderate lather (it lathers more than Shikakai). BTW it has a fruit/spice smell to it…I do not particularly mind it but those with a sensitive sense of smell will pick up on its scent!  

Box application instructions:

1. Take required quantity of powder, add a little water and mix to make a thick past. 2. Gently massage (scalp) using your fingertips. 3. Wait for 2 – 5 minute and 4. wash thoroughly with water.
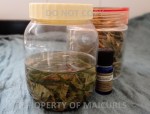
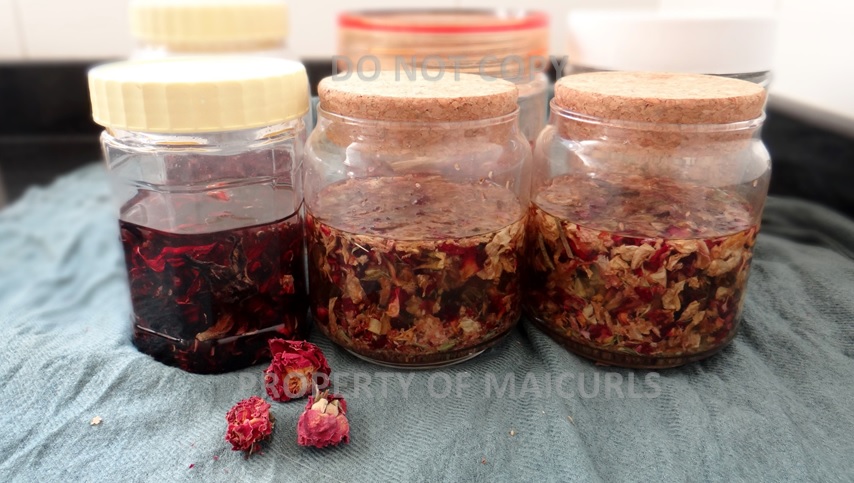
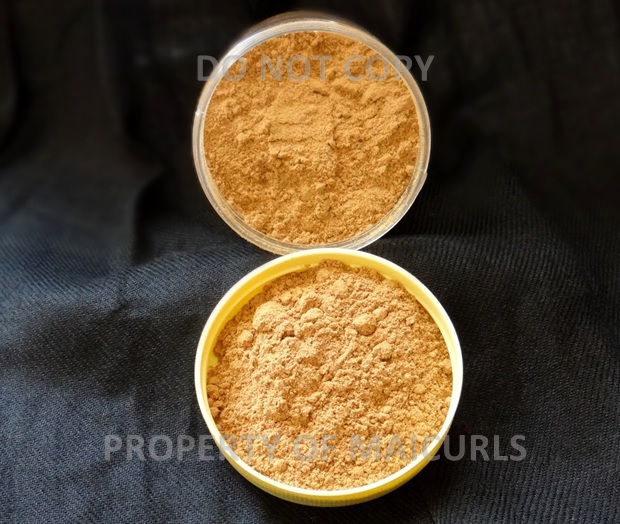
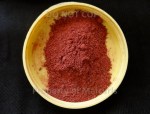
Aritha Powder

                                             Aritha Powder

My experiments: I tried two different methods

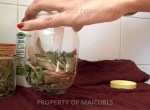
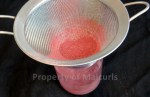
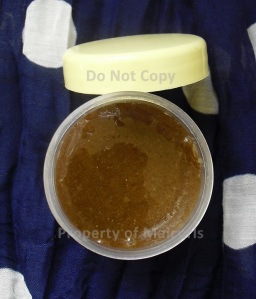
1. Box method – 5 tablespoons of Aritha and 8 tablespoons of water. It made a really thick paste and I applied it to my damp scalp as instructed. I carefully and slowly massaged my scalp for a few minutes while in the shower, left it on for 5 minutes and then rinsed it off with lukewarm water. While I was rinsing it off I would glide my hands down the length of my hair so that there would be some contact but I did not concentrate on the length of my hair.

Pros- My scalp felt really really clean. I had no buildup what so ever and even though it  had limited contact with the length of my hair it still felt really clean. 

Con – My hair felt drrrryyyyy afterwards! It took a couple of rinses till I felt like I got all the mix off my scalp and hair. The mix did what it was suppose to (cleaned my hair and scalp) but maybe a little too effectively in terms of stripping my hair of its natural oils. I needed an intesne moisturizing DC afterwards.

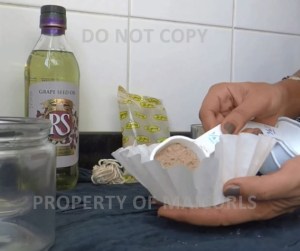
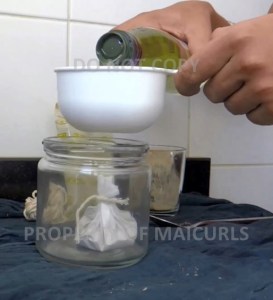
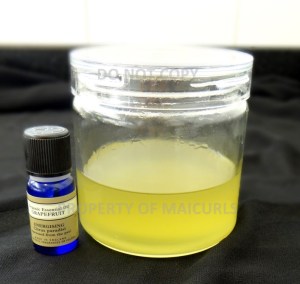
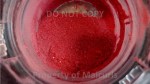
2. Second Method – Due to my previous experience (really dry hair) I prepped by doing a hot oil treatment for 30 minutes before applying the Aritha. I used less powder and a lot more water (3 tablespoons Aritha and 3/4 cup of water). I put the mixture in an old (clean) squeeze container and liberally squirted the mixture over my scalp. (Do not get it in your eyes it will burn and feel uncomfortable!) Since it was a lot more liquid-based, the mixture ran down my hair as well. I gently massaged just my scalp and let it sit for 5 minutes before rinsing it out with lukewarm water.

Pros – Again my scalp felt and looked really clean as did the length of my hair.  

Cons – My hair still felt dry afterwards even though I “prepoo’d” for 30 minutes. Also because it was very watery the mix did run down my hair a couple of times while I was massaging my scalp. 

Verdict

Would I buy this again? Yes BUT only to use for my face not to use it on my hair. I prefer Shikakai as a natural shampoo because it did not leave my hair as dry but did a good job of cleaning my hair. I can not say this is a “bad” product because it did what it supposed to do (cleans the scalp) and also dried the length of my hair from the limited contact it had. I think perhaps those with more product build up or an oily scalp might find this a little less harsh? I just know that I would use it again for my face but not my scalp. 

P.S. I was not asked/paid or compensated to mention the company or brand. The product was bought with my own money and the review was based on my own personal experience. This review was based on my own personal experiences and should you choose to use Aritha I would suggest you do your research and then do a patch test before applying the product on your scalp to see if you are allergic to it or not. 

Have you tried Aritha as a shampoo? If so, what did you think? If not, do you use any other Auyvedic powder as a natural shampoo? Let me know! 

Maicurls

Maicurls

DIY Scalp Scrub

Good Morning Maicurlies,

I wanted to share another DIY mix with you. I am sure you are wondering when does she stop mixing?! NEVER 😀

In all serenity I LOVE mixing my products. I have had both the bad and good store bought products and I can not lie not ALL of my DIY mixes have been a success however at least I can blame myself for that. I prefer tailoring products and adding ingredients I know are good for me, work for me and will not harm me or my body.

Anyways back to the topic which is a scalp scrub.

photo credit: lovelihood via photopin cc

               photo credit: lovelihood via photopin cc

There are a number of different reasons why you might want to use a scrub and different ways in which you can make one. The skin on our scalp is no different to the skin on the rest of our body. It can become dry, flaky, overloaded with product, irritated, itchy and so on. Scrubs can help to:

  • Remove dead cells
  • Relieve an itchy or irritated scalp
  • Relieve flaking/dandruff
  • Help to remove build up on the scalp
  • Clear up clogged pores
  • Relieve scalp acne, scalp pimples and white heads
  • Provide moisture and oils to a dry scalp

My particular scalp includes ingredients that helps to exfoliate, remove buildup, moisturize, conditions my roots and scalp as well as relax and increase blood flow to my scalp. I have a video on YouTube of my DIY Scalp Scrub.

Scalp Scrub

                          My DIY Scalp Scrub

Ingredients:

  • 8 Teaspoons of Raw Sugarcane (brown) Sugar*
  • 10 Tablespoons of Pure Honey
  • 2 teaspoons of Amla Powder (optional)
  • 2.5 teaspoons of Almond Oil
  • 4 drops of Peppermint Essential Oil (optional)

*I blend the brown sugar before making the scrub just for a few pulses because I have a sensitive scalp and do not want to scratch it with rough sugar granules. Even if you do not have a sensitive scalp I suggest first lightly blending the sugar because the scrub will not only be gentler on your scalp but also on your roots!

Ingredient Explanation:

Sugarcane (brown) Sugar – Acts as the exfoliant to help remove dead skin and buildup (you can use regular white sugar if you can not find brown sugar).

Honey – Used to moisturize the scalp and roots due to its humectant properties. It also has natural antibacterial and anti-fungal properties to help heal up scalp irritations a little quicker. (You can use molasses if you are allergic to honey.) 

Amla – Helps to condition dry scalps and roots, restores the p.H balance and also works as a good anti-fungal and antibacterial agent. (This is an optional ingredient.) 

Almond Oil – Helps to restore any lost natural oils produced by the scalp. (You can use any oil – I  suggest using any light oil of choice)

Peppermint Essential Oil (EO) – Helps to simulate blood flow to the scalp which helps to promote hair growth due to the increase in oxygen from the blood flow. It also has antibacterial and anti-fungal properties and is an excellent soothing EO. (You can use any EO of choice)
NOTE: Essential oils are potent therefor need to be diluted and if you are pregnant I would refrain from using any EO

Mixing

I first blend the 8 teaspoons of sugar just a few pulses and put it in a bowl. I add the remaining ingredients to the bowl and mix everything really well and then transfer it into a container.

I would recommend using a scrub no more than once every 2 weeks. The longer you leave the scrub standing the more the sugar will dissolve so you might need to remake this recipe before you use it up (depending on how much you use when you scrub).

TIP: This scrub can of course also be used for your body.  If you feel like you will not be able to use all of it for your scalp before the sugars dissolves use it for your body! 

Do you use a scrub for your scalp if so what do you use? If you try my recipe please let me know if you enjoyed it or not I would love to hear from you.

Thanks

Maicurls

Maicurls

Hibiscus Flowers For Hair, Health and Skin

Hi Maicurlies,

So today I wanted to delve into the world of flowers and their abilities to help our health and appearance! The flower of the day is Hibiscus (Rosa-Sinensis!)

Hibiscus

The particular Hibiscus I will be writing about is the Red Hibiscus since that is what I grow in my garden.

In this post I will just touch upon the benefits and uses of Hibiscus powder/petals. I plan to write about how to make the powder in the coming weeks.

If you have been reading my Blog or following my Videos on YouTube you will notice that I love being able to use one product for several different purposes and Hibiscus does just that! While the Hibiscus plant (found in tropical regions across the world as well as countries in Asia and the Middle East) and in particularly its flowers are commonly used for decorative purposes , today I will be discussing its benefits as an Ayurvedic herb!

Hibiscus For the hair Hibiscus powder can be used to help grow healthy hair due to the fact that it stops excessive hair shedding, provides the hair with a boost of luster and bounce, adds a natural shine to the hair, strengthens the hair and as if that is not enough it is also said to delay premature graying. When combined with other Ayurvedic herbs such as Alma and Brahmi – the mix results in a wonderful conditioning paste. You can make your very own Hibiscus oil by seeping some petals in a carrier oil (e.g. Virgin Coconut Oil, Extra Virgin Olive Oil, Grapeseed Oil, Almond Oil etc.) for 2 weeks and then straining it out. Should you be looking for a more intensified red tint from Henna, then Hibiscus powder is what you need as it can give you a more burgundy to red wine result. (Note – If you have light hair e.g. blond to light brown the colour deposit from the powder will be more visible than for those with darker hair e.g. dark brown to black.)

Keep in Mind – Hibiscus is slightly acidic and therefore might make your hair feel a little dry afterwards (depends on person to person) therefor, you should follow up with a moisturizing deep conditioner after application. You should also remember to cover counter tops with old newspapers and wear gloves and clothes you do not mind getting stained when using Hibiscus powder.

For the skin – Apart from its ability to help in the health of our hair, Hibiscus is also an awesome skin care ingredient that you should try to add to your routine! It is known to help reduce acne, eczema and skin irritations, particularly when it is made into a paste with Amla. Since Hibiscus contains Alpha Hydroxyl Acid (AHA), this makes it a commonly used ingredient in anti-aging products due to the fact that it stimulates the production of collagen. It is popular for its ability to reduce the appearance of winkles, delay the signs of again and reduce dark circles under the eyes.

For the Health – Hibiscus can also be consumed as a tea “sour tea” by seeping 2 teaspoons of Hibiscus powder in 1 cup of boiled water. (You can actually buy Hibiscus tea if you do not want to make your own.) The taste of the tea is quite sour and strong therefore you might want to sweeten it using honey. Hibiscus tea is said to help lower blood pressure, cholesterol levels, help those suffering with type 2 Diabetes and due the antioxidants present in the flower, it is said to help keep mild colds and flues at bay. It is also believed that drinking Hibiscus tea regularly can help increase your satiety (the feeling you get when you are full.) If you feel full you do overeat! 😀 At the same time it is believed that Hibiscus tea can help digest starch and sugar so why not add it to list of herbal teas right?! (Note: this is not a “diet” tea and should not be used as such.) 

P.S. you do not have to make your own Hibiscus power. There are number of sites selling Ayurvedic herbs (including Hibiscus) that are ready for use. 

Thanks

Maicurls

Maicurls