Monthly Archives: December 2015

Hard Protein/Moisture Balance Treatment

Hello Maicurlies, 

Today I wanted to share something that has become a “hair saver” (for me). My Hard Protein/Moisture Balancing Treatment.

Hard Protein Treatment

This recipe has become part of my routine however, it is not something I do every week or even every month because as the name suggests it is a HARD protein treatment. Before I delve into the details of what I use, how I mix, how I apply etc. it is important to point out a few things.

  1. This is an extremely hard protein treatment that should only be done once every 2 – 3 months (some might only want to do this 2 times a year).
  2. I have been told that this feels/acts like the 2 step ApHogee Protein Treatment therefore if you have tired that before, keep in mind how often you have used it/how you hair felt afterwards. Do not do both this and ApHogee treatments since they work similarly and you might end up with protein overload!
  3. It is vital to do a Moisturizing Deep Condition (DC) after. VITAL! Your hair will feel hard, brittle and almost straw-like (this is normal) however, it should not feel like that after you have done the Moisturizing DC. Without the moisturizing DC you will not have a protein/moisture balance and that will just result in breakage (not good)!
  4. If your hair does still feel hard after your Moisturizing DC, do another DC again!
  5. Ensure you have fully and properly detangled your hair before you apply the protein mix. Protein makes the hair hard (and this one does so extremely well) and if you haven’t detangled your hair beforehand you will only end up breaking hair in the spots where you have knots as you try to distribute the mix.
  6. Work with freshly washed, clean and damp hair to remove any product buildup which will allow the protein to latch on and penetrate the hair strands (this is when you would detangled your hair).
  7. Once the mix is on your hair DO NOT TOUCH YOUR HAIR!
  8. Leave the mix on for no more than 15 minutes!
  9. Some people like to use a drier/hooded drier after applying the protein to help dry the hair however, since I do not use any form on heat I do not suggest this step in my demonstration. (If you do decide to use heat, please ensure it is not set to high because you can cause damage).
  10. Once the time is up use your shower head/faucet (warm water) to rinse your hair going in a downwards motion. After you let water run over your hair slowly use your finger tips to help ensure all of the protein has been rinsed out (gently). You can use conditioner after you rinse to make sure the protein is out.
  11. ALWAYS DO A MOISTURIZING DC!!!!! (Sorry but I have to stress this part).

Ingredients/Tools Used:

Hard Protein Treatment Ingredients

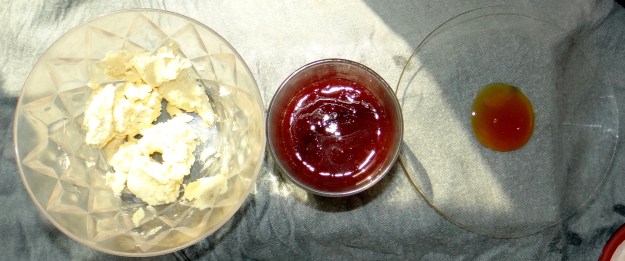
  • 7 oz Hot Water (I used bottled water)
  • 0.24 oz Gelatine 
  • 0.5 oz Pure Apple Cider Vinegar (ACV)
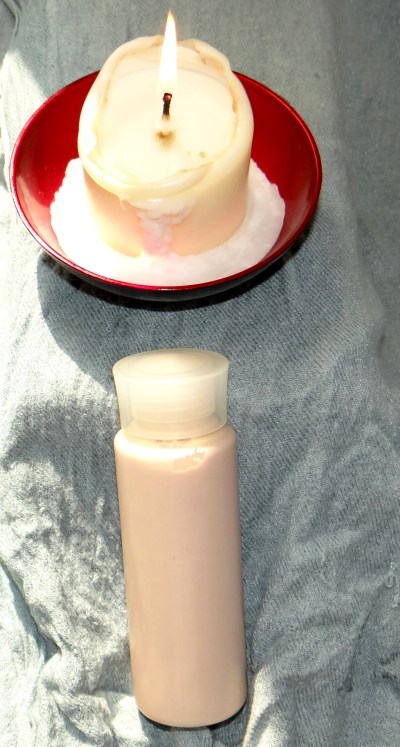
  • Applicator bottle
  • Bowl/container (to mix)
  • Spoon
  • Essential Oil (optional if you can’t stand the smell of ACV but the ACV smell will go away anyways after you rinse and DC your hair). 

Mixing:

Sprinkle the gelatine over the water (while it is still hot) and stir to dissolve the gelatine. Add the ACV, stir again and pour into your applicator bottle. Allow the mix to completely cool down (if you plan to add EO add it after the mix has cooled down). 

Application

While you are letting the mix cool wash and detangle your hair so it is free from products, this will allow the protein to attach and absorb into the hair strands easier. Section your hair into parts to make it easier to work with and pour the mix from root to tip, paying particualr attention to the ends since this is where breakge occurs most frequently. Distribute the mix by finger combing/wide tooth comb but be VERY CAREFUL since the protein will make your hair feel hard and can cause breakage if you are rough. (This is why it is important to make sure you have fully detangled your hair prior to application)! After you are done with one section LEAVE THAT PART ALONE, do not touch it anymore and move onto the next. Once you are done allow the mix to sit for no more than 15 minutes. Typically people like to use a drier/hooded drier while waiting for the 15 minutes however, I do not use heat and therefore do not take this step. If you do, please make sure that you do not bake your hair, you will see damage if you do!

After the 15 minutes using your shower head/facet let warm water run over your hair going in a downwards motion (do not use your fingers to manipulate) unitl you feel your have rinsed out the protein. Once you have rinsed with water alone then you can gently use your fingers to run over your hair to make sure it is protein free,  you can use a little conditioner to help ensure all the protein is out.  Follow up with a Moisturizing DC for no less than 1.5 hours and proceed with your styling. If you feel your hair still feels rough, dry, brittle you need to do another moisturizing DC to restore the protein/moisture balance! 

This is my demonstration video:

If you try this mix I would love to hear what you think and if you have used ApHogee before I would love to hear if you think these two work similarly or not. 

Thanks

Maicurls

Maicurls

Merry Christmas Maicurlies!

Hey Maicurlies,

I just wanted to wish you and your loved ones a very Merry Christmas! 

Christmas Eve 2015

                                      (This photo is from Christmas Eve – I did a Jumbo Perm Rod Set)

I hope you and your family have a blessed Christmas filled with love, laughter, happiness, good health and that this continues into the New Year! 

Thanks

Maicurls

Maicurls

2 Head Wrap Styles for Winter (Protective Styles)

Hey Lovely Maicurlies, 

So this post comes a little late (I am currently sitting in a hotel in Dubai waiting to check out). I wanted to yet again share some head wrap styles! I had posted a few photos on Instagram (yes I am addicted) and was kindly requested to do a demonstration of one of the styles so I figured I would do 2 styles in one video.

2 head wrap styles for winter

2 head wrap styles for winter

In the first example of my video I start of with a messy bun that is covered with a satin scarf first (since the outer scarf I use is neither Satin nor Silk) and then I used the outer scarf.

For the second style I start off with 2 really rough flat twists that I pin down and again use my satin scarf first followed by the outer scarf. 

It is easier to explain in video which I of course have:

I would love to hear if you use scarfs during winter to help protect your hair? 

Thanks

Maicurls

Maicurls

DIY Hair Setting Lotion

Hey Maicurlies,

Today I have yet another DIY to share! 😀

DIY Hair Setting Lotion

DIY Hair Setting Lotion

This baby is my DIY Hair Setting Lotion and before I begin I want to point out that while I consider this a “lotion” the name comes from the fact that it has a lotion-ish consistency. It does not contain the main ingredients included in most normal hair lotions/creams you can buy from the store. What this recipe does contain is Flax Seed Gel (FSG) and Whipped Butter, along with a little natural honey. It is an all natural (no parabens, no chemicals, no alcohol) product that helps enhance your curls, provides you with light hold while at the same time provides moisture and seals in that moisture.

As I have always mentioned in all of my DIY recipes, you do not have to follow my recipe step by step (it is good to experiment for yourself) but just so you have an idea of what I do, I include my: DIY Protein Hibiscus Flax Seed Gel and my DIY Double Coffee Whipped butter. (I will provide you with ingredient alternatives below).

I have used this product in a number of different ways and loved the results of each for example to set a rake & shake (similar to a wash and go), perm rod curls, twist-outs. I like to apply this as a final product after I have moisturized my hair with a leave-in conditioner. I do not follow up with a butter/oil/gel since this basically has it all! 

Ingredients/Tools Used:

Ingredients used

Mixing Method:

Hair Setting Lotion

Hair Setting Lotion

1. I put my (super fluffy and delicious smelling) double coffee whipped butter in a tall container and pour in the FSG. 2. Using an emulsifier (you can use a blender) I pulse the butter and gel together until it starts to combine, add the honey and continue to pulse till it starts to turn into a lotion-ish consistency (usually no more than 3 – 4 minutes). That is it! Simple 😀 

Storage:

You MUST I repeat you MUST store this in the fridge. FSG has a short shelf life on its own and while the honey does help to extend the shelf life, you are combining butter together with a liquid; therefore in order to avoid bacteria from growing too quickly it has to be stored in the fridge. You also only want to make small amounts so that you can use it up quickly and then just remake some more. Again, this will reduce the chances of your product growing mold before it is used up (avoid wasting it). 

Ingredient alternatives:

Instead of the Protein FSG I use you can of course use regular FSG. The whipped butter used is completely up to you, whipped Shea butter, mango butter, a combination of butters will work just as well. Honey is an optional ingredient that can either be skipped all together or replaced with glycerin or agave nectar. The addition of this helps to provide the mix with a little extra moisture and again helps to extend the shelf life of the product (just a little nothing major). You could also opt to try and use a store bought gel (however the consistency of the end product will probably be much thicker and more like a DIY hair custard which is great too)! 

Benefits:

  • Provides light hold (none crunchy hold)
  • Helps enhance curl defintion
  • Proivdes moisture
  • Provides shine
  • Helps seal in moisture 

This product has the ability to provide your hair with hold and curl definition while at the same time it provides moisture due to the Flax Seed Benefits such as the Omega fatty acids present in the seeds. Depending on your FSG recipe you might have extra moisturizing elements e.g. I use rose water, and plain water which is great for the hair and scalp. The addition of carrier oils in the gel also helps with providing the hair with sheen and the ability to seal in moisture. The same applies for the whipped butter which helps to soften the hair, smooth the hairs cuticles, provides shine and seals in moisture. If you added Essential oil in the process of your gel/butter making this again helps with the overall health of your hair and scalp. Overall this is one goody in a squeeze bottle! 

Here is my “how to” video:

I would love to hear what you think if you try this recipe and if you attempt this with a store bought gel I really would love to hear how it turned out!

Thanks

Maicurls

Maicurls