Tag Archives: DIY Henna Bar

DIY Frozen Henna Bars (updated recipe)

Property of Maicurls – Frozen Henna Bars

I am back with an update version of my frozen henna bars. This recipe consists of some new ingredients and some of the old ingredients in my previous recipe.

If you have not used Henna or ayurvedic herbs before, I highly recommend that you research them first, before applying onto you hair! While they are natural and a healthy addition to incorporate into your hair routine (providing strength, shine and so much more, with henna being a great natural way to add a red/reddish orange undertone to the hair) it is always best to be informed. I have a little breakdown of Henna along with some of the other ingredients I use here.

Before I get asked the infamous question of “will it make my hair red”. The answer is yes and no. It totally depends on the colour of your hair before applying henna. If you have black or dark hair, you will notice a subtle red undertone to the hair which is more noticeable under direct sunlight (not really visible indoors). If you have light brown hair, you will notice a reddish brown undertone to your hair and if you are blond, you definitely will get an orange tint to your hair. For grays and white hair, you will get a golden orange/fiery orange tone to your hair. (Ps. there are a variety of henna “species” which means that the type/location to the plant you can get, you can get a verity of dye intensity).

In case you want to tone down that orange tint (for those with gray/white hair) – naturally – Indigo is the way to go. Indigo is used to give a final black tone to the hair. You can either do a two step process of first apply henna followed by Indigo (most optimal for stubborn grays) or you can do a 50/50 combination of mixing henna and Indigo which will give more of a dark brown tone. Amla helps to provide a slightly brownish tone to henna and hibiscus will give it a kick of red. I personally have never tried Indigo myself but you can inform yourself about it along with an really in-depth look about all the herbs here at hennasooq.com

PSA: It is ALWAYS required to do a strand & skin test to make sure you are not allergic to henna or any other herb you use on your hair. I will also stress the fact that natural pure henna (good henna) only comes in one colour: Reddish orange. There is no natural brown henna, black henna or anything else. If you find that it is either one of two scenarios: it’s a blend of henna along with indigo, amla, hibiscus etc. so it will have other ayurvedic herbs mixed together (which is fine as long as it only contains natural herbs). Or it is unnatural “natural henna” which, can be harmful potentially containing harsh chemicals which, can damage the skin & hair. They can cause allergic reactions, burns and even lead to death in some cases (those that experience an allergic shock) so as I mentioned PLEASE make yourself aware of what you are applying.

Property of Maicurls – Frozen Henna Bars

Now with all that mentioned, here is my updated recipe. I am keeping it simple and effective.

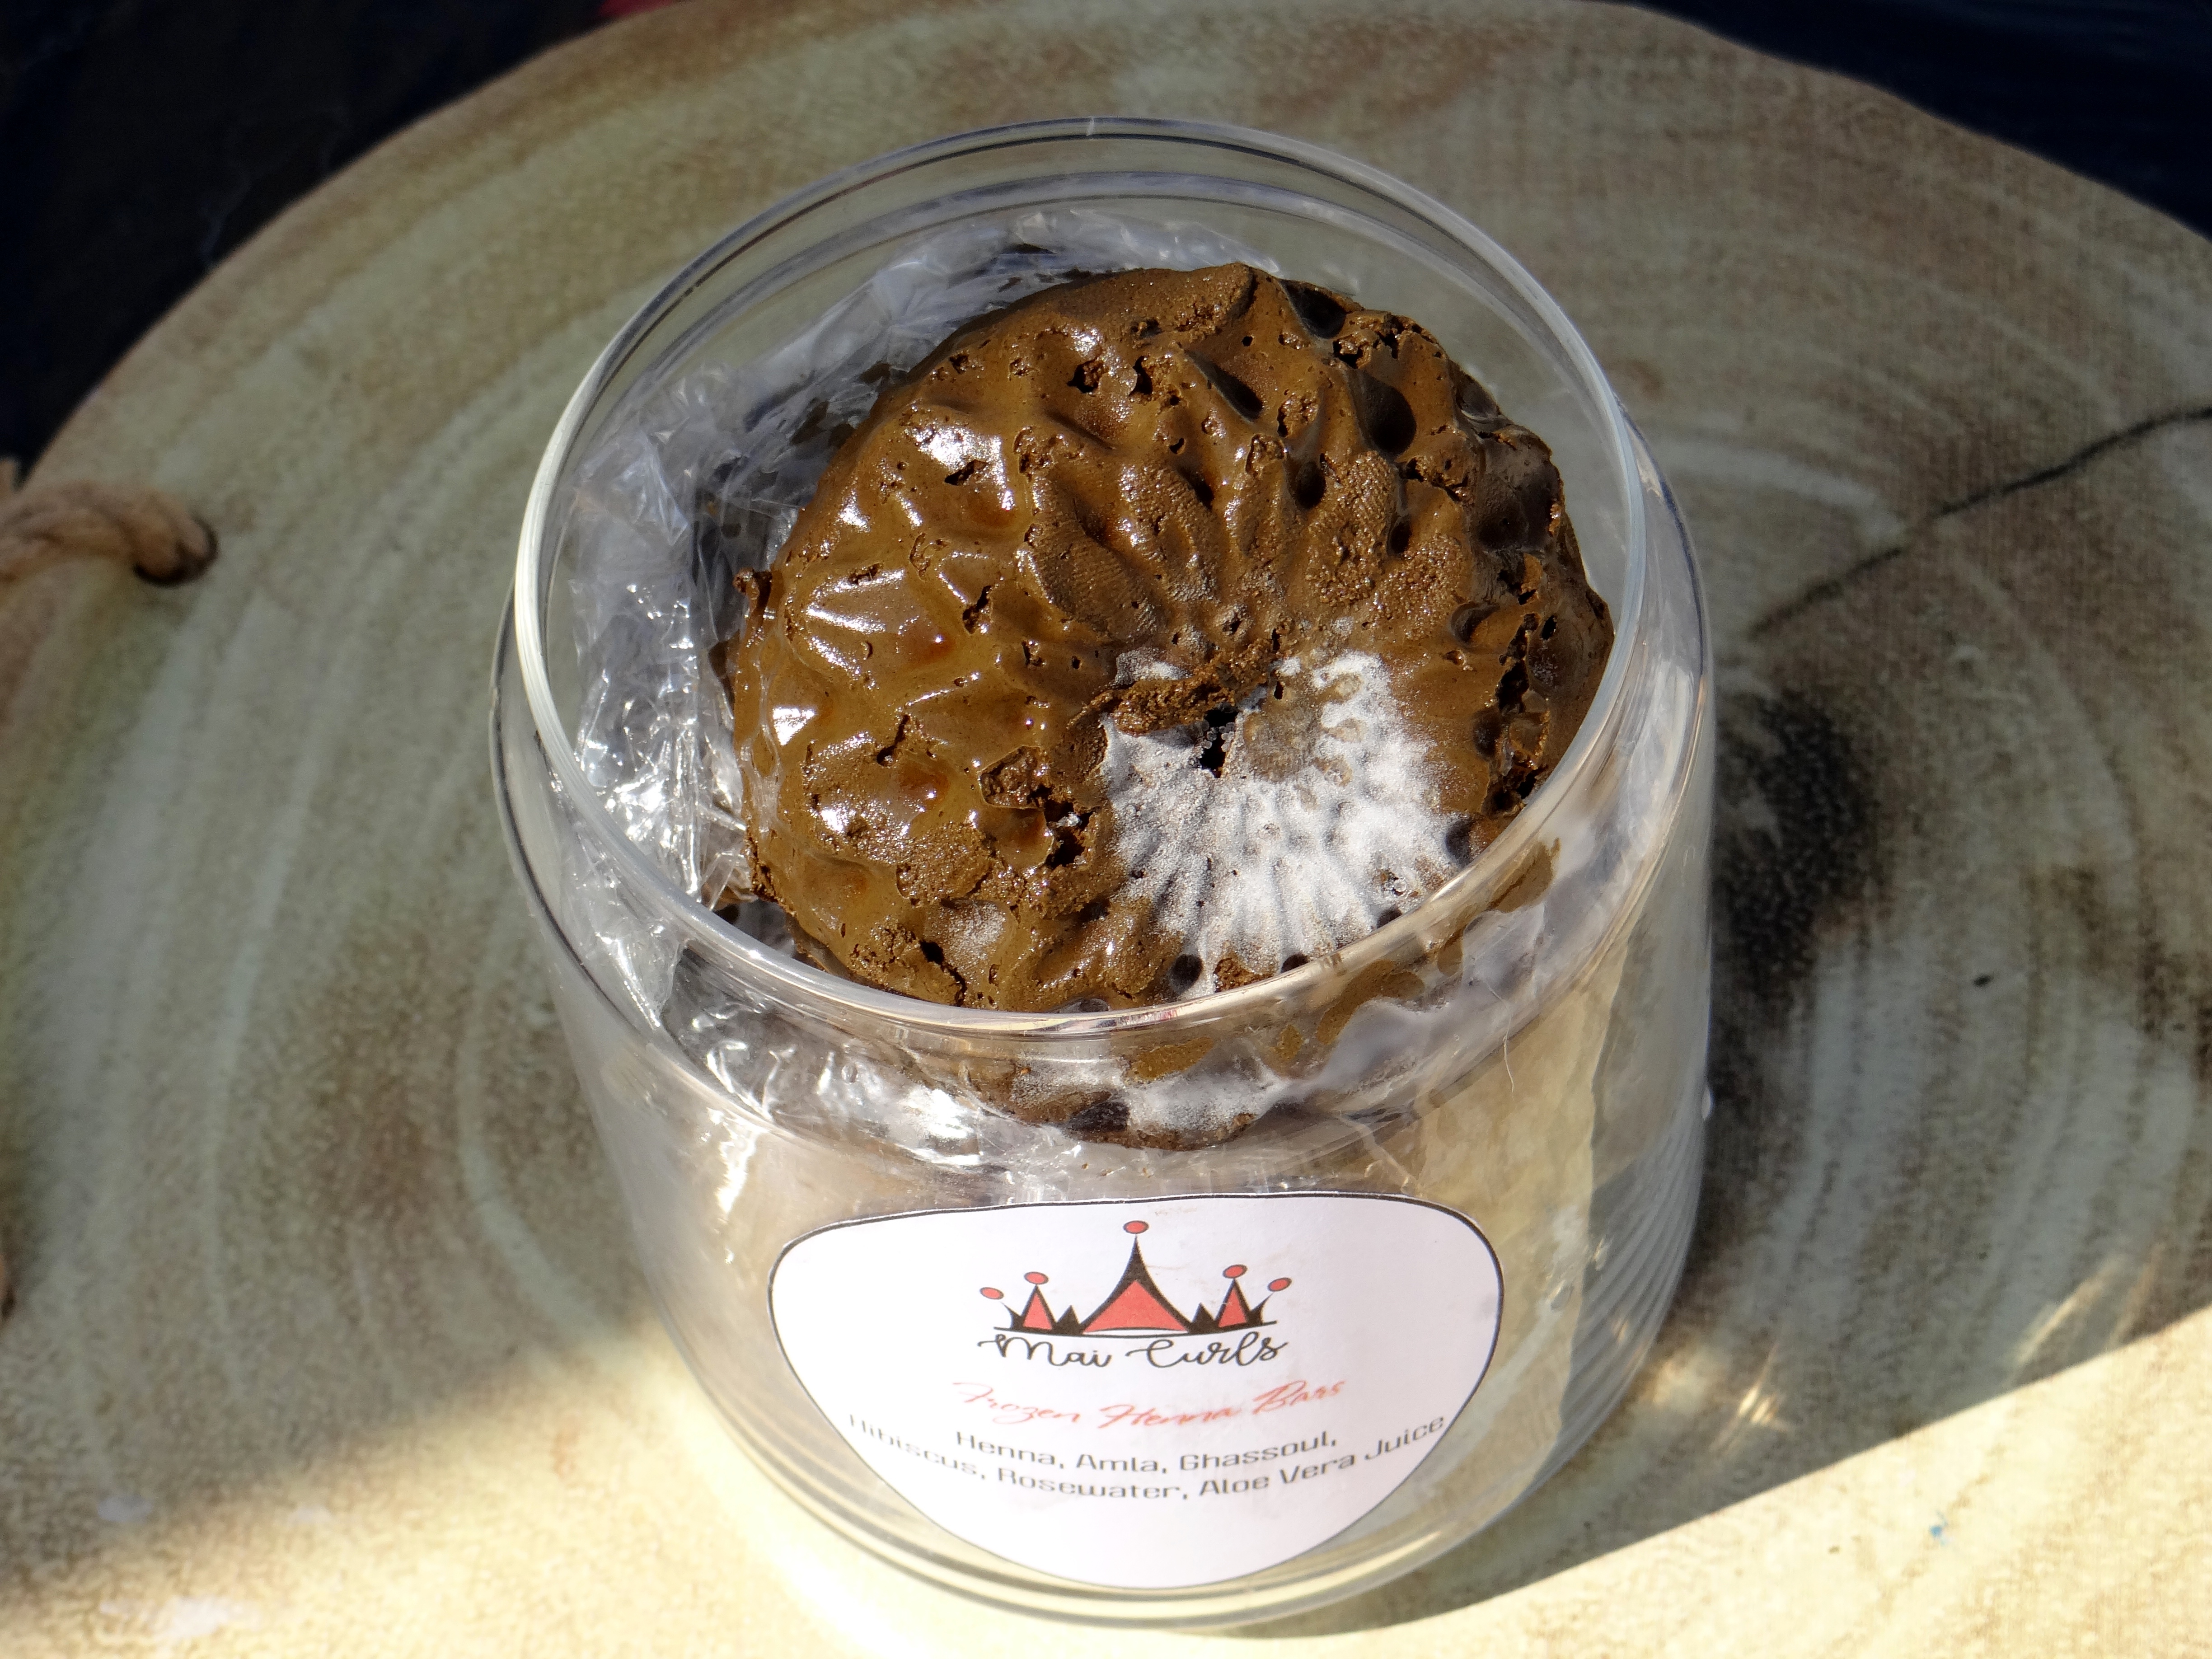
Ingredients & Tools (Makes five 100 gram bars 3.5 oz.) – 500 grams total 17.6 oz.

  • 1.5 cups Henna
  • 1 1/4 cups Rosewater
  • 1/4 cup Ghassoul/Rhassoul
  • 1/4 cup dried Hibiscus petals
  • 1/4 cup dried Rosebuds/ petals (optional)
  • 1/4 cup Amla
  • 1/4 cup fresh Aloe Vera Juice
  • Bowls
  • Sieve
  • Spatula
  • Pot
  • Gloves
  • Lining (to protect worksurface)
  • Silicone molds (any container)
  • Clingfilm
  • Airtight container

Additional/Optional:

Instead of pure Rosewater you can either do a combination of water & Rosewater or just stick to plain water. The Rosebuds are not a requirement but I love adding Rosebuds for the additional Rose benefits. Hibiscus is the acidic element for dye release (along with the Amla powder which, is also acidic) but you can use Hibiscus tea or any other tea. You can add other ayurvedic herbs to the paste, I’ve just been keeping it simple.

Method:

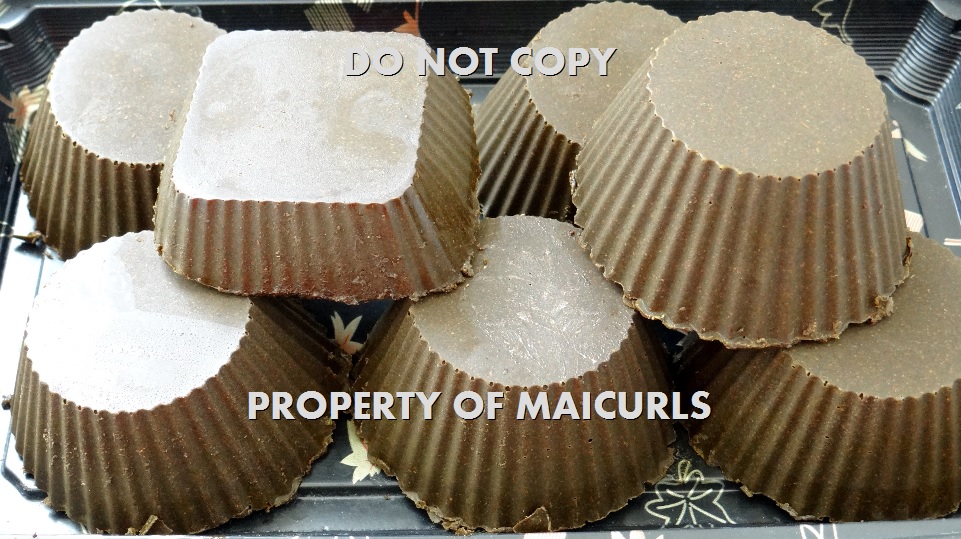
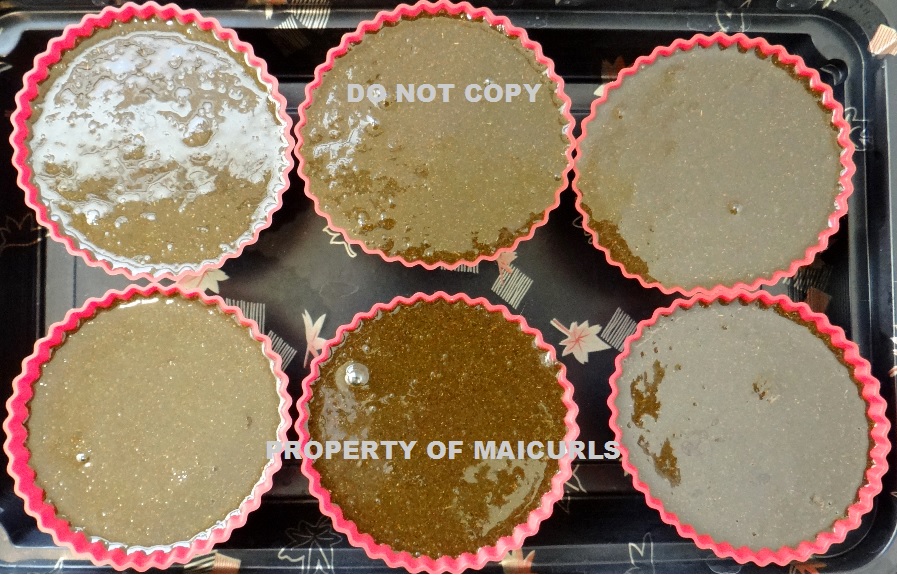
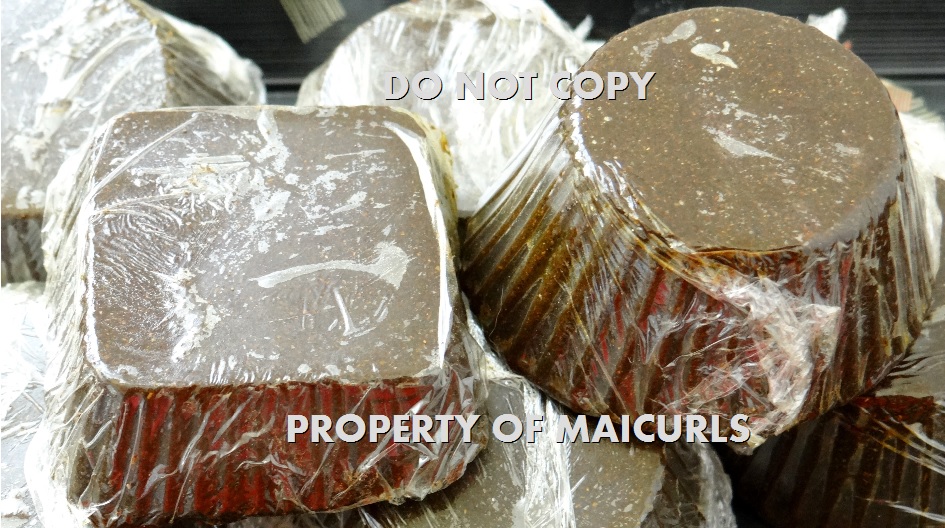
I add the Rosebuds and Hibiscus petals to the Rosewater which I heat up (I do not boil the water) and allow the petals to seep. I combine and mix all the powders together so that everything is well combined before adding the liquids. I pour the Rosewater through a sieve first and then pour the Aloe Vera Juice to the powders. (Slowly) add the Rosewater to the powders and mix. Once everything is well combined, cover the paste with clingfilm and allow for dye release to start. (Everyone’s henna starts releasing dye depending on the type of henna you have, for me, right before 5 hours is when it starts to kick in for my henna). Transfer the paste into molds, cover each mold with clingfilm and freeze. Once the bars freeze transfer into an airtight container and wrap each bar with clingfilm to preserve them.

Additional information:

I will mention that I like the henna paste to be thick because when I “melt” them for use, I put the bars in a bowl with a little heated up hibiscus rosewater which, will help to melt down the bars. I prefer not making the bars too runny prior to freezing because frozen henna bars tend to be a little more runny after they have thawed anyways. But that is totally a personal choice, so if you prefer to start off with a runnier paste all you have to do is add more liquid to the recipe.

You can store the bars in the freezer for up to 4 months (some say 6) but I tend to use them up before 2 months and just remake fresh batches. (I use 2 – 3 at a time).

Would love to hear what you think if you give these a try!

Maicurls

DIY Henna Gloss Bars

Hey Maicurlies,

Today I am super super excited to share another DIY product and I am happy to say it has been added to my list of favourites!

Henna Bars

YUP, I finally worked out a mix for these DIY Henna Gloss Bars that I am really happy with. A while ago I started experimenting and wrote a quick post about it here. In my previous experiments I used too much oil, then too much butter but I finally have a recipe that is right (for my hair).

Here are some pictures of my previous experiments. They look pretty but didn’t feel quite right.

NOTE: If you have not used henna before then you want to do your research because while I rave abut how AWESOME it is, there always are pro’s and con’s to everything that need to be considered. I normally use BAQ Henna powder to make a paste and have written about my Henna/Amla DC recipe as well as information about henna. But I recommend that you do more research. A good starting point is Henna For Hair. Once you have done that, come back here 😀

Ingredients – This mix makes  16.2 oz = 6.5 bars

I have quite long hair that is fine but I like to coat my hair with henna so you might need to tweak the ratios depending on the length and density of you hair. 

  • 2.8 oz Unrefined Cocoa Butter
  • 0.7 oz Coffee Infused Almond Oil (use any carrier oil)
  • 4.2 oz Virgin Coconut Oil
  • 0.2 oz Glycerine (optional – can be replaced with honey or agave nectar if you wish)
  • 0.15 oz Vitamin E Oil
  • 5.3 oz BAQ Henna
  • 1.4 oz Hibiscus*
  • 2.1 oz Amla*

*These powders can be replaced with other Auyverdic herbs such as Shikakai, Bhrami etc depending on the results you want to get. They are acidic which help with the dye release of the henna.

Mixing Instruction

Henna Bars 4

  1. First melt the Cocoa butter in a double broiler for no more than 5 minutes.
  2. In a glass bowl combine all the powders together and mix well.*
  3. After the butter melts take it off the stove, add the oils together and stir.
  4. Slowly add the melted butter and oils to the powder step by step and stir really well.
  5. Pour the mix into your moulds (I use silicon moulds since the bars are easy to pop out once frozen but you could use ice cube trays).
  6. Cover the henna with cling film to allow the dye release process and freeze them for a minimum of 12 hours.

*Don’t use any metal items when mixing henna. – This is a precaution in case you are not using 100% pure BAQ Henna (which you should be using). If you know you are using 100% pure BAQ henna then you do not have to worry, I use glass and plastic items just to “set an example” but I am sure the henna I get is pure. 

Storage

I like to cover each individual bar once it has set with cling film and then place them in a resealable sandwich bag that is dated so I remember when the bars were made.

Henna Bars 2

Covered henna bars

Always store the bars in the freezer otherwise they will start to melt and will slowly loose their properties over time. You can keep the bars in your freezer for weeks, I actually always find that henna stored in the freezer has a stronger dye potency so I leave mine in the freezer for no less than 1 week before I use them. However after a while you might notice that the dye peak has started to drop.

Melting/Application process

This is really about personal preference but I like to use either Coconut Cream or Conditioner (depending on what I’ve got at home) when I double broil the henna bars. Never use direct heat on the bars e.g. do not put them in the microwave or in a pot directly on the heat of a stove! While I make 6 bars I only use 5 bars for a full strength henna treatment and 0.5 – 1.5 bar for a henna gloss. The extra’s are left in the freezer for future use. 

Coconut Cream/milk: I use roughly 1/3 cup of coconut cream. I first double broiling the bars and then add the coconut cream, adding a little more (if it is too thick) and apply onto damp cleansed and detangled hair. I prefer my mix to be a little on the thicker side so it won’t run down my neck. 

Conditioner: I use 1/2 cup of conditioner (depending on how thick the conditioner is). I first double broil the bars and slowly add the conditioner a step at a time and mix.  I apply onto damp cleansed and detangled hair. I prefer my mix to be a little on the thicker side so it won’t run down my neck. 

Tea: I use roughly 1/3 cup of green tea (you can use any tea). I first double broiling the bars and then add the tea. I apply onto damp cleansed and detangled hair. I prefer my mix to be a little on the thicker side so it won’t run down my neck. 

I tend to leave the mix on my hair for 30 minutes – 1 hour but you can leave it on for more/less time. I cover my hair with a clingfilm, a shower cap, usually a plastic bag as well and then a scarf just to make sure it is nice and toasty warm up there. 

*NOTE: ALWAYS do a moisturising Deep Condition (DC) after applying henna on your hair to restore the balance. Henna can make the hair feel dry and brittle therefore the moisturising DC brings back moisture to the hair. 

When Do I use them?

Henna Bars 1

I like to use the bars in between the times I use my regular henna paste because it is a little less drying, it is easier to rinse out and to be honest I LOVE making the bars! I still use my normal henna paste (recipe here), I just alternate between the two. I also like to use the bars as a gloss that gives my hair a light colour touch up and due to all the conditioner I use, my hair doesn’t feel as dry afterwards. 

I would LOOOOOVE to hear if you try this out and if you come up with your own recipes! If you use a pre-made Henna bar please let me know what you think about that, I love hearing from you all! 

Thanks

Maicurls

Maicurls